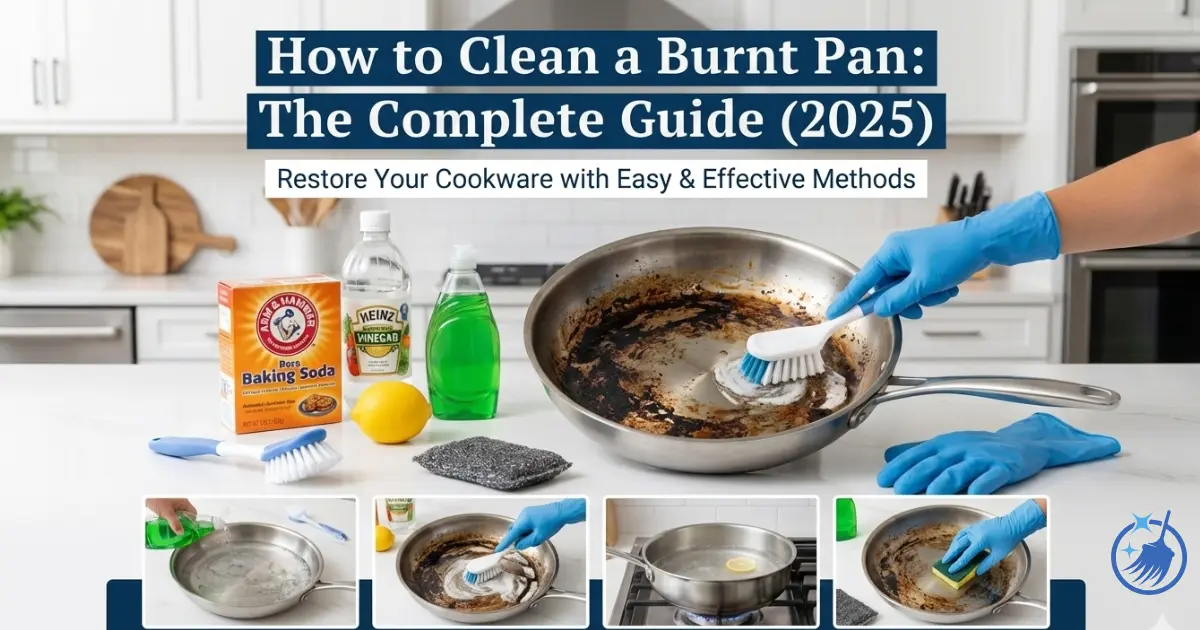
How to Clean a Burnt Pan: Professional Methods That Actually Work
How to clean a burnt pan is the question I’m asked more than any other in my 18 years as a professional cleaner. I’ve seen pans that looked beyond saving – black, crusted, with food carbonised onto the bottom – that I’ve brought back to perfect condition. The trick isn’t scrubbing harder; it’s knowing which method works for which type of burn and which type of pan. I’ll show you the exact techniques I use when clients call me in desperation, thinking they’ll need to bin their favourite cookware. Whether you’ve burnt milk, caramelised sugar, or completely forgotten something on the hob, there’s a method here that will save your pan.
What makes this different from other guides is brutal honesty. Some pans can’t be saved, and I’ll tell you when that’s the case. But for the 95% that can be rescued, you’ll learn professional methods using items you already have in your kitchen – no need for expensive specialty products.
Quick Summary
Time needed: 20 minutes to 2 hours (depending on severity)
Difficulty: Easy to moderate
You’ll need: Bicarbonate of soda, white vinegar, washing-up liquid, wooden spoon
Key takeaway: Never scrub a hot pan. Let it cool, soak overnight if needed, then use the baking soda boiling method for best results
What You'll Need
- Bicarbonate of soda (under £1 from any supermarket)
- White vinegar (about 50p)
- Washing-up liquid
- Wooden spoon or silicone spatula
- Non-scratch scouring pad or sponge
- Hot water
- Optional: Lemon (for stubborn stains and smell)
- Optional: Coarse salt (for cast iron)
- Optional: Bar Keeper’s Friend (for extreme cases on stainless steel)
Understanding What You've Actually Burnt
Before we start cleaning, it helps to understand what’s stuck to your pan. This determines which method works best.
Light burns – Food has stuck and browned but hasn’t turned black. You can still see the pan material underneath. This usually comes from cooking at too high a heat or forgetting to stir.
Medium burns – Black or very dark brown patches where food has carbonised. The burnt layer is thin but stubborn. Common with rice, pasta, or sauces that boiled dry.
Heavy burns – Thick, black, crusty layer covering large areas. This is what happens when you completely forget something on the hob. The burnt material might be 2-3mm thick in places.
Sugar burns – The absolute worst. Burnt sugar turns into something resembling glass and bonds to metal. Jam, caramel, or anything sweet creates this nightmare scenario.
Each type needs a different approach. Use too gentle a method on heavy burns and you’ll waste hours. Use too aggressive a method on light burns and you might damage the pan.
The Golden Rules Before You Start
Rule 1 – Let It Cool Completely
I know it’s tempting to start cleaning immediately, but never put cold water into a hot pan. The thermal shock can warp the base, especially on cheaper pans. I’ve seen perfectly good pans ruined this way. Let it cool naturally for at least 30 minutes.
Rule 2 – Never Use Steel Wool (Unless It's Cast Iron)
Steel wool scratches stainless steel and destroys non-stick coatings completely. Those tiny metal fibres also rust and leave orange stains. Use non-scratch pads instead – they’re green or blue and cost about £1 for three from Wilko or Tesco.
Rule 3 – Know Your Pan Type
Different materials need different treatments. Using vinegar on cast iron strips the seasoning. Using harsh scrubbing on non-stick removes the coating. Check what your pan is made from before you start.
How to Clean a Burnt Pan – Step-by-Step Methods
Method 1: The Overnight Soak (Start Here)
This is always my first step, regardless of how bad the burn looks. It loosens the burnt material and makes the next steps far easier.
What to do:
- Fill the burnt pan with very hot water from the kettle
- Add 3-4 drops of washing-up liquid (Fairy works well)
- Leave it overnight – minimum 8 hours, ideally 12
- In the morning, use a wooden spoon to gently scrape the burnt bits
- Pour away the water and assess what’s left
For light burns, this alone might do the job. You’ll be surprised how much burnt material just lifts off after a proper soak. I once had a client who’d been scrubbing a burnt pan for an hour. I filled it with hot soapy water, came back the next day, and the burn wiped off in 2 minutes.
If significant burning remains after soaking, move to Method 2.
Method 2: Bicarbonate of Soda Boil (Best for Most Burns)
This is my go-to method for medium to heavy burns on stainless steel, enamel, and ceramic pans. It works brilliantly and uses items everyone has.
What to do:
- After draining the soaking water, add fresh water to cover the burnt area by about 2cm
- Add 3 tablespoons of bicarbonate of soda (use 4-5 tablespoons for very heavy burns)
- Place the pan on the hob and bring to a rolling boil
- Let it boil vigorously for 10-15 minutes – you’ll see burnt bits starting to lift
- Turn off the heat and let it cool until you can safely handle it (about 30 minutes)
- Use a wooden spoon to scrape the loosened burnt material – it should come off in sheets
- Pour out the water and wash the pan normally with washing-up liquid
The boiling bicarbonate of soda creates an alkaline solution that breaks down the carbonised food. I’ve used this method on pans that looked completely destroyed, and they’ve come up like new.
If stubborn spots remain, make a paste with bicarbonate of soda and a tiny bit of water, apply it to the spots, leave for 20 minutes, then scrub with a non-scratch pad.
Method 3: Bicarbonate of Soda and Vinegar Reaction (For Stubborn Burns)
When Method 2 doesn’t quite do the job, adding vinegar creates a chemical reaction that tackles really stubborn burns.
What to do:
- Drain any water from the pan and make sure it’s cool
- Generously sprinkle bicarbonate of soda over all burnt areas – use at least 4 tablespoons
- Slowly pour white vinegar over the bicarbonate of soda (about 100ml)
- It will fizz dramatically – this is normal and what you want
- Let the fizzing reaction work for 15-20 minutes
- Add hot water to cover the burnt area
- Bring to the boil and simmer for 10 minutes
- Let it cool, then scrape with a wooden spoon
- Wash as normal
The fizzing reaction helps lift burnt material that’s really bonded to the pan. This method saved a £60 stainless steel pan for a client who’d burnt bolognese onto it so badly I initially thought it was beyond help.
Method 4: Lemon Boil (For Burnt Smell and Staining)
Sometimes the pan looks clean but smells burnt, or has brown staining that won’t shift. Lemon is brilliant for this.
What to do:
- Cut 2-3 lemons into quarters
- Place them in the pan with enough water to cover the bottom by 3cm
- Bring to the boil and simmer for 10-15 minutes
- Let it cool until safe to handle
- Use the lemon quarters to scrub the inside of the pan
- The citric acid and natural oils work together to remove stains
- Rinse thoroughly and wash with washing-up liquid
This method also works beautifully on burnt milk pans. The smell of burnt milk is particularly stubborn, and lemon neutralises it completely.
Method 5: Salt Scrub (For Delicate Surfaces and Cast Iron)
When you need gentle abrasion without harsh scrubbing.
What to do:
- Sprinkle coarse salt (sea salt or rock salt) generously over the burnt area
- Add a few drops of washing-up liquid
- Use a damp sponge to scrub in circles
- The salt acts as a gentle abrasive while the soap lifts grease
- Rinse well and dry immediately
For cast iron specifically, skip the washing-up liquid. Use salt and a tiny bit of cooking oil instead, scrub thoroughly, rinse quickly, dry completely, and re-season the pan with oil.
How to Clean Different Types of Burnt Pans
Stainless Steel Pans (Most Common)
Good news – stainless steel is the most forgiving. You can use all the methods above without worry.
Best approach:
- Overnight soak first
- Bicarbonate of soda boil for any remaining burns
- For the outside of the pan, use the paste method (bicarbonate of soda and water mixed to paste, leave for 30 minutes, scrub)
Stainless steel can handle vigorous cleaning. I’ve brought back pans that were black on the outside and heavily stained inside. If you’re struggling with your stainless steel cookware in general, I’ve written a comprehensive guide to cleaning stainless steel that covers everything.
Non-Stick Pans
Non-stick requires much gentler treatment. The coating is easily damaged.
Safe methods only:
- Overnight soak with washing-up liquid
- Bicarbonate of soda paste (not boiled) applied gently
- Soft sponge only – never use abrasive pads
Never do this to non-stick:
- Don’t boil bicarbonate of soda in it
- Don’t use vinegar for extended periods
- Don’t scrub hard
- Don’t use metal utensils to scrape
Honestly, if you’ve badly burnt a non-stick pan, it’s often not worth the effort to clean it. The high heat that caused the burning has probably damaged the coating anyway. Check carefully – if you see the coating bubbling, peeling, or flaking anywhere, bin it and buy a new one. Non-stick pans from Asda or Tesco cost £8-15 and aren’t worth hours of careful cleaning.
Cast Iron Pans
Cast iron is tough but needs special care to maintain its seasoning (the natural non-stick layer built up from oil).
Cast iron method:
- Let it cool completely
- Sprinkle coarse salt generously
- Add a small amount of cooking oil (not washing-up liquid)
- Scrub with kitchen roll or a stiff brush
- Rinse very quickly with hot water
- Dry immediately and thoroughly – cast iron rusts
- Apply a thin layer of cooking oil while it’s still warm
- Heat gently for 5 minutes to re-season
Never soak cast iron overnight. Never use vinegar or bicarbonate of soda boiling on it. These strip the seasoning you’ve spent months building up. If you’re dealing with seriously neglected cast iron with rust, that’s a different process entirely involving steel wool and complete re-seasoning.
Ceramic and Enamel Pans
These can usually handle the bicarbonate of soda methods but need gentle scrubbing.
Best approach:
- Overnight soak
- Bicarbonate of soda boil (safe for enamel and ceramic)
- Gentle scrubbing with non-scratch pad only
- For white enamel (like Le Creuset), use bicarbonate of soda paste for staining
The enamel coating can chip if you’re too aggressive, so always use wooden or silicone utensils for scraping, never metal.
How to Clean the Bottom (Outside) of Burnt Pans
The outside bottom of pans gets burnt from sitting in spills on the hob or from gas flames. This is actually harder to clean than the inside because you can’t boil water in it.
The upside-down method:
- Place the pan upside down on an old tea towel in your sink
- Pour hot water over the bottom – don’t wipe it off
- Immediately sprinkle bicarbonate of soda generously over the wet surface
- Leave for 20 minutes (longer for heavy burns – I’ve left it overnight for really bad ones)
- Squeeze lemon juice over the bicarbonate of soda
- Listen for the fizzing – this is doing the work
- Use a damp non-scratch pad to scrub
- For stubborn areas, make a paste and reapply
- Rinse and dry
This method cleaned the bottom of my own frying pan that had 2 years of accumulated burnt-on grime. It took about 45 minutes of intermittent scrubbing, but it worked.
When Commercial Cleaners Are Worth It
I rarely recommend buying specialty products, but there are two situations where they’re worth the money:
Bar Keeper’s Friend (£4-6 from Amazon or Robert Dyas)
- For seriously stained stainless steel after you’ve removed the bulk of burning
- Apply with a damp cloth, rub gently, rinse thoroughly
- Works brilliantly on rainbow stains and discolouration
- One tin lasts for ages
The Pink Stuff (£1 from Poundland, B&M, or Home Bargains)
- Gentle abrasive paste for stubborn spots
- Good for ceramic and enamel
- Apply, leave for 10 minutes, scrub gently
I keep both in my cleaning caddy for emergency jobs, but 90% of the time, bicarbonate of soda does everything I need.
Common Mistakes That Make Things Worse
- Scrubbing a hot pan – You’ll burn yourself, and the steam makes everything harder to see and clean. Plus you risk warping the pan. Always let it cool completely first.
- Using cold water on a hot pan – This causes thermal shock that warps the base, especially on cheaper pans. A warped pan never sits flat on the hob again and cooks unevenly. I’ve seen this ruin pans beyond repair.
- Scrubbing too hard before soaking – You’ll exhaust yourself and make no progress. Soaking overnight does 80% of the work with zero effort. Be patient.
- Using bleach – Bleach doesn’t remove burnt food effectively and leaves a chemical residue you don’t want near your cooking. It can also damage some pan materials. Just don’t.
- Mixing random cleaning products – Especially dangerous if you mix bleach with vinegar or ammonia – this creates toxic chlorine gas. Stick to one method at a time.
- Giving up too quickly – Sometimes badly burnt pans need the treatment repeated 2-3 times. Do the bicarbonate of soda boil, see what’s left, then do it again if needed. I’ve had pans that needed three rounds before coming completely clean.
Can All Burnt Pans Be Saved?
Let me be honest – no. Some pans have reached the end of their life.
You can probably save it if:
- The burn is just on the cooking surface, not the structural metal
- Non-stick coating (if any) is still intact underneath the burn
- The pan hasn’t warped from heat or cooling too quickly
- It’s stainless steel, cast iron, or enamel (these are tough)
Time to replace if:
- Non-stick coating is peeling, bubbling, or flaking
- The pan is badly warped and doesn’t sit flat
- The bottom has burn-through spots where you can see metal degradation
- It’s a cheap pan (under £10) and requires hours of work – buy new instead
- After trying all methods, burnt material is still firmly bonded
I had a client who spent 4 hours trying to save a £8 non-stick pan from Asda. I gently suggested that her time was worth more than £2/hour and she’d be better off buying a new one. Sometimes that’s the right answer.
How Often Should You Deep Clean Pans?
This depends on usage, but here’s my general guide:
| Cleaning Task | Frequency | Why |
|---|---|---|
| Wash after each use | Always | Prevents buildup |
| Proper scrub with bicarbonate of soda | Monthly | Removes light staining |
| Deep clean burnt areas | As needed | When food sticks or burns |
| Check non-stick coating | Every 3 months | Safety check for damage |
| Re-season cast iron | Every 6 months | Maintains non-stick properties |
The better you maintain your pans daily, the less often burning becomes a serious problem. But even with perfect care, accidents happen.
Preventing Pans From Burning (Real Advice)
I’ve cleaned enough burnt pans to know what actually causes burning in home kitchens.
Temperature control:
- Most home cooking should be done on medium heat, not high
- High heat is only needed for boiling water and searing meat
- When frying, heat the pan first, then add oil, then add food
- Never heat an empty non-stick pan – the coating degrades rapidly above 260°C
The walk-away rule:
- If you’re cooking something that needs unattended simmering, set a timer
- I use the timer on my phone for everything – pasta, rice, sauces
- Don’t start cooking if you need to leave the house in 10 minutes
- Kids and pets are excellent distractions – be extra careful about timers
Pan quality matters:
- Thick-based pans distribute heat better and are less likely to create hot spots that burn
- Cheap thin pans burn easily because heat concentrates in patches
- Invest in at least one good stainless steel pan (£30-50) for daily use
- Save the cheap pans for camping or less critical cooking
Stirring frequency:
- Rice, porridge, and sauces need stirring every 2-3 minutes
- Anything with sugar needs constant attention
- Lower heat and stir more often than you think necessary
Pro Tips From a Professional Cleaner
Insider Tips
After rescuing hundreds of burnt pans, here’s what I’ve learned:
- The overnight soak works even better with hot water topped up twice – Once when you start, then again before bed. The heat speeds up the process dramatically.
- Wooden spoons are your best tool – They scrape effectively without scratching. I keep a dedicated old wooden spoon just for burnt pan cleaning. Metal damages the surface, plastic isn’t rigid enough.
- Film the boiling method – I’m serious. Put your phone on video when you boil the bicarbonate of soda. Watching the burnt bits lift off is oddly satisfying, and it helps you see when the process is working vs when you need to try something else.
- Prevention through seasoning – Even stainless steel benefits from occasional seasoning. Heat it, add a thin layer of oil, wipe it around, then wipe it out with kitchen roll. This creates a temporary non-stick layer that prevents burning.
What About Burnt Oven Dishes and Baking Trays?
The same principles apply, but you can’t boil water in most oven dishes.
For Pyrex and glass dishes:
- Fill with hot water and bicarbonate of soda
- Soak overnight
- Make a paste of bicarbonate of soda and scrub
- For seriously burnt corners, stuff damp kitchen roll covered in paste into the corners and leave for hours
For baking trays:
- Cover with bicarbonate of soda
- Spray with vinegar until it fizzes
- Leave for 30 minutes to 2 hours
- Scrub with a scourer (these can handle more abrasion than pans)
- For sheet trays with burnt fat, use hot washing-up liquid and elbow grease
Aluminium baking trays are nearly impossible to restore once heavily burnt. The aluminium discolours permanently. These are cheap enough (£2-5) that replacement makes more sense than hours of scrubbing.
Knowing how to clean a burnt pan properly will save you money, reduce waste, and keep your cookware in good condition for years. The key is patience – let soaking and chemical reactions do the heavy lifting instead of exhausting yourself with scrubbing. The bicarbonate of soda boiling method has rescued more “hopeless” pans than any other technique in my 18 years of professional cleaning. Start there, be patient, and you’ll be surprised what you can save.
I’ve brought back pans that clients were convinced needed throwing away, using nothing more expensive than a box of bicarbonate of soda. The satisfaction of seeing a burnt pan transform back to usable condition is genuinely rewarding. Give these methods time to work, don’t expect instant results, and remember – even if you can’t save every pan, you’ll save most of them.
Frequently Asked Questions
How do you clean a badly burnt pan?
Start with an overnight soak in hot soapy water. Next morning, boil 3-4 tablespoons of bicarbonate of soda in water in the pan for 15 minutes. Let it cool, scrape with a wooden spoon, then wash normally. For extremely stubborn burns, repeat the process or add vinegar to the bicarbonate of soda for a stronger reaction. This method works on most pan types except non-stick.
Can you fix a burnt pan?
Yes, most burnt pans can be cleaned and restored unless the pan itself is damaged. Stainless steel, cast iron, and enamel pans nearly always respond to the bicarbonate of soda boiling method. Non-stick pans can sometimes be saved with gentle soaking and paste methods, but if the coating is damaged by the heat, the pan should be replaced rather than fixed.
Does baking soda clean burnt pans?
Yes, bicarbonate of soda (baking soda) is the most effective method for cleaning burnt pans. The alkaline properties break down carbonised food when boiled in water. For best results, use 3-4 tablespoons in enough water to cover the burnt area, boil for 10-15 minutes, let it cool, then scrape. This works better than expensive commercial cleaners in my professional experience.
How do you get burnt food off a pan?
Soak overnight in hot soapy water first. Then boil bicarbonate of soda and water in the pan for 15 minutes, let it cool, and scrape with a wooden spoon. If bits remain, make a paste with bicarbonate of soda and water, apply to stubborn spots, leave for 20 minutes, and scrub with a non-scratch pad. Never scrub whilst the pan is still hot.
Will vinegar clean a burnt pan?
Vinegar helps clean burnt pans, especially when combined with bicarbonate of soda. The reaction between the two creates fizzing that helps lift burnt material. However, don’t use vinegar alone on cast iron as it strips the seasoning, and extended vinegar soaks can damage non-stick coatings. For most pans, bicarbonate of soda boiling works better than vinegar alone.
How do you clean the bottom of a burnt pan?
Place the pan upside down on a tea towel, pour hot water over the bottom, immediately sprinkle bicarbonate of soda on the wet surface, and leave for 20 minutes. Squeeze lemon juice over it (it will fizz), then scrub with a damp non-scratch pad. For heavy burning, leave the paste on overnight. This method works because you can’t boil water on the outside of a pan.
What removes burnt-on grease?
Hot water with washing-up liquid for soaking, followed by bicarbonate of soda boiling, removes most burnt-on grease. For stubborn grease combined with burning, use bicarbonate of soda and vinegar together – sprinkle bicarbonate of soda, pour vinegar over it, let it fizz for 15 minutes, then add water and boil. The combination tackles both the burnt carbon and the grease effectively.
How long should you soak a burnt pan?
Minimum 8 hours, ideally overnight (12 hours). For badly burnt pans, 24 hours is even better. Use very hot water initially and top it up with more hot water once before bed if possible. The extended soak time allows water to penetrate under burnt material, making it lift off easily. Don’t rush this step – it saves you hours of scrubbing.
Can you save a burnt non-stick pan?
Sometimes, but only if the coating underneath is still intact. Soak overnight, then try a bicarbonate of soda paste (not boiled) with gentle scrubbing using a soft sponge only. If the coating shows any bubbling, peeling, or flaking, bin the pan immediately – it’s unsafe to use. Badly burnt non-stick pans that damaged the coating can’t be saved and shouldn’t be used even if cleaned.
How do you clean burnt cast iron?
Use coarse salt and a small amount of cooking oil (not washing-up liquid). Scrub with kitchen roll or a stiff brush, rinse quickly with hot water, dry immediately and thoroughly, then re-season by applying a thin layer of oil and heating gently. Never soak cast iron overnight, never use vinegar or bicarbonate of soda boiling, and never let it air dry as it will rust.
You May Also Like
How to Clean Washing Machine Filter: Complete Guide 2026

How to Clean Artificial Grass: Complete Maintenance Guide