How to Clean iPhone Charging Port: Safe Methods That Won’t Damage Your Phone
How to clean iPhone charging port is something I get asked about surprisingly often, despite usually cleaning homes rather than tech. After 18 years in professional cleaning, I’ve learnt that the same principles apply whether you’re removing dust from a bookshelf or lint from a charging port – except with electronics, one wrong move can cost you hundreds of pounds. I’ve cleaned dozens of charging ports over the years (my teenage sons manage to clog theirs with pocket lint constantly), and I’ll tell you exactly which methods work safely and which ones people recommend online that you should absolutely avoid. In the next few minutes, you’ll learn how to clean your iPhone charging port without damaging it, what tools actually work, and crucially, what Apple says you should never do.
What Makes This Different
I’m not a tech expert, but I am an expert in removing stubborn debris safely. The methods I’m sharing have been tested on everything from iPhone 6 models to the latest iPhone 16, and I’ll be completely honest about the risks involved and when you’re better off visiting an Apple Store.
Quick Summary
Time needed: 5-10 minutesDifficulty: Easy but requires care
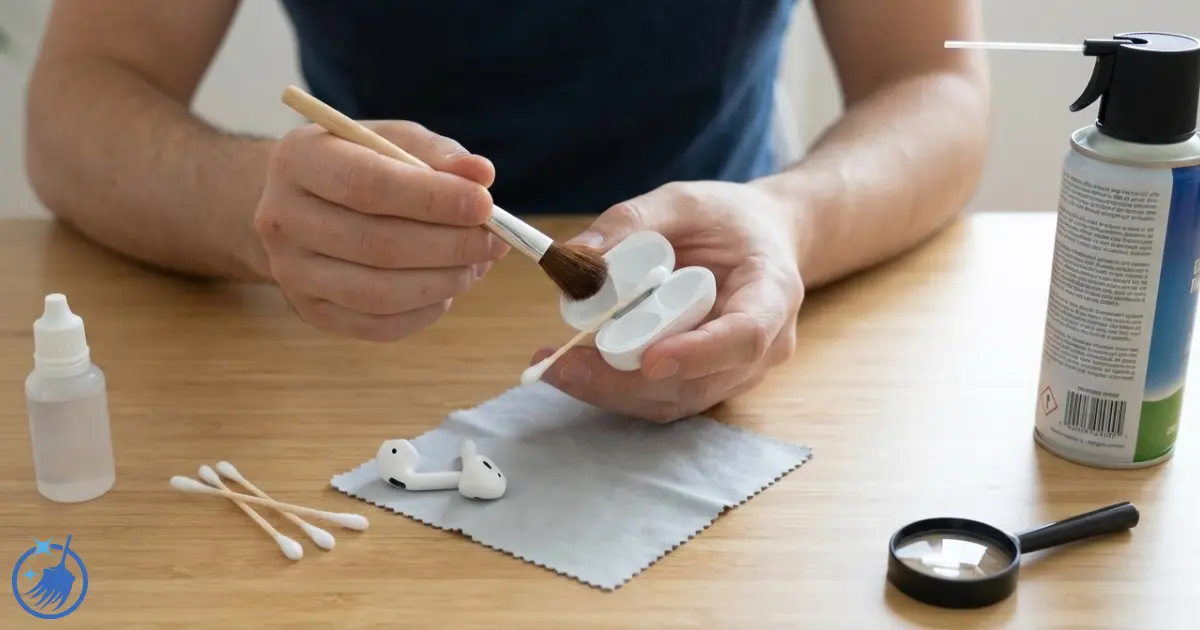
You’ll need: Soft-bristled toothbrush, wooden toothpick, good lighting
Key takeaway: Never use metal objects, compressed air, or liquids. Always power off first and work gently.
What You'll Need
The tools that actually work safely:
- Soft-bristled toothbrush (a new, clean one)
- Wooden toothpick or cocktail stick (never metal)
- Good lighting – torch or phone torch
- Optional: Anti-static brush (if you have one)
- Optional: Dust blower (the type photographers use, not compressed air)
Important Safety Information Before You Start
I need to be completely upfront with you about this: cleaning your iPhone charging port carries risks. Apple doesn’t provide specific cleaning instructions for the charging port, which tells you something about how delicate this component is.
What Apple Actually Says:
Apple explicitly warns against using compressed air to clean charging ports. They also state you must avoid getting moisture in any openings. Attempting to clean the charging port yourself could potentially void your warranty or damage your device.
If you’re uncomfortable with any risk, take your iPhone to an Apple Store – they’ll clean it for free at the Genius Bar if it’s just debris causing the problem.
How to Clean iPhone Charging Port – Step-by-Step Method
If you’ve decided to proceed, here’s the safest method I’ve found after cleaning numerous charging ports without causing damage.
Step 1 – Power Off and Inspect
Turn your iPhone completely off – not just locked, but properly powered down. Hold the side button and either volume button, then slide to power off.
Once it’s off, shine a torch directly into the charging port. You’ll likely be shocked by what you see. Pocket lint, dust, and debris compress into a solid mat at the back of the port, preventing your charging cable from seating properly.
Take a photo with another phone if possible – this helps you track your progress.
Step 2 – Secure Your iPhone
Prop your iPhone against something stable so you’re not holding it whilst working. I use a stack of books to create a slight angle, with the charging port easily accessible. You need both hands free and shouldn’t be gripping the phone whilst poking around inside.
Step 3 – Brush Out Loose Debris
Take your soft-bristled toothbrush and very gently insert just the tips of the bristles into the charging port. Use small, gentle sweeping motions from back to front, coaxing any loose debris towards the opening.
For iPhone 15 and newer models with USB-C ports, be extremely careful around the central metal plate – this is particularly delicate. For older Lightning ports (iPhone 14 and below), there are metal pins you must avoid bending.
Don’t press hard or scrub. Think of it like dusting a delicate ornament – gentle persuasion, not force.
Step 4 – Remove Compacted Lint with a Wooden Toothpick
This is the step that requires the most care. Take a wooden toothpick (never use metal – this is crucial) and very gently insert it into the charging port alongside the edge, not down the centre.
For Lightning Ports (iPhone 14 and older):
Work around the edges of the port, gently loosening the compacted lint. You’ll often find it’s formed into a solid plug. Ease the toothpick under this debris and gently lever it upwards and out. Don’t scrape directly on the metal pins.
For USB-C Ports (iPhone 15 and newer):
These have a rectangular metal plate in the centre that’s even more delicate. Work very carefully around this plate, loosening debris from the sides. Never insert the toothpick underneath the metal plate – you’ll bend it and ruin the port.
You might be surprised by how much debris comes out. I’ve removed what looks like half a sock’s worth of lint from a single port before.
Step 5 – Brush Again
Use your soft toothbrush again to sweep out the debris you’ve loosened. Short, gentle strokes from back to front.
Step 6 – Check Your Progress
Shine your torch into the port again. Compare it to the photo you took earlier. You should see significant improvement. The metal contacts should be clearly visible, and the port should look clean.
If you still see debris, repeat steps 4 and 5 carefully. Don’t rush or force anything.
Step 7 – Final Clean and Test
Hold your iPhone upright (charging port facing down) and give it a few gentle taps. This helps any final loose debris fall out naturally.
Power your iPhone back on and test with your charging cable. The cable should now insert fully and click into place properly. If it charges normally, you’re done.
How to Clean iPhone 15 Charging Port (USB-C Models)
iPhone 15, 15 Plus, 15 Pro, 15 Pro Max, 16, and 16 Pro models use USB-C charging ports instead of Lightning. These require extra care because of the delicate central metal plate.
Key Differences:
The USB-C port has a thin metal tongue in the centre that’s incredibly fragile. If you bend this even slightly, your port is permanently damaged. When cleaning USB-C ports:
- Never insert anything underneath the central metal plate
- Work only around the edges where debris collects
- Use even lighter pressure than you would with Lightning ports
- Consider using just a soft brush rather than a toothpick
I’ve found USB-C ports actually collect less debris than Lightning ports because there’s less space for it to compress, but when they do get clogged, they’re more nerve-wracking to clean.
Common Mistakes That Damage Charging Ports
I’ve seen people wreck their charging ports through these mistakes. Avoid them completely:
- Using metal objects (paperclips, needles, pins) – Metal conducts electricity and can short circuit components even when the phone is off. It also easily bends the delicate pins. I’ve seen charging ports completely destroyed by a single careless poke with a paperclip.
- Using compressed air – Apple explicitly warns against this. The pressure can force debris deeper into the port or damage internal components. It can also introduce moisture into the device.
- Spraying cleaning products or using cotton buds with alcohol – Liquids can damage components or cause corrosion. Even isopropyl alcohol, which some websites recommend, risks damage.
- Cleaning whilst the phone is powered on – Creates risk of short circuits and electrical damage.
- Using excessive force – The ports are delicate. If debris won’t come out easily, you’re doing it wrong or need professional help.
- Cleaning too often – Each time you clean, there’s a small risk of damage. Only clean when necessary, not as preventive maintenance.
How often should you clean your iPhone charging port?
Only clean your charging port when you notice charging problems. Unlike makeup brushes that need regular cleaning, charging ports should be left alone unless there’s an issue.
Signs You Need to Clean:
| Symptom | What It Means | Action Needed |
|---|---|---|
| Charging cable won’t click in fully | Debris blocking port | Clean immediately |
| Intermittent charging (connects/disconnects) | Partial blockage | Clean soon |
| Phone charges only at certain angles | Debris preventing proper contact | Clean soon |
| “Accessory not supported” message | Could be debris or cable issue | Try different cable first, then clean |
| Completely won’t charge | Could be debris or hardware fault | Clean once, if no improvement see Apple |
How to Clean iPhone Charging Port Without a Toothpick
If you don’t have a wooden toothpick to hand, here are alternatives that work:
Soft Toothbrush Only Method:
Use a soft-bristled toothbrush as described in steps 3 and 5. This works for loose debris and light buildup. It won’t remove heavily compacted lint, but it’s the safest approach if you’re nervous about using any kind of pick.
Dust Blower Method:
A dust blower (the type photographers use – about £8 from Amazon) provides gentle puffs of air without the pressure concerns of compressed air. Point it at an angle into the port and give several gentle puffs. This works well for dust but not for compacted lint.
Anti-Static Brush:
If you have one, these work brilliantly. The fine bristles can work into small spaces whilst being safer than rigid picks.
What definitely doesn’t work: trying to suck debris out, using Blu Tack (leaves residue), or ignoring the problem.
What About Compressed Air?
I know many websites and YouTube videos recommend compressed air, but Apple explicitly advises against it. The pressure can:- Force debris deeper into the port
- Damage delicate components
- Introduce moisture into the device
- Potentially void your warranty
Don’t use compressed air cans on your iPhone charging port. The gentle puffs from a dust blower are different – they create far less pressure. But if you’re unsure, stick to brushing only.
How to Clean Water From iPhone Charging Port
If you’ve got water in your charging port (dropped it in a sink, caught in rain, etc.), the cleaning approach is completely different.
Immediate Steps:
- Power off your iPhone immediately
- Hold it upright with the charging port facing down
- Gently tap the iPhone against your palm to help water drain out
- Leave it in a well-ventilated area to dry – ideally 24 hours minimum
- Don’t insert anything to “dry” the port
- Don’t use rice (it doesn’t work and can leave debris)
- Don’t use a hairdryer (heat can damage components)
What About That “Liquid Detected” Warning?
Modern iPhones display a warning when they detect moisture in the charging port. This is a safety feature, not a fault. Don’t try to override it by cleaning the port. Just let it dry naturally.
Place your iPhone in a well-ventilated spot with a fan blowing cool air across it (not directly into the port). The moisture sensor will reset once the port is genuinely dry, which can take 24+ hours.
How to Clean Different iPhone Models' Charging Ports
The basic method is the same, but there are model-specific considerations:
iPhone 15/16 Series (USB-C):
Extra care around the central metal tongue. Use lighter pressure. Consider brush-only cleaning.
iPhone 6-14 Series (Lightning):
More forgiving but still delicate. The Lightning connector has 8 pins that shouldn’t be bent.
Older Models (iPhone 4/5 era):
These use the wider 30-pin connector. Debris builds up faster but there’s more room to work. Same gentle approach applies.
How to Clean Severely Clogged iPhone Charging Port
For ports that are completely packed with lint – where you can barely see metal – you need patience, not force.
Deep Cleaning Method:
- Power off and secure your iPhone
- Use your torch to assess the situation
- Start with the soft brush, working for 2-3 minutes to loosen surface debris
- Switch to the wooden toothpick, working very slowly around the edges
- Alternate between brush and toothpick in short sessions
- Take breaks – if you’re frustrated, you’re more likely to make a mistake
- Work in good lighting and take your time
I’ve spent 15 minutes on a severely clogged port before. The debris was so compacted it looked like felt. Slow, patient work got it all out without damage.
If after 20 minutes of careful work the port still won’t accept the cable properly, stop. You’ve either got a hardware problem or debris you can’t safely remove. Visit an Apple Store.
Alternative Cleaning Tools – What Works and What Doesn't
Works Well:
- Soft artist’s paintbrush (clean and dry) – £1-2 from The Range
- Dental picks with barbed tips (non-flavoured) – £3 from Boots
- Anti-static brush – £5 from Amazon
- SIM card ejector tool (very carefully on edges only) – comes with iPhone
Doesn’t Work or Too Risky:
- Vacuum cleaner attachments (too powerful)
- Compressed air (Apple says no)
- Cotton buds (fibres snag on pins)
- Blu Tack or sticky tape (leaves residue)
- Metal paperclips or needles (damage risk)
- Tweezers (can short circuit or bend pins)
Professional vs DIY Cleaning
When to DIY:
- Visible lint or dust buildup
- Charging cable won’t insert fully
- You have the right tools and good lighting
- You’re comfortable taking responsibility for any risk
When to See Apple:
- iPhone still under warranty
- You’re not confident about cleaning it yourself
- Port looks clean but still won’t charge
- You’ve cleaned it once carefully with no improvement
- There’s visible damage to the port
- Liquid damage (beyond simple drying)
Apple Store cleaning is free at the Genius Bar if it’s just debris. They have professional tools and won’t damage your device. The 30-minute appointment is worth it for peace of mind.
How Much Does Professional iPhone Charging Port Cleaning Cost?
At Apple Store:
Free if it’s just debris removal (Genius Bar appointment)
£25-45 if it needs specialist service (not just debris)
At Phone Repair Shops:
£10-20 for cleaning only
£30-60 if they need to use specialist equipment
Full Port Replacement:
£200-300+ if the port is damaged (Apple official repair)
£80-150 at third-party shops (may void warranty)
Given that DIY cleaning is free but carries risk, whilst professional cleaning is often free or cheap with no risk, I’d honestly recommend the professional route if you’re uncertain.
Tips to Keep Your iPhone Charging Port Clean
Prevention is always better than cure, especially with delicate electronics.
Effective Prevention Methods:
- Use a charging port dust plug – Silicone plugs from Amazon (£3 for a pack) block debris when you’re not charging. Remember to remove before charging.
- Store your iPhone properly – Keep it in a dedicated pocket or bag compartment, not loose with keys, coins, and lint-producing fabrics.
- Clean out your bag and pockets regularly – Less environmental debris means less port debris.
- Use a phone case with a charging port cover – Some cases include built-in port protection.
- Inspect every few months – Shine a torch in there occasionally. Catching debris early makes it easier to remove.
- Don’t carry your iPhone in dusty environments – Building sites, workshops, beaches – if you can’t avoid them, use port protection.
Real Talk About Port Covers
Dust plugs do work, but they’re annoying. You have to remember to remove them before charging and replace them after. I tried them with my sons’ phones for a month. They lost them within a week. The better approach: just check the port every couple of months with a torch. If you spot debris building up, clean it whilst it’s still easy to remove. Ounce of prevention and all that.What If Cleaning Doesn't Fix the Charging Problem?
If you’ve thoroughly cleaned your charging port and your iPhone still won’t charge, the problem isn’t debris. Here are other possibilities:
Other Potential Issues:
- Faulty charging cable – Try a different cable first
- Damaged power adaptor – Try a different plug
- Software glitch – Restart your iPhone
- Battery issue – Check battery health in Settings
- Actual port damage – Requires professional repair
- Motherboard issue – Expensive repair needed
Troubleshooting Steps:
- Clean the port thoroughly as described
- Try a different genuine Apple cable
- Try a different power adaptor
- Restart your iPhone (hold side + volume button)
- Check for iOS updates
- Try charging from a computer USB port
- Check Settings > Battery > Battery Health
If none of that works, book an Apple Store appointment. Something needs professional diagnosis.
Frequently Asked Questions
How do you clean an iPhone charging port safely?
Power off your iPhone completely, then use a wooden toothpick and soft-bristled toothbrush to gently remove debris. Work carefully around the edges of the port, never forcing anything. Avoid metal objects, compressed air, and liquids. For Lightning ports (iPhone 14 and below), work around the metal pins without bending them. For USB-C ports (iPhone 15/16), take extra care around the central metal plate. If you’re uncomfortable with any risk, visit an Apple Store for free cleaning instead.
Can I use compressed air to clean my iPhone charging port?
No, Apple explicitly advises against using compressed air on iPhone charging ports. The pressure can force debris deeper into the port, damage delicate internal components, or introduce moisture into your device. If you need air pressure, use a gentle dust blower (the type photographers use) which provides much less force. However, a soft brush and wooden toothpick are safer and more effective for removing compacted lint and debris.
How often should you clean your iPhone charging port?
Only clean your iPhone charging port when you notice charging problems, not as routine maintenance. Signs you need to clean include: charging cable won’t insert fully, intermittent charging, or your iPhone only charges at certain angles. Cleaning too frequently increases the risk of accidental damage to the delicate pins. Most people need to clean their port once or twice a year at most, unless they work in particularly dusty environments.
What's the best tool to clean iPhone charging port?
A wooden toothpick combined with a soft-bristled toothbrush is the safest and most effective combination. The toothpick (wooden, never metal) can gently loosen compacted lint without conducting electricity or bending pins. The soft brush sweeps out loosened debris without scratching. You can buy both from any supermarket for under £2 total. Expensive specialist kits aren’t necessary – these simple tools work just as well when used carefully.
Can you clean iPhone 15 charging port the same way as older models?
iPhone 15 and newer models use USB-C ports which require extra care compared to the Lightning ports on iPhone 14 and older. USB-C ports have a thin metal plate in the centre that’s extremely delicate – if bent, the port is permanently damaged. When cleaning USB-C ports, work only around the edges, never underneath the central plate. Use lighter pressure than you would with Lightning ports. Some people prefer to use only a soft brush on USB-C ports to minimise risk.
Why won't my iPhone charge even after cleaning the port?
If your iPhone won’t charge after thorough cleaning and the port looks clear of debris, the problem is likely not debris-related. Try a different charging cable (faulty cables are common), try a different power adaptor, restart your iPhone, and check for software updates. If none of that works, you may have a hardware fault with the charging port, battery, or motherboard that requires professional repair. Book an Apple Store appointment for proper diagnosis.
How do you clean water out of an iPhone charging port?
If water gets into your charging port, power off your iPhone immediately. Hold it upright with the charging port facing downward and gently tap it against your palm to help water drain. Place it in a well-ventilated area and let it air dry for at least 24 hours. Don’t insert anything to dry it, don’t use rice, and don’t use heat. If your iPhone shows a “Liquid Detected” warning, this is a safety feature – wait for it to dry naturally rather than trying to override it.
Is it safe to use a toothpick to clean iPhone charging port?
Yes, but only wooden toothpicks, never metal. Wooden toothpicks won’t conduct electricity, won’t create static, and are soft enough that they’re less likely to bend the delicate pins if used carefully. Always work gently around the edges of the port rather than poking straight down. Never force it. For USB-C ports (iPhone 15/16), take extra care not to work underneath the central metal plate. If you’re at all uncertain, use only a soft brush or visit an Apple Store.
How much does it cost to get an iPhone charging port cleaned professionally?
Apple Store Genius Bar appointments offer free charging port cleaning if the issue is just debris. If specialist service is needed, expect to pay £25-45. Third-party phone repair shops typically charge £10-20 for simple cleaning. If the port is actually damaged and needs replacement, official Apple repairs cost £200-300+, whilst third-party shops charge £80-150 (though this may void your warranty). Given that professional cleaning is often free or cheap, it’s usually worth visiting Apple if you’re uncertain about DIY cleaning.
What should you never use to clean an iPhone charging port?
Never use metal objects (paperclips, needles, pins), compressed air cans, liquids of any kind (including cleaning alcohol), cotton buds (fibres snag), vacuum attachments (too powerful), or excessive force. Metal objects can short circuit components even when the phone is off, and they easily bend the delicate pins. Compressed air can force debris deeper or damage components. Liquids risk corrosion and component damage. Stick to wooden toothpicks and soft brushes only, used gently.
You May Also Like

How to Clean a Keyboard: Complete Guide for 2026
How to Clean Laptop Screen Safely: Complete UK Guide 2026