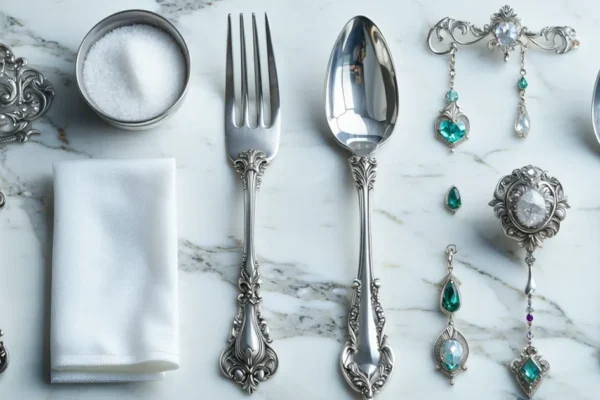
How to Clean Silver: Complete Guide (Jewellery, Cutlery & More)
How to clean silver properly can restore even the most tarnished pieces to their original brilliant shine in minutes. After 18 years as a professional cleaner working across the UK, I’ve cleaned everything from valuable family heirlooms in Mayfair to everyday silver jewellery in student flats. The black tarnish that forms on silver isn’t permanent damage – it’s a chemical reaction that’s completely reversible with the right method.
I’ve tested every silver cleaning technique you’ll find online – from the aluminium foil method to commercial polishes to toothpaste hacks. Some work brilliantly. Others are a waste of time or, worse, can damage your silver permanently. In this guide, I’ll show you exactly how to clean silver using methods I’ve refined over nearly two decades, including which techniques work best for different types of silver and when to use natural methods versus professional cleaners.
What you’ll learn:
- The fastest method to clean tarnished silver (works in 2 minutes)
- How to clean silver jewellery without scratching delicate pieces
- Natural cleaning methods using bicarbonate of soda, vinegar, and aluminium foil
- When to use commercial silver cleaners versus DIY methods
- Specific techniques for necklaces, rings, cutlery, and silver plate
- How to prevent tarnish and maintain your silver long-term
Quick Summary
Time needed: 2-15 minutes depending on method and tarnish severity
Difficulty: Easy – suitable for anyone
You’ll need: Bicarbonate of soda, aluminium foil, hot water, microfibre cloth
Key takeaway: The aluminium foil method removes tarnish in 2 minutes through a chemical reaction, whilst gentle polishing works best for delicate jewellery and antiques
What You'll Need
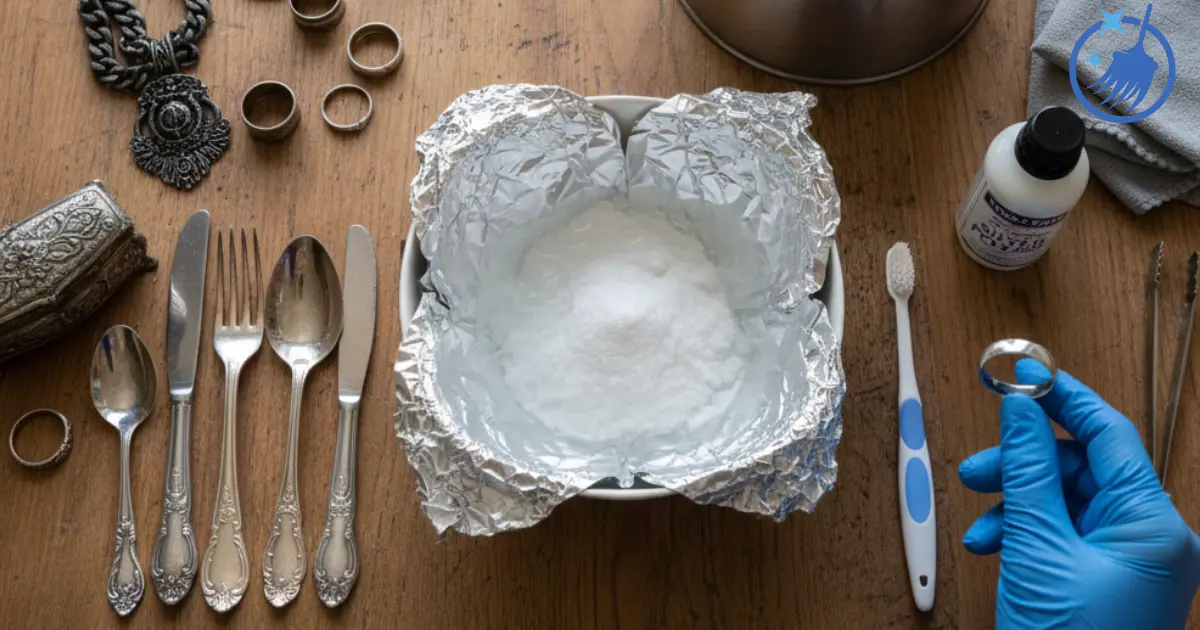
For comprehensive silver cleaning, gather these items:
For the Aluminium Foil Method (Fast & Effective):
- Aluminium foil – standard kitchen foil
- Bicarbonate of soda – 2 tablespoons per litre of water (50p from any supermarket)
- Boiling water – from your kettle
- Glass or ceramic bowl – large enough for your items
- Tongs or slotted spoon – for removing hot items
For Gentle Hand Cleaning (Delicate Items):
- Washing up liquid – small squirt
- Soft toothbrush – child’s toothbrush works perfectly
- Microfibre cloths – 2-3 cloths, lint-free
- Warm water – in a bowl
- Silver polish cloth – optional but recommended (£3-5)
For Stubborn Tarnish:
- White vinegar – 100ml (50p)
- Commercial silver polish – Silvo, Goddard’s, or Town Talk (£3-6)
- Cotton buds – for detailed areas and engraving
Optional Items:
- Jeweller’s rouge cloth – for final buffing (£4-8)
- Rubber gloves – to protect hands when using polish
- Old towel – to protect work surface
How to Clean Silver – The Aluminium Foil Method (Fastest)
This is my go-to method for heavily tarnished silver. It uses a chemical reaction to reverse tarnish without any scrubbing, which makes it perfect for intricate jewellery, cutlery, and items with detailed patterns.
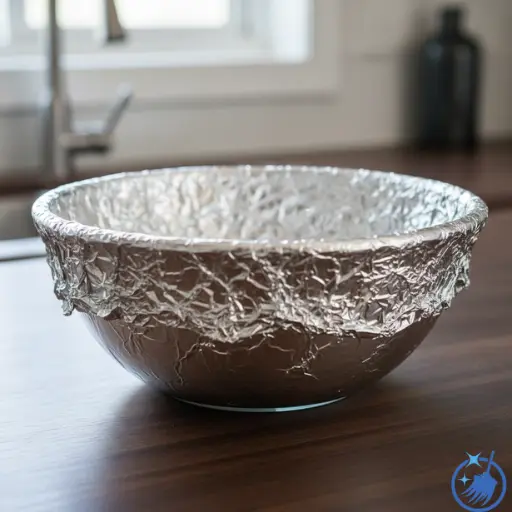
Step 1 – Line a Bowl with Aluminium Foil
Take a glass or ceramic bowl large enough to submerge your silver items. Line the entire inside with aluminium foil, shiny side up. Make sure the foil covers the bottom and sides completely – this is crucial for the chemical reaction to work.
The bowl must be non-metallic. Never use a metal bowl or sink as this interferes with the electrochemical process that removes tarnish.
Why this works: The aluminium acts as a catalyst in a chemical reaction that transfers the sulphur compounds causing tarnish from the silver back to their original state, whilst the aluminium oxidises instead.
Step 2 – Add Bicarbonate of Soda
Place your tarnished silver items in the foil-lined bowl. Make sure each piece touches the aluminium foil – this contact is essential for the chemical reaction.
Add 2 tablespoons of bicarbonate of soda per litre of water you’ll need. For a standard mixing bowl, that’s about 3-4 tablespoons scattered over the items.
Step 3 – Pour Boiling Water
Boil your kettle and carefully pour boiling water over the silver items until they’re completely submerged. You’ll immediately see a chemical reaction – the water may fizz slightly, and you might notice a faint sulphur smell (like rotten eggs). This is normal and means it’s working.
Watch as the tarnish disappears before your eyes. Light tarnish vanishes in 30 seconds to 1 minute. Heavy tarnish takes 2-5 minutes. You can actually see the silver brightening as the black tarnish lifts away.
Timing: Most pieces are completely clean in 2-3 minutes. If tarnish remains after 5 minutes, the piece needs hand cleaning with polish instead.
Step 4 – Remove and Rinse
Use tongs or a slotted spoon to remove the silver items – they’ll be hot from the boiling water. Rinse each piece under cold running water to remove any bicarbonate residue.
Dry immediately and thoroughly with a soft microfibre cloth. Don’t let silver air dry as water spots can form and new tarnish can start developing.
Step 5 – Buff to a Shine
Once dry, buff each piece with a clean microfibre cloth or a silver polishing cloth. Use circular motions and gentle pressure. This final buffing brings out the brilliant shine you’re looking for.
For extra sparkle on jewellery, use a jeweller’s rouge cloth for the final buff. These cost £4-8 but last for years and give a professional finish.
How to Clean Silver Jewellery by Hand
Delicate silver jewellery, pieces with gemstones, or items with intricate details often need gentler hand cleaning rather than the aluminium foil method.
Step 1 – Prepare Warm Soapy Water
Fill a bowl with warm (not hot) water and add 2-3 drops of washing up liquid. Swish it around to create light suds. The water should be warm to the touch but not uncomfortably hot.
Never use boiling water on silver jewellery with gemstones – the heat can crack or cloud certain stones like opals, pearls, or emeralds.
Step 2 – Soak the Jewellery
Place your silver jewellery in the soapy water and let it soak for 5-10 minutes. This loosens dirt, oils from skin, and light tarnish without any scrubbing.
For pieces with gemstones, limit soaking to 5 minutes and avoid submerging pearls, opals, or turquoise completely as these porous stones can absorb water and deteriorate.
Step 3 – Gently Scrub with a Soft Brush
After soaking, use a soft toothbrush (child’s size is perfect) to gently scrub the silver. Pay attention to:
- Chain links where dirt accumulates
- Settings around stones where oils collect
- The back of earrings and posts
- Any engraved or textured areas
- Jump rings and clasps
Use light pressure and circular motions. Silver is a soft metal – aggressive scrubbing can scratch it.
Step 4 – Rinse and Dry Thoroughly
Rinse each piece under cold running water, making sure all soap residue is removed. Soap left on silver can cause cloudiness or new tarnish to form faster.
Pat dry with a soft microfibre cloth, then leave pieces on a clean towel for 10-15 minutes to air dry completely. Once fully dry, buff with a silver polishing cloth to bring out the shine.
For chains, use a hairdryer on the cool setting to dry between links where water gets trapped.
How to Clean Specific Silver Items
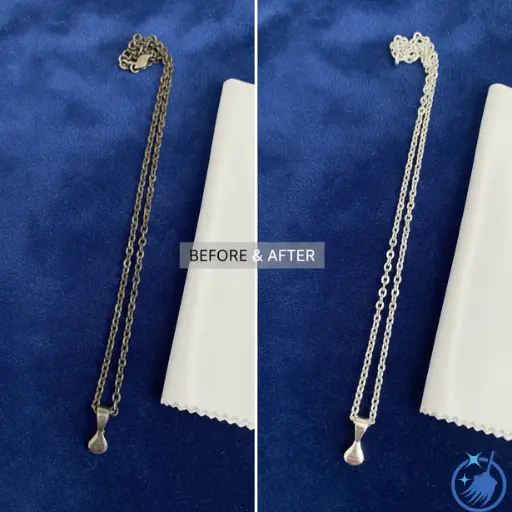
Cleaning Silver Necklaces and Chains
Silver chains tarnish faster than solid pieces because each link has more surface area exposed to air. The spaces between links also trap dirt and oils.
Method: Use the aluminium foil method for heavily tarnished chains, or hand wash for light cleaning. For intricate chains, after cleaning, thread a piece of cotton thread between some links and use a sawing motion to remove any remaining residue trapped in tight spaces.
Drying: This is crucial for chains. After rinsing, blot with a microfibre cloth, then use a hairdryer on cool setting to blow-dry between links. Any trapped moisture will cause tarnish to return within days.
Cleaning Silver Rings
Rings tarnish quickly because they’re exposed to lotions, soaps, and sweat constantly. The underside of the band often has heavier tarnish than the top.
Method: For plain silver bands, the aluminium foil method works perfectly. For rings with gemstones, hand wash only – especially if the stone is pearl, opal, turquoise, or emerald, which are damaged by heat or harsh chemicals.
Special attention: Use a cotton bud dipped in cleaning solution to clean around stone settings where grime builds up. These areas are often missed but make a huge difference to the ring’s appearance.
Cleaning Silver Earrings
Earrings accumulate skin oils, dead skin cells, and products from ears and hair. The posts and backs especially need thorough cleaning for hygiene.
Method: Hand washing works best for earrings. Soak in warm soapy water for 10 minutes, then use a soft toothbrush on all surfaces. Pay extra attention to the posts and butterfly backs.
Hygiene note: I recommend cleaning earrings weekly if worn regularly. The buildup on posts can cause ear irritation or infections.
Cleaning Silver Cutlery
Silver cutlery tarnishes from exposure to foods containing sulphur (eggs, onions, mayonnaise) and from storage in contact with other metals.
Method: The aluminium foil method is perfect for silver cutlery. You can clean an entire canteen at once. For a full set, use a large roasting tin lined with foil, add bicarbonate, arrange cutlery so each piece touches the foil, then pour over boiling water.
Handles: If your cutlery has bone, ivory, or wooden handles, don’t submerge these in boiling water – it can crack or warp them. Clean the silver portions only, keeping handles out of the water.
Cleaning Silver Plate
Silver plate is a thin layer of silver over a base metal (usually copper or nickel). It requires gentler cleaning because aggressive polishing can wear through the silver layer.
Method: Use the aluminium foil method with slightly cooler water (90°C instead of boiling), or hand wash with gentle polish. Never use abrasive cleaners or harsh scrubbing.
Warning signs: If you see copper or brass colour showing through, the silver plating has worn away. At this point, the item needs re-plating (professional service, £30-100 depending on size), not cleaning.
Cleaning Sterling Silver (925)
Sterling silver is 92.5% pure silver mixed with 7.5% other metals (usually copper). It’s the standard for most silver jewellery and is marked with “925”, “Sterling”, or a lion hallmark.
Method: All methods in this guide work for sterling silver. It tarnishes more slowly than pure silver but still needs regular cleaning.
Does 925 sterling silver tarnish? Yes, absolutely. The copper content actually makes it tarnish faster than pure silver (which is too soft for most uses). However, this tarnish is completely reversible with proper cleaning.
Common Mistakes to Avoid When Cleaning Silver
- Using toothpaste to clean silver – This is all over the internet but it’s terrible advice. Toothpaste contains abrasives that scratch silver, especially modern whitening toothpastes which use micro-silica particles. I’ve seen dozens of pieces permanently damaged by toothpaste cleaning. The scratches catch light and make the silver look dull. Never use toothpaste on silver.
- Cleaning silver jewellery with gemstones in boiling water – Heat can crack, cloud, or permanently damage opals, pearls, turquoise, emeralds, and many other gemstones. Always hand wash jewellery with stones using warm (not hot) water, or remove stones before using the aluminium foil method.
- Storing silver in plastic bags – Airtight plastic traps moisture and accelerates tarnishing. Store silver in tarnish-prevention cloths or bags specifically designed for silver storage, available at any jeweller or Lakeland for £5-12.
- Wearing silver in chlorinated water – Swimming pools, hot tubs, and bleach can permanently discolour silver. Always remove silver jewellery before swimming. I’ve seen rings turn black permanently from chlorine exposure.
- Mixing different cleaning methods – Don’t use the aluminium foil method and then immediately apply commercial polish, or mix vinegar with bicarbonate in the same cleaning session. Use one method completely, rinse thoroughly, then assess if further cleaning is needed.
- Scrubbing too hard – Silver is a soft metal. Aggressive scrubbing with a stiff brush or scouring pad creates scratches that catch light and make the silver look dull rather than shiny. Always use the softest materials and gentlest pressure.
- Not drying thoroughly – Water spots on silver attract tarnish and leave marks. Always dry silver immediately and completely after cleaning, then buff with a dry cloth. Never leave silver to air dry.
- Using the wrong bowl for the aluminium foil method – Metal bowls or sinks interfere with the electrochemical reaction. Always use glass, ceramic, or plastic bowls only.
How often should you clean silver?
| Item Type | Cleaning Frequency | Preventative Care |
|---|---|---|
| Worn jewellery (daily) | Weekly light clean, monthly deep clean | Remove before swimming, showering, applying lotions |
| Occasional jewellery | Clean when tarnished (every 2-3 months) | Store in tarnish-prevention cloth or bag |
| Silver cutlery (displayed) | Monthly or when tarnished | Store in lined cutlery chest, use tarnish strips |
| Silver cutlery (used regularly) | Clean after each use if possible | Hand wash immediately after contact with eggs, mayonnaise |
| Ornaments and decorative pieces | Every 3-6 months or when tarnished | Dust weekly, keep away from humidity |
| Family heirlooms and antiques | Once or twice yearly | Professional cleaning every 2-3 years for valuable pieces |
Special circumstances:
- Coastal areas: Clean monthly – salt air accelerates tarnishing
- High humidity homes: Clean every 2-3 weeks and use desiccant packets in storage
- After wearing perfume: Clean immediately – perfume chemicals react with silver
- Before special events: Clean 1-2 days ahead, not same day (allows tarnish prevention to set in)
Best Products for Cleaning Silver
Budget Option (Under £2)
Bicarbonate of soda and aluminium foil – This combination costs less than £1 and handles 90% of silver cleaning needs. You already have these in your kitchen. The electrochemical reaction removes tarnish without scratching or chemicals.
White vinegar – 50p per bottle from any supermarket. Works well for light tarnish when combined with bicarbonate in a paste. Less effective than the foil method for heavy tarnish but good for spot cleaning.
Where to buy: Tesco, Sainsbury’s, Asda – own-brand versions work identically to branded Cost per clean: Approximately 10-15p
Mid-Range Option (£3-8)
Goddard’s Silver Dip – £4.50 for 125ml. This liquid cleaner works quickly on intricate items with detailed engraving that the foil method can’t reach. You dip the item, rinse, and dry. Very effective but has a strong chemical smell.
Town Talk Silver Polish – £5.99 for 150ml. My favourite commercial polish for valuable pieces or stubborn tarnish. It’s a gentle cream that doesn’t scratch, contains tarnish inhibitors, and leaves a protective layer.
Silvo Wadding Polish – £3.50. Impregnated cotton wadding that cleans and polishes simultaneously. Excellent for large items like trays and candlesticks.
Where to buy: Lakeland, John Lewis, Amazon, larger supermarkets Cost per clean: 30p-£1 depending on item size
Premium Option (£8-20)
Hagerty Silver Foam – £12.99 for 185ml. Professional-grade foam that’s exceptional for silver plate and antiques. It’s gentle enough not to wear through plating but strong enough for heavy tarnish. Used by professional restorers.
Connoisseurs Silver Jewellery Cleaner – £14.99 for 236ml. Specifically formulated for delicate jewellery with gemstones. Comes with a basket and brush. Safe for most stones (check instructions for pearls and opals).
Silver polishing cloths (professional grade) – £8-15 for a set. Impregnated with gentle cleaners and anti-tarnish agents. Last for hundreds of uses and are perfect for maintaining silver between deep cleans.
Where to buy: Specialist jewellery suppliers, John Lewis, Amazon Cost per clean: £1-2
Professional Favourite
For everyday items and regular maintenance, I use the bicarbonate and aluminium foil method – it’s fast, cheap, and remarkably effective. For clients’ valuable antiques or family heirlooms, I use Town Talk Silver Polish for its gentleness and protective qualities, followed by buffing with a professional-grade polishing cloth.
For pieces worth over £500, I recommend professional cleaning every 2-3 years at a jeweller (typically £15-30 per piece). They can properly clean, check for damage, and re-plate if needed.
Natural vs Chemical Silver Cleaners
When Natural Cleaners Work Best
Bicarbonate of soda, vinegar, and the aluminium foil method handle the majority of silver cleaning needs:
- Regular tarnish on everyday items
- Silver jewellery worn frequently
- Cutlery and serving pieces
- Items with intricate patterns that are hard to reach with polish
- Environmentally conscious cleaning
- Safe for most gemstones (though always hand wash stones, don’t use hot water)
Advantages:
- Non-toxic and safe around children and pets
- Costs under £1 for multiple cleanings
- No harsh chemical residue
- Works faster than commercial cleaners for heavy tarnish
- Won’t damage silver if used correctly
Limitations:
- Requires very hot or boiling water for the foil method
- Not suitable for silver with heat-sensitive gemstones
- Won’t add a protective anti-tarnish coating
- Slight sulphur smell during cleaning (though it dissipates quickly)
When You Need Chemical Cleaners
Reach for commercial silver cleaners when:
- Valuable antiques: Professional-grade polishes add a protective layer that helps prevent future tarnish
- Silver plate: Gentle chemical cleaners won’t wear through the thin silver layer
- Detailed engravings: Liquid dip cleaners reach into grooves that cloths and brushes can’t access
- Persistent tarnish: When natural methods haven’t worked after 2-3 attempts
- Heat-sensitive items: Jewellery with delicate gemstones needs room-temperature chemical cleaners
- Prevention: Anti-tarnish polishes slow future tarnishing
Recommended chemical cleaners:
- Silver dip cleaners: Fast results, good for intricate items. Strong chemical smell, rinse thoroughly.
- Cream polishes: Gentle, add protective coating, excellent for antiques. Require more elbow grease than dips.
- Impregnated cloths: Convenient, last for years, perfect for maintenance. Not powerful enough for heavy tarnish.
My Professional Recommendation
Use a hybrid approach:
- Monthly: Natural cleaning with bicarbonate and foil for everyday items
- Quarterly: Quality cream polish for valuable pieces to add protective coating
- Weekly: Quick buff with polishing cloth for worn jewellery
- As needed: Professional cleaning for heirlooms and items worth £500+
This gives you the benefits of both approaches whilst minimising chemical use and protecting your investment in silver pieces.
Troubleshooting Silver Cleaning Problems
Problem: Silver That Has Turned Black
Severely tarnished silver that looks completely black isn’t damaged – it’s just heavy tarnish buildup. This happens when silver hasn’t been cleaned in years or has been stored in humid conditions.
Solution: Use the aluminium foil method with a double dose of bicarbonate (4 tablespoons per litre). Leave items in the solution for 5-10 minutes. For extremely stubborn cases, repeat the process a second time with fresh solution.
If this doesn’t work, the black coating might be fire scale (from manufacturing) or the item might be silver plate where the plating has worn completely away, revealing the dark base metal underneath. Fire scale requires professional removal.
Problem: How Do You Clean Heavily Tarnished Silver?
Heavily tarnished silver with thick black coating in all the crevices needs a combination approach.
Solution:
- Start with the aluminium foil method to remove the bulk of tarnish (5-10 minutes)
- Rinse and dry
- Apply commercial silver polish with a soft cloth, working it into engraved areas with a soft toothbrush
- Rinse thoroughly and dry
- Final buff with a polishing cloth
This two-step process removes heavy tarnish without excessive scrubbing that might scratch the silver.
Problem: White Residue After Cleaning
This usually appears as white streaks or a chalky film and is caused by undissolved bicarbonate of soda or inadequate rinsing after using commercial polish.
Solution: Rinse the piece again thoroughly under running water, making sure all residue is removed. Dry completely and buff with a clean microfibre cloth. The white film will disappear.
To prevent this, always rinse silver for at least 30 seconds after any cleaning method, turning the piece to ensure all surfaces are thoroughly rinsed.
Problem: Scratches Appearing After Cleaning
If your silver looks more scratched or dull after cleaning, you’ve either used an abrasive cleaner (like toothpaste) or scrubbed too hard with a rough cloth.
Solution: Unfortunately, scratches in silver are permanent and can only be removed by professional jeweller buffing (£15-50 depending on the piece). For minor scratching, continued gentle polishing with a rouge cloth may minimise their appearance over time.
Prevention is key – always use the softest materials and gentlest pressure when cleaning silver.
Problem: Tarnish Returns Within Days
If your silver tarnishes again almost immediately after cleaning, you’re either not drying it thoroughly or storing it improperly.
Solution:
- After cleaning, dry silver completely with a microfibre cloth
- Buff with a polishing cloth containing anti-tarnish agents
- Store in tarnish-prevention bags or wraps (available at Lakeland, £5-12)
- Add tarnish-prevention strips to storage (3M makes good ones, £7 for 50 strips)
- Avoid storing in bathrooms or kitchens where humidity is high
- Never store silver in newspaper – the ink contains sulphur that accelerates tarnishing
Problem: Silver Won't Come Clean in Detailed Areas
Intricate engravings, filigree work, or chain links can trap tarnish that’s hard to reach.
Solution: Use a silver dip cleaner (like Goddard’s Silver Dip, £4.50) which is liquid and flows into detailed areas. Submerge the piece for 1-2 minutes, agitate gently, then rinse very thoroughly under running water. The chemical cleaner reaches areas that cloths and brushes can’t access.
For extremely fine details, use a cotton bud dipped in the cleaning solution to work into specific areas.
When to Call a Professional
I recommend taking silver to a professional jeweller when:
- The piece is a valuable antique or family heirloom worth £500+
- Silver plate is worn through and showing base metal
- There’s physical damage (dents, loose stones, broken clasps)
- You’ve tried multiple cleaning methods without improvement
- The piece has significant sentimental value and you’re nervous about damaging it
- You’re seeing green or red discolouration (indicates base metal exposure)
Professional silver cleaning typically costs £10-30 per item and includes inspection for damage, proper cleaning, and often a protective coating. For valuable pieces, it’s worth the investment every 2-3 years.
How to Prevent Silver Tarnish
Prevention is easier than cleaning. Here’s how to slow tarnish formation:
Storage Solutions:
- Tarnish-prevention bags or cloths – Line jewellery boxes or wrap individual pieces. Available at Lakeland, Amazon (£5-15)
- Anti-tarnish strips – Place these in storage boxes or drawers. They absorb sulphur compounds from the air. Replace every 6-12 months (3M, £7 for 50)
- Chalk or activated charcoal – Put pieces in storage boxes or safes to absorb moisture
- Airtight containers – For pieces not worn regularly, store in zip-lock bags with air pressed out
Wearing and Care:
- Last on, first off – Put jewellery on after applying perfume, lotion, and hairspray (these accelerate tarnish)
- Remove before wet activities – Take off before showering, swimming, washing dishes, cleaning
- Wear it often – Paradoxically, silver worn regularly tarnishes slower than stored silver. Friction from wearing polishes it naturally
- Clean promptly – If exposed to perfume, chlorine, or sulphur-containing foods, clean same day
Environmental Control:
- Avoid humidity – Don’t store silver in bathrooms or damp basements
- Use desiccant packets – Add silica gel packets to storage boxes
- Keep away from rubber – Rubber contains sulphur and causes rapid tarnishing
- Don’t wrap in newspaper – The ink contains sulphur compounds
Maintenance:
- Weekly buff – For worn jewellery, a 10-second buff with a polishing cloth after each wear prevents tarnish buildup
- Monthly check – Examine stored silver and clean any that’s starting to tarnish
- Immediate action – Clean light tarnish as soon as you spot it (30 seconds of work vs 5 minutes for heavy tarnish)
Understanding Silver and Tarnish
What Causes Silver to Tarnish?
Tarnish is a chemical reaction between silver and sulphur compounds in the air. The silver reacts with hydrogen sulphide (from air pollution, some foods, cosmetics, and even perspiration) to form silver sulphide, which appears as the black coating we call tarnish.
Common sources of sulphur:
- Air pollution (especially in cities)
- Rubber bands, elastic, latex gloves
- Certain foods: eggs, onions, mayonnaise, mustard
- Cosmetics and perfumes
- Wool and felt
- Some paints and varnishes
- Newspaper (the ink contains sulphur)
Is Tarnish Damage?
No. Tarnish is a surface layer of silver sulphide – it’s not corrosion or deterioration of the silver itself. The silver underneath is completely intact. This is why cleaning removes tarnish so effectively – you’re reversing a chemical reaction, not repairing damage.
However, very heavy tarnish that’s left for decades can become difficult to remove and may require professional restoration.
Why Does Some Silver Tarnish Faster?
Several factors affect tarnishing speed:
- Silver purity: Pure silver (99.9%) tarnishes slowly. Sterling silver (92.5% silver, 7.5% copper) tarnishes faster because the copper content is more reactive.
- Air exposure: Silver stored airtight tarnishes much slower than displayed items.
- Humidity: High moisture in air accelerates tarnishing significantly.
- Location: Urban areas with more air pollution see faster tarnishing than rural areas.
- Contact: Silver touching rubber, wool, or newspaper tarnishes rapidly.
- Frequency of wear: Surprisingly, worn silver tarnishes slower than stored silver because friction from wearing provides natural polishing.
Pro Tips From a Professional Cleaner
Insider Tips
After cleaning thousands of silver items across the UK, here’s what I’ve learned:
- The cotton glove trick – After cleaning valuable silver, handle it with cotton gloves for the next 24 hours. Oils from your skin can create new tarnish spots before the protective layer from polishing has fully set. I use this for clients’ antiques and family heirlooms.
- Temperature matters – For the aluminium foil method, boiling water works fastest but 90°C water (just off the boil) is gentler and works nearly as well. For silver plate or delicate items, let the kettle cool for 1-2 minutes before pouring.
- The link test – Before cleaning a full silver chain, test one link with your chosen method. Some older chains have soldered links that can be damaged by certain cleaners. Better to discover this with one link than ruin an entire necklace.
- Layered cleaning – For items that are both dirty and tarnished, wash in warm soapy water first to remove dirt and oils, then use the foil method for tarnish. Trying to remove tarnish from dirty silver just spreads the dirt around.
- The overnight soak – For silver with stubborn tarnish in deep engravings, try this: after the initial foil cleaning, make a paste of bicarbonate and water, apply it to the engraved areas, and leave overnight. The paste continues working whilst you sleep. Rinse and buff in the morning.
- Storage location – I never store silver in kitchens or bathrooms due to humidity and cooking fumes. A bedroom drawer or wardrobe is ideal – consistent temperature, lower humidity, less air circulation bringing in pollutants.
- The tissue paper buffer – When storing multiple silver items together, separate them with acid-free tissue paper. Metal-to-metal contact can create galvanic corrosion and mysterious dark spots. Cost is minimal (£3 for 25 sheets) and prevents damage worth hundreds.
- Regular rotation – If you have silver jewellery you’re storing long-term, wear each piece at least once every 3-6 months. This natural polishing from wearing keeps it in better condition than sitting untouched in a box. Set a calendar reminder to rotate through your collection.
Conclusion
Learning how to clean silver properly transforms the appearance of tarnished pieces in minutes using items you already have at home. The bicarbonate of soda and aluminium foil method I’ve shared works through a genuine chemical reaction that reverses tarnish without harsh scrubbing or expensive products. I’ve used this technique for 18 years professionally and it costs about 10p per cleaning yet outperforms products costing £10 or more.
The key principles are simple: use the aluminium foil method for heavy tarnish and everyday items, hand wash delicate jewellery with gemstones, always dry thoroughly, and store silver properly to prevent rapid re-tarnishing. Clean light tarnish immediately rather than waiting until it’s severe – 30 seconds of preventative buffing beats 10 minutes of restoration work.
Start by gathering your supplies today: a roll of foil (£1), bicarbonate of soda (50p), and a microfibre cloth. Choose your most tarnished piece and try the aluminium foil method. You’ll see the transformation within 2 minutes and wonder why you didn’t start sooner. With proper cleaning and storage, your silver will maintain its brilliant shine for generations.
Frequently Asked Questions
How to clean silver that has turned black?
Silver that has turned completely black has heavy tarnish, not permanent damage. Use the aluminium foil method: line a bowl with foil, add 4 tablespoons of bicarbonate of soda, place the blackened silver touching the foil, and pour boiling water over it. The black tarnish will disappear in 2-5 minutes through a chemical reaction. For extremely stubborn cases, repeat with fresh solution.
Does 925 sterling silver tarnish?
Yes, 925 sterling silver (92.5% silver, 7.5% copper) definitely tarnishes. The copper content actually makes it tarnish faster than pure silver. However, this tarnishing is completely reversible with proper cleaning. Regular buffing with a polishing cloth and proper storage in tarnish-prevention bags will slow tarnish formation significantly.
How to clean silver jewellery at home?
For light tarnish, hand wash silver jewellery in warm water with washing up liquid, use a soft toothbrush on details, rinse thoroughly, and dry immediately. For heavier tarnish, use the aluminium foil method: line a bowl with foil, add bicarbonate of soda, place jewellery touching the foil, pour boiling water over it, and wait 2 minutes. Rinse, dry thoroughly, and buff with a soft cloth. Note: hand wash jewellery with gemstones using warm (not hot) water.
Can you use toothpaste to clean silver?
No, never use toothpaste on silver. Toothpaste contains abrasive particles that scratch silver’s soft surface permanently. These scratches catch light and make silver look dull rather than shiny. Use bicarbonate of soda with the aluminium foil method instead – it’s non-abrasive and actually works better than toothpaste without causing damage.
What is the best way to clean tarnished silver?
The aluminium foil method is the fastest and most effective: line a bowl with aluminium foil (shiny side up), add your tarnished silver touching the foil, sprinkle 2 tablespoons of bicarbonate of soda per litre of water needed, then pour boiling water over everything. The tarnish disappears in 2-5 minutes through an electrochemical reaction. This method costs about 10p and works better than commercial cleaners costing £10.
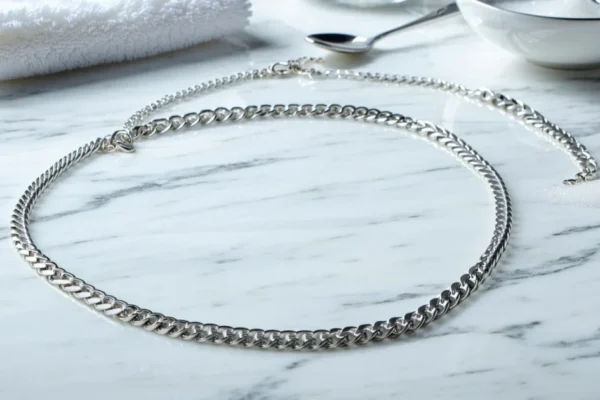
How to clean silver necklaces?
For silver necklaces, use the aluminium foil method to remove tarnish quickly without scrubbing delicate chains. After the foil cleaning, if any tarnish remains in tight links, thread cotton through some links and use a sawing motion to clean between them. Rinse thoroughly, then dry completely using a microfibre cloth and a hairdryer on cool setting to remove moisture trapped between links. This prevents rapid re-tarnishing.
How often should you clean silver?
Clean silver jewellery worn daily with a quick weekly hand wash and monthly deep clean using the aluminium foil method. For occasional-wear jewellery, clean when you notice tarnish starting (every 2-3 months typically). Silver cutlery displayed should be cleaned monthly or when tarnished. The key is cleaning light tarnish immediately rather than waiting until it’s heavy – this reduces effort from 5 minutes to 30 seconds.
What cleans silver naturally?
Bicarbonate of soda combined with aluminium foil and hot water creates a natural electrochemical reaction that removes tarnish without harsh chemicals. White vinegar mixed with bicarbonate into a paste also works for light tarnish. Both methods cost under £1, are non-toxic, and work faster than most commercial cleaners. Avoid natural methods like lemon juice or salt, which can be too acidic and damage silver over time.
How to clean silver plate?
Silver plate requires gentler cleaning than solid silver because aggressive methods can wear through the thin silver layer. Use the aluminium foil method with water at 90°C (slightly cooled from boiling) rather than boiling water. Alternatively, hand wash with mild commercial silver polish designed for plated items. Never use abrasive cleaners or harsh scrubbing. If you see copper or brass colour showing through, the plating has worn away and needs professional re-plating.
How do you remove tarnish from silver quickly?
The fastest method is the aluminium foil technique: it removes even heavy tarnish in 2-5 minutes with no scrubbing required. Line a bowl with foil, add bicarbonate of soda and your silver, pour boiling water over it, and watch the tarnish disappear before your eyes. The chemical reaction literally lifts tarnish off the silver and transfers it to the aluminium. Rinse, dry, and buff for an instant brilliant shine.
You May Also Like
How to Clean Rust Off Metal: Complete Removal Guide 2026
How to Clean Silver Necklace: Complete Guide 2026