What is Drum Clean on a Washing Machine? Complete UK Guide 2026
You’ve just finished a load of washing, and there’s a small light blinking on your machine’s control panel. It says “Drum Clean” or maybe “Eco Drum Clean” or “Tub Clean”. You’ve never noticed it before, and now you’re wondering what on earth it means and whether you should press it.
Here’s the straightforward answer: drum clean is a built-in self-cleaning cycle found on modern washing machines. It heats water to between 60°C and 70°C and runs a special wash programme without any clothes inside. The purpose? To kill bacteria, remove mould, eliminate detergent residue, and keep the inside of your drum hygienically clean.
Think of it as your washing machine giving itself a hot bath. Just as you wouldn’t expect to stay clean by only ever washing in cold water, your machine can’t properly clean itself when you’re constantly running 30°C eco cycles (which, let’s be honest, most of us do).
This automatic cleaning feature has become increasingly important as we’ve all shifted to lower-temperature washing to save energy. Whilst cold washes are brilliant for your electricity bills and the environment, they’re terrible at keeping your machine clean. Detergent doesn’t fully dissolve, fabric softener leaves a sticky film, and bacteria absolutely love the damp, lukewarm conditions inside your drum.
In this guide, you’ll discover exactly what drum clean does, how it differs from manually cleaning your washing machine drum, when you should use it, and why that blinking reminder light is actually trying to save you from a smelly, underperforming washing machine.
Quick Summary
Time needed: 60-90 minutes (cycle runs automatically)
Difficulty: Easy
You’ll need: Empty washing machine, nothing else (no detergent!)
Key takeaway: Drum clean is your machine’s self-cleaning programme that uses high temperatures to kill bacteria and remove buildup – run it monthly for best results.
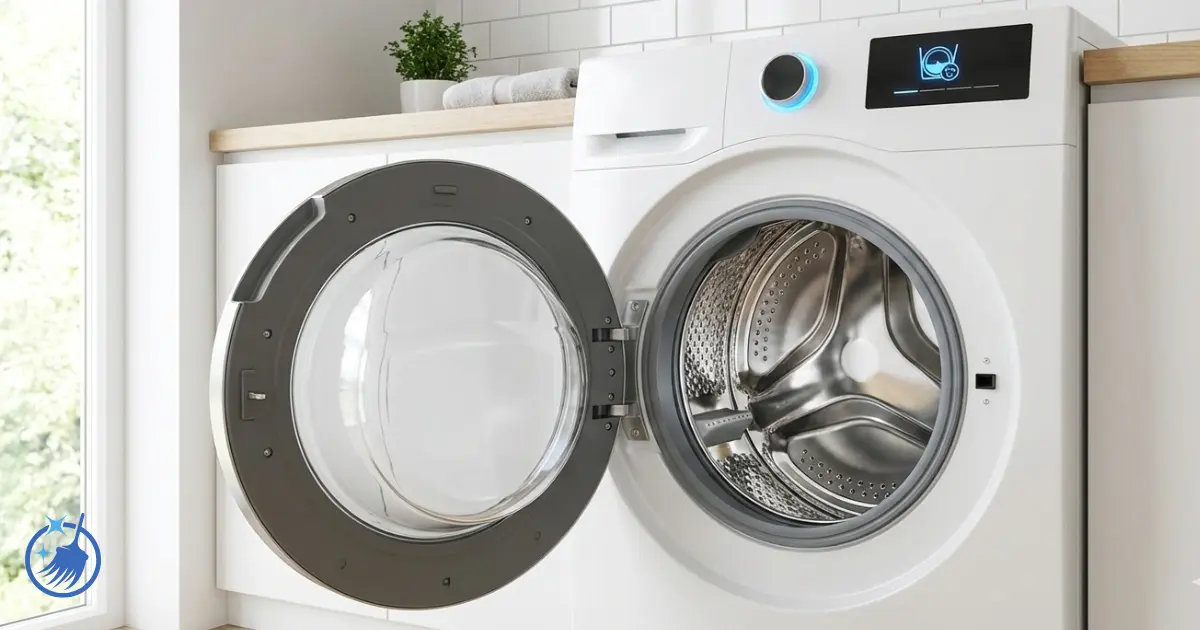
What is Drum Clean on a Washing Machine?
Drum clean is an automatic self-cleaning cycle built into modern washing machines. When you select this programme, your machine runs a special wash cycle without any laundry inside, using water heated to 60-70°C combined with extended spin cycles and specific agitation patterns.
The cycle works by heating water to temperatures high enough to kill bacteria, dissolve detergent residue, and break down the biofilm that forms on the drum’s inner surface. Most drum clean cycles last between 60 and 90 minutes, significantly longer than a typical wash programme.
Unlike a regular hot wash (where you might wash towels or bedding at 60°C), the drum clean cycle is specifically calibrated to clean the machine itself. The spin patterns are different, the water levels vary, and the timing is optimised to target problem areas like the rubber door seal, the drum’s interior walls, and the space between the inner and outer drums where nasty buildup loves to hide.
Here’s what happens during a typical drum clean cycle:
- The drum fills with hot water (60-70°C)
- The drum rotates in specific patterns to distribute heat evenly
- Water is held at high temperature for an extended period
- Multiple rinse cycles flush away loosened debris
- A final high-speed spin removes excess moisture
The programme doesn’t just clean what you can see. The hot water circulates through the entire system, including the pipes, pump, and filter connections. This helps prevent blockages and keeps water flowing properly through your machine.
The drum clean function isn’t the same as washing your machine with vinegar and baking soda. Whilst manual cleaning methods have their place, drum clean is designed to be a routine maintenance programme you run regularly to prevent problems, rather than a deep clean to fix existing issues.
Why Washing Machines Need Drum Cleaning
Modern washing habits have created the perfect storm for dirty washing machines. We’re all trying to be more energy-conscious, which means most loads now run at 30-40°C. Brilliant for the planet and your electricity bill, absolutely terrible for your washing machine’s hygiene.
At these lower temperatures, detergent doesn’t fully dissolve. Instead, it forms a sticky residue that clings to the drum walls, door seal, and internal pipes. Fabric softener is even worse – it’s designed to leave a coating on your clothes, but plenty of it stays behind in your machine, creating a tacky film that traps dirt, lint, and bacteria.
This buildup becomes a breeding ground for bacteria and mould. The damp, lukewarm environment inside your drum after a 30°C wash is essentially a five-star hotel for microorganisms. They multiply rapidly, forming biofilms that can’t be removed by simply running another cold wash.
Hard water makes everything worse. If you live in London, the South East, or other hard water areas across the UK, limescale deposits add another layer of grime. These mineral deposits don’t just look unsightly – they reduce your machine’s efficiency, make it work harder, and can eventually damage heating elements and pumps.
The consequences of neglecting drum cleanliness include:
Persistent musty odours that transfer to your supposedly clean laundry. You’ll notice clothes coming out of the wash smelling damp or mouldy, even when using fresh detergent.
Visible mould and mildew, particularly around the rubber door seal. Those black spots aren’t just unpleasant to look at – they’re colonies of mould spores that contaminate every wash.
Reduced cleaning performance. When your drum is coated in old detergent and biofilm, fresh detergent can’t work properly. Your clothes won’t get as clean, and you’ll end up using more product to compensate.
Mechanical problems. Buildup in pipes and filters restricts water flow, putting strain on the pump. This can lead to drainage issues, error codes, and eventually expensive repairs.
Shorter machine lifespan. Regular maintenance, including drum cleaning, can add years to your washing machine’s life. Neglect it, and you’ll be shopping for a replacement far sooner than necessary.
The drum clean function addresses these problems through regular preventive maintenance. By running this cycle monthly, you stop buildup before it becomes a serious issue. Think of it like brushing your teeth – you don’t wait until you have cavities before you start cleaning them.
Drum Clean by Brand: Different Names, Same Function
Walk into any appliance shop, and you’ll find drum clean cycles under a confusing array of names. Samsung calls it one thing, LG calls it another, and Bosch has its own terminology. They all do essentially the same job, but knowing the specifics for your brand helps you use the feature properly.
Samsung: ECO DRUM CLEAN and ECO DRUM CLEAN+
Samsung washing machines use two variants of this feature. ECO DRUM CLEAN is the standard version, whilst ECO DRUM CLEAN+ includes additional functions.
Both cycles heat water to 60-70°C and run for approximately 90 minutes. The key difference is that ECO DRUM CLEAN+ triggers a reminder every 40 washes, whilst the basic version doesn’t have automatic reminders.
When the reminder light appears on Samsung machines, you’ll see either a dedicated icon or an LED indicator on the control panel. The machine gives you a grace period of 6 consecutive washes where you can ignore the reminder. From the 7th wash onwards, the reminder disappears but will return after another 40 washes.
Samsung is very specific about one thing: don’t add any cleaning agents or regular detergent. Their manuals explicitly state this can damage the drum or leave residue that harms your laundry. The high temperature alone provides sufficient cleaning power.
LG: TUB CLEAN
LG washing machines label this function as “Tub Clean”. It works identically to other brands’ drum clean cycles but LG recommends using a washing machine cleaning tablet for best results.
The programme allows you to add a cleaning product in three ways: powder goes in the main wash compartment, liquid goes in a cup insert, or tablets can be placed directly in the drum. After the cycle completes, LG emphasises leaving both the door and detergent dispenser open to ventilate and dry any remaining moisture.
LG’s tub clean cycle also includes specific maintenance reminders for cleaning the drain pump filter, which should be done alongside running the tub clean programme.
Bosch and Siemens: Drum Clean Programme
Bosch and Siemens machines (which share technology) use a straightforward “Drum Clean” label. These brands typically recommend running the programme every 20 washes.
The machine automatically notifies you when it’s time to run the programme. Bosch machines often use a 90°C Cottons programme for drum cleaning, making it one of the hottest cleaning cycles available.
Siemens machines are particularly user-friendly about reminders – they tell you exactly when maintenance is due, taking the guesswork out of scheduling.
Beko: DrumClean+
Beko’s DrumClean+ function combines soaking, pulsating, and high-speed spinning. The brand claims this approach removes 99.9% of bacteria whilst helping the machine run more efficiently for longer.
Like Samsung, Beko machines remind you to run the cycle after a set number of washes. The reminder system is automatic, so you don’t need to count loads yourself.
Hotpoint, Indesit, and Other Brands
Hotpoint typically labels the function as “Auto Clean” or “Self Clean”, whilst Indesit machines may use “Eco Clean” or similar terminology. Whirlpool, Zanussi, and other brands use variations on these names.
If your machine doesn’t clearly label a drum clean function, check your user manual for “maintenance cycle”, “hygiene cycle”, or “self-cleaning programme”. Most machines manufactured after 2015 include some version of this feature.
Here’s a quick comparison:
| Brand | Function Name | Reminder Frequency | Temperature | Can Add Cleaner? |
|---|---|---|---|---|
| Samsung | ECO DRUM CLEAN(+) | Every 40 washes | 60-70°C | No |
| LG | TUB CLEAN | Manual/As needed | 60°C | Yes (recommended) |
| Bosch/Siemens | Drum Clean | Every 20 washes | Up to 90°C | Optional |
| Beko | DrumClean+ | Automatic reminder | 60-70°C | Not required |
| Hotpoint | Auto/Self Clean | Varies | 60°C | Check manual |
How to Use the Drum Clean Function
Using drum clean is refreshingly simple. The exact button sequence varies by brand, but the principles remain consistent across all machines.
Universal Steps for Running Drum Clean
Step 1: Empty the drum completely
Remove all laundry, loose items, and anything else inside the drum. Check the door seal folds for any forgotten items – coins, tissues, and small socks love hiding there.
Step 2: Close the door
Make sure the door clicks shut properly. Most machines won’t start the drum clean cycle unless the door is fully closed and latched.
Step 3: Select the drum clean programme
Look for the dedicated drum clean button on your control panel. It might be labelled as “Drum Clean”, “Eco Drum Clean”, “Tub Clean”, or similar. Turn the programme dial to this setting or press the corresponding button on digital displays.
Step 4: Start the cycle
Press the Start/Pause button. Some machines require you to hold the button down for a few seconds. The cycle will begin, and you’ll usually hear the drum fill with water after a brief pause.
Step 5: Leave it alone
Don’t interrupt the cycle. It needs to run completely to be effective. Most programmes last 60-90 minutes.
Step 6: Leave the door open afterwards
Once the cycle finishes, open the door and leave it ajar for several hours. This allows any remaining moisture to evaporate, preventing mould growth between cleans.
What NOT to Do During Drum Clean
Don’t add regular laundry detergent. Whilst tempting, standard detergents create excessive foam during drum clean cycles. This foam can overflow, triggering error codes or leaving residue that defeats the purpose of cleaning.
Avoid using fabric softener. This one should be obvious – fabric softener leaves a coating, which is exactly what you’re trying to remove.
Don’t interrupt the cycle halfway through. Some people stop the programme to “check on it”, but this prevents proper cleaning and can leave the drum in a partially dirty state.
Can You Add Cleaning Products?
This depends entirely on your machine’s manufacturer. Samsung and several other brands explicitly forbid adding any cleaning agents to their drum clean cycles. The high water temperature provides sufficient sanitising power without additional chemicals.
LG, conversely, recommends using a washing machine cleaning tablet. Bosch suggests it’s optional, and Beko doesn’t require it but doesn’t forbid it either.
If your manual allows cleaning products, use only those specifically designed for washing machines. Proper washing machine cleaners are formulated to dissolve at high temperatures without creating excessive foam or leaving residue.
Never use bleach in an automatic drum clean cycle unless your manual specifically recommends it. Bleach can damage rubber seals and gaskets, particularly if concentrated or improperly diluted.
After the Cycle Completes
Open the drum door and inspect the interior. You should see clean, shiny metal without visible residue or dark spots. If you notice stubborn marks remaining, you may need to manually clean the drum as a follow-up.
Wipe down the rubber door seal with a clean, dry cloth. Moisture collects in the folds, and whilst the drum clean cycle helps, manually drying these areas prevents mould growth.
Check the detergent drawer. The drum clean cycle doesn’t clean this component, so you’ll need to maintain it separately. Remove and rinse the drawer under running water if you notice buildup.
Leave the door open for at least 2-3 hours, ideally until the drum is completely dry. This simple habit prevents musty smells developing between washes.
Understanding the Drum Clean Reminder
That blinking light on your control panel isn’t just decoration. It’s your machine’s way of telling you it needs maintenance. Understanding how these reminders work helps you keep your machine in optimal condition without obsessively counting wash loads.
Most washing machines count cycles automatically. Every time you complete a wash programme, an internal counter ticks upwards. When it reaches a predetermined number (20, 30, or 40 washes depending on your brand), the reminder activates.
The reminder usually appears as either a dedicated icon that lights up or an LED next to the drum clean button. Some modern machines with digital displays show a text message stating “Drum Clean Required” or similar wording.
You don’t need to run drum clean immediately when the reminder appears. Most manufacturers build in a grace period. Samsung machines, for example, let you ignore the reminder for 6 consecutive washes before it temporarily disappears. This flexibility is useful if you need to finish essential laundry before running the maintenance cycle.
However, consistently ignoring the reminder defeats its purpose. The manufacturer has calculated that interval based on typical usage patterns and buildup rates. Regularly postponing drum clean means allowing bacteria, mould, and residue to accumulate beyond recommended levels.
After you complete a drum clean cycle, the reminder resets automatically. You won’t see it again until you’ve run another 20-40 washes (depending on your model). Some machines display a “Drum Clean Complete” message briefly before the counter resets.
Occasionally, the reminder counter can malfunction or fail to reset properly. If you’ve run drum clean but the light stays on, try turning the machine off at the wall socket, waiting 30 seconds, then powering it back on. This forces a system reset that usually clears stuck reminders.
If the reminder returns unusually quickly (after only 10-15 washes, for instance), your machine might be detecting excessive buildup. This can happen if you use too much detergent, wash very dirty items regularly, or have hard water. In these cases, you may need to run drum clean more frequently than the standard reminder suggests.
Some premium washing machines now include app connectivity that sends reminder notifications to your smartphone. These systems track not just cycle counts but also programme types, load sizes, and temperature patterns to predict optimal cleaning intervals more accurately.
How Often Should You Use Drum Clean?
The official recommendation from most manufacturers is monthly. However, real-world usage patterns mean this frequency isn’t perfect for everyone.
If you run multiple loads daily, you should stick to monthly drum cleaning. The constant use, combined with the variety of detergents and fabric softeners cycling through your machine, creates faster buildup. Heavy users might even benefit from running drum clean every 3 weeks.
Moderate users washing 3-4 loads weekly can safely extend the interval to every 6 weeks. You’re giving the machine enough time to dry between uses, and the lower volume means slower accumulation of residue.
Light users who only wash once or twice weekly might stretch to every 8-10 weeks. However, don’t extend beyond 3 months. Even with infrequent use, bacteria and mould can establish themselves in damp conditions.
Your water hardness significantly affects optimal cleaning frequency. Hard water areas (most of London, the South East, and parts of the Midlands) require more frequent drum cleaning due to limescale buildup. If you live in these regions, stick to monthly cleaning regardless of usage levels.
The types of programmes you use matter too. Constantly running 30°C quick washes accelerates the need for drum cleaning because detergent never fully dissolves. If most of your loads are cold or warm rather than hot, increase cleaning frequency.
Visible signs indicate you need to run drum clean sooner than scheduled:
Persistent musty smell that doesn’t disappear after a hot wash or ventilation. This indicates established bacteria colonies that need high-temperature sanitising.
Black spots or discolouration around the rubber door seal. This is mould growth that requires immediate attention.
Clothes smelling damp or musty after washing. Your “clean” laundry shouldn’t smell of anything except perhaps a faint detergent scent.
Visible residue on the drum surface when you peer inside. You might see grey streaks, white powder marks, or a cloudy film.
Slow drainage during spin cycles. Whilst primarily a filter or pump issue, buildup throughout the system can contribute to poor water flow.
Here’s a practical schedule based on usage:
- Daily washers (7+ loads/week): Every 3-4 weeks
- Regular users (4-6 loads/week): Every 4-6 weeks
- Moderate users (2-3 loads/week): Every 6-8 weeks
- Light users (1 load/week): Every 8-10 weeks
- Hard water areas: Follow manufacturer’s minimum (usually monthly)
- Mostly cold washes: Follow manufacturer’s minimum (usually monthly)
Don’t confuse frequency recommendations for drum clean with general washing machine maintenance. You still need to wipe door seals, clean filters, and maintain the detergent drawer separately, regardless of how often you run drum clean.
Drum Clean Function vs Manual Cleaning
There’s considerable confusion about whether running drum clean eliminates the need for manual cleaning. The short answer is no – they serve different purposes and complement each other rather than being alternatives.
What Drum Clean Does Well
The automated cycle excels at routine sanitising. High temperatures kill bacteria and break down light biofilm that’s just beginning to form. It’s preventive maintenance that stops problems before they become serious.
Drum clean is completely hands-off. Press a button, walk away, and the machine does everything itself. There’s no scrubbing, no disassembly, and no getting your hands dirty.
The cycle reaches areas you can’t easily access manually. Hot water circulates through internal pipes, around the outer drum, and into connection points that would require significant disassembly to clean by hand.
It’s consistent. Human manual cleaning varies in thoroughness depending on energy levels and time availability. The drum clean cycle performs identically every time, ensuring reliable baseline hygiene.
What Drum Clean Doesn't Do
The cycle can’t remove stubborn, established buildup. If you have thick limescale deposits, sticky fabric softener residue that’s been accumulating for months, or significant mould colonies, drum clean lacks the mechanical action and targeted chemical power to shift these completely.
It doesn’t clean the detergent drawer. This component sits outside the main drum and water circulation path. Buildup here continues accumulating regardless of how often you run drum clean.
Door seal folds remain problematic. Whilst drum clean helps, the deep folds in rubber door seals trap moisture and grime that high-temperature water can’t fully reach. These areas need manual wiping.
Filters and debris traps aren’t addressed. The lint filter, pump filter, and inlet filter mesh require separate maintenance. Drum clean doesn’t clean these components at all.
External surfaces stay untouched. The machine’s exterior, control panel, and visible drum edges need manual wiping with appropriate cleaners.
When Manual Cleaning is Essential
You’ll need hands-on intervention when you notice black mould spots that drum clean hasn’t removed, when visible residue remains after running the cycle, if persistent odours continue despite regular drum cleaning, or when you can feel sticky or grimy patches on the drum surface.
Manual cleaning also becomes necessary after washing particularly dirty items (muddy sports kit, pet bedding, or heavily soiled work clothes), before deep descaling in hard water areas, or when you’ve neglected maintenance for an extended period and need to reset the machine to a clean baseline.
The Best Approach: Both Methods Together
Professional appliance technicians recommend combining both approaches. Run drum clean monthly as preventive maintenance, preventing buildup before it starts. Then conduct manual deep cleaning every 3-4 months to address areas the automatic cycle misses.
Your manual cleaning session should include wiping the rubber door seal thoroughly, removing and washing the detergent drawer, checking and cleaning filters, wiping external surfaces, and inspecting for any developing issues.
Think of drum clean as daily tooth brushing and manual cleaning as the six-monthly dentist visit. Both are necessary for optimal maintenance, and neither can fully replace the other.
Drum Clean vs Washing Machine Cleaner Tablets
Walking down the cleaning aisle, you’ll find numerous washing machine cleaning products in tablet, powder, and liquid form. This raises an obvious question: if you’re using these products, do you still need drum clean?
How Cleaning Tablets Work
Washing machine cleaner tablets contain concentrated descaling agents, surfactants, and antibacterial compounds. When dissolved in water during a wash cycle, they chemically attack limescale, break down detergent residue, and kill bacteria through chemical action rather than just heat.
These products reach further than drum clean alone. They flow through all water pathways, including inlet pipes, the pump, and outlet hoses. The chemical formulation specifically targets the types of buildup common in washing machines.
Quality cleaning tablets also include ingredients that prevent foaming, which means they work effectively even in machines designed for low-water, high-efficiency washing.
The Limitations of Each Method
Drum clean uses heat as its primary cleaning mechanism. It’s excellent for killing bacteria but less effective against mineral deposits or stubborn chemical residue. Think of it as sterilising rather than deep cleaning.
Cleaning tablets provide chemical cleaning power but work best when combined with heat. Running them on a cold wash wastes their potential. They’re also an ongoing expense, whilst drum clean is free once you own the machine.
Using Both Together
The most effective maintenance routine combines both methods. Here’s how professional appliance technicians suggest structuring this:
Run drum clean monthly on its own (no additives). This provides baseline sanitisation and prevents everyday buildup from establishing itself.
Every third drum clean cycle (approximately quarterly), add a washing machine cleaning tablet. This deeper clean tackles accumulating mineral deposits and reaches areas that heat alone can’t fully address.
In hard water areas, increase tablet use to every second drum clean cycle (bi-monthly). The extra descaling power prevents limescale from damaging heating elements and reducing efficiency.
Brand Compatibility Considerations
Some manufacturers void warranties if you use cleaning tablets in their drum clean programme. Samsung is particularly strict about this. Always check your manual before adding any products to an automatic drum clean cycle.
If your manual forbids additives during drum clean, run a separate hot cotton cycle (60-90°C) with the cleaning tablet. This achieves similar results without technically violating warranty terms.
LG and some other brands actively recommend using cleaning tablets with their tub clean programme, including specific instructions for placement (drum vs detergent drawer).
When Tablets Are Particularly Valuable
Cleaning tablets become essential rather than optional in hard water areas where limescale builds rapidly, after periods of neglect when the machine hasn’t been maintained properly, when dealing with persistent odours that drum clean alone doesn’t eliminate, or if you primarily wash at low temperatures (30-40°C).
They’re also valuable if you use a lot of fabric softener, which creates sticky residue that heat alone struggles to remove fully.
Cost Considerations
Drum clean is free (aside from water and electricity costs). Cleaning tablets typically cost £5-15 for a pack of 3-6 tablets. Using them quarterly means spending roughly £10-20 annually on this maintenance.
Compare this to the cost of appliance repairs (£80-150 for a callout) or early replacement of a neglected machine (£300-800 for a decent model). The tablets represent excellent preventive value.
Troubleshooting Drum Clean Issues
Even simple maintenance programmes occasionally go wrong. Knowing how to troubleshoot common drum clean problems saves frustration and potentially expensive service calls.
Machine Still Smells After Drum Clean
This is the most common complaint. You’ve run the cycle as instructed, but opening the door still releases an unpleasant musty odour.
The usual culprit is the door seal. Drum clean helps, but it can’t completely clean the deep folds where mould establishes colonies. Pull back the rubber seal and inspect carefully. You’ll often find black spots or a slimy film hiding in the folds.
Clean the seal manually using a solution of warm water and a splash of white vinegar. Use an old toothbrush to scrub into the folds, then dry thoroughly with a clean cloth. This should be done every few weeks regardless of drum clean frequency.
The detergent drawer is another odour source that drum clean doesn’t address. Remove it completely and wash under running water. Check the drawer housing in the machine itself – this cavity often harbours mould.
Finally, check your filter. A clogged debris filter traps dirty water that turns stagnant and smelly. This odour can permeate the entire machine, making it seem like drum clean hasn’t worked.
Drum Clean Reminder Won't Turn Off
You’ve run the cycle, but the reminder light continues blinking accusingly at you. This usually indicates the machine didn’t recognise the cycle completion properly.
Try a power reset first. Turn the machine off at the socket, wait 30 seconds, then turn it back on. This forces the electronics to restart and often clears stuck reminders.
If that doesn’t work, run the drum clean cycle again. Occasionally, the cycle gets interrupted without you realising, or a power fluctuation causes incomplete recognition.
Some machines require you to press and hold the power button for 5-10 seconds after drum clean completes to manually record the cycle count. Check your manual for model-specific reset procedures.
Cycle Takes Unusually Long
Most drum clean programmes run 60-90 minutes. If yours is still going after 2 hours, something’s wrong.
First, check your water pressure. Low pressure means the drum fills slowly, extending cycle time significantly. This isn’t a machine fault but a plumbing issue.
A partially blocked inlet filter can also slow filling. This mesh screen at the water inlet connection catches debris but needs periodic cleaning. Turn off the water supply, unscrew the inlet hose, and remove the small filter screen for cleaning.
Drainage problems extend cycles too. If the pump struggles to empty water, the machine pauses repeatedly, waiting for drainage before proceeding to the next cycle stage. Clean your filter if you suspect drainage issues.
Error Codes During Drum Clean
Modern machines display error codes when something goes wrong. Common codes during drum clean include:
Door lock errors: The machine can’t secure the door properly. Check nothing is caught in the door seal preventing full closure. Test the door catch mechanism by opening and closing firmly several times.
Water inlet errors: The drum isn’t filling within the expected timeframe. Check your water supply is fully turned on and inspect inlet filters for blockages.
Drainage errors: Water isn’t emptying properly. Clean the debris filter and ensure the outlet hose isn’t kinked or blocked.
Temperature sensor errors: The machine can’t heat water to the required temperature. This might indicate a faulty heating element requiring professional repair.
Consult your manual for specific error code meanings. Most provide troubleshooting steps for common codes.
Drum Clean Doesn't Complete
The cycle starts but stops partway through, leaving the drum full of water or paused indefinitely.
Power supply interruption is a common cause. If your electricity flickered even briefly, the machine might pause and wait for manual intervention. Press Start/Pause to resume.
Door lock failure during the cycle causes automatic stopping for safety reasons. The machine won’t continue if it detects the door isn’t properly secured.
Severe overloading in previous washes sometimes leaves items trapped in the drum mechanism. Even though you’ve removed visible laundry, a sock or small item might be jammed somewhere, preventing proper drum rotation.
When to Call a Professional
Whilst many issues are easily resolved, some situations require professional help:
- Drum clean consistently fails to complete despite troubleshooting
- Error codes persist after following manual instructions
- You can smell burning during the cycle
- Water leaks during drum clean
- Unusual grinding or banging noises that didn’t exist before
- The machine completes the cycle but clothes in subsequent washes come out damaged or marked
Professional technicians can diagnose mechanical failures, replace faulty sensors, and identify issues that aren’t apparent to users. Most manufacturers recommend professional servicing every 2-3 years regardless of drum clean usage.
Complementary Maintenance Tasks
Drum clean is important but represents just one part of comprehensive washing machine maintenance. Other components need regular attention to keep your machine performing optimally.
Door Seal Maintenance
The rubber door seal traps more dirt than any other visible component. After every few washes, quickly wipe the seal with a dry cloth. Once weekly, use a damp cloth with a touch of washing-up liquid to clean more thoroughly.
Pay special attention to the bottom of the seal where water collects. This area stays damp and develops mould rapidly if neglected. Dry it thoroughly after cleaning.
Never use bleach or harsh chemicals on rubber seals. These damage the material, causing cracks and tears that lead to leaks. Mild soap and water suffices for regular cleaning.
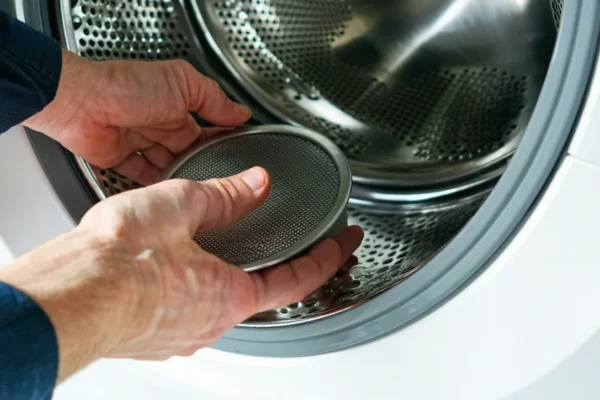
Filter Cleaning Schedule
Your washing machine has multiple filters that require periodic cleaning. The main debris filter (usually located behind a small panel at the bottom front) should be checked monthly and cleaned whenever you notice buildup.
To clean the filter, place towels on the floor to catch water, open the panel, slowly unscrew the filter (expect water to drain out), remove trapped debris, rinse the filter under running water, then reinstall securely.
The inlet filter mesh at your water supply connection should be checked every 6 months. This tiny screen catches sediment from your water supply. Hard water areas may need more frequent checking.
Detergent Drawer Care
The drawer collects detergent residue, fabric softener buildup, and mould. Remove it completely once a month and wash thoroughly under hot water.
Most drawers have a release button or tab that allows full removal. Check your manual if you’re unsure how to remove yours completely.
Scrub the drawer with an old toothbrush to remove stubborn deposits from corners and liquid dispenser compartments. Don’t forget to clean the drawer housing cavity in the machine itself.
Proper Drying Between Uses
This simple habit prevents numerous problems. After every wash, leave the door open for at least a few hours. This allows air circulation that evaporates moisture and prevents mould growth.
If you need to close the door (perhaps you have curious pets or small children), wait until the drum is completely dry. At minimum, leave it open for 30-60 minutes after each wash.
Also leave the detergent drawer slightly open. This often-overlooked step allows this damp compartment to dry properly.
Detergent Usage
Using the correct amount of detergent reduces buildup significantly. Most people use too much, assuming more detergent equals cleaner clothes. It doesn’t – excess detergent leaves residue on both your laundry and your machine.
Modern concentrated detergents require much less product than older formulations. Follow the dosage guidance on your specific product, and reduce further if you have soft water.
Consider switching to liquid detergent if you currently use powder. Liquid dissolves more completely at low temperatures, creating less residue inside your machine.
These complementary tasks, combined with regular drum clean cycles, form a complete maintenance routine that extends your machine’s lifespan, improves washing performance, and prevents the majority of common washing machine problems.
Frequently Asked Questions About Drum Clean
Do I need to add cleaning products to the drum clean cycle?
This depends entirely on your washing machine brand. Samsung, Beko, and several other manufacturers explicitly state you should NOT add any cleaning products during their drum clean cycles. The high water temperature (60-70°C) provides sufficient sanitising power without additional chemicals.
LG, however, actively recommends using a washing machine cleaning tablet with their Tub Clean programme. Bosch and Siemens list cleaning products as optional rather than prohibited.
The safest approach is to check your user manual. If it says “do not use cleaning agents”, follow that guidance. Adding products when prohibited can leave residue, create excessive foam, or even void your warranty.
If your manual allows or recommends cleaning products, use only those specifically designed for washing machines. Never use regular laundry detergent, fabric softener, or dishwasher tablets in a drum clean cycle.
For brands that prohibit additives during drum clean but you want deeper chemical cleaning, run a separate hot cotton cycle (60-90°C) with a proper washing machine cleaner. This achieves similar results without technically using products in the drum clean programme itself.
Can I wash clothes during a drum clean cycle?
Attempting to wash clothes during drum clean defeats the entire purpose of the cycle. The programme is calibrated to clean the machine itself, not your laundry. Water levels, spin patterns, and timing are all optimised for machine maintenance rather than fabric care.
Additionally, running drum clean with laundry inside can harm your washing machine. The cycle isn’t designed to handle the weight and bulk of clothes, potentially causing imbalance, excessive vibration, or strain on the drum bearings.
If you urgently need to wash something whilst the drum clean cycle is running, you’ll need to wait. Most programmes last 60-90 minutes. Plan your drum clean for times when you don’t have pressing laundry needs.
How long does a drum clean cycle take?
Most drum clean cycles run between 60 and 90 minutes, though this varies by brand and model. The cycle takes significantly longer than a regular wash because it includes extended heating periods, multiple rinse phases, and thorough spin cycles.
Samsung ECO DRUM CLEAN typically runs for approximately 90 minutes. LG Tub Clean programmes usually complete in 60-75 minutes. Bosch and Siemens drum clean cycles can take 90-120 minutes, particularly if using the 90°C Cottons programme option.
The cycle needs this extended duration to properly sanitise your machine. Water must reach and maintain high temperatures (60-70°C) throughout the drum and internal pipes. Multiple rinse cycles then flush away loosened debris and residue.
Don’t try to rush the process by interrupting the cycle. Stopping halfway prevents proper cleaning and can leave your drum in a worse state than before you started.
If your drum clean cycle regularly takes longer than 2 hours, you may have a water pressure issue or a partially blocked inlet filter slowing the fill rate. Check your water supply and inlet filters.
What temperature does drum clean use?
Standard drum clean cycles heat water to between 60°C and 70°C. This temperature range is hot enough to kill bacteria, dissolve detergent residue, and break down biofilm without being so extreme that it risks damaging machine components.
Some brands offer variation. Samsung’s ECO DRUM CLEAN heats to 60-70°C consistently. Bosch and Siemens machines may use up to 90°C if you run a Cottons 90 programme instead of a dedicated drum clean button.
These high temperatures are essential for effective sanitisation. At 60°C and above, most bacteria and mould spores die within minutes. Detergent and fabric softener residue, which remains solid at room temperature, liquefies and can be rinsed away.
The temperature is also why drum clean cycles take longer than regular washes. Heating water to 70°C throughout the entire system takes time, particularly in larger capacity machines or those with low-power heating elements.
If you live in a hard water area, the high temperature has an additional benefit. It helps break down limescale deposits that build up on heating elements and internal surfaces, though severe limescale may require specialist descaling products.
Is drum clean the same as a hot wash?
No. Whilst both use high temperatures, they’re designed for different purposes and operate differently.
A hot wash (such as a 60°C cotton cycle) is designed to clean your laundry. The programme focuses on agitation, detergent distribution, and fabric care. Water levels, spin speeds, and cycle timing are all optimised for cleaning clothes.
Drum clean is designed to clean the machine itself. The programme uses different spin patterns, altered water levels, and specific timing to target machine components rather than laundry. The water circulates in ways that reach internal pipes, the space between inner and outer drums, and other areas that don’t benefit from normal wash cycles.
Additionally, drum clean cycles don’t use detergent (or actively prohibit it), whilst hot washes rely on detergent to clean your clothes. The cleaning mechanism is purely thermal and mechanical rather than chemical.
You can’t simply run a hot cotton wash and expect the same results as drum clean. Whilst better than nothing, a regular hot wash won’t clean your machine as thoroughly as the dedicated maintenance programme.
That said, if your machine doesn’t have a drum clean function, running the hottest, longest cycle available (usually Cottons 90°C) with an empty drum provides a reasonable alternative.
Can I use the drum clean function with hard water?
Yes, you can and should use drum clean if you have hard water. In fact, hard water areas make regular drum cleaning even more important.
Hard water contains high levels of dissolved minerals, primarily calcium and magnesium. These minerals form limescale deposits on heating elements, drum surfaces, and inside pipes. Limescale reduces your machine’s efficiency, increases energy consumption, and eventually causes mechanical failures.
The high temperatures used in drum clean cycles help break down and remove limescale buildup. At 60-70°C, some calcium carbonate deposits soften and can be flushed away during rinse cycles.
However, drum clean alone isn’t sufficient in hard water areas. You should also:
Use a washing machine descaler every 2-3 months alongside regular drum clean cycles. These products contain acids that chemically dissolve limescale more effectively than heat alone.
Consider using washing products designed for hard water, which include built-in water softeners that reduce mineral deposits.
Check your heating element periodically (or have a technician do so during servicing). Hard water can coat elements with thick limescale that requires mechanical removal.
If you live in London, the South East, or other hard water regions, increase drum clean frequency to monthly regardless of wash load volume. The limescale accumulation happens whether you wash daily or weekly.
Why does my machine recommend drum clean so often?
If your drum clean reminder seems to appear constantly, there are several possible explanations.
The most common reason is simply that you’re washing frequently. Manufacturers typically set reminders to trigger every 20-40 washes. If you run multiple loads daily, you’ll legitimately hit this threshold within 2-3 weeks.
Some machines count partial cycles. If you frequently stop and restart washes, or run rinse-only cycles, these might register as full wash counts towards the drum clean reminder.
Hard water accelerates the need for cleaning. Some smart washing machines adjust their reminder frequency based on water hardness detection. If the machine senses high mineral content, it may prompt for drum clean more frequently than the standard interval.
Excessive detergent use triggers more frequent reminders on certain models. The machine detects foam levels and residue patterns, interpreting heavy buildup as a need for more frequent cleaning.
Predominantly cold washes also increase reminder frequency on some machines. If you mainly run 30-40°C cycles, the machine recognises that bacteria and residue aren’t being regularly killed by hot washes, so it prompts for maintenance more often.
Finally, a malfunctioning reminder system might cause false alerts. If you’re certain you’re running drum clean regularly but the reminder still appears after just 5-10 washes, consult your manual for reset procedures or contact the manufacturer’s support line.
What happens if I ignore the drum clean reminder?
Ignoring the drum clean reminder won’t cause immediate disaster, but it sets the stage for progressive problems that worsen over time.
Initially, you’ll notice nothing wrong. The machine continues washing normally, and your clothes seem fine. This is why many people dismiss the reminder as unnecessary.
After several weeks of neglect, subtle changes appear. Your laundry might start smelling slightly musty, though you’ll probably attribute this to damp weather or forgetting to remove clothes promptly. The machine door begins to develop an unpleasant odour when opened.
As months pass without drum clean, bacteria colonies establish themselves. These form biofilms on the drum surface that regular cold washes can’t remove. Your clothes now consistently smell less fresh, even when using extra detergent.
Visible mould appears around the door seal, particularly in the folds at the bottom where water collects. This black spotting isn’t just unsightly – it contaminates every wash with mould spores.
Detergent and fabric softener residue builds up throughout the system. This sticky layer traps lint, dirt, and more bacteria. The accumulation begins affecting mechanical function, restricting water flow through pipes and putting strain on the pump.
Eventually, you’ll experience actual machine problems. Error codes appear due to drainage issues. The machine takes longer to complete cycles. Clothes come out with mysterious marks or residue. The pump works overtime, consuming more electricity and generating excess heat that shortens component lifespan.
The worst-case scenario is complete mechanical failure requiring expensive repairs or early machine replacement. Professional technicians consistently report that machines requiring major repairs are often those that have never had proper maintenance, including drum clean cycles.
Most manufacturers build in grace periods (typically 6 washes) where you can postpone drum clean without consequences. Use these for genuine scheduling conflicts, but don’t make a habit of continuously ignoring the reminder.
Is drum clean necessary for new washing machines?
Yes, though perhaps not immediately. The fact your machine is new doesn’t exempt it from the need for regular maintenance.
For the first few months, your new machine stays relatively clean because there hasn’t been time for significant buildup. You can safely wait until the manufacturer’s reminder appears before running your first drum clean cycle.
However, don’t fall into the trap of thinking new machines don’t need maintenance. Bacteria, mould, and residue accumulate from the very first wash. Modern washing habits (cold washes, liquid detergents, fabric softeners) create conditions for buildup regardless of machine age.
New machines often come with initial protective coatings and factory residues. Running a drum clean cycle after a month of use (even if the reminder hasn’t appeared) removes these substances and establishes good maintenance habits from the start.
Starting regular drum clean cycles immediately also trains you to maintain proper habits. If you neglect maintenance from the beginning, you’ll likely continue neglecting it, leading to problems within a year or two rather than the 7-10 year lifespan a well-maintained machine should achieve.
Consider your first drum clean as part of the machine’s break-in period. Just as new cars need their first service after initial use, new washing machines benefit from an early maintenance cycle that removes factory residues and establishes baseline cleanliness.
Does drum clean clean the rubber seal too?
Drum clean helps clean the rubber seal but can’t completely maintain it on its own. The cycle’s hot water and spray patterns reach the seal’s surface and inner folds, removing some bacteria and light residue.
However, the rubber seal’s deep folds trap moisture, lint, and grime in areas where water circulation during drum clean can’t fully penetrate. These hidden spots remain damp after the cycle completes, providing perfect conditions for mould growth.
The seal also collects hair, fabric fibres, and small debris that get wedged into the folds. Drum clean might loosen these but often can’t flush them away completely. They remain trapped, decomposing and creating odours.
For thorough seal maintenance, you need to supplement drum clean with manual cleaning. Once a week, pull back the rubber folds and wipe with a damp cloth. Focus on the bottom section where water pools. Every month, use a diluted vinegar solution or mild detergent to scrub the folds more thoroughly.
After manual cleaning, dry the seal completely with a clean towel. Moisture left in the folds negates your cleaning efforts, as mould can re-establish itself within days.
Some people question whether they need to manually clean the rubber seal if they’re running drum clean regularly. The answer is yes – both methods are necessary. Think of drum clean as routine sanitising and manual seal cleaning as targeted maintenance for the area most prone to mould.
Can I use vinegar in the drum clean cycle?
This depends on your washing machine manufacturer, and most actually advise against it.
Samsung explicitly warns against using vinegar in drum clean cycles. Their manuals state that acidic substances can damage rubber components, particularly the door seal and internal gaskets. The acetic acid in vinegar, whilst effective at dissolving limescale, can degrade rubber over time, causing cracks and eventual leaks.
Bosch and Siemens also recommend against vinegar use, suggesting their own branded cleaning products or generic washing machine cleaners instead.
LG is more permissive but doesn’t actively recommend vinegar. Their manuals focus on commercial washing machine cleaners as the preferred option.
The issue isn’t that vinegar doesn’t work – it’s highly effective at removing limescale and mineral deposits. The problem is potential long-term damage to components not designed for regular acid exposure.
If you want to use vinegar for washing machine cleaning, the safer approach is to run a separate hot cotton cycle (not the dedicated drum clean programme) with 2 cups of white vinegar in the drum. This achieves similar cleaning results without technically violating manufacturer guidelines about drum clean cycles.
Never use malt vinegar or cleaning vinegar with higher acidity concentrations. Standard white vinegar (typically 5% acetic acid) is harsh enough. Stronger solutions increase the risk of component damage.
Some people report success using vinegar monthly without problems, but this represents a calculated risk. If your machine develops seal leaks within warranty period and the manufacturer discovers regular vinegar use, they might deny coverage.
The safer choice for regular maintenance is sticking to drum clean without additives (as most manufacturers recommend) and occasionally using a proper washing machine cleaner formulated not to damage machine components.
Why does my drum still look dirty after drum clean?
Drum clean cycles sanitise your machine but don’t always remove visible staining or discolouration. Several factors explain why your drum might still look marked after running the cycle.
Hard water staining creates cloudy white or grey marks on the drum surface. These mineral deposits are stubborn and often require multiple cleaning cycles or specialised descaling products to remove completely. A single drum clean cycle won’t eliminate established limescale.
Rust spots occasionally appear on older drums, particularly if you wash items with metal components (buttons, zips, bra wires) that leave tiny scratches. These scratches expose the base metal, which oxidises over time. Drum clean can’t remove rust – this requires specific rust removers or, in severe cases, professional drum replacement.
Mould staining leaves dark marks even after the mould itself dies during drum clean. The organic matter that caused the discolouration remains on the surface. You’ll need to manually scrub these areas with a suitable cleaner to remove the visual marks.
Detergent and fabric softener buildup sometimes creates a cloudy film that drum clean partially removes but doesn’t eliminate entirely. This requires mechanical action – manual scrubbing with a cloth and diluted vinegar or bicarbonate of soda solution.
Some marks you’re seeing might be on the inside of the outer drum (the part you can’t directly access) showing through the holes in the inner drum. Drum clean helps here but can’t completely clean surfaces you can’t physically reach.
If your drum looks dirty after drum clean, try this approach: run a second drum clean cycle using a washing machine descaling product (if your manufacturer permits it), manually scrub visible marks with appropriate cleaning products, then run a final rinse cycle to flush away any residue.
For persistent issues, particularly rust or severe limescale, you may need professional help. Technicians can disassemble parts of the drum for deep cleaning or recommend whether component replacement is more cost-effective than continued cleaning attempts.
Do all washing machines have a drum clean function?
No, drum clean is primarily a feature of washing machines manufactured from approximately 2010 onwards. Older machines typically don’t include this dedicated maintenance programme.
Most machines made after 2015 include some version of drum clean, though it goes by different names depending on the brand. Front-loading and high-efficiency machines are more likely to have this feature than basic top-loaders.
Budget models sometimes omit drum clean to reduce manufacturing costs. If you bought an entry-level machine, check your control panel and manual carefully – the function might not be present.
If your machine lacks drum clean, you can achieve similar results by running your hottest, longest programme (typically Cottons 90°C or similar) with an empty drum. This doesn’t exactly replicate a dedicated drum clean cycle, but it provides adequate maintenance for machines without the built-in feature.
Add a washing machine cleaning tablet to your hot empty cycle for better results. This combines the heat benefit with chemical cleaning power that targets detergent residue and limescale.
Modern machines increasingly include drum clean as standard because manufacturers recognise that contemporary washing habits (cold washes, liquid detergents, concentrated softeners) create conditions requiring regular maintenance cycles.
If you’re buying a new washing machine, consider drum clean functionality as a valuable feature. It simplifies maintenance and helps extend machine lifespan. Check the control panel or ask the retailer specifically about maintenance programmes before purchasing.
For older machines without this feature, establishing a manual maintenance routine becomes more important. Regular filter cleaning, door seal maintenance, and monthly hot empty cycles help compensate for the lack of an automated drum clean programme.
Can drum clean fix a smelly washing machine?
Drum clean can fix smell problems, but only if caught relatively early. The cycle excels at preventing odours through regular use but struggles with established problems.
For mild musty smells just beginning to develop, a single drum clean cycle often resolves the issue entirely. The high temperature kills bacteria causing the odour, and the extended rinse cycles flush away the dead material.
Moderate odours that have been building for several weeks usually require multiple approaches. Run drum clean, then manually clean the door seal where mould colonies often hide. Clean your detergent drawer and check the filter for trapped debris that might be decomposing and creating smells.
Severe, persistent odours indicate problems drum clean alone can’t fix. These suggest established mould colonies in hard-to-reach areas, decomposing material trapped in pipes or the pump, or serious mechanical issues like a damaged seal allowing water to pool in places it shouldn’t.
For stubborn smells, try this systematic approach:
Run a drum clean cycle. After completion, manually clean the door seal with diluted bleach or specialised mould remover. Remove and thoroughly clean the detergent drawer and its housing. Check and clean the debris filter. Run another drum clean cycle with a washing machine cleaning tablet (if your manufacturer permits). Leave the door open for 24 hours to completely dry the interior.
If smells persist after this intensive treatment, the problem likely originates from somewhere you can’t easily access. Blocked pipes, a failing pump seal, or drainage issues all cause odours that routine cleaning can’t eliminate. These situations require professional diagnosis and repair.
Prevention is far more effective than cure. Running drum clean monthly before problems develop means you’ll rarely deal with significant odours. The cycle maintains baseline cleanliness that prevents bacteria and mould from establishing themselves.
Is it safe to leave the house whilst drum clean is running?
Yes, drum clean is perfectly safe to leave unattended. The cycle is fully automated and designed to run without supervision.
The machine runs with an empty, balanced drum, so there’s no risk of the imbalance issues that occasionally occur during regular wash cycles with poorly distributed laundry. Without clothes absorbing water and shifting around, the spin cycles run smoothly without excessive vibration.
Modern washing machines include multiple safety features that activate whether you’re home or away. Door locks prevent opening during operation. Water inlet valves close automatically if the cycle completes or encounters problems. Overflow sensors detect excessive water levels and trigger drainage.
Many people specifically schedule drum clean for times when they’re out – heading to work, running errands, or overnight. The cycle runs quietly in the background and completes without intervention.
The only situation where supervision might be valuable is if your machine has a history of leaking or mechanical problems. In these cases, staying nearby allows you to catch issues quickly. However, a machine with known faults probably needs professional repair rather than drum clean cycles.
One practical tip: if you leave whilst drum clean is running, prop the door open slightly when you return home. This allows moisture to evaporate whilst you’re busy with other tasks, and you won’t forget to ventilate the drum later.
How do I know if my drum clean cycle is working properly?
Several indicators confirm your drum clean cycle is functioning as intended.
The most obvious sign is cleanliness. After the cycle completes, open the door and inspect the drum. You should see shiny, clean metal without visible residue, dark spots, or cloudy film. The rubber door seal should look refreshed, with less obvious grime in the folds.
Your machine should smell neutral or very faintly of nothing. A fresh, clean scent indicates successful sanitisation. Any lingering musty or chemical odours suggest incomplete cleaning.
Touch the drum surface after the cycle finishes (once it’s cool enough). It should feel smooth and clean, not sticky or slimy. Any tackiness indicates detergent or softener residue that wasn’t fully removed.
During the cycle, you should hear normal operation sounds: water filling, heating element clicking on, drum rotation at various speeds, and water draining. Unusual grinding, banging, or squealing suggests mechanical issues rather than drum clean problems specifically.
The cycle should complete within the expected timeframe (60-120 minutes depending on your model). If it consistently takes much longer, you may have water pressure or drainage issues affecting efficiency.
After several regular drum clean cycles (monthly for 3-4 months), your clothes should smell noticeably fresher after washing. Drum clean’s cumulative effect is cleaner laundry, as your machine isn’t contaminating supposedly clean clothes with bacteria and residue.
If you’re uncertain whether drum clean is effective, run a thorough manual cleaning after a drum clean cycle. If your manual cleaning effort removes substantial additional dirt or grime, your drum clean cycles may not be working optimally. Check for mechanical issues, water temperature problems, or try adding a cleaning tablet to boost effectiveness.
Does using drum clean save money in the long term?
Yes, regular drum clean cycles represent excellent value despite the small cost per cycle in electricity and water.
Each drum clean cycle costs approximately 30-50 pence in combined electricity and water charges, depending on your energy tariffs. Running monthly adds roughly £4-6 annually to your utility bills.
Compare this to the costs of neglecting maintenance:
Professional appliance repairs typically cost £80-150 just for the callout, before parts and labour. Common washing machine failures related to poor maintenance (pump replacements, heating element descaling, seal replacements) add another £50-200 in parts.
Early machine replacement represents the biggest financial hit. A decent washing machine costs £300-800. Proper maintenance, including regular drum clean, can extend machine life from 5-7 years (typical for neglected machines) to 10-12 years or more.
Reduced efficiency from dirty machines increases every electricity bill. Limescale-coated heating elements work harder and longer to reach target temperatures. Buildup in pipes restricts water flow, making the pump run longer. These cumulative inefficiencies might add £10-20 annually to energy costs.
Product waste adds up too. When clothes don’t smell fresh after washing, people use extra detergent, fabric softener, and scent boosters trying to compensate. A clean machine cleans clothes properly using standard product amounts.
Finally, consider the replacement cost for clothing damaged by a dirty machine. Mould spores, bacteria, and residue can stain or smell-contaminate clothes beyond recovery. Even a few ruined items (particularly workwear, school uniforms, or special occasion clothing) quickly exceed the annual cost of drum clean cycles.
The mathematics are straightforward: spending £5 yearly on drum clean cycles prevents hundreds of pounds in repairs, replacements, and inefficiency costs. It’s one of the highest-value maintenance activities you can perform on any household appliance.
Conclusion
The drum clean function on your washing machine isn’t optional or unnecessary – it’s essential maintenance that protects your investment and ensures your laundry actually gets clean. That blinking reminder light is your machine asking for help before problems develop, not nagging you needlessly.
Running drum clean monthly takes minimal effort (literally just pressing a button) yet prevents the bacteria growth, mould infestations, and detergent buildup that plague neglected machines. Combined with basic manual maintenance like wiping door seals and cleaning filters, this simple routine extends your machine’s lifespan by years whilst keeping your clothes genuinely fresh and clean.
Remember that drum clean complements rather than replaces thorough manual cleaning. Both methods work together to keep your machine in optimal condition. Run drum clean for routine sanitising, add quarterly deep cleaning for areas the cycle can’t fully reach, and you’ll avoid the vast majority of washing machine problems.
Your machine works hard for you, processing countless loads of laundry over its lifetime. Give it the regular maintenance it needs, and it’ll reward you with years of reliable, hygienic cleaning performance.
You May Also Like
How to Clean Washing Machine Filter: Complete Guide 2026

How to Clean Artificial Grass: Complete Maintenance Guide