How to Clean an Air Fryer: The Complete UK Guide
How to clean an air fryer properly is something I wish more people asked me about before their machines start smoking or their food starts tasting strange. After 18 years cleaning kitchens across the UK, I’ve seen air fryers in every state imaginable – from pristine to absolutely caked in burnt grease. The good news? Cleaning an air fryer takes less time than actually cooking with it, and you probably already have everything you need in your kitchen cupboard. I’ll show you exactly how to clean your air fryer using methods I’ve tested dozens of times, including one brilliant hack that removes even the most stubborn baked-on grease in under five minutes.
In this guide, you’ll learn the quickest daily cleaning routine that takes just two minutes, how to tackle seriously grimy baskets without damaging the coating, which parts you can (and absolutely cannot) put in the dishwasher, and why cleaning your heating element matters more than you think. Most guides skip the heating element entirely, but trust me – that’s where half your problems start.
Quick Summary
Time needed: 5 minutes (daily clean) or 15 minutes (deep clean)
Difficulty: Easy
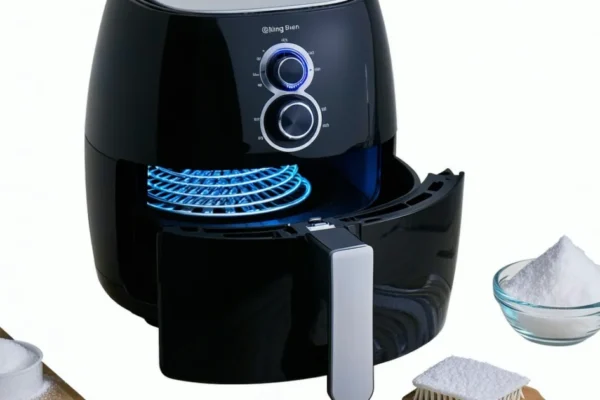
You’ll need: Washing-up liquid, bicarbonate of soda, soft sponge, warm water
Key takeaway: Clean your basket after every use to avoid stubborn build-up that takes serious elbow grease to remove.
What You'll Need
For a standard clean:
- Washing-up liquid (Fairy works brilliantly)
- Warm water
- Soft sponge or microfibre cloth
- Old toothbrush (for crevices)
For stubborn grease:
- Bicarbonate of soda (about 50p from any supermarket)
- White vinegar (optional)
- Hydrogen peroxide (£1-2 from Boots or Superdrug)
How to Clean an Air Fryer Basket – Step-by-Step Guide
Step 1 – Let It Cool and Remove Parts
Switch off and unplug your air fryer immediately after cooking. Let it cool for at least 10 minutes – the residual heat actually helps loosen grease, but you don’t want to burn yourself. Remove the basket, any crisping plates, and any other removable parts. This is crucial because water should never touch the main unit’s electrical components.
Step 2 – Quick Daily Wash
For everyday cleaning after cooking chips or vegetables, fill your sink with warm water and add a good squirt of washing-up liquid. Submerge the basket and any plates for about two minutes whilst you sort other things. Use the soft side of your sponge to wipe away any food particles. Rinse thoroughly under warm running water and dry with a tea towel.
This takes literally five minutes and prevents the build-up that leads to those nightmare cleaning sessions later.
Step 3 – Tackle Stubborn Grease
If you’ve been cooking bacon, fish, or anything particularly greasy, you’ll need more power. Sprinkle two tablespoons of bicarbonate of soda directly into the basket, add a tablespoon of warm water, and mix it into a paste. Use an old toothbrush to work this paste into any stubborn spots, paying special attention to the corners and holes in the basket. Let it sit for 10 minutes, then rinse thoroughly.
Step 4 – Clean the Heating Element
Here’s what most people skip, and it’s genuinely important. Look inside the main unit at the heating element (the coil at the top). Use a dry soft brush or clean toothbrush to gently sweep away any dust, crumbs, or grease splatter. Never use water directly on the heating element – this can damage the electrics. If there’s visible grease, wait until the unit is completely cool, then carefully wipe with a barely damp cloth.
I’ve had clients wonder why their air fryer smokes every time they use it. Nine times out of ten, it’s because there’s old grease on the heating element that burns when the fryer heats up.
Step 5 – Clean the Exterior
Wipe down the outside of the air fryer with a damp cloth. For the control panel, use a dry microfibre cloth to avoid getting moisture in the buttons. Don’t forget the bottom vents – these need to stay clear for proper airflow. A quick wipe with a dry cloth removes any dust that’s accumulated.
Step 6 – The Secret Weapon for Seriously Grimy Baskets
If your basket has dark, baked-on grease that won’t budge, I’ve got a method that works every single time. Mix two tablespoons of bicarbonate of soda, two tablespoons of hydrogen peroxide, and add two pumps of washing-up liquid directly into the basket. This creates a paste that’s remarkably effective. Use a soft brush to work it around the entire basket for about two minutes, then rinse thoroughly with warm water.
I tested this after cleaning a client’s air fryer that hadn’t been properly cleaned in six months. The difference was remarkable – it looked nearly new again.
Common Mistakes to Avoid
- Using abrasive scrubbers on non-stick coating – Steel wool and harsh scourers will scratch the non-stick surface, making it less effective and harder to clean in future. Always use the soft side of your sponge.
- Putting non-dishwasher-safe parts in the dishwasher – Not all air fryer baskets are dishwasher safe. Check your manual first. Some coatings deteriorate in dishwashers, and I’ve seen people ruin perfectly good baskets this way.
- Cleaning whilst still hot – I know you want to get it done, but cleaning whilst the fryer is scalding hot can warp the basket and you risk burning yourself. Ten minutes of cooling time won’t hurt.
- Ignoring the heating element – As I mentioned earlier, a dirty heating element causes smoking and affects how evenly your food cooks. It takes 30 seconds to clean properly.
- Using too much water inside the main unit – A damp cloth is fine for the interior walls, but never pour water inside or hold it under a tap. The electronics don’t appreciate it.
- Letting grease build up – It’s tempting to give the basket a quick rinse and call it done, but grease accumulates. What takes two minutes to clean fresh takes 20 minutes to remove once it’s baked on multiple times.
How Often Should You Clean an Air Fryer?
| Cleaning Task | Frequency | Why |
|---|---|---|
| Quick basket wash | After every use | Prevents stubborn build-up |
| Deep clean basket | Weekly (with heavy use) | Removes accumulated grease |
| Heating element check | Weekly | Prevents smoking and uneven cooking |
| Exterior wipe | Weekly | Keeps it looking tidy |
| Full deep clean | Monthly | Maintains optimal performance |
Best Products for Cleaning Air Fryers
Budget option (under £2) Bicarbonate of soda and washing-up liquid. This combination handles 90% of cleaning jobs brilliantly, and you’ve probably already got both in your kitchen.
Mid-range option (£3-5) Fairy Power Spray or similar degreasing spray. These cut through grease quickly, but honestly, they’re not essential for most cleaning tasks.
Premium option (£8-12) Specialist air fryer cleaning sprays from brands like Lakeland. They work, but they’re not worth the premium unless you’re cleaning multiple air fryers daily (which I am).
Professional favourite A mixture of bicarbonate of soda, hydrogen peroxide, and washing-up liquid. It costs about £3 total, removes anything, and doesn’t damage the coating. This is what I use in my own kitchen.
Dishwasher or Hand Wash?
This depends entirely on your air fryer model. Here’s what I’ve learned from cleaning hundreds of them:
Generally dishwasher-safe:
- Ninja air fryer baskets and crisping plates
- Tower air fryer removable parts
- Most Tefal ActiFry parts
Usually hand-wash only:
- Air fryer baskets with digital displays attached
- Wooden or bamboo accessories
- Some budget brand coatings that deteriorate in dishwashers
Always check your manual first. If your basket comes out of the dishwasher looking dull or with the coating peeling, switch to hand washing immediately. The coating is vital for preventing food from sticking.
When you do use a dishwasher, place items on the top rack only. The intense heat from the bottom element can sometimes damage non-stick coatings over time.
Preventing Smoking and Odours
If your air fryer smokes during cooking, it’s usually one of three things:
Old grease on the heating element – Clean this as I described earlier. Even a thin film of old oil will smoke when heated to 200°C.
Overfilled basket – If food touches the heating element, it burns and smokes. Leave at least 2cm clearance at the top.
Wrong type of oil – Oils with low smoke points (like extra virgin olive oil) smoke in air fryers. Use oils with higher smoke points like vegetable or rapeseed oil instead.
For lingering odours after cooking fish or strong-smelling foods, place half a lemon in the basket and run the air fryer at 180°C for 3 minutes. This neutralises odours brilliantly and costs pennies.
Pro Tips From a Professional Cleaner
Insider Tips
After cleaning hundreds of air fryers, here’s what I’ve learned:
- Clean whilst warm, not hot – The residual heat helps loosen grease, making cleaning faster. Just wait 10 minutes after cooking.
- Use air fryer liners for messy foods – Reusable silicone liners or perforated parchment protect your basket during cooking. They cost about £5 for a pack that lasts months.
- Keep a dedicated cleaning brush – An old toothbrush works perfectly for crevices. Keep it with your cleaning supplies so you’re not using your actual toothbrush.
- Don’t forget the drawer slot – The slot where the basket slides in accumulates crumbs and grease. Wipe it weekly with a damp cloth.
- Season after deep cleaning – After a really thorough clean, lightly coat the basket with a tiny amount of vegetable oil on kitchen roll. This maintains the non-stick coating.
Conclusion
Cleaning an air fryer properly takes less time than you think – five minutes for daily maintenance, fifteen for a deep clean. The key is consistency. Clean your basket after every use, check the heating element weekly, and give it a proper deep clean monthly. These simple habits prevent the stubborn, baked-on grease that requires serious effort to remove.
The bicarbonate of soda method I’ve shared works on even the grimiest baskets, costs almost nothing, and doesn’t damage the non-stick coating. After 18 years of professional cleaning, it’s still the method I use in my own kitchen and recommend to every client who asks how to clean an air fryer properly.
Your air fryer will cook better, last longer, and won’t smoke or smell strange if you follow these steps. It’s worth the small effort. <!– INTERNAL LINKS: Add 2-3 related article links here once published –>
Related guides:
- How to Clean Your Oven: Professional Methods
- Kitchen Appliance Cleaning Schedule
- Best Cleaning Products for Non-Stick Cookware
Frequently Asked Questions
How often should I clean my air fryer?
You should clean the basket and any removable parts after every single use – this takes about five minutes and prevents stubborn build-up. Give the heating element a quick check weekly, and do a thorough deep clean of the entire unit monthly. If you cook greasy foods like bacon frequently, you might need to deep clean fortnightly instead.
Can you put an air fryer basket in the dishwasher?
It depends on your specific model. Check your manufacturer’s instructions first, as not all air fryer baskets are dishwasher-safe. Brands like Ninja and Tower typically have dishwasher-safe baskets, but some budget models have coatings that deteriorate in dishwashers. If your manual says it’s safe, always place items on the top rack only, as the bottom element can be too harsh for non-stick coatings.
Why is my air fryer smoking?
An air fryer usually smokes because there’s old grease or food residue on the heating element that burns when the unit heats up. Turn off the fryer, let it cool completely, and clean the heating element with a dry brush. Smoking can also happen if you’ve overfilled the basket so food touches the heating element, or if you’re using oil with a low smoke point like extra virgin olive oil.
How do you remove baked-on grease from an air fryer?
For stubborn baked-on grease, make a paste with two tablespoons of bicarbonate of soda and enough warm water to create a spreadable consistency. Apply this to the affected areas, let it sit for 10-15 minutes, then scrub gently with an old toothbrush or soft sponge. For extremely tough grease, add two tablespoons of hydrogen peroxide to the bicarbonate of soda paste – this combination removes even the most stubborn build-up.
Can I use vinegar to clean my air fryer?
Yes, white vinegar works well for cutting through grease and eliminating odours. Mix equal parts white vinegar and water, apply to the basket with a soft cloth, and rinse thoroughly. However, never pour vinegar or any liquid directly into the main unit. For stuck-on food, bicarbonate of soda is usually more effective than vinegar alone.
What should you not clean an air fryer with?
Never use steel wool, harsh abrasive scrubbers, or metal scouring pads on air fryer baskets – these scratch the non-stick coating permanently. Avoid harsh chemical cleaners like oven cleaner, as they can damage the coating and leave harmful residues. Don’t use excessive amounts of water inside the main unit, and never submerge the entire appliance in water or spray liquids directly onto electrical components.
How do you clean the heating element in an air fryer?
The heating element must be cleaned carefully because water can damage the electrical components. Wait until the air fryer is completely cool, then use a dry soft brush or clean toothbrush to gently sweep away any dust, crumbs, or grease. If there’s visible grease, use a barely damp cloth to wipe it away carefully, ensuring no water drips onto electrical parts. Do this weekly to prevent smoking and maintain even cooking.
Why does my air fryer smell after cleaning?
If your air fryer smells after cleaning, you might not have rinsed away all the cleaning product thoroughly. Washing-up liquid residue can leave an odd smell when heated. Rinse all parts thoroughly with clean water after washing. To eliminate any lingering odours, place half a lemon in the basket and run the air fryer empty at 180°C for 3 minutes – this neutralises smells effectively.
You May Also Like
How to Clean Washing Machine Filter: Complete Guide 2026

How to Clean Artificial Grass: Complete Maintenance Guide