Washing Machine Maintenance Wash: What It Is & When to Use It
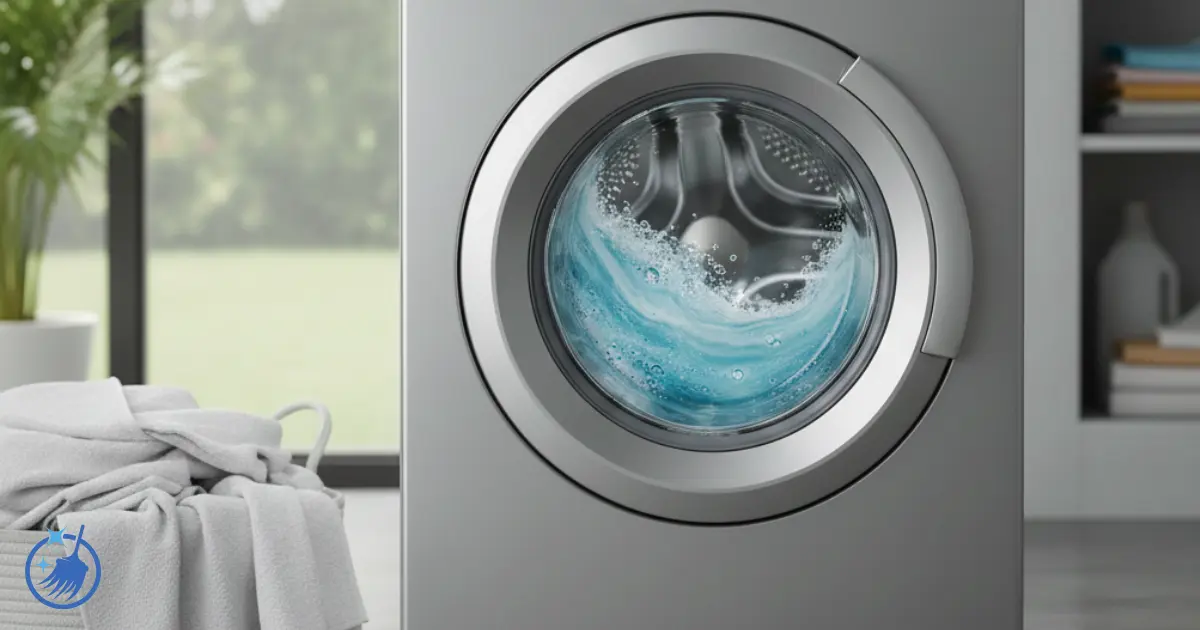
If you’ve noticed your washing machine smells musty despite being a cleaning appliance, or your freshly washed clothes carry an odd odour, you’re not alone. The culprit isn’t your detergent or washing technique – it’s likely that your machine itself needs cleaning from the inside out.
A maintenance wash is a specific empty hot cycle designed to clean the interior of your washing machine, removing the bacteria, mould, detergent residue, and limescale that accumulate over time. Think of it as a self-cleaning cycle for your appliance, targeting the hidden buildup in the drum, pipes, and seals that regular washing simply doesn’t address.
Most people don’t realise their washing machine needs its own cleaning routine. After all, it’s constantly filled with water and detergent, so surely it must be clean? Unfortunately, modern energy-efficient machines use less water and lower temperatures, creating the perfect environment for bacteria and mould to thrive. Add liquid detergents that lack bleaching agents into the mix, and you’ve got a recipe for a grimy, smelly appliance that’s secretly making your laundry less clean.
In this comprehensive guide, you’ll discover exactly what a maintenance wash is, why your machine desperately needs one, and how to perform it correctly whether you have a top-loader, front-loader, or a specific brand like Miele or Bosch. You’ll learn the warning signs that your machine needs attention right now, the common mistakes that make things worse, and practical troubleshooting steps when things don’t go to plan. By the end, you’ll have a complete maintenance routine that keeps your washing machine fresh, efficient, and working properly for years to come.
Quick Summary
Time needed: 2-3 hours (mostly machine running time)
Difficulty: Easy
You’ll need: Powder detergent with bleach OR washing machine cleaner tablets, access to hot wash cycle (60°C minimum)
Key takeaway: Run an empty hot wash cycle monthly with powder detergent or cleaner tablets to remove bacteria, mould, and residue buildup that causes odours and reduces washing performance.
What Is a Washing Machine Maintenance Wash?
A maintenance wash is an empty washing cycle run at high temperature specifically to clean your washing machine itself, not your clothes. It’s a preventive measure designed to remove the accumulation of bacteria, mould spores, soap scum, fabric softener residue, and limescale that builds up inside your appliance over time.
The key word here is “maintenance”. This isn’t a reactive emergency clean when your machine is already ponging – it’s a regular routine that prevents problems from developing in the first place. Running consistently hot water through an empty drum with the right cleaning agents flushes out all the hidden nasties lurking in places you can’t easily reach: the drum perforations, internal pipes, pump, and heating element.
Why It's Called Different Names
You might have come across various terms for essentially the same process. A maintenance wash is also known as a service wash, cleaning cycle, or drum clean. Some manufacturers use their own terminology – Miele calls it a “maintenance programme”, Bosch labels it “drum clean”, Samsung uses “self clean”, and LG refers to “tub clean”. Don’t let the different names confuse you – they all describe the same fundamental process of running your machine empty at high temperature with a cleaning agent.
If you have a machine with a dedicated drum clean programme, that’s your maintenance wash. Otherwise, you’ll simply use the hottest cotton cycle available.
How It Differs From Regular Washing
The difference between a maintenance wash and your regular laundry cycle is crucial to understand:
Purpose: Regular washes clean your clothes. A maintenance wash cleans the machine itself.
Contents: Your drum is completely empty during a maintenance wash – no clothes, towels, or anything else. This ensures the cleaning agents target the machine’s interior surfaces rather than being absorbed by fabrics.
Temperature: While you might wash most laundry at 30-40°C, a maintenance wash requires the hottest setting your machine offers, typically 60-90°C. This high heat is essential for killing bacteria and dissolving stubborn residue.
Detergent type: Regular washes can use any detergent, but maintenance washes work best with powder detergent containing bleach, or purpose-made washing machine cleaners. Liquid detergents lack the bleaching agents needed to kill bacteria effectively.
Frequency: You do laundry whenever clothes are dirty, but maintenance washes follow a schedule – typically monthly regardless of how dirty the machine looks.
Why Your Washing Machine Needs a Maintenance Wash
Modern washing machines face challenges that older models never encountered. Energy efficiency regulations have led manufacturers to design machines that use significantly less water and encourage lower temperature washing. Whilst brilliant for the environment and your energy bills, these changes create the perfect breeding ground for bacteria and mould.
The Hidden Buildup Problem
Every time you wash clothes, tiny amounts of detergent, fabric softener, dirt, and fibres don’t rinse away completely. In older machines that used gallons of hot water, this wasn’t a major issue. Today’s efficient machines use a fraction of that water, meaning residue accumulates much faster on internal surfaces.
Cold and cool washes compound the problem. Washing at 30°C or 40°C doesn’t kill bacteria or dissolve grease effectively. The bacteria that live on your worn clothes happily transfer to the warm, damp environment inside your machine, where they multiply rapidly. Before long, you’ve got a thriving bacterial ecosystem in there.
Liquid detergents, whilst convenient and gentle on fabrics, contain no bleaching agents. Traditional powder detergents include oxygen bleach (sodium percarbonate) that kills bacteria during each wash. When you switch exclusively to liquid products, you lose this built-in sanitising effect, accelerating the need for dedicated maintenance washes.
What Accumulates Inside Your Machine
Four main culprits build up inside your washing machine over time:
Detergent and fabric softener residue creates a sticky film on internal surfaces. This gunk attracts dirt and provides an ideal surface for bacteria to cling to. It can clog small holes in the drum, block pipes and valves, and reduce water flow throughout the system. Fabric softener is particularly notorious for leaving waxy deposits that are difficult to shift.
Bacteria and mould thrive in the damp, dark interior of your washing machine. The rubber door seal on front-loaders is especially prone to mould growth because water collects in its folds. These microorganisms cause that distinctive musty smell and can transfer to your supposedly clean laundry. Some bacteria can even survive the wash cycle on your clothes.
Limescale forms when hard water leaves calcium and magnesium deposits behind. If you live in a hard water area (common across much of the UK), limescale coats your heating element like fur inside a kettle. This forces the element to work harder to heat water, increasing your energy consumption. Eventually, heavy limescale buildup can cause the heating element to fail entirely.
Dirt and debris from clothes and pockets accumulates in drum perforations and the drain system. Fluff, hair, tissues, coins, and general grime all contribute to blockages that reduce your machine’s efficiency and can cause drainage problems.
Consequences of Neglecting Maintenance Washes
Skipping maintenance washes might not seem like a big deal initially, but the problems escalate quickly.
Immediate issues include persistent musty odours whenever you open the machine door. Your clothes start coming out of the wash smelling less fresh, or even picking up that mouldy smell from the machine. You might notice visible black spots of mould on the door seal, or slimy residue in the detergent drawer. Some people find their “clean” laundry has mysterious marks or residue that wasn’t there before washing.
Long-term problems affect both performance and costs. Your machine becomes less effective at actually cleaning clothes, forcing you to rewash items or use more detergent. The heating element struggles to function properly when coated in limescale, increasing energy consumption by up to 25%. Internal components like pumps, valves, and seals can fail prematurely due to residue buildup, leading to expensive repairs. A machine that should last 10-15 years might need replacing after just 5-7 years.
Health concerns shouldn’t be overlooked either. Bacteria from your machine can transfer to clothes and potentially cause skin irritation, especially for those with sensitive skin or conditions like eczema. Mould spores in your laundry area can aggravate allergies and respiratory issues.
When Do You Need a Maintenance Wash?
Understanding when and how often to run a maintenance wash depends on several factors, but there’s a simple baseline recommendation that works for most households.
Standard Frequency Recommendation
Run a maintenance wash once per month. This monthly cycle has become the industry standard recommendation from both washing machine manufacturers and detergent companies. It provides sufficient cleaning to prevent buildup without being excessive.
However, your specific circumstances might require more or less frequent maintenance:
Heavy users who run 10 or more loads per week should increase frequency to every 2-3 weeks. Professional households, large families, and anyone washing gym clothes or work uniforms regularly fall into this category. The sheer volume of washing means more rapid accumulation of residue.
Average users running 5-9 loads weekly are fine with the standard monthly maintenance wash. This covers most typical households.
Light users doing 1-4 loads per week can extend the interval to every 6-8 weeks. However, don’t skip maintenance entirely just because you wash infrequently – bacteria and mould can actually thrive in machines that sit unused with residual moisture.
Holiday homes or rarely used machines should receive a maintenance wash before the first use after any extended period of non-use. Stagnant water and trapped moisture create perfect conditions for mould growth.
Factors That Increase Frequency Need
Several washing habits and circumstances mean you should run maintenance washes more frequently than the standard monthly recommendation:
Using liquid detergent exclusively is the biggest factor. Liquid products contain no bleaching agents, so your machine never gets the antibacterial treatment that powder detergents provide during regular washing. If you only use liquids, increase maintenance washes to every 2-3 weeks. Better still, switch to powder detergent for white items and towels, reserving liquid for delicates and colours.
Washing mainly on cold or cool cycles prevents natural sanitising. Bacteria multiply happily at 30-40°C but die at 60°C and above. If environmental concerns or fabric care requirements mean you rarely wash hot, monthly maintenance washes become absolutely essential. Consider running at least one 60°C cycle weekly for towels and bedding to supplement your maintenance routine.
Living in a hard water area accelerates limescale accumulation significantly. The South East of England, parts of the Midlands, and East Anglia all have notably hard water. If your kettle furs up quickly, your washing machine faces the same problem. Increase maintenance washes to fortnightly and consider using a descaling product quarterly.
Using eco-friendly or non-bleach products exclusively means your machine never receives bleaching agents. Soap nuts, eco balls, and exclusively colour-safe detergents all lack the antibacterial properties of traditional powder. Increase maintenance frequency to every 2 weeks if these are your only cleaning products.
Front-loading machines trap more moisture and are significantly more prone to mould, particularly around the rubber door seal. Whilst top-loaders benefit from monthly maintenance washes, front-loaders really need that consistent routine plus regular seal cleaning.
Warning Signs You Need One Now
Certain symptoms indicate your machine needs a maintenance wash immediately, regardless of when you last did one:
Smell test failures are the most obvious sign. Opening your machine door shouldn’t greet you with musty, mouldy, or sour odours. If your clothes smell less than fresh after washing, or develop an odd smell after drying, the machine itself is the source. Don’t try to mask the problem with fragranced detergents or fabric softeners – you need to eliminate the bacteria causing the smell.
Visual indicators provide clear evidence of buildup. Black spots or brown smears on the white rubber door seal indicate mould colonisation. Slimy or sticky residue in the detergent drawer means fabric softener and detergent have accumulated. Check inside your drum for any visible scum, particularly around the holes in the drum wall where gunk commonly builds up. Grey or brown deposits anywhere inside the machine require immediate attention.
Performance issues suggest internal blockages or residue buildup. Clothes not getting properly clean despite adequate detergent use often indicates the machine itself is contaminated. Excessive suds appearing during the wash cycle can signal residue buildup. Water drainage problems or the machine taking longer to complete cycles might relate to blocked filters or pipes clogged with residue. Error codes related to drainage or heating require investigation before running a maintenance wash.
Increased detergent needs shouldn’t be necessary. If you find yourself using more detergent than the packet recommends and clothes still aren’t coming out clean, the problem lies with your machine, not your detergent dose.
How to Do a Maintenance Wash: Step-by-Step Guide
Running a maintenance wash is straightforward once you understand the key requirements. The process differs slightly between machine types, but the fundamental principles remain the same.
What You Need
Essential items for a basic maintenance wash include powder detergent containing bleach or oxygen bleach. Look for traditional biological or non-biological washing powder – the box should list sodium percarbonate or similar bleaching agents in the ingredients. Alternatively, purpose-made washing machine cleaner tablets like Dr Beckmann Service-it Deep Clean or Affresh work excellently and contain optimised formulations for this specific task.
DIY alternatives include baking soda and washing soda crystals. These are cheaper than commercial products and work reasonably well, though they lack the targeted cleaning power of proper washing machine cleaners. A combination of 1 cup baking soda in the drum plus half a cup of washing soda crystals in the detergent drawer makes an effective natural option.
What not to use is equally important. Avoid liquid detergent or liquid tablets – they contain no bleaching agents and won’t kill bacteria effectively. Colour-safe detergents specifically exclude bleach, making them useless for maintenance washes. Never add fabric softener, which will make the residue problem worse rather than better.
Basic Method for Machines Without Specific Programme
If your washing machine doesn’t have a dedicated maintenance or drum clean programme, follow this straightforward process:
Step 1: Empty the drum completely. This is absolutely critical. Check thoroughly that no clothes, towels, or any other items remain inside. Even a single sock will reduce effectiveness because it absorbs the cleaning agents meant for the machine surfaces.
Step 2: Add your chosen cleaning agent. You have several options here. For powder detergent with bleach, add 2-3 tablespoons directly into the main wash compartment of the detergent drawer. For washing machine cleaner tablets, place 1-2 tablets directly into the empty drum. If using the baking soda method, pour 1 cup of baking soda into the drum and add half a cup of washing soda crystals to the detergent drawer.
Step 3: Select cycle settings carefully. Temperature is the most crucial setting – choose the hottest cycle available, minimum 60°C but preferably 90°C. Select a full-length wash cycle, not a quick or eco wash. Quick washes don’t provide enough time for cleaning agents to work properly, whilst eco modes use lower temperatures that won’t kill bacteria. Set the spin speed to maximum available to ensure all water and loosened residue drains away completely. Turn off any pre-wash option as you don’t need it. An extra rinse cycle is optional but helpful for removing loosened residue thoroughly.
Step 4: Start the programme. Simply close the door and press start. The machine will heat the water, agitate the drum, and complete the full wash cycle. This typically takes 2-3 hours depending on your machine and chosen programme.
Step 5: Post-wash inspection and cleaning. Once the cycle completes, open the door and take a good sniff. The interior should smell genuinely fresh, not musty or chemical. Wipe down the rubber door seal with a clean, damp cloth to remove any loosened debris. Remove the detergent drawer completely and give it a rinse under the tap. Leave the door wide open to allow the interior to air dry completely before your next load of laundry.
Step 6: Consider a second rinse. If you used a lot of cleaner or can see any residue remaining, run one more short cycle with just water and no detergent. This ensures all cleaning agents are completely removed before you wash clothes again.
Special Considerations for Top-Loading Machines
Top-loading washing machines allow a modified approach that can be more effective:
Pre-soak method works brilliantly for top-loaders. Fill the drum with hot water to the highest level, add your cleaning agent, then let the machine agitate for about 5 minutes to distribute the cleaner. Now pause the machine and let everything soak for 30-60 minutes. This extended contact time allows the cleaning agents to really work on stubborn buildup. After soaking, resume the cycle to complete the wash and rinse phases normally.
Accessibility advantage means you can manually scrub problem areas whilst the machine is paused. Use the soaking time to wipe down the inside top rim, clean around the agitator, and address any visible marks or residue you can reach. This hands-on approach combined with the cleaning cycle provides thorough results.
Additional cleaning tasks specific to top-loaders include checking if your agitator is removable – some models allow you to lift it out for separate cleaning underneath. Don’t forget to wipe down the lid and the very top rim where splashes accumulate. Check and clean the fabric softener dispenser if your machine has one built into the agitator.
Key Differences for Front-Loading Machines
Front-loaders require extra attention in specific areas:
Door seal attention is absolutely critical. The rubber gasket on front-loading machines is the number one location for mould growth because it folds trap water after every wash. Even a thorough maintenance wash won’t clean those rubber folds properly – you must clean the seal manually as part of your routine. Check and wipe dry after every wash to prevent problems developing.
Drainage considerations matter more for front-loaders because they rely entirely on the pump to remove water. Before running your maintenance wash, check that the drain filter is clear of debris. A clogged filter prevents proper drainage and reduces the effectiveness of your maintenance wash. Make sure the drain hose at the back isn’t kinked or positioned too high, which can cause drainage problems.
Programme selection is often easier on front-loaders if your machine has a dedicated drum clean or self-clean setting. If not, select the cotton programme at the hottest available temperature, typically 90°C. Front-loaders generally offer higher temperature options than top-loaders.
HE (High-Efficiency) Machines
High-efficiency washing machines need slightly different treatment:
Use HE-compatible products exclusively. Standard powder detergent creates too many suds for HE machines, potentially causing operational problems. Choose HE washing powder, HE-specific washing machine cleaners, or the baking soda method, which is naturally low-sudsing. Never use regular detergent in HE machines even for maintenance washes.
Lower water levels in HE machines mean one thorough maintenance wash might not be enough for heavy buildup. Consider running two consecutive maintenance washes – the first loosens residue, the second rinses it away. This two-step approach compensates for the minimal water usage.
Manufacturer guidelines for HE machines often include specific “clean washer” cycles. Check your manual as some HE machines calculate usage and display reminders to run a cleaning cycle after a certain number of washes, typically every 30-40 cycles. Follow these prompts for optimal results.
Using Commercial Washing Machine Cleaners
Purpose-made products offer convenience and optimised formulations:
Dr Beckmann Service-it Deep Clean is the UK’s most recommended washing machine cleaner. Add one pouch directly to the empty drum, run at 60°C minimum (though 90°C provides better results), and it effectively tackles both bacterial buildup and limescale. The powder format is particularly effective for front-loading machines.
Affresh Washing Machine Cleaner uses tablet form, making dosing simple. Drop one tablet into the empty drum and run your hottest cycle. Originally designed for American market HE machines, it works excellently in UK washers and specifically targets the residue that liquid detergents leave behind.
Dettol Washing Machine Cleaner focuses on antibacterial action, making it particularly good for eliminating odours. Add the pouch to the drum and run at 60°C. The familiar Dettol scent confirms the antibacterial treatment, though the smell dissipates completely once the cycle finishes.
Store-brand options from supermarkets like Tesco, Sainsbury’s, and Asda contain similar active ingredients at lower prices. They generally work effectively when used at the correct temperature and full cycle length. Don’t be afraid to try own-brand products – they deliver good results for significantly less money.
The Vinegar and Baking Soda Debate
White vinegar appears in countless online guides as a natural washing machine cleaner, but it comes with important caveats.
Arguments supporting vinegar use point to its acidic nature making it effective for dissolving limescale. It deodorises well, costs very little, and qualifies as environmentally friendly. Many people swear by their vinegar cleaning routines and report good results.
Arguments against vinegar focus on potential damage. The acetic acid can degrade rubber seals and hoses with repeated exposure. Major manufacturers including Miele and Bosch specifically warn against using vinegar in their machines, stating it can void warranties. Vinegar’s acidity may corrode certain metal components over time, particularly in older machines or those with aluminium parts.
Our recommendation takes a middle ground. Occasional vinegar use – perhaps once every 3-4 months – for light descaling is unlikely to cause significant harm in most modern machines. However, don’t use vinegar for your regular monthly maintenance washes. Choose powder detergent or proper machine cleaners for consistent routine maintenance, and use manufacturer-approved descaling products for hard water areas rather than relying on vinegar.
If you choose vinegar, limit yourself to 1-2 cups maximum, always run at 60°C minimum, and follow with a water-only rinse cycle. Crucially, never mix vinegar with bleach – this combination creates toxic chlorine gas that can cause serious respiratory harm.
Baking soda remains safer as a natural alternative. Add 1 cup of baking soda to the drum, run your hot cycle, and it effectively deodorises whilst being gentle on machine components. Washing soda crystals (sodium carbonate) are more alkaline than baking soda, making them better at dissolving grease and soap scum. Use half a cup in the detergent drawer monthly without concerns about component damage.
Brand-Specific Maintenance Wash Instructions
Different manufacturers approach maintenance washes with varying levels of specificity. Here’s what you need to know for popular brands available in the UK.
Miele Washing Machines
Miele takes maintenance seriously, building a dedicated programme into most models manufactured from around 2010 onwards.
Accessing the maintenance programme varies slightly by model. Turn your programme selector to the “Further programmes” position. Use the up and down sensor controls on the display to scroll through available options. When “Maintenance” appears, press OK to confirm your selection. Some older Miele models might label this as “Cleaning” or show it with a specific symbol.
Programme intensity options give you flexibility. The default setting includes “Short” mode, which runs a briefer cycle with lower water level and just one rinse. This works fine for monthly routine maintenance when your machine is generally in good condition. For more intensive cleaning, deselect the “Short” option by touching that display area. The intensive mode uses substantially more water, runs for longer, and includes three rinse cycles. Use intensive mode every 3-4 months, after extended periods using only liquid detergent, when persistent odours remain, or if you live in a hard water area.
Miele’s recommendations specify using either Miele branded machine cleaner or quality powder detergent with bleach. Set temperature to 60°C minimum, though 90°C provides better results for intensive cleaning. The company suggests running the maintenance programme monthly, or after approximately every 100 wash cycles, whichever comes first.
TwinDos system maintenance is a separate procedure for machines with automatic dosing. The system needs its own cleaning routine every few months or when switching between cartridge types. Access this through the maintenance menu, where you’ll find specific TwinDos maintenance options. Follow the on-screen instructions, which guide you through cleaning the dispenser system step-by-step.
Bosch Washing Machines
Bosch includes drum clean programmes on models manufactured from approximately 2015 onwards.
Finding drum clean on your Bosch machine typically involves turning the programme dial to look for a special symbol (usually a drum with sparkle or cleaning icon). On newer models with digital displays, check under “Additional Programmes” or “Special Programmes” sections. The exact location varies by model series, so consult your manual if you can’t locate it.
If no dedicated programme exists on older Bosch machines, simply use the “Cottons” cycle at 90°C. Select the longest cycle duration available rather than any quick or eco option. This standard hot cotton wash effectively serves as a maintenance wash when run empty with appropriate cleaning agent.
Bosch recommendations include using Bosch branded washing machine cleaner or traditional powder detergent containing bleach. Run the drum clean empty, without any clothes or laundry items. Frequency should be approximately every 20 wash cycles, though monthly provides a simple schedule to remember. Display-equipped models may show reminders when drum clean is due.
Descaling requirements for hard water areas involve using Bosch descaler every six months. Follow the product instructions carefully, as descaling differs from standard maintenance washing. Bosch specifically warns against using vinegar, citing potential damage to rubber components and voiding of warranty coverage.
AEG Washing Machines
AEG machines from recent years typically include machine clean or drum clean programmes.
Programme location varies by model. Select “Additional programmes” or similar menu option on your control panel. Scroll through until you find “Machine Clean” or “Drum Clean”. Some AEG models simply use the 90°C Cotton programme as their cleaning cycle. Check your specific model’s manual for confirmation.
AutoDose models with automatic detergent dispensing have an additional maintenance requirement. The detergent and softener tanks need periodic cleaning, run separately from drum cleaning. Access this through the machine’s maintenance menu, following on-screen prompts to clean the dispenser system.
ProSense technology in newer AEG machines may indicate when cleaning is needed through display messages. Pay attention to these smart prompts, as they monitor actual usage patterns rather than simple cycle counts.
Recommended products include AEG branded washing machine cleaner or quality powder detergent at 90°C. Monthly maintenance washing keeps the machine in optimal condition.
Hotpoint Washing Machines
Most Hotpoint machines lack dedicated cleaning cycles, requiring the standard method.
Alternative approach for Hotpoint owners involves selecting the “Cotton” programme and manually setting temperature to 90°C. Use the longest cycle length available. Add powder detergent or washing machine cleaner to the empty drum and run as normal.
Hotpoint-specific considerations include their anti-stain technology in certain models, which may require slightly more frequent maintenance due to the complex washing action. Newer models with auto-clean features will display prompts – follow these as they appear.
Steam function models benefit from occasionally running the steam programme as supplementary maintenance between full hot washes. Steam helps loosen residue and provides additional sanitising, though it doesn’t replace proper maintenance washes.
Samsung Washing Machines
Samsung incorporates self-cleaning functions into many modern models.
Self Clean and Self Clean+ programmes typically have a dedicated button on the control panel clearly labelled. Alternatively, check under programme dial settings for a self-cleaning option. The Self Clean+ function uses higher temperatures (70°C and above) and includes additional drum soaking phases for more intensive cleaning. Cycles run for 1-4 hours depending on the machine’s assessment of buildup levels.
Samsung’s approach differs from other brands because their self-clean cycle uses ultra-high temperature water without requiring any detergent or cleaning products. The machine heats water beyond normal washing temperatures, relying purely on thermal cleaning. For stubborn odours, you can add a drum cleaner product, but it’s not necessary for routine maintenance.
Reminder system displays “Drum Clean” notifications after approximately 40 wash cycles. Address these prompts within a reasonable timeframe to maintain machine health. Ignoring warnings repeatedly can affect warranty coverage in some cases.
LG Washing Machines
LG’s Tub Clean cycle appears on most models from recent years.
Activating Tub Clean is straightforward on LG machines – either select “Tub Clean” on the programme dial or press the dedicated Tub Clean button on the control panel. The cycle runs for approximately 90 minutes, using very hot water (60-90°C) with high-speed drum rotation to dislodge and remove residue.
TubFresh reminder appears as a flashing “CL” indicator after about 30 wash cycles. This reminder system helps ensure you don’t forget routine maintenance. Some LG warranties require following these maintenance prompts, making them worth heeding.
Usage flexibility allows running Tub Clean empty or with a commercial tub cleaner product. For routine maintenance when your machine smells fine, running empty works perfectly. Add a cleaner product when tackling persistent odours or after long periods without maintenance.
Whirlpool Washing Machines
Whirlpool’s integration with Affresh products shapes their maintenance approach.
Clean Washer cycle appears on many Whirlpool models, sometimes labelled as the “Affresh cycle” due to their partnership with that product line. Find it on your programme dial or in the special programmes menu. Machines without a dedicated cycle should use the Sanitary or Heavy Duty programme at the highest available temperature.
Affresh tablet system works optimally in Whirlpool machines by design. Place one tablet in the empty drum and run the Clean Washer cycle. The tablets fizz and dissolve, working their way through the entire wash system. Whilst Affresh tablets cost more than basic powder detergent, they deliver excellent results in Whirlpool machines.
Alternative cleaning for those preferring not to buy Affresh involves using powder detergent or adding 1 cup of chlorine bleach to the drum when running the Clean Washer cycle at 90°C. Always run an additional rinse cycle after using bleach to ensure complete removal.
What to Clean During Your Maintenance Routine
Running the maintenance wash cycle is only part of a complete cleaning routine. Several components need manual attention because the hot water cycle can’t reach them effectively.
Door Seal and Gasket
Front-loading machines have rubber seals that fold inward, creating pockets where water, detergent residue, and debris collect after every wash. This makes the door seal the single most common location for mould growth in washing machines.
Cleaning method starts with preparing a solution of equal parts water and white vinegar in a spray bottle or bowl. Dampen a cloth with this solution and carefully lift the rubber seal to expose all the folds and crevices. Wipe thoroughly around the entire circumference, paying special attention to the bottom where water pools. Look for trapped items like coins, tissues, or small socks that commonly hide in seal folds. Remove any debris you find.
For stubborn mould, regular cleaning solution won’t be enough. Mix a diluted bleach solution using 1 part chlorine bleach to 10 parts water. Apply this carefully to mouldy areas using a cloth or spray bottle, keeping the bleach away from surrounding surfaces. Leave the solution on the mould for 10-15 minutes to work, then scrub gently with an old toothbrush. Rinse thoroughly with clean water and dry completely.
Prevention is far easier than cure. Wipe the seal dry with a clean towel after every single wash, even if it seems excessive. This simple 30-second habit prevents 90% of mould problems. Always leave your washing machine door ajar between uses to allow air circulation, which lets any remaining moisture evaporate naturally.
Detergent Drawer and Dispenser
The detergent drawer accumulates residue surprisingly quickly, with fabric softener being the worst culprit for creating sticky buildup.
Removing the drawer should be your first step. Most machines have a small release button or tab – press this whilst pulling the drawer out. The button is usually located inside the drawer compartment itself. If you can’t find it, check your machine’s manual for drawer removal instructions specific to your model.
Soaking makes cleaning far easier. Fill your sink or a basin with hot water and add 1 tablespoon of washing soda or baking soda. Submerge the entire drawer and let it soak for 30 minutes minimum. This softens hardened residue and makes scrubbing more effective.
Scrubbing targets the corners, ridges, and syphon tubes where residue hides. Use an old toothbrush to reach tight spaces, paying particular attention to the fabric softener compartment, which always has the worst buildup. Many drawers have a removable rubber insert in the softener section – take this out and clean it separately, checking underneath where hidden gunk accumulates.
Housing maintenance shouldn’t be forgotten. The cavity where the drawer sits also needs cleaning. With the drawer removed, spray diluted bleach or all-purpose cleaner into the housing. Use a toothbrush or small brush to reach the back corners and top surface inside the cavity. Wipe everything clean with a damp cloth, ensuring you remove all loosened residue.
Drying and replacement completes the process. Air dry the drawer completely before sliding it back into position, or dry thoroughly with a clean towel if you’re in a hurry. Moisture in the drawer encourages mould growth.
Perform this thorough drawer cleaning every 2-3 months as part of your regular maintenance schedule.
Drain Filter
Your washing machine’s drain filter catches debris from clothes and pockets, preventing it from reaching the pump where it could cause damage or blockages.
Location varies by brand, but most commonly you’ll find a small access hatch at the bottom front of your machine, near the floor. Some models position the filter at the back, though this is less common. Check your manual if you’re not sure.
Preparation saves dealing with unexpected floods. Place old towels under and around the filter area because water will drain out when you open it. Have a shallow bowl or baking tray ready to catch this water.
Opening procedure typically involves slowly unscrewing the filter anticlockwise. Go gently and be ready for water to start flowing as soon as you begin turning. Some machines have a small drain hose you can pull out first to drain away most of the water into your bowl before removing the filter fully. This makes the process much less messy.
Cleaning the filter means removing all collected debris. You’ll typically find coins, hair, lint, buttons, and general muck trapped in the filter screen. Rinse the filter thoroughly under running water, using your fingers or a soft brush to dislodge stubborn debris. Check the filter cavity inside the machine as well – shine a torch inside and remove any visible blockages.
Replacing the filter requires hand-tightening clockwise until snug. Don’t overtighten, as this can damage the thread. Close the access panel or hatch, then run a short rinse cycle to check for leaks. If water leaks from the filter area, remove and reseat the filter more carefully.
Warning signs that your filter needs immediate cleaning include water not draining properly from the machine, error codes related to drainage problems, unusual grinding or rattling noises during the drain or spin cycle, and musty smells seeming to come from the bottom of the machine.
Clean your drain filter every 3-6 months depending on usage. Heavy users should check it quarterly.
Water Inlet Filters
Small mesh filters inside your water inlet valve prevent sediment and debris from entering your washing machine from the mains water supply.
Location is at the back of the machine where the inlet hoses connect. You’ll need to access the rear panel, which might mean pulling the machine away from the wall.
Cleaning method starts with turning off the water supply taps completely. Disconnect the inlet hoses from the back of the machine (have a towel ready for drips). Look inside each connection point on the machine – you’ll see small mesh filters. Carefully remove these filters using needle-nose pliers or similar tool. Rinse the filters under running tap water, using a soft brush if sediment has accumulated. Replace the filters securely, reconnect the inlet hoses, tighten the connections finger-tight plus a quarter turn with pliers (don’t overtighten), then turn the water supply back on.
Frequency of every six months works for most households, or clean them sooner if you notice reduced water flow into the machine or longer fill times.
External Surfaces
Don’t neglect the parts you can see every day. Wipe the control panel with a slightly damp cloth, being careful not to soak electronic components. Clean the exterior cabinet with mild soap and water, removing detergent spills and dust. Wipe the top surface where detergent and softener often spill. If possible, pull the machine forward occasionally to vacuum lint and dust from behind it, which improves air circulation and reduces fire risk if you have a tumble dryer nearby.
Common Maintenance Wash Mistakes to Avoid
Understanding what not to do is just as important as knowing the correct method. These common errors reduce effectiveness or can even damage your machine.
Running Maintenance Wash With Clothes Inside
The temptation to “not waste a cycle” leads some people to throw in old towels or cleaning cloths whilst running a maintenance wash. This completely defeats the purpose. The cleaning agents and bleach will target the fabrics instead of attacking residue on the machine surfaces. Your towels might get damaged by the concentrated bleach and high temperature, whilst your machine doesn’t get properly cleaned. Always run your maintenance wash with a completely empty drum.
Using Liquid Detergent
Grabbing your usual liquid detergent for a maintenance wash seems logical, but it simply doesn’t work. Liquid products contain no bleaching agents whatsoever. They can’t kill the bacteria causing odours, and they may even add to the residue problem. Colour-safe detergents specifically exclude bleach by design, making them equally useless for maintenance purposes. You must use powder detergent that contains bleach or oxygen bleach, or a purpose-made washing machine cleaner.
Running at Low Temperature
Trying to save energy by running your maintenance wash at 40°C misses the entire point. Low temperatures don’t kill bacteria, can’t dissolve built-up residue effectively, and won’t tackle mould properly. The whole reason for running a maintenance wash is to use high heat to sanitise and clean. Yes, 90°C uses more energy than 30°C, but one monthly hot cycle makes negligible difference to your annual energy consumption whilst dramatically improving machine hygiene.
Using Quick or Eco Wash Settings
Quick wash programmes don’t provide enough time for cleaning agents to work properly. They use less water and shorter wash phases, meaning residue doesn’t get adequately flushed away. Eco modes prioritise energy saving through lower temperatures and reduced water, making them totally inappropriate for maintenance washes. Always select a full-length standard programme at maximum temperature.
Adding Fabric Softener
Some people reason that fabric softener will make their machine smell nice during the maintenance wash. Unfortunately, fabric softener leaves a waxy residue that coats surfaces, making the buildup problem worse rather than better. This defeats the entire purpose of the cleaning cycle. Never add fabric softener to a maintenance wash. If your machine still smells after a proper maintenance wash, run another cycle or address the underlying cause rather than masking it with fragrance.
Mixing Cleaning Agents
The most dangerous mistake is combining vinegar and bleach, thinking this creates extra cleaning power. This combination generates toxic chlorine gas that can cause severe respiratory damage and in extreme cases proves fatal. Never mix these substances. Choose one cleaning method per wash – either vinegar for light descaling or bleach/powder for antibacterial cleaning, never both together. Even mixing them in your sink or bucket whilst preparing solutions creates dangerous fumes.
Forgetting Manual Cleaning Components
Assuming that running a hot cycle will clean everything leads to disappointment. The door seal folds trap moisture and debris that no amount of hot water will shift – you must wipe them manually. Detergent drawer buildup won’t be removed by the maintenance wash alone because the water doesn’t flow through there forcefully enough. Filters require physical removal and cleaning. A complete maintenance routine combines the hot wash cycle with manual cleaning of specific components.
Inconsistent Frequency
The reactive approach of “I’ll do it when I remember” or “when it starts smelling” allows problems to develop unchecked. Buildup accumulates gradually, and by the time you notice odours, you have a significant contamination problem requiring multiple intensive cleaning cycles to resolve. Preventive maintenance on a consistent monthly schedule stops problems developing in the first place and makes the task far easier each time. Set a phone reminder on the same date each month – perhaps the first or last day – so you never forget.
Troubleshooting: When Maintenance Wash Doesn't Work
Sometimes your maintenance wash doesn’t deliver the expected results. Here’s how to identify and resolve common problems.
Machine Still Smells After Maintenance Wash
Severe buildup is the most common culprit when one maintenance wash doesn’t eliminate odours. Years of neglect create layers of residue that one hot cycle can’t fully remove. The first wash dislodges some buildup but doesn’t remove everything. Run 2-3 consecutive maintenance washes, allowing the machine to cool for an hour between cycles if you’re concerned about component wear. Each successive wash removes more loosened material until the smell finally disappears.
Door seal mould persists because maintenance washes don’t reach into the rubber folds effectively. Even after a thorough hot wash, mould trapped in seal crevices survives and continues producing odours. You must clean the door seal manually, lifting all folds and wiping with diluted bleach solution. For stubborn black mould, apply bleach, leave for 10-15 minutes, scrub with an old toothbrush, rinse thoroughly, and dry completely.
Full drain filter creates stagnant water pockets that smell terrible regardless of how clean the drum is. The odour source isn’t the drum at all but trapped debris in the filter. Remove and clean the drain filter thoroughly, checking for accumulated hair, lint, and general grime. Whilst you have the filter out, shine a torch into the cavity and check for any visible blockages or standing water.
Drainage issues mean water isn’t fully evacuating from the system, leaving stagnant pools that breed bacteria. Check the drain hose for kinks, ensure it’s positioned at the correct height (not too high or low), and verify it’s not pushed too far into the standpipe, which can create an airlock. If problems persist, the pump itself might be failing or blocked, requiring professional attention.
Mould behind the drum in the tub area is thankfully rare but explains persistent smells when everything else is clean. This location is inaccessible without machine disassembly. Try running 3-4 intensive maintenance washes with commercial cleaner at 90°C. If the smell continues after this, you likely need professional service to access and clean the outer tub.
Clothes Still Smell After Washing
If your maintenance wash completed successfully but clothes still come out smelling odd, the problem might not be the machine.
Overloading prevents clothes moving freely through the water and detergent. Packed items in the centre of a full drum never get properly clean. Follow your manufacturer’s load capacity guidance and don’t pack the drum tightly. Clothes should tumble freely with space to move.
Delayed removal causes bacterial growth on damp clothes. Leaving washed items sitting in the closed drum for hours before transferring to the dryer or washing line allows bacteria to multiply. The smell develops on the clothes themselves, not from the machine. Always remove washing promptly when the cycle finishes.
Incorrect detergent amount affects cleaning. Too little detergent means clothes don’t get clean, leaving body oils and dirt that develop odours when damp. Too much detergent leaves residue on fabrics that also smells as it builds up. Follow the dosage guidance on your detergent packet, adjusting for water hardness and soil level.
Inappropriate detergent for temperature matters more than many people realise. Washing exclusively on cold cycles with regular detergent gives poor results. If you wash mainly at 30°C, ensure you use detergent specifically formulated for low temperatures. Better still, mix in occasional 60°C washes for towels and bedding to kill bacteria.
Water temperature for regular washes affects hygiene. Washing everything on cold settings indefinitely means bacteria never get killed. This isn’t a machine problem but a user habit issue. Include at least one 60°C wash weekly for items that can tolerate it, particularly towels, bedding, and underwear.
Visible Mould Won't Go Away
Black spots persisting on the door seal after maintenance washes require direct treatment.
Chemical treatment sequence starts with mixing a bleach solution (1 part bleach to 10 parts water). Apply this to mouldy areas using a cloth or spray bottle, avoiding over-saturation. Allow the solution to sit for 10-15 minutes so the bleach can kill mould spores. Scrub thoroughly with an old toothbrush, getting into all the seal folds. Rinse very thoroughly with clean water and wipe dry completely.
Ongoing prevention must become habitual. Wipe the seal dry after every single wash without exception. Leave the door wide open between uses, not just ajar. Ensure your laundry room has adequate ventilation. If condensation is a problem, consider running a dehumidifier.
Seal degradation sometimes means the rubber itself has deteriorated beyond cleaning. Perished seals develop cracks, splits, or permanent discolouration where mould has penetrated too deeply. Replacement seals cost £20-50 depending on your machine model and are actually quite simple to fit yourself in many cases. A new seal provides a fresh start and eliminates deeply embedded contamination.
Machine Makes Strange Noises During Maintenance Wash
Gurgling or whooshing sounds during the drain phase are usually normal, especially if you haven’t run a maintenance wash recently. These noises indicate dislodged buildup moving through the drainage system. Check your drain filter after the cycle completes to remove any debris that has collected there.
Banging or thumping sounds shouldn’t happen with an empty drum. Check carefully that nothing is trapped inside – a single coin or button can cause surprising noise. Verify the machine is level, as an unstable machine vibrates more. If loud banging persists, this might indicate worn drum bearings, though these wouldn’t suddenly develop during a maintenance wash.
Grinding or scraping noises suggest something is wrong mechanically. A bearing failure creates a grinding sound that worsens over time. A damaged or loose component might be scraping against the drum. These noises warrant professional inspection.
High-pitched squealing often indicates a worn belt or bearing. Whilst these components don’t fail suddenly during a single maintenance wash, the different drum speed and movement patterns might make an existing problem more noticeable.
Error Codes During Maintenance Wash
Drainage error codes (E20, E21, OE, or similar depending on brand) indicate water isn’t draining properly. Stop the machine, clean the drain filter immediately, check the drain hose for kinks or blockages, and verify the drain hose end sits at the correct height. Reset the machine and try again.
Water inlet errors (E10, E11, or similar) mean the machine can’t fill with water. Check your water supply taps are fully turned on, clean the inlet filters which might be blocked with sediment, and verify inlet hoses aren’t kinked or have debris blocking them.
Temperature or heating errors suggest the heating element can’t reach the set temperature. Heavy limescale coating on the element is a common cause in hard water areas. Try running a descaling cycle with proper descaling product. If the error persists, the heating element itself might have failed and needs professional replacement.
When to Call a Professional
Certain problems exceed DIY capabilities and require expert attention:
- Multiple maintenance washes fail to resolve persistent odours despite cleaning all manual components
- Error codes persist after you’ve checked and addressed obvious causes
- Strange mechanical noises continue after the maintenance wash
- Water drainage problems remain after cleaning the filter and checking the hose
- Visible damage to internal components like the drum or spider arm
- Machines older than 10 years with multiple concurrent problems might not be worth repairing
Prevention through regular maintenance remains far cheaper than professional repairs. An annual professional service alongside your monthly maintenance routine can catch small problems before they become expensive failures.
Preventing the Need for Frequent Maintenance Washes
Whilst monthly maintenance washes are recommended, several daily habits reduce buildup and make each maintenance wash more effective.
Best Practices for Daily Use
Detergent type mixing provides the best results and machine care. Use powder detergent for white laundry, heavily soiled items, and towels. The oxygen bleach in powder helps sanitise your machine during every wash. Reserve liquid detergent for delicate items, coloured fabrics that might fade, and clothes that specifically require gentle treatment. This mixed approach gives your machine regular bleaching action without compromising fabric care.
Correct dosing prevents the main cause of residue buildup. More detergent doesn’t mean cleaner clothes – it means more residue coating your machine’s interior. Follow the dosage recommendations on the packet, adjusting for water hardness and soil level. Hard water areas need more detergent than soft water areas. Lightly soiled office clothes need less than muddy sports kit. HE machines require significantly less detergent than standard machines.
Temperature variety in your regular washing maintains machine hygiene naturally. Don’t wash absolutely everything on cold cycles. Mix in at least one 60°C wash per week for towels, bedding, or white cotton items. This regular hot wash prevents bacterial buildup between maintenance washes. The energy difference between 30°C and 60°C for one weekly wash is minimal compared to the machine hygiene benefit.
Prompt removal of finished laundry prevents bacterial growth. Wet clothes sitting in a closed drum create the perfect environment for bacteria to multiply. These bacteria transfer to the drum interior, contributing to smells. Transfer clothes to the dryer or washing line as soon as the cycle finishes. If you can’t be home when washing finishes, use the delay timer to ensure the cycle completes just before you arrive.
Door left open between uses allows moisture to evaporate completely. Front-loading machines particularly benefit from this practice because moisture tends to collect in the door seal folds. Prop the door wide open, not just slightly ajar. This air circulation prevents mould spores establishing colonies in damp, enclosed spaces.
Seal wiping after each wash takes just 30 seconds but prevents 90% of mould problems. Keep a clean cloth near your machine and make it habit to wipe the door seal dry before leaving the door open. This simple action removes the moisture that mould needs to grow.
Fabric softener moderation reduces waxy residue buildup. Fabric softener isn’t necessary for every load – many items like towels and sportswear actually perform better without it. When you do use softener, measure carefully according to packet instructions. Never pour it directly into the drum and don’t exceed recommended doses.
Pocket checking before loading prevents debris accumulating in your machine. Coins, tissues, hair grips, and other pocket contents end up in the drum perforations, filters, and pump if you don’t remove them first. Spend 30 seconds checking pockets as you load the machine.
Weekly Quick Checks
Spend just 60 seconds weekly on these preventive inspections:
Check the door seal for visible debris, moisture, or early signs of mould. Wipe the detergent drawer area with a damp cloth to prevent residue hardening. Ensure your laundry room has adequate ventilation, opening windows if needed. Verify the door has been left ajar between uses. These quick checks catch problems early before they require intensive cleaning.
Monthly Maintenance Schedule
Structure your monthly routine for maximum effectiveness:
Week 1: Run your full maintenance wash and clean the detergent drawer thoroughly.
Week 2: Deep clean the door seal, checking carefully in all folds, and wipe exterior surfaces.
Week 3: Check and clean the drain filter, inspecting the drain hose position and condition.
Week 4: In hard water areas, clean the inlet filters. Review any issues you’ve noticed during the month.
This staggered approach spreads maintenance tasks throughout the month rather than doing everything at once. Each task takes just 10-15 minutes, making maintenance feel manageable rather than overwhelming.
Benefits of the Preventive Approach
Consistent preventive maintenance delivers substantial rewards:
Your laundry consistently smells genuinely fresh rather than just “acceptable”. No mysterious musty odours develop overnight. The machine maintains optimal performance throughout its lifespan, potentially lasting 15+ years instead of 8-10. Energy bills stay lower because a clean heating element works efficiently rather than struggling through limescale buildup. You avoid expensive repair call-outs costing £80-200 per visit. You never need to replace a machine prematurely due to neglect-related failures.
Cost comparison makes the case clearly. Monthly maintenance costs £2-5 in cleaner and electricity. A single repair visit costs £80-200. Replacing a neglected machine costs £300-1000 or more. Prevention wins decisively on financial grounds alone, before even considering the hygiene and performance benefits.
Special Situations
Certain circumstances require adapted approaches to maintenance washing.
Inherited or Second-Hand Washing Machines
Taking on a used machine means you don’t know its maintenance history. Assume the worst and give it intensive treatment.
Initial deep clean involves running three consecutive maintenance washes. Use a commercial washing machine cleaner for the first two washes at 90°C. For the third wash, use powder detergent with bleach. This triple approach tackles accumulated neglect comprehensively.
Physical inspection between washes reveals problem areas. Remove and thoroughly clean the detergent drawer, examining for stubborn residue. Deep clean the door seal, treating any mould with diluted bleach. Clean all accessible filters. Check water inlet and drain hoses for age, flexibility, and condition. Stiff, cracked, or perished hoses need replacing before they fail catastrophically.
Baseline establishment helps you monitor the machine’s condition. Note any existing issues like strange noises, unusual vibration, or minor operational quirks. Take photos of the machine’s interior condition. Monitor performance over the first month, watching for deterioration or improvement. This baseline lets you identify developing problems quickly.
After Extended Non-Use
Machines left unused in holiday homes, during long-term travel, or in storage develop their own problems.
Before first use, inspect thoroughly for mould, musty smells, or signs of pest activity (spiders particularly love unused washing machines). Verify all hoses remain properly connected and undamaged. Check no rust or corrosion has developed.
Cleaning protocol requires running two maintenance washes before attempting to wash any clothes. This ensures the machine is genuinely clean rather than transferring stale smells to your laundry. Don’t use the machine for actual washing until smells have completely resolved.
Test run with an empty cycle (no cleaning agents) verifies all functions work correctly. Check that water fills properly, the drum rotates in both directions, water drains completely, and no leaks appear anywhere. This empty test avoids discovering problems when you have a full load of clothes inside.
After Flooding or Water Damage
If your laundry area has flooded or your machine was affected by water damage, proceed cautiously.
Safety first means never using a machine that’s been submerged or significantly water-damaged until it’s been professionally inspected for electrical safety. Water inside electrical components creates serious shock and fire risks. Pay for proper inspection rather than risking your safety.
If given the all-clear, run multiple maintenance washes to clean any flood debris or contaminants that entered the system. Clean all accessible components manually. Dry everything thoroughly before use. Continue monitoring closely over subsequent weeks.
Be prepared for the possibility that a flooded machine may be beyond economic repair. Water damage to motors, control boards, and electrical components often proves terminal. Insurance may cover replacement.
New Washing Machine First Use
Even brand-new machines benefit from an initial cleaning cycle.
Installation clean removes manufacturing residues, protective coatings, and warehouse dust. Run one empty hot cycle before washing your first load of clothes. This tests all machine functions whilst ensuring any factory residues rinse away rather than transferring to your clothing.
Most manufacturers actually recommend this initial cleaning cycle in their setup instructions, though many people skip this step in their eagerness to start using the new machine.
Do I need to run a maintenance wash if I use powder detergent regularly?
Yes, though you can potentially reduce the frequency slightly. Powder detergent containing bleach or oxygen bleach helps keep your machine cleaner during regular use because it kills bacteria and breaks down grease with each wash. The bleaching agents provide ongoing sanitisation that liquid detergents simply can’t match.
However, maintenance washes remain necessary even with regular powder use. Some areas of your machine still need targeted cleaning regardless of detergent type. The door seal folds trap moisture and debris that regular washing doesn’t address. Filters accumulate lint and pocket contents. Limescale still builds up in hard water areas despite the best detergents. The drum perforations and internal pipes develop residue over time.
If you consistently use powder detergent with bleach for most of your washing, you can probably extend your maintenance wash interval to every 6-8 weeks instead of monthly. Monitor your machine for any developing smells or visible residue. If everything stays fresh and clean at this frequency, you’ve found the right balance. The moment you notice any mustiness, return to monthly maintenance washes.
The key is using powder for appropriate loads. Reserve it for white laundry, towels, bedding, and heavily soiled items. You can still use liquid for delicates and colours. This mixed approach gives your machine regular bleaching action whilst protecting sensitive fabrics.
Can I use chlorine bleach instead of washing machine cleaner?
Yes, chlorine bleach works for maintenance washes, but you need to use it correctly and understand the limitations.
Add 1 cup of chlorine bleach directly to the detergent drawer (never the fabric softener compartment). Run a hot empty cycle at 60-90°C, selecting a full-length programme rather than quick wash. The crucial extra step is running an additional rinse cycle after the main wash completes. This ensures all bleach residue is completely removed before you wash clothes again. Any bleach remaining in the system will damage your next load of laundry.
Several important cautions apply to chlorine bleach use. Never mix bleach with vinegar or any other cleaning products, as this creates toxic chlorine gas that can cause serious respiratory harm. Some manufacturers specifically warn against chlorine bleach in their machines, stating it can corrode metal parts or damage components with repeated use. Check your manual before proceeding. Don’t use chlorine bleach too frequently – monthly use risks component damage over time.
Oxygen bleach (sodium percarbonate) provides a gentler alternative that’s less corrosive to machine components whilst still killing bacteria effectively. You’ll find oxygen bleach in most powder detergents, making them excellent for maintenance washes. Purpose-made washing machine cleaners offer the best balance – they’re formulated specifically for washing machines with appropriate bleaching agents that won’t damage components.
For most people, powder detergent with oxygen bleach or commercial washing machine cleaners prove safer, easier, and more effective than chlorine bleach for regular maintenance.
What's the difference between maintenance wash and descaling?
These are two different processes addressing different types of buildup, often confused because they both clean your washing machine.
Maintenance wash targets organic buildup including bacteria, mould, detergent residue, fabric softener deposits, and general grime. You run it using hot water combined with detergent or cleaner containing bleaching agents. The purpose is sanitising and removing the sticky residues that cause odours. Standard frequency is monthly for most households. Think of it as antibacterial cleaning that tackles smells and hygiene issues.
Descaling specifically removes limescale deposits formed by hard water. Calcium and magnesium minerals dissolved in hard water precipitate onto heating elements, drum surfaces, and internal pipes when water evaporates or heats. You need acidic solutions like citric acid or proprietary descaling products to dissolve these mineral deposits. The appropriate frequency depends on your water hardness – every 3-6 months in hard water areas, rarely or never in soft water regions. This is mineral deposit removal rather than sanitisation.
The confusion arises because both processes involve running your machine empty at high temperature. The crucial difference lies in what you’re trying to remove and the products needed.
In hard water areas, you need both maintenance washes and descaling. You can combine them if your chosen product includes descaling agents alongside antibacterial components. Many commercial washing machine cleaners address both issues simultaneously. Alternatively, alternate between them – run a maintenance wash one month, descaling the next month.
Check your kettle as a simple water hardness indicator. If limescale builds up quickly in your kettle, your washing machine faces the same problem. Soft water areas rarely need descaling, but maintenance washes remain essential for everyone.
My machine has an eco mode – should I use it for maintenance wash?
No, absolutely never use eco mode for maintenance washes. This defeats the entire purpose of the cleaning cycle.
Eco modes prioritise energy efficiency through several measures that work against effective machine cleaning. They use substantially lower temperatures, typically 20-40°C instead of the 60-90°C needed to kill bacteria and dissolve residue. Cycle times are shorter, giving cleaning agents insufficient time to work properly. Water usage is minimised, meaning less flushing action to remove dislodged buildup. The spin speed may be reduced, leaving more water and residue in the system.
These energy-saving features make perfect sense for regular laundry – modern detergents clean clothes effectively at lower temperatures, saving energy without sacrificing washing performance. However, maintenance washes require completely different conditions. You need genuinely hot water to kill bacterial colonies and mould spores. High temperatures dissolve hardened residue that low temperatures barely touch. Adequate water volume flushes loosened gunk from internal pipes and drum perforations. Long cycle times let bleaching agents work thoroughly.
For maintenance washes, always select the standard cotton programme at the hottest available temperature. Choose full-length cycles over quick options. Forget about energy efficiency for this one monthly cycle – the small additional energy cost is negligible compared to the machine hygiene benefit.
Consider it this way: one 90°C maintenance wash per month uses far less energy than your heating element struggling inefficiently through limescale buildup, or your machine failing prematurely and needing replacement. The environmental impact of manufacturing a new washing machine vastly exceeds the energy cost of proper monthly maintenance over 15 years of machine lifespan.
Can I do a maintenance wash with vinegar?
You can use vinegar occasionally for light descaling, but it’s not recommended for regular monthly maintenance washes.
White vinegar’s acidity makes it moderately effective at dissolving limescale deposits, and it does deodorise reasonably well. As a natural, cheap, and environmentally friendly option, it appeals to many people. Occasional use – perhaps once every 3-4 months specifically for descaling in hard water areas – is unlikely to cause significant problems in most modern washing machines.
However, several serious concerns surround regular vinegar use. The acetic acid can degrade rubber seals, door gaskets, and internal hoses with repeated exposure. These components aren’t designed to withstand frequent acid contact, and deterioration develops gradually over time. Major manufacturers including Miele and Bosch specifically warn against vinegar in their machines, with some stating it voids warranty coverage. The acidity may corrode certain metal components, particularly in older machines or those with aluminium parts rather than stainless steel.
For regular monthly maintenance washes, choose powder detergent containing bleach or purpose-made washing machine cleaners instead. These products are formulated specifically for washing machines, with pH levels and ingredients that clean effectively without damaging components. They kill bacteria, remove residue, and often include some descaling properties without the risks vinegar poses.
If you decide to use vinegar despite the warnings, follow these strict guidelines. Limit yourself to 1-2 cups maximum in the detergent drawer. Always run at 60°C minimum for effectiveness. Follow with a water-only rinse cycle to remove all acid traces. Never use vinegar more than quarterly. Most importantly, never ever mix vinegar with bleach or any bleach-containing products – this combination releases toxic chlorine gas that can cause serious respiratory damage or death.
Baking soda and washing soda crystals offer safer natural alternatives. They’re alkaline rather than acidic, so they don’t degrade rubber or corrode metal. Add 1 cup of baking soda to the drum for deodorising, or use half a cup of washing soda crystals in the detergent drawer for cutting through grease and soap scum. These work effectively without component damage risks.
How do I know if my maintenance wash actually worked?
Several clear indicators tell you whether your maintenance wash successfully cleaned your machine.
The smell test provides the most immediate feedback. Open your machine door and take a good sniff. The interior should smell genuinely fresh and clean, like nothing at all or perhaps faintly of whatever cleaner you used. There should be absolutely no musty, mouldy, damp, or sour odours. If any unpleasant smell lingers, your maintenance wash didn’t fully succeed.
Visual inspection reveals residue and mould issues. Look carefully inside the drum – the stainless steel or enamel surface should be clean without visible scum, marks, or discolouration. Check the drum perforations (the small holes throughout the drum wall) for any gunk or residue visible in them. Examine the door seal thoroughly, lifting the rubber folds to look in the crevices. The seal should be clean without black mould spots, brown smears, or slimy deposits. Check the detergent drawer for remaining residue – whilst you should clean this manually, a successful maintenance wash helps keep it fresher between cleanings.
The performance test comes with your next load of actual laundry. Wash a regular load using your normal detergent and cycle. When you remove the clothes, they should smell genuinely fresh and clean. Sniff them carefully – there should be no musty undertones, no odd smells, just clean laundry fragrance (or no smell if you use unscented products). Check your clothes visually for any mysterious marks or residue that wasn’t there before washing. Properly washed items should look cleaner, never dirtier.
Water clarity during the rinse phase can indicate residue removal. If you can see through the door during rinsing, the water should run reasonably clear. Heavily cloudy or discoloured rinse water suggests lots of residue washing out, which is actually good – it means the maintenance wash is working.
If your machine still doesn’t smell fresh after one maintenance wash, this doesn’t necessarily mean failure. Severe buildup requires multiple consecutive maintenance washes to fully resolve. Run a second maintenance wash, then reassess. If problems persist after 2-3 maintenance washes, you likely have mould in the door seal requiring manual cleaning, a full drain filter needing attention, or potentially mould growth in areas inaccessible without professional service.
Success means fresh smells, clean appearance, and laundry that comes out properly clean without odours. Anything less indicates work still needed.
Is there a difference between maintenance wash and service wash?
No difference whatsoever. These are simply two different names for exactly the same process. The terminology varies by region, manufacturer, and personal preference, but they describe identical procedures.
Both terms refer to running your washing machine empty at high temperature with a cleaning agent to remove bacteria, mould, residue, and limescale buildup from the machine’s interior. The process, purpose, and technique remain identical regardless of which name you use.
The terminology confusion extends further. Some manufacturers and users also call it a cleaning cycle, drum clean, or tub clean. Brand-specific names include Miele’s “maintenance programme”, Bosch’s “drum clean”, Samsung’s “self clean”, and LG’s “tub clean”. Regional variations see different terms dominating – “service wash” appears more commonly in traditional British usage, whilst “maintenance wash” has become more prevalent recently, perhaps influenced by manufacturer terminology.
Don’t let these different names cause confusion when researching information or following advice. A forum post about “service washes”, a manual referring to “maintenance programmes”, and an article discussing “drum clean cycles” are all talking about the same fundamental process. They all mean: run your machine empty at high temperature with appropriate cleaning agent, typically monthly, to clean the machine itself rather than clothes.
The only time terminology matters is when looking for a specific programme on your particular washing machine. Your manual might list “drum clean”, “maintenance”, “self clean”, or similar under special programmes. These dedicated cycles are pre-programmed specifically for this purpose. If your machine lacks such a programme, simply use the hottest cotton cycle regardless of what name you call the process.
Whether you say “I’m running a maintenance wash” or “I’m doing a service wash”, you’re describing the same essential machine hygiene practice.
Can I wash anything during a maintenance wash to not waste water?
No, this completely defeats the purpose of a maintenance wash. Your drum must be absolutely empty for the process to work properly.
The fundamental principle is that maintenance washes clean your machine, not clothes. When you add any items – even old towels or cleaning cloths – the cleaning agents and bleach will target those fabrics instead of attacking the residue on your machine’s interior surfaces. Detergent molecules and bleaching agents are designed to clean fibres and organic material. Give them fabric to clean, and that’s what they’ll do, leaving the machine buildup largely untouched.
Think about how washing works. Detergent surfactants are attracted to dirt, grease, and organic material – they surround these substances, lift them from surfaces, and hold them in suspension so water can rinse them away. In a maintenance wash, you want these surfactants attacking the gunk coating your drum, pipes, and seals. Add clothes, and those surfactants immediately find easier targets. Your clothes might get damaged by concentrated bleach and extremely high temperatures, whilst your machine doesn’t get properly cleaned.
The water used isn’t wasted – it’s performing essential machine maintenance that extends appliance lifespan, prevents expensive repairs, and ensures optimal performance. Would you consider water used to clean your toilet “wasted” because you’re not simultaneously washing your hands? Different cleaning tasks require different approaches.
If you feel strongly about maximising water efficiency, separate the concepts entirely. Run your maintenance wash empty as intended monthly. Separately, ensure you’re washing full loads of actual laundry rather than half-loads, which genuinely does waste water. Include at least one 60°C wash weekly for towels and bedding, providing some sanitising benefit during regular use. This approach maintains both machine hygiene and water efficiency without compromising either.
The small amount of water used monthly for proper maintenance is negligible compared to the water wasted by an inefficient, clogged machine requiring longer cycles, rewashing of improperly cleaned items, and eventual premature replacement.
How long does a maintenance wash take?
A typical maintenance wash runs for 1.5 to 3 hours depending on your machine and the programme selected.
Standard cotton programmes at 90°C generally take 2 to 2.5 hours to complete. The machine needs substantial time to heat cold water to 90°C, maintain that temperature throughout the wash phase, provide adequate agitation time for cleaning agents to work, complete multiple rinse cycles to remove dissolved residue, and spin thoroughly to extract all water. Modern machines often include multiple pause phases during heating to maximise energy efficiency, which extends overall cycle time.
Dedicated maintenance or drum clean programmes usually take 1.5 to 2 hours, though this varies significantly by manufacturer. These pre-programmed cycles are optimised specifically for machine cleaning, sometimes using different water levels or agitation patterns than standard washing programmes. Samsung’s Self Clean+ can run for up to 4 hours if the machine detects heavy buildup, whilst some basic drum clean cycles complete in 90 minutes.
Intensive programmes selecting the longest available cycle option naturally take longer, sometimes reaching 3 hours. These extended cycles provide extra wash time and additional rinse cycles that thoroughly remove loosened residue.
Never use quick wash programmes for maintenance washes. Quick cycles completing in 15-30 minutes cannot heat water adequately, provide sufficient contact time for cleaning agents to work, or rinse away dissolved buildup properly. The time saved isn’t worth the ineffective cleaning.
Plan accordingly for the lengthy cycle time. Many people run maintenance washes overnight, letting the machine work whilst they sleep. Alternatively, start the cycle when leaving for work, returning home to a completed clean machine. If your machine has a delay timer function, use it to schedule the maintenance wash to complete just before you wake up or arrive home. This avoids water sitting stagnant in a closed machine for hours after the cycle finishes.
The lengthy cycle time actually benefits the cleaning process. Those hours allow hot water and cleaning agents to work thoroughly on stubborn buildup, ensure complete dissolution of residue, and provide adequate rinsing to remove everything. Don’t try to rush the process.
What if my washing machine doesn't have a hot water setting?
If your machine’s maximum temperature is 60°C or lower, you can still perform effective maintenance washes with slight adaptations.
Use the maximum available temperature, even if that’s only 60°C. Whilst 90°C provides better results, 60°C still kills most bacteria, dissolves soap scum reasonably well, and provides significant sanitising benefit. The key is consistency – regular maintenance washes at 60°C prove far more effective than sporadic cleaning at higher temperatures.
Increase frequency of maintenance washes to compensate for lower temperatures. If your machine maxes out at 60°C, run maintenance washes every 2-3 weeks instead of monthly. More frequent cleaning at moderate temperatures achieves similar results to less frequent cleaning at very high temperatures.
Check your manual carefully before assuming your machine can’t reach high temperatures. Some machines have maximum temperatures that aren’t immediately obvious on the main dial. Look for specific programmes labelled “Cottons” or “Whites” that might offer 90°C, even if the general dial only shows up to 60°C. Some machines require selecting a specific programme first, then adjusting temperature separately on a digital display. Others have a hidden temperature boost function activated by pressing multiple buttons simultaneously.
Use stronger cleaning products to compensate for lower temperatures. Commercial washing machine cleaners with multiple active ingredients work harder than simple powder detergent. Products specifically formulated for lower temperature effectiveness exist – look for cleaners labelled as working at 60°C.
Consider the double wash approach. Run two consecutive maintenance washes at your maximum temperature. The first cycle loosens buildup, the second removes the dislodged residue. This sequential cleaning compensates somewhat for lower individual cycle temperatures.
Cold-fill only machines (which is most UK washing machines manufactured recently) heat water internally rather than receiving hot water from your home’s hot water system. This makes no difference to maintenance wash effectiveness. The machine will heat to whatever temperature you select, whether that’s 60°C or 90°C. Heating takes longer than filling with pre-heated water, extending cycle time, but the final temperature is identical.
The main limitation is if your machine genuinely maxes out at 40°C or lower, which is extremely rare. Such machines really struggle with effective maintenance washes, though regular use of strong commercial cleaners helps. Fortunately, almost all washing machines sold in the UK offer at least 60°C settings, which is adequate for maintenance purposes.
Do I need to run a maintenance wash on a brand new washing machine?
Yes, though for slightly different reasons than with an established machine, and with different timing.
Before first use, run one empty hot cycle without clothes to remove manufacturing residues. Washing machine factories leave protective coatings, lubricants, oils, and general manufacturing debris inside machines. New machines also accumulate warehouse dust during storage and shipping. Running an initial cleaning cycle rinses away these substances before they transfer to your first load of clothes. Nobody wants factory residue on their clean laundry.
Most manufacturer instruction manuals actually specify this initial cleaning cycle during setup, though many people skip it in their eagerness to start washing. Take the time to do it properly. Add a small amount of powder detergent or a washing machine cleaner tablet, select a hot cycle (60°C is sufficient for initial cleaning, though 90°C works fine too), and run it completely empty. This installation wash also tests all machine functions before you entrust your clothes to it.
After the initial clean, begin your regular monthly maintenance schedule from the first month of use. Don’t wait until you notice smells or problems developing. Prevention is far easier than cure. Some people assume new machines don’t need maintenance for the first year or two, but buildup begins immediately with first use. Soap residue, fabric softener deposits, and bacterial colonies don’t wait for your machine to age before establishing themselves.
Your brand new machine will obviously need less intensive maintenance than a neglected five-year-old one. The monthly maintenance washes take minimal effort when starting from a clean baseline, preventing the heavy contamination that requires multiple intensive cleaning cycles to resolve later.
Think of it like dental hygiene. You wouldn’t wait until you develop cavities before brushing your teeth. Similarly, don’t wait until your machine smells before starting maintenance washes. Establish good habits from day one, and your machine will reward you with 15+ years of reliable, fresh-smelling service.
You May Also Like
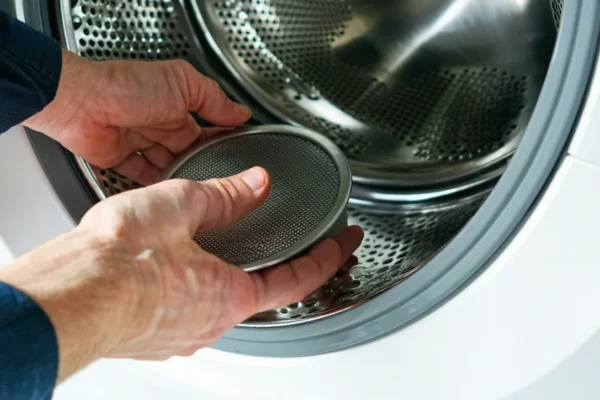
How to Clean Washing Machine Filter: Complete Guide 2026

How to Clean Artificial Grass: Complete Maintenance Guide