Streaks come from three things: water that dries too fast, minerals or cleaner left behind, and a dirty or linty cloth. Clean glass that is out of direct sun, use as little cleaner as will do the job, finish with a squeegee or a clean dry microfibre cloth, and use distilled water in hard water areas. That covers almost every streaky window, and the rest of this page is the detail, from method to fixes for marks that will not budge.
Plan on about 15 to 30 minutes a window the first time, less once you have a rhythm. You need little: a few microfibre cloths, a spray bottle, a squeegee if you want one, and something to dust the frames first. Skim the quick facts below, or jump to the part you need.
- Best conditions: dry, mild, overcast or shaded glass that is cool to the touch.
- Cleaner: a few drops of washing-up liquid in water, a half and half vinegar and water spray, or a shop-bought glass cleaner. Use less than you think.
- Water: distilled if your tap water is hard.
- Finish: squeegee, or a fresh dry microfibre cloth. Never paper towel.
- Check: from a few angles, and against something dark.
Disclosure: Cleaners Guide is a participant in the Amazon Associates programme, so if you buy through links on this page we may earn a small commission at no extra cost to you. It never changes our recommendations, we suggest products because they work and we point out cheaper options where they do the same job. Prices and availability change, so always check the current price before buying.
Why windows streak in the first place
A streak is a thin deposit that catches the light. It is either what was dissolved in the water you used, or the cleaner you applied and did not remove, or fibres and grease your cloth carried across. Knowing which one helps you fix it, because they need different cures.
| Cause | What you see | Why it happens |
|---|---|---|
| Hard water minerals | White, slightly rough spots or a chalky haze | Water evaporates and leaves calcium and magnesium behind. Tap water in much of the UK is moderately to very hard |
| Too much cleaner or soap | A film or haze that shows at certain angles | Surfactants stay on the glass and form a thin layer you cannot wipe off with a damp cloth |
| Drying too fast | Streaks that follow your wiping strokes | Hot glass in sunshine dries the solution before you can lift it |
| Dust turned to mud | Smears and grey trails | Dry dust meets liquid and becomes a paste that you spread |
| Dirty cloth or squeegee blade | Lines, dots, fine scratches | Grit and grease on the tool are carried onto the glass |
| Linty cloth or paper | Tiny fibres, sparkly bits | Cheap cloths and paper shed as they dry |
| Old residue from earlier cleans | The same patch always streaks | Layers of product build up and need stripping, not more cleaning |
Notice that most causes are about technique, and none of them is solved by scrubbing harder. If streaks show only at certain angles, think residue. If they are white and rough, think minerals.
The kit, and what each piece is for
You do not need a professional bag of tricks. The comparison below shows the four things that make a measurable difference, and what each is best for. The links go to Amazon UK searches so that you can compare sizes and prices.
| Item | Best for | What to look for | Watch out for |
|---|---|---|---|
| A squeegee, such as a professional-style window squeegee or a standard one | Large panes and outside glass, where one pull removes most of the water | A straight, firm rubber blade, a comfortable handle, a blade about as wide as a normal pane (25 to 30 cm suits many windows). Spare blades are handy | The blade must be clean and undamaged. A nicked blade leaves a line every pass |
| Microfibre glass cloths | Frames, edges, small panes, and the final buff | Tight, low-pile weave marketed for glass or polishing, ideally in more than one colour so you can separate jobs | Wash without fabric softener, because it coats the fibres and reduces absorbency |
| A glass cleaner spray or window cleaner | Greasy film, kitchen windows, and quick jobs | Streak-free or low-residue wording, no strong fragrance, clear usage instructions | Do not mix with other products. Check the label if you have tinted film |
| Distilled water | Mixing cleaner and rinsing in hard water areas | Plain distilled or deionised water in a bottle you can pour from easily | It will not clean on its own, but leaves no minerals when it dries |
Everyday extras: a soft brush or dry duster for frames, a bucket or spray bottle, a dry towel for the sill, and a strip applicator or sponge if you prefer the wet-and-squeegee approach used on outside glass. Our guide to what window cleaners use goes into the professional set-up, and the best way to clean windows compares the main approaches. If you are choosing between cloth types, see microfibre vs cotton cloths.
A few things to avoid. Paper towels leave lint and tear when wet. Abrasive scourers, scouring powder and rough sponges scratch glass permanently. Old rags with fabric softener or grease on them smear. Newspaper has a following but leaves ink on frames and hands, and it only works as a dry buff. Cloths used for polish or cooking should not go near windows. After use, launder microfibre separately on a warm wash without softener, and see our washing machine cleaner guide if the machine itself needs a refresh before it takes a load of cloths.
The method, inside and out
Get ready
- Pick the moment. Cool, dry and overcast is ideal. If the sun is out, do the shaded side of the house first and work round with it, or choose early morning or evening.
- Protect the floor. Lay a towel along the sill and floor, because even a careful job drips.
- Clear the way. Move plants, ornaments and furniture back, and tie curtains out of the way. Curtains are due a wash anyway.
- Dry dust first. Vacuum or brush the frames, sills, corners and the glass itself, top to bottom. This stops mud forming. Take screens or insect mesh off, rinse or vacuum them, and let them dry completely before they go back.
- Clean the tracks and sills. Dirt on the frame runs onto clean glass. Our guide to cleaning window tracks shows how to do the channels properly.
- Pre-treat the stubborn bits. Bird droppings, sap and stickers need a few minutes’ soaking with warm soapy water before you start.
Squeegee technique
Wet the glass evenly with your cleaning solution, using a sponge, strip applicator or spray. Wipe the squeegee blade on a clean cloth, then set it against the glass at a slight angle at the top corner. Pull it across in one steady stroke, keeping the blade in contact. Wipe the blade on the cloth, then start the next stroke slightly overlapping the last, working down the window. Finish with a pass along the bottom edge to pick up what has run down. Dry the edges and the sill with a cloth straight away, because the water that pools there will dribble back down a clean pane.
Wipe the blade every stroke, or the dirty water you pulled off goes back onto the glass. If you feel the blade skipping, it is dry or dirty. Apply more solution or clean the blade. Smaller panes in a window with bars are easier with a cloth.
Cloth technique
Fold a damp microfibre cloth into a pad. Wipe the glass in an S shape from top to bottom with light pressure, turning the pad to a clean face as it picks up dirt. Straight overlapping lines are easier to keep consistent than circles. Straight away, follow with a second, dry microfibre cloth, buffing in the same pattern. Two cloths is the secret: one lifts the dirt, the other removes the moisture.
Inside glass
Inside windows usually carry fingerprints, condensation film and cooking grease, not weather dirt. Spray a small amount of cleaner onto the cloth rather than the window, which stops it running into the frame, and wipe. Mind the top edge of the frame and the sill, which hold dust that will drop onto the glass. A kitchen window may need a stronger first pass to cut the grease film, then a rinse and dry.
Outside glass
Outside windows take weather. Rinse or brush away loose grit first, so you do not rub it across the glass. Wash frames and sills first, then the glass, using plenty of solution. Let it sit for half a minute on dirty patches, then scrub with a damp sponge or applicator, and squeegee or wipe off. Work one window at a time, because breezy conditions dry the glass fast. Never lean out of an upper window and never work from an unstable ladder. If it is above ground floor level and you cannot reach safely from inside or with a pole from the ground, leave it to a professional with proper equipment.
The whole routine in order
For a typical window, this is the sequence that gives the fewest second attempts.
- Dust the frame, sill and glass dry, top to bottom.
- Wipe the frame and sill with a damp cloth so they cannot drip onto clean glass.
- Apply solution to one pane only: a light, even wetting. On a cloth job, damp the cloth, not the window.
- Loosen stuck-on marks with a gentle rub or a few extra seconds of contact time. Do not dig at them while they are dry.
- Remove the liquid in one go: squeegee strokes from the top, or an S pattern with a damp cloth.
- Dry the edges, corners and sill straight away.
- Buff with a clean dry cloth if there is any haze left.
- Check from two or three angles before moving to the next pane. It is far quicker to fix a pane while the cloth is still in your hand.
If you have a lot of windows, break the job into zones. Do the busiest ones (kitchen, patio doors, a child’s room) more often, and the rest on a seasonal cycle. This spreads the effort, and no single window gets so dirty that it needs aggressive treatment. Change to a fresh cloth when the one you are using feels damp through, because a cloth that is saturated just moves water around.
Wet windows also look different from dry ones. Many streaks only appear as the last of the water dries, so give it a couple of minutes and look again before you declare victory. If the pane looks clear when wet but marked when dry, you have left something behind, usually cleaner, and the fix is a rinse with clean distilled water and a dry buff.
Habits that experienced cleaners rely on
- Wipe the blade on a damp cloth before the first pull, so it glides and picks up no dust.
- Use a lint-free cloth reserved for glass. The one you used on the kitchen worktop is not it.
- Do the top of each pane first so drips run onto dirty glass, not clean.
- Wear a small towel or cloth tucked into a belt or pocket, ready to catch drips and dry the blade.
- Keep the squeegee and cloths in a bucket or bag, so you are not hunting for them with wet hands.
These are standard habits of anyone cleaning a lot of glass, rather than secrets. Their value is that they cut down the little corrections that eat up time.
Check, and find which side the streak is on
Step back and look from different angles and in changing light. A sunny day shows everything, a dark bin bag or a piece of black card held behind the glass makes streaks stand out. To work out which side a streak is on, the trick is to clean the inside in horizontal strokes and the outside in vertical ones. When you see a horizontal streak, it is on the inside, and when it is vertical, it is outside. Buff any marks away with a clean dry cloth.
Cleaners that work, and a few that do not
Most households can choose between three simple options. Read each recipe as a guide rather than a rule. The aim is always the thinnest film of cleaner you can get away with.
A few drops of washing-up liquid
Use about two or three drops in a bucket of warm water, around five litres. A bucket that is frothy is too strong. This is the best choice for grimy outside glass, sap and bird mess. Rinse with a second pass of clean water, then squeegee or dry. Too much soap is the single biggest cause of film.
White vinegar and water
Equal parts white vinegar and water in a spray bottle is a cheap, popular choice. Vinegar is a mild acid, so it dissolves mineral deposits and cuts light film, and it dries without leaving much behind. Use distilled water to mix it if your tap water is hard. It is fine for most glass, but keep it off natural stone sills, marble and limestone, and wipe it off rubber seals rather than letting it sit. If the smell bothers you, open a window while you work, it fades as it dries.
Why does vinegar suit glass? It is a weak acid, so it dissolves the alkaline mineral deposits that tap water leaves, and it dries cleanly without a perfumed film. It also has a mild effect on grease, but not a strong one, so a really oily kitchen window may need a few drops of washing-up liquid first. If you want less smell, you can let the cloth do most of the work with a lighter spray. Essential oils are an optional extra rather than a cleaning aid, and some can leave an oily film on glass, so we would skip them.
Shop-bought glass cleaner
Sprays made for glass work well and are quick. Good ones evaporate evenly and leave little behind. Use the amount on the label, which is usually small. See glass cleaner sprays if you want to compare. Avoid products with oils, waxes or silicones for windows that need a clear finish, since they can leave a smear.
Isopropyl alcohol mixes
A mix of roughly equal parts water and isopropyl alcohol with a splash of vinegar dries fast and does not freeze easily, which helps in cold weather and on greasy glass. Do not use it on tinted film, coated glass or plastic and acrylic panes unless the manufacturer says it is safe, and keep it away from flames, ventilated, and out of reach of children.
What we do not recommend
We would not suggest mixing ammonia into a window solution at home. Ammonia fumes are harsh, it can irritate skin and airways, and it can damage tinted film. It is dangerous to combine with bleach, which releases toxic gas. Our list of products you should never mix explains why. Cornstarch mixes and scouring powders do little for streaks and can scratch or leave residue, so we would skip them.
To sum up: for regular cleaning, a vinegar spray or a good commercial glass cleaner is fine. For dirty outside glass, a few drops of washing-up liquid. For a stubborn film, plain distilled water and a clean cloth. And keep a small spray of 50/50 vinegar and distilled water handy for quick touch-ups between proper cleans.
Timing, weather and how often
Glass heated by the sun can dry a spray in seconds, so you are baking residue on before you can wipe it. A mild day, between about 10 and 20 degrees, is comfortable to work in, while sun or wind can speed drying. Clean on a cool morning or evening if you can. Below about 5 degrees water can freeze on the glass or in the corners before you wipe it, so add a little isopropyl alcohol to the mix on cold days, or leave it until it is milder. A light shower afterwards will not ruin a good clean, but heavy rain with dirty runoff might.
| Situation | A sensible rhythm |
|---|---|
| Typical UK home | Outside twice a year, say spring and autumn, inside as it gets smeary |
| Busy road, traffic film | Every couple of months, as it builds up |
| Near the sea | More often, because salt spray dries to a crust |
| Under trees or near fields | Extra in pollen season, and after leaf fall in autumn |
| Kitchen and patio doors | Quick inside wipe whenever grease or fingerprints show |
| Children and pets | Quick wipes at nose and paw height |
| Time of year | Typical problem | What to do |
|---|---|---|
| Spring | Pollen film and winter grime | Do the main outside clean once the worst of the pollen has settled, then touch up |
| Summer | Insects, open-window smears, suncream fingerprints | Quick inside wipes, outside only in shade |
| Autumn | Wet leaves, tannin marks, shorter days showing every mark | Clear leaves and gutters, then a full clean before winter |
| Winter | Condensation, low sun showing streaks | Wipe condensation, ventilate, and do inside glass on dry days |
Seasons bring their own dirt. In spring, pollen leaves a sticky yellow film. In summer, insects and open-window smudges. In autumn, wet leaves can leave brown tannin marks, so clear them from sills and frames. In winter, condensation on windows can cause mould on frames, which then marks the glass, so ventilate. You can also keep glass cleaner longer with some small habits: clean sills weekly, keep gutters clear (see our guide to cleaning gutters without a ladder), trim plants back from the glass, and wipe fresh marks within a day or two.
Eight mistakes that guarantee streaks
Most people make at least a few of these without realising. Check your routine against the list.
Cleaning in direct sun
Warm glass dries solution faster than you can work. The residue that is left bakes on and is harder to shift than the original dirt. If the glass feels warm to the back of your hand, wait, or move to the shaded side of the house.
Using too much cleaner
More product does not mean cleaner glass. The excess forms a film that you cannot wipe off with a damp cloth, and it shows up at angles in low sun. A few light sprays per pane is usually plenty. For a bucket, your applicator should be damp, not dripping. If you suspect you overdo it, halve the amount.
Reaching for paper towels
Kitchen roll sheds fibres, breaks up when wet and does not absorb well enough to take away the last of the water. A few good microfibre cloths last for years, wash easily and perform better. Keep them for glass.
Skipping the dry dust
Wetting dusty glass produces mud. It only takes thirty seconds with a brush or a vacuum nozzle to avoid it. Work from top to bottom, and do the corners and frames too.
Hard tap water
If your kettle furs up, your tap water is hard, and mixing cleaner with it or rinsing with it leaves minerals behind. Using distilled water for the final rinse, or in your spray bottle, takes that out of the picture. It is cheap and a bottle goes a long way when used only on windows. Cold tap water is a reasonable compromise in a softer water area.
Letting the cleaner dry
A phone call or a distraction and the spray dries on the pane. Dried cleaner forms a film which needs a clean-off pass before you can do the proper one. Work one pane at a time and do not spray the next until you have finished the last.
Dirty tools
A squeegee blade that has picked up grit, a cloth that is already dirty and a bucket of grey water will each put dirt back on the glass. Rinse the blade, swap cloths when damp, and change the water midway through a big job.
The wrong stroke
Rubbing in small circles with a loaded cloth leaves swirls. Use straight overlapping strokes or an S pattern, with light pressure. Circular buffing is fine only for the last dry polish, when there is no liquid left to spread.
A word on condensation. Windows that run with water on winter mornings are telling you about the room, not the glass. Wipe the pane and frame with a dry cloth to stop mould starting in the corners, ventilate when cooking or drying washing, and leave trickle vents open if you have them. Mould on seals needs its own cleaning, and our guide to what kills mould explains the options.
Different glass, different care
Double glazing
The surface technique is the same, and our double glazed windows guide goes into frames and vents. If you see misting or droplets between the panes, the sealed unit has failed, so no cleaning will fix it and the unit will need replacing. Keep solution from pooling around the rubber gaskets and seals, and wipe it off the frames.
Tinted film and coated glass
Window film is usually applied to the inside surface, and ammonia, harsh solvents and abrasive tools can damage it. New film also needs time to cure, so ask your installer when it is safe to clean. Use a soft cloth and a mild, ammonia-free cleaner, or the maker’s recommendation. Self-cleaning glass and other coated glass often carry specific advice from the supplier, such as avoiding abrasive pads and silicone-based cleaners, so check before you assume.
New windows and frames
New windows often arrive with protective film on the glass or frames, and installers may leave adhesive or plaster dust. Peel the film as the installer instructs, and ask when it is safe to clean the glass, particularly if there is a coating or film. Clean frames at the same time as the glass. uPVC frames take a damp cloth with a few drops of washing-up liquid. Wooden frames should not be soaked, and painted ones need only a damp cloth. Aluminium frames can be wiped with a mild cleaner, and white oxidation from old aluminium frames can run onto the glass, so clean the frames first and rinse before you start on the glass. Avoid scouring powder, which scratches frames, and keep strong solvents off them.
Kitchen windows
Cooking leaves a thin, sticky layer of grease that spreads into a haze. Plain vinegar spray struggles with it, so start with warm water and a few drops of washing-up liquid on a cloth, wipe, then rinse with a cloth wrung out in clean water, and finish with your usual dry buff. A kitchen window near the hob may need this monthly. The extractor fan helps by pulling steam and fat out before they settle, which is another reason to keep its filters clean.
Patio doors, conservatories and skylights
Large sliding doors collect fingerprints at hand height and on the handles, so wipe those most often. A conservatory roof and skylights are the same glass but harder to reach and unsafe to walk on, so do not climb on them. Clean from inside with a pole, or from the outside only with proper roof-access equipment, and use a professional if you cannot reach safely. Some conservatory roofs use polycarbonate rather than glass, which scratches easily and should only be cleaned with soft cloths and mild soapy water.
Screens, mesh and the things around the window
Insect screens and mesh trap dust and drip it onto the glass when it rains. Vacuum them, wash with mild soapy water if needed and let them dry fully before refitting. Curtains and blinds near the window carry dust that falls on the sill, so shake or vacuum them before you start. Net curtains need washing too, see our guide to cleaning net curtains.
Frosted, patterned and leaded glass
Textured glass collects dirt in the grooves, so use a soft brush with a little solution, then rinse and dry well so nothing pools in the pattern. On leaded or stained glass, go gently around the lead, keep it damp not wet, and dry it quickly. Do not use acid or vinegar on the metal.
High windows
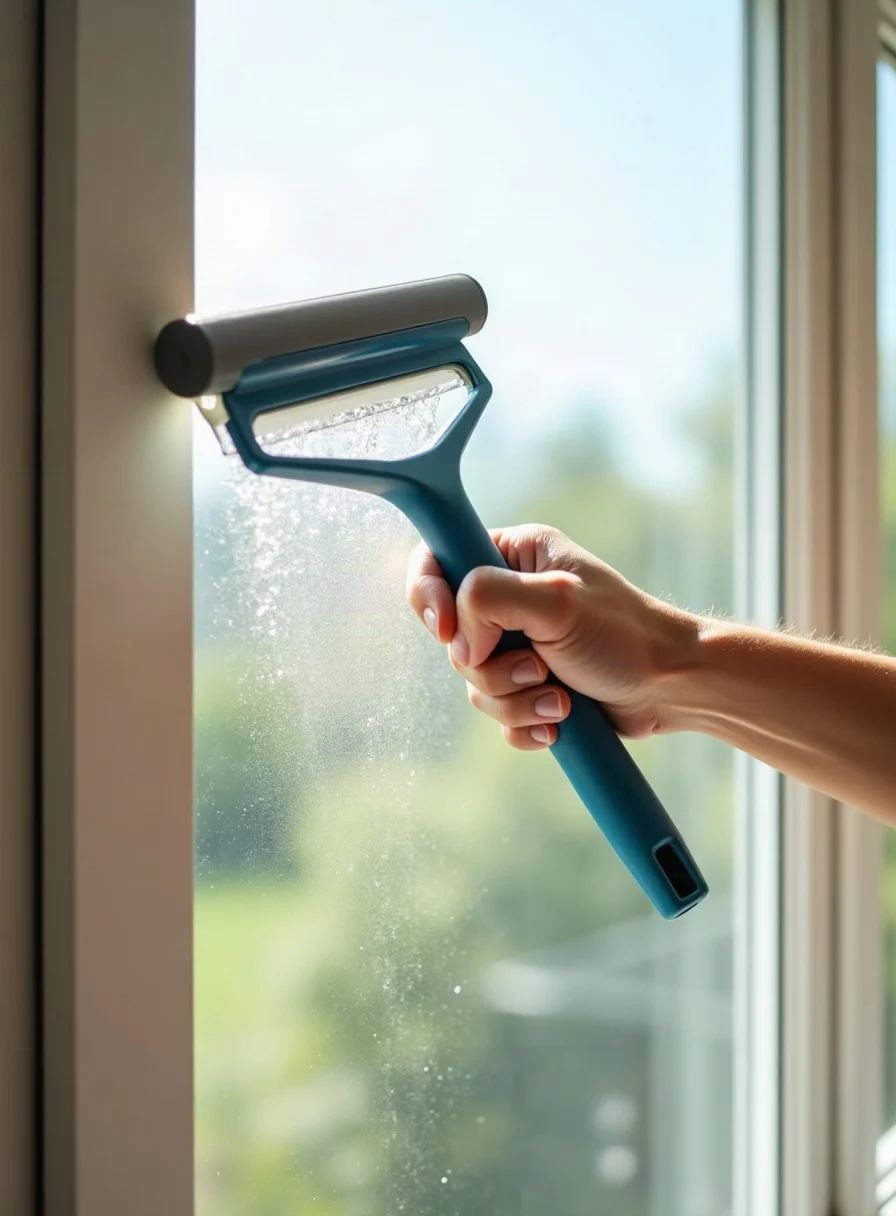
Reach them with a telescopic pole and squeegee head or a pole with a water-fed brush, from the ground. If the window is above the first floor, or you cannot get safe access, use a professional. A window vacuum, which squeegees and sucks up the water, helps with indoor panes and drips, but it is not essential.
Car windows
Car glass picks up a film from the dashboard and the air conditioning, so the inside often needs two passes. Use a lightly dampened microfibre cloth with a little glass cleaner or a vinegar spray, rubbing in small sections, then a clean dry cloth. Spray onto the cloth, not the glass, so that nothing drips into door panels or electronics. Use a separate cloth for glass, never one that has touched wax or polish. Wipe the wiper blades while you are there, because dirty blades smear the screen the first time it rains. Do not use the paper-towel approach, and do not use ammonia cleaners on tinted car windows.
When streaks will not go away
| What it looks like | Probably | Try this |
|---|---|---|
| White, rough spots or haze | Mineral deposits from hard water | Spray neat white vinegar, leave 5 to 10 minutes, rub gently with a cloth, rinse with distilled water, and dry |
| A film that catches light, a draggy feel | Cleaner residue | Go over it with plain distilled water and a fresh cloth. Repeat. Then dry with a clean cloth |
| Streaks that vary with the angle | Fine residue or minerals | Distilled water first. If it persists, a weak vinegar mix of one part vinegar to four parts water, then dry |
| The same patch always streaks | Layers of old product | Strip it: wipe with neat vinegar, rinse with distilled water, let it dry fully, then clean lightly |
| Cloudy edges next to metal frames | Frame oxidation transferring to the glass | Clean the frame first, then the glass, repeating if needed |
| Hazy even after all this | Etched or damaged glass or a failed coating | Cleaning will not fix it. Ask a glazier |
For a stubborn mineral deposit on plain glass, a paste of bicarbonate of soda and a little water, rubbed on gently with a damp cloth, is a mild abrasive that will not scratch like a scourer. Rinse thoroughly. A limescale remover made for kettles or showers can also work, provided you follow the label, keep it off frames and seals, and rinse well. Some people use very fine steel wool on plain glass. We would avoid it, because a speck of grit can scratch glass permanently and it should never go near coated, tinted or self-cleaning glass. A plastic scraper is a safer way to lift dried paint spots, adhesive and stickers, and a new razor scraper used flat on plain glass can lift paint spots, but never on coated glass.
Work through one fix at a time, and let the glass dry between steps, so you know what worked. If one particular window always streaks whatever you do, it may have an old coating or film breaking down, or failed seals letting moisture in, and is worth asking a glazier to look at.
Specific marks, and how to treat them
| Mark | What usually works | Caution |
|---|---|---|
| Bird droppings | Soak with warm soapy water for a few minutes, then wipe off with a cloth. Wash hands afterwards | Do not scrape them dry, as they can contain grit |
| Tree sap | Soften with a cloth wetted with washing-up liquid solution; a little isopropyl alcohol on a cloth can help on plain glass | Test on frames and seals, and keep alcohol away from plastics |
| Water-based paint spatters | Warm soapy water, then lift with a plastic scraper held flat | Do not use a metal blade on coated glass |
| Gloss or oil-based paint spots | Methylated spirits or white spirit on a cloth, following the product’s label; ventilate well | Test on the frame first, because solvents can mark uPVC and paint |
| Sticker or tape residue | Warm soapy water, then a little isopropyl alcohol or a dab of cooking oil to soften, then wash again | Wash oil off thoroughly so it does not smear |
| Smoke, nicotine or kitchen grease | Warm water with a few drops of washing-up liquid, then rinse with clean water | Needs two passes, so do not give up after one |
| Insect splatter | Soak with a wet cloth on top for a couple of minutes, then wipe | Do not rub dry |
Whenever you use a solvent, ventilate the room, keep it away from heat and flames, and put used cloths out to dry flat in the open air before washing or binning them.
Looking after your tools
Tools are part of the result. Rinse the squeegee blade and dry it, and store it with the blade off the bench so the edge does not curl. Replace blades when they nick, harden or leave a line on every pass. Wash microfibre cloths separately from towels and fluffy items, at a warm temperature without fabric softener, and let them air dry. Throw out any that have gone stiff or greasy. Empty and rinse spray bottles occasionally so old product does not build up in the nozzle, and label them, especially any that contain a mix, so nobody mistakes them for something else.
Tricks that do help
- Wipe the squeegee blade with a damp cloth before the first pull so it glides and picks up no dust.
- Buff the last marks with a dry microfibre cloth, and some people use a lint-free paper coffee filter for the final polish.
- Work one pane at a time, so nothing dries before you reach it.
- Keep a bucket of clean water to rinse the cloth between windows, and change it when it turns grey.
- Clean the tracks and frames first, so dirty water does not run over finished glass.
Three quick questions
Is newspaper really good for cleaning windows?
It can work as a dry buff because plain newsprint is not fluffy, but modern newsprint leaves ink on hands and white frames, and it does nothing a clean microfibre cloth does not do better. If you want to try it, use plain pages only, for dry glass, and wear gloves. Paper coffee filters are a cleaner alternative for the final polish.
Is vinegar safe on every window?
On normal glass, yes, diluted. Keep it off natural stone sills such as marble and limestone, which it etches, and wipe it off rubber seals and metal lead rather than leaving it to sit. Check the supplier’s advice for tinted film, coated or self-cleaning glass before using it, and never mix it with bleach or ammonia.
Is a window vacuum worth buying?
It suits people with a lot of glass, or who want drip-free results indoors, because it squeegees and collects the water in one pass. It needs charging and the cost is higher than a squeegee, so it is hard to justify for a couple of windows twice a year. A good squeegee and clean cloths will give the same result with a bit of technique.