How to Clean Air Fryer Heating Element: Complete Guide 2026
How to clean air fryer heating element requires careful attention to safety and proper technique to maintain your appliance’s performance. The heating element, typically located at the top of your air fryer’s cooking chamber, accumulates grease and food particles over time. Regular cleaning prevents smoke, unusual odors, and ensures optimal cooking results.
Most air fryer heating elements need cleaning every 5-10 uses or when you notice visible residue buildup. The process involves using gentle cleaning solutions like baking soda paste and avoiding harsh chemicals that could damage electrical components. Different brands like Ninja, Philips, and Tower have specific design considerations that affect cleaning approach.
Proper maintenance extends your air fryer’s lifespan and prevents costly repairs. Additionally, keeping kitchen appliances clean is part of comprehensive home maintenance, similar to deep cleaning your entire kitchen for optimal hygiene and performance.
TL;DR
- Always unplug and cool your air fryer for 30+ minutes before cleaning the heating element
- Use baking soda paste and soft brushes – never harsh chemicals or abrasive materials
- Clean every 5-10 uses or when you notice grease buildup, smoke, or unusual odors
- Different brands require specific techniques: Ninja focuses on fan areas, Philips on starfish-shaped elements
Safety Precautions Before Cleaning Your Air Fryer Heating Element
Proper safety measures prevent electrical accidents and protect your air fryer from damage during heating element maintenance. These precautions ensure safe cleaning practices while preserving your appliance’s warranty coverage.
Critical Safety Warning
Essential Pre-Cleaning Steps
Always unplug your air fryer from the electrical outlet before beginning any cleaning process. Furthermore, allow the appliance to cool completely for at least 30 minutes after cooking. The heating element reaches temperatures exceeding 200°C during operation, making immediate cleaning dangerous.
Check that all internal components have returned to room temperature before proceeding. Additionally, remove the basket and any accessories to provide clear access to the heating element area. This cooling period prevents thermal shock to electrical components and protects your hands from burns.
Water and Electrical Component Safety
Never submerge electrical components in water or allow liquid to pool around the heating element housing. Water infiltration can damage internal wiring and create serious electrical hazards. Instead, use damp cloths for cleaning while keeping moisture away from electrical connections.
Avoid spraying cleaning solutions directly onto the heating element or surrounding electrical areas. Moreover, ensure your hands are completely dry when handling the air fryer during cleaning. This practice prevents accidental electrical contact and maintains safe cleaning conditions.
Cleaning Material Restrictions
Harsh abrasive cleaners and steel wool damage heating element coatings and reduce appliance efficiency. These materials can scratch protective surfaces and create areas where food particles accumulate more easily. Use only soft brushes, microfiber cloths, and gentle cleaning solutions like baking soda paste.
Chemical oven cleaners contain caustic ingredients that can corrode heating elements and void manufacturer warranties. Similarly, avoid bleach-based products that may leave harmful residues on cooking surfaces. Stick to food-safe cleaning methods that protect both your appliance and your health.
Manufacturer Warranty Considerations
Review your warranty guidelines before attempting heating element cleaning to avoid voiding coverage. Many manufacturers specify approved cleaning methods and prohibited practices in their user manuals. Improper cleaning techniques can result in warranty claim denials for future repairs.
Document your cleaning routine with photos if warranty claims become necessary later. Some brands like Ninja and Philips provide specific cleaning instructions that differ from general guidelines. Following manufacturer recommendations protects your investment and ensures continued warranty protection.
- Unplug and cool for 30+ minutes before any cleaning attempt
- Keep water away from electrical components to prevent damage and hazards
- Use only soft cleaning materials – no steel wool or harsh chemicals
- Check warranty terms before cleaning to maintain coverage
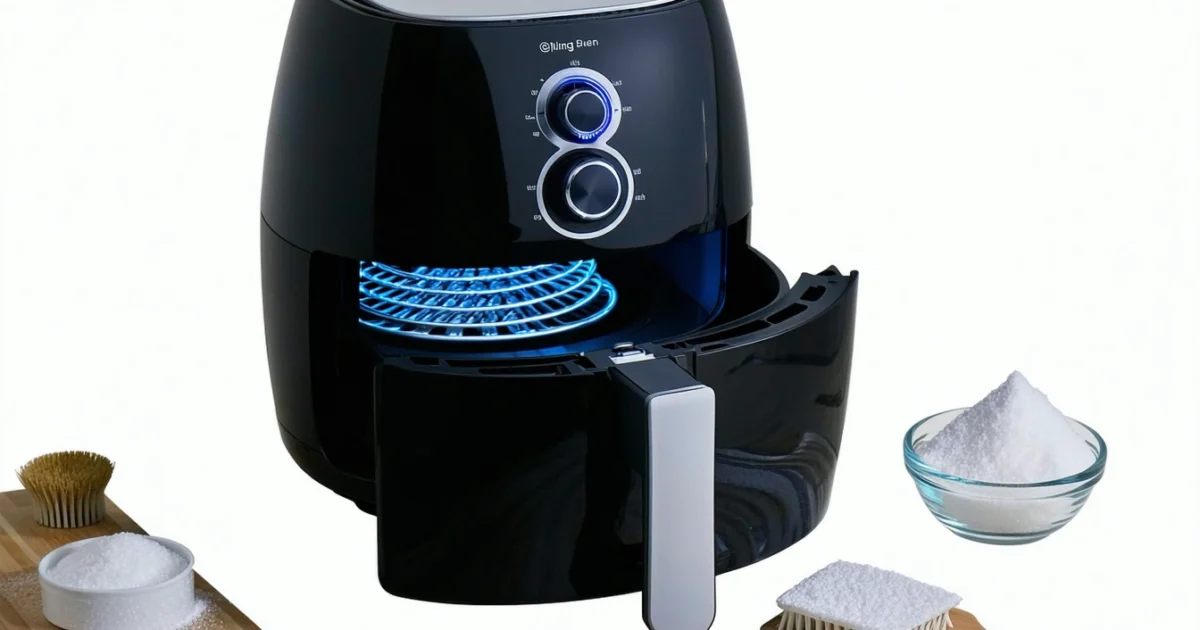
What You'll Need to Clean Your Air Fryer Heating Element
Gathering the right cleaning supplies ensures effective heating element maintenance without causing damage. Most cleaning materials are common household items that work safely on electrical components. However, selecting appropriate tools prevents scratches and corrosion that could affect your air fryer’s performance.
Essential Cleaning Tools
A soft-bristled brush or old toothbrush provides the ideal tool for removing stubborn food particles from heating element surfaces. These brushes reach into crevices without scratching delicate coatings that protect the heating components. Additionally, the bristles dislodge grease buildup effectively while maintaining gentle contact with electrical parts.
Microfiber cloths or paper towels absorb cleaning solutions and wipe away loosened debris without leaving lint residue. Microfiber material traps particles more effectively than standard cloths, making it superior for final cleaning passes. Furthermore, these materials won’t scratch surfaces like rougher fabrics might.
Cotton swabs access tight spaces around heating elements where larger cleaning tools cannot reach. These precision tools remove grease from small gaps and corners with surgical accuracy. Moreover, cotton swabs allow controlled application of cleaning solutions to specific problem areas.
Natural Cleaning Solutions
Baking soda paste combines baking soda with water in a 3:1 ratio to create a mildly abrasive cleaning compound. This paste breaks down grease and food residue without harsh chemicals that could damage heating elements. The alkaline properties of baking soda neutralize acidic food particles that cause stubborn stains.
White vinegar solution mixed with water in equal parts dissolves mineral deposits and cuts through grease buildup naturally. Vinegar’s acetic acid content makes it particularly effective against calcium and lime scale that accumulates on heating surfaces. This solution also eliminates odors that develop from repeated cooking cycles.
Basic dish soap and warm water provides gentle cleaning power for routine maintenance without aggressive chemicals. Dawn or similar grease-cutting formulas work best for removing cooking oils and food particles. This combination offers the safest cleaning method for regular heating element care.
Pro Tip
Preparation and Safety Items
Keep rubber gloves available to protect your hands from cleaning solutions and potential sharp edges inside the air fryer. Gloves also provide better grip when handling wet cleaning tools around electrical components. Safety should remain your top priority throughout the cleaning process.
Have clean, dry towels ready for immediate drying of any moisture that contacts electrical parts. Quick drying prevents water damage and reduces the risk of electrical shorts when you reconnect the appliance. These towels also help you maintain a clean workspace during the cleaning process.
Similar to maintaining other kitchen appliances, proper preparation ensures successful cleaning outcomes. The same attention to detail that applies to grill cleaning helps achieve optimal results with air fryer heating elements.
- Soft-bristled brush or old toothbrush for gentle scrubbing
- Microfiber cloths or paper towels for wiping and drying
- Baking soda paste (3:1 ratio with water) for stubborn buildup
- White vinegar solution (1:1 ratio with water) for grease cutting
- Dish soap and warm water for routine cleaning
- Cotton swabs for accessing tight spaces
- Rubber gloves for hand protection
- Clean, dry towels for immediate moisture removal
Step-by-Step Cleaning Process
Following a systematic approach ensures thorough cleaning while protecting your air fryer’s delicate heating element. This methodical process removes grease buildup, food particles, and odors without damaging electrical components. Proper technique prevents costly repairs and maintains optimal cooking performance.
Initial Disassembly and Access
Start by removing all removable parts including the basket, tray, and drip pan from your air fryer. These components should come out easily after the unit has cooled completely. Clean these parts separately in your sink while you focus on the heating element area.
Next, access the heating element located at the top of the cooking chamber in most air fryer models. The heating coil sits exposed above the cooking basket area, making it visible once you remove the basket. Some models feature protective guards around the element that require careful navigation during cleaning.
Debris Removal and Initial Cleaning
Begin by gently brushing away loose food particles and debris using a soft-bristled brush or clean toothbrush. Work systematically around the heating coil, paying attention to areas where grease typically accumulates. Avoid applying excessive pressure that could damage the delicate heating element.
Use cotton swabs to reach tight spaces around the heating element mounting points. These areas often trap small food particles that standard brushes cannot access. Furthermore, swabs allow precise cleaning without risking damage to electrical connections.
Deep Cleaning with Baking Soda Treatment
For stubborn grease spots, apply baking soda paste directly to affected areas and allow it to sit for 10-15 minutes. This alkaline paste breaks down cooking oils and carbonized food residue naturally. The waiting period allows the baking soda to penetrate and soften hardened buildup.
Create the paste using a 3:1 ratio of baking soda to water, mixing until you achieve a thick, spreadable consistency. Apply this mixture carefully around the heating element, avoiding direct contact with electrical connections. The paste works effectively on both fresh grease and older, baked-on residue.
Wiping and Residue Removal
After the treatment period, use a damp cloth to wipe away the paste and loosened grime from the heating element area. Work methodically to ensure complete removal of both the baking soda mixture and dissolved grease. Multiple passes may be necessary for heavily soiled areas.
Microfiber cloths work exceptionally well for this step because they trap particles effectively without scratching surfaces. Additionally, their lint-free properties prevent fabric residue from accumulating on the clean heating element.
Odor Elimination and Final Cleaning
For persistent cooking odors, wipe the area with vinegar solution using a 1:1 ratio of white vinegar to water. This acidic solution neutralizes odor-causing compounds while cutting through any remaining grease residue. The vinegar treatment also helps prevent future odor buildup.
Apply the vinegar solution sparingly using a well-wrung cloth to avoid excess moisture near electrical components. Work quickly and follow immediately with a dry cloth to remove any vinegar residue that could affect food flavors during future cooking sessions.
Drying and Reassembly
Most importantly, dry the heating element area thoroughly with a clean, lint-free cloth before reassembling your air fryer. Any residual moisture could cause electrical problems or create steam during the next cooking cycle. Pay special attention to crevices where water might collect.
Allow the unit to air dry for 15-20 minutes after wiping to ensure complete moisture evaporation. This drying period prevents water damage and ensures safe operation when you reconnect the appliance. Only reassemble the removable parts once you’ve confirmed the heating element area is completely dry.
Safety Reminder
Brand-Specific Cleaning Tips
Different air fryer manufacturers design their heating elements with unique configurations that require specific cleaning approaches. Understanding your appliance’s particular heating element structure ensures more effective cleaning while preventing damage to delicate components.
Ninja Air Fryers
Ninja air fryers feature upper heating elements positioned directly above the cooking chamber with integrated fan systems. Focus your cleaning efforts on the upper heating element and surrounding fan area where grease particles commonly accumulate during cooking cycles.
The fan blades in Ninja models collect cooking residue that can affect air circulation efficiency. Use a soft-bristled brush to gently clean between fan blades, working from the center outward to avoid damaging the motor assembly. Additionally, wipe the upper heating element coils with a damp microfiber cloth, ensuring you reach all exposed surfaces.
Philips Air Fryers
Philips air fryers incorporate a distinctive starfish-shaped heating element that creates multiple ridges and grooves where food particles can lodge. Clean this specialized element carefully around each ridge using cotton swabs dipped in warm soapy water.
The starfish design requires methodical cleaning to reach all surface areas effectively. Work systematically around each arm of the heating element, paying particular attention to the junction points where grease typically accumulates. Furthermore, the unique shape means cleaning takes longer than conventional coil elements, so allow extra time for thorough maintenance.
Tower Air Fryers
Tower air fryers utilize coil-style heating elements that spiral around the upper chamber interior. These coiled elements create multiple surfaces where cooking residue can accumulate, requiring careful attention to each coil section during cleaning.
Clean between the coil spaces using a narrow brush or pipe cleaner to remove trapped food particles. The coil configuration allows better access than some designs, but grease can still collect in the spiral grooves. Moreover, ensure you clean both the top and bottom surfaces of each coil for complete maintenance.
Cosori and Other Brands
Cosori air fryers and similar brands typically feature standard coil or bar-style heating elements that follow general cleaning principles. However, always consult your specific model’s manual for manufacturer-recommended cleaning procedures and safety precautions.
Most brands share similar heating element designs, but component accessibility and safety features vary significantly. Some models include removable heating element covers, while others require cleaning in place. Consequently, manufacturer guidelines provide essential information about disassembly procedures and cleaning limitations for your specific appliance.
Important Safety Note
Brand-specific cleaning approaches ensure you maintain your air fryer effectively while respecting design limitations. Following manufacturer guidelines protects your appliance investment and maintains optimal cooking performance across all heating element configurations.
Common Mistakes to Avoid
Proper heating element maintenance requires avoiding several critical mistakes that can damage your air fryer permanently. Understanding these common errors protects your appliance investment while ensuring safe cleaning practices throughout the maintenance process.
Chemical Cleaning Errors
Never use harsh chemicals like bleach, oven cleaner, or ammonia-based products on heating elements. These aggressive substances corrode metal components and leave toxic residues that contaminate food during cooking. Furthermore, chemical cleaners create dangerous fumes when heated, posing serious health risks.
Stick to mild dish soap, baking soda, or white vinegar for safe cleaning alternatives. These gentle solutions effectively remove grease and food residue without damaging delicate heating element surfaces or compromising food safety standards.
Moisture and Electrical Safety
Don’t spray cleaning solutions directly onto the heating element or surrounding electrical components. Direct spraying causes moisture to penetrate electrical connections, potentially creating short circuits or permanent appliance damage. Instead, apply cleaning solutions to your cloth or brush before wiping the element.
Additionally, avoid excessive moisture that could seep into electrical housings or control circuits. Water and electricity create dangerous combinations that can cause electrical shock, fire hazards, or complete appliance failure. Always wring out cleaning cloths thoroughly before use.
Safety Warning
Physical Damage Prevention
Don’t force or bend the heating element during cleaning, as these components are designed for specific positioning and alignment. Bending coils or bar elements disrupts heat distribution patterns and can cause permanent performance issues or complete element failure.
Use gentle pressure when cleaning around heating elements, allowing your brush or cloth to follow the natural contours. Aggressive scrubbing damages protective coatings and creates scratches where food particles accumulate more easily in future cooking sessions.
Timing and Temperature Mistakes
Never attempt cleaning immediately after cooking when elements remain hot. Hot surfaces cause cleaning solutions to evaporate rapidly, reducing effectiveness while creating potential burn hazards. Moreover, rapid temperature changes from cool cleaning solutions can crack or warp heating elements.
Allow your air fryer to cool completely for at least 30 minutes after use before beginning any cleaning procedures. This cooling period ensures safe handling while preventing thermal shock damage to sensitive electrical components.
Similar cleaning principles apply to other kitchen appliances requiring careful maintenance. For comprehensive appliance care guidance, consider exploring deep kitchen cleaning techniques that cover multiple appliance types safely.
How Often to Clean Your Air Fryer Heating Element
Establishing a proper cleaning frequency for your air fryer heating element ensures optimal performance while preventing grease buildup that can cause smoke and unpleasant odors. Regular maintenance schedules vary based on usage patterns, cooking habits, and the types of foods you prepare.
Light Cleaning Schedule
Perform light cleaning after every 5-10 uses to maintain your heating element’s efficiency. This frequency works well for typical household usage involving standard foods like vegetables, chicken, or frozen items that don’t produce excessive grease splatter.
Light cleaning involves wiping down accessible surfaces with a damp cloth and checking for visible residue accumulation. During this routine maintenance, inspect the heating element for any food particles that may have adhered during recent cooking sessions.
Deep Cleaning Requirements
Monthly deep cleaning becomes necessary for most users, though heavy usage may require more frequent attention. Deep cleaning addresses accumulated grease, stubborn residue, and areas that light cleaning cannot reach effectively.
Additionally, perform deep cleaning whenever you notice significant grease buildup, regardless of timing. Grease accumulation varies dramatically based on cooking frequency and food types, making visual inspection more reliable than strict scheduling.
Immediate Cleaning Situations
Clean your heating element immediately if food splatters directly onto the surface during cooking. Fresh splatters remove more easily than dried residue, preventing permanent staining and reducing cleaning effort required later.
Similarly, address spills or drips that reach the heating element area promptly. Immediate attention prevents these substances from carbonizing onto hot surfaces, which creates stubborn buildup requiring intensive cleaning methods.
Warning Signs Requiring Attention
Several clear indicators signal that your heating element needs cleaning attention. Smoke production during preheating often results from grease or food particles burning on the element surface.
- Unusual odors during operation, particularly burning or rancid smells
- Visible residue accumulation on element surfaces
- Reduced heating efficiency or longer preheating times
- Food particles stuck to element coils or surfaces
These symptoms indicate that cleaning frequency should increase until normal operation resumes. Ignoring these warning signs can lead to permanent damage or safety hazards.
Usage-Based Cleaning Adjustments
Heavy users who cook daily may need to clean their heating elements every 3-5 uses, particularly when preparing greasy foods like bacon, sausages, or marinated meats. These foods produce more splatter and residue than standard cooking.
Conversely, occasional users who cook primarily vegetables or lean proteins can extend cleaning intervals to every 10-15 uses. However, even light users should perform monthly inspections to ensure no hidden buildup has occurred.
For comprehensive kitchen appliance maintenance, similar cleaning principles apply to other cooking equipment. Proper grill cleaning techniques demonstrate how regular maintenance prevents buildup and ensures optimal performance across different cooking appliances.
Troubleshooting: When Your Heating Element Won't Come Clean
Sometimes standard cleaning methods fail to remove stubborn buildup from your air fryer’s heating element. Carbon deposits and baked-on grease require specialized techniques to restore your appliance’s performance without causing damage.
Removing Stubborn Carbon Deposits
For persistent carbon buildup that resists regular cleaning, a plastic scraper provides gentle mechanical removal without scratching the element surface. Never use metal scrapers or abrasive tools, as these can damage the protective coating on heating elements.
Additionally, create a paste using baking soda and water to tackle tough deposits. Apply this mixture to cooled elements, allowing it to sit for 15-20 minutes before gently scrubbing with a soft-bristled brush. The alkaline properties of baking soda help break down acidic grease residues effectively.
Steam Cleaning Method for Deep Cleaning
Steam cleaning offers a powerful solution for loosening stubborn residue without harsh chemicals. Place a heat-safe bowl filled with water in your air fryer basket, then run the appliance at 200°F (93°C) for 3-5 minutes.
This process generates steam that penetrates and softens hardened grease deposits. After the cycle completes, immediately clean the warm elements using a damp cloth or soft brush. The combination of heat and moisture makes removal significantly easier than cold cleaning attempts.
Safety Reminder
When to Contact Customer Service
Certain situations require professional intervention rather than continued DIY cleaning attempts. Contact your manufacturer’s customer service when buildup persists despite multiple cleaning sessions using appropriate methods.
- Heating element shows discoloration that won’t clean off
- Strange electrical smells persist after thorough cleaning
- Element appears bent, cracked, or physically damaged
- Appliance under warranty experiencing performance issues
Professional cleaning services specialize in appliance maintenance and possess tools unavailable to home users. Furthermore, attempting aggressive cleaning on warranty-covered appliances may void coverage if damage occurs during the process.
Signs of Heating Element Damage
Recognizing heating element damage prevents safety hazards and determines when replacement becomes necessary. Visual inspection reveals several critical warning signs that indicate professional assessment or replacement requirements.
| Damage Type | Visual Signs | Action Required |
|---|---|---|
| Physical Damage | Cracks, breaks, or bent coils | Immediate replacement |
| Corrosion | Rust spots or white deposits | Professional assessment |
| Coating Loss | Exposed metal or flaking surface | Replacement recommended |
| Electrical Issues | Sparking or burning smells | Stop use immediately |
Moreover, performance indicators often signal element deterioration before visible damage appears. Uneven heating patterns, significantly longer preheating times, or complete heating failure indicate internal element problems requiring professional diagnosis.
When replacement becomes necessary, consult your appliance manual for compatible part numbers. Many manufacturers offer replacement elements, though professional installation ensures proper electrical connections and safety compliance. For comprehensive appliance maintenance guidance, deep kitchen cleaning techniques provide additional insights for maintaining cooking equipment effectively.
Frequently Asked Questions
Do air fryer elements need cleaning?
Yes, air fryer heating elements require regular cleaning to maintain optimal performance. The heating element accumulates grease, food particles, and residue over time, which can cause smoke, unusual odors, and reduced cooking efficiency. Clean your heating element every 5-10 uses or whenever you notice visible buildup to prevent these issues.
How do you clean a fryer heating element safely?
To clean an air fryer heating element safely, first unplug the appliance and allow it to cool for at least 30 minutes. Remove the basket and accessories for better access. Use a baking soda paste (baking soda mixed with water) and a soft brush to gently scrub the element. Never use harsh chemicals, steel wool, or submerge electrical components in water.
How to clean the inside coils of an air fryer?
Clean the inside coils by creating a paste with baking soda and water, then applying it to the coils with a soft brush or cloth. Allow the paste to sit for 10-15 minutes to break down grease and food particles. Gently scrub in circular motions, then wipe clean with a damp microfiber cloth. Ensure all residue is removed before using the air fryer again.
How to clean air fryer heating element with baking soda?
Mix baking soda with a small amount of water to create a thick paste. Apply this paste to the heating element using a soft brush, avoiding electrical connections. Let it sit for 10-15 minutes to break down grease and buildup. Gently scrub with the soft brush, then wipe clean with a damp cloth. Baking soda is safe, non-toxic, and effectively removes stubborn residue without damaging the element.
How to clean air fryer heating element Ninja?
For Ninja air fryers, focus on cleaning around the fan area and heating element located at the top of the cooking chamber. Use the same baking soda paste method, but pay special attention to the fan blades and surrounding areas where grease tends to accumulate. Ninja models often have removable components that make cleaning easier – check your manual for specific instructions.
How to clean Philips air fryer heating element?
Philips air fryers typically feature a starfish-shaped heating element design. Clean this by applying baking soda paste to each arm of the element, being careful around the electrical connections. Use a soft brush to gently clean between the element arms where food particles often get trapped. The unique design requires extra attention to ensure all surfaces are properly cleaned.
How to clean air fryer inside top without taking it apart?
Clean the inside top by tilting the air fryer slightly to access the heating element area. Use a long-handled soft brush or cloth to reach all areas. Apply baking soda paste with the brush, let it sit, then wipe clean with a damp microfiber cloth. This method allows thorough cleaning without disassembling the unit, which could void your warranty.
What is the easiest air fryer to clean heating element?
Air fryers with removable heating elements or easy-access designs are the easiest to clean. Models with wider openings, fewer crevices, and non-stick coated elements require less scrubbing. Some brands design their heating elements with smooth surfaces and accessible positioning that makes maintenance simpler. Check product specifications for cleaning-friendly features before purchasing.
How often should I clean my air fryer heating element?
Clean your air fryer heating element every 5-10 uses or when you notice visible grease buildup, smoke during cooking, or unusual odors. Heavy users who cook greasy foods daily may need to clean more frequently, while occasional users can extend the interval. Regular cleaning prevents stubborn buildup that becomes harder to remove over time.
Can I use dish soap to clean the air fryer heating element?
Yes, you can use a small amount of mild dish soap mixed with water, but avoid getting soap directly on electrical components. Apply the soapy solution with a cloth or soft brush, then thoroughly rinse and dry the area. However, baking soda paste is often more effective for removing grease and doesn’t require rinsing, making it the preferred cleaning method.
What should I avoid when cleaning air fryer heating elements?
- Never use steel wool or abrasive cleaners that can scratch protective coatings
- Avoid harsh chemicals like oven cleaners or bleach that can corrode elements
- Don’t submerge electrical components in water or allow liquid to pool
- Never clean while hot – always cool for 30+ minutes first
- Avoid spraying cleaners directly onto electrical connections
How do I know if my air fryer heating element needs cleaning?
Signs that your heating element needs cleaning include visible grease or food buildup, smoke during cooking, unusual odors, reduced cooking performance, or longer cooking times. If you notice any of these symptoms, it’s time for a thorough cleaning. Regular visual inspection after every few uses helps catch buildup before it becomes problematic.
Will cleaning the heating element void my air fryer warranty?
Proper cleaning using manufacturer-approved methods typically won’t void your warranty. However, using harsh chemicals, abrasive materials, or improper techniques can void coverage. Always check your warranty guidelines and user manual for specific cleaning instructions. Document your cleaning routine with photos if warranty claims become necessary in the future.
How long should I wait before using my air fryer after cleaning the heating element?
Wait until the heating element is completely dry before using your air fryer again. This typically takes 15-30 minutes depending on humidity and ventilation. Ensure no moisture remains around electrical components and that all cleaning residue has been removed. Running the air fryer while damp can cause electrical issues and affect food safety.
You May Also Like

How to Clean Artificial Grass: Complete Maintenance Guide
How to Clean a Grill: Complete Guide for Gas & Charcoal