How to Clean Mould Off Walls: Complete Removal Guide 2026
How to clean mould off walls requires the right approach, safety equipment, and cleaning solutions to effectively remove fungal growth while protecting your health and wall surfaces. Successfully tackling wall mould involves identifying the type of growth, preparing proper safety measures, choosing between natural or chemical cleaning methods, and addressing underlying moisture issues to prevent recurrence.
Mould on walls poses significant health risks including respiratory problems, allergic reactions, and skin irritation. Therefore, prompt removal becomes essential for maintaining a safe living environment. Additionally, understanding whether you’re dealing with surface mould or deeper infestations helps determine the appropriate cleaning strategy and when professional intervention may be necessary.
This comprehensive guide covers everything from natural cleaning methods using vinegar and baking soda to chemical solutions with bleach and commercial removers. Moreover, we’ll explore proper safety preparation, step-by-step cleaning processes for different wall types, and crucial prevention strategies. For broader household cleaning guidance, check out our complete kitchen deep cleaning guide for maintaining a mould-free home environment.
TL;DR
- Safety first: Always wear protective equipment (mask, gloves, eye protection) and ensure proper ventilation before cleaning mould
- Natural solutions work: White vinegar, baking soda, and tea tree oil effectively remove surface mould without harsh chemicals
- Address root causes: Control moisture sources, improve ventilation, and monitor humidity levels to prevent mould recurrence
- Know your limits: Call professionals for extensive infestations, health concerns, or when structural issues are suspected
Understanding Mould on Walls: Identification and Health Risks
Identifying mould on walls requires understanding the visual characteristics of different species and their potential health implications. Black mould (Stachybotrys chartarum) appears as dark, greenish-black patches with a slimy texture when wet. Meanwhile, green mould (Aspergillus) manifests as fuzzy, blue-green spots that spread rapidly across surfaces. White mould (Penicillium) creates powdery, cotton-like growths that often blend with wall colours, making detection challenging.
Each mould type presents distinct visual markers that help homeowners assess the severity of their situation. Furthermore, the texture, colour intensity, and growth pattern provide crucial clues about the species involved and appropriate removal strategies.
Health Implications and Urgent Removal Scenarios
Mould exposure triggers respiratory problems including coughing, wheezing, and throat irritation in healthy individuals. However, vulnerable populations face more severe health risks that demand immediate attention. Children, elderly individuals, and people with asthma or compromised immune systems experience heightened sensitivity to mould spores.
Urgent Removal Required
Prolonged exposure leads to chronic respiratory conditions, skin irritation, and allergic reactions. Additionally, mycotoxins produced by certain mould species cause headaches, fatigue, and cognitive issues. Therefore, any mould growth exceeding one square metre requires professional evaluation rather than DIY removal attempts.
Surface Mould vs Deeper Infestations
Surface mould affects only the outermost layer of paint or wallpaper and responds well to standard cleaning methods. This type appears as thin, easily removable patches that haven’t penetrated the wall material. Conversely, deeper infestations extend into plaster, drywall, or structural materials, creating more complex removal challenges.
| Surface Mould Indicators | Deep Infestation Signs |
|---|---|
| Thin, wipeable patches | Thick, embedded growth |
| Recent appearance | Recurring after cleaning |
| Dry wall surface | Soft, damp wall areas |
| No structural damage | Peeling paint or wallpaper |
Testing the wall’s firmness helps distinguish between surface and deep mould problems. Soft, spongy areas indicate moisture penetration and potential structural compromise. Moreover, persistent musty odours suggest hidden mould colonies growing within wall cavities or behind surface materials.
When Professional Assessment Becomes Necessary
Professional mould assessment becomes essential when DIY cleaning efforts fail to resolve the problem permanently. Additionally, extensive mould coverage exceeding ten square feet requires specialist intervention to prevent cross-contamination during removal. Structural damage, recurring growth patterns, and unknown mould species also warrant professional evaluation.
- Mould covering more than one square metre
- Growth in HVAC systems or ductwork
- Suspected sewage or contaminated water source
- Immunocompromised household members
- Structural damage or soft wall areas
- Strong, persistent musty odours
Professional assessment includes air quality testing, moisture mapping, and species identification through laboratory analysis. Furthermore, certified specialists determine whether remediation requires containment procedures, specialised equipment, or structural repairs. Early professional intervention prevents minor mould problems from escalating into costly structural damage or serious health hazards.
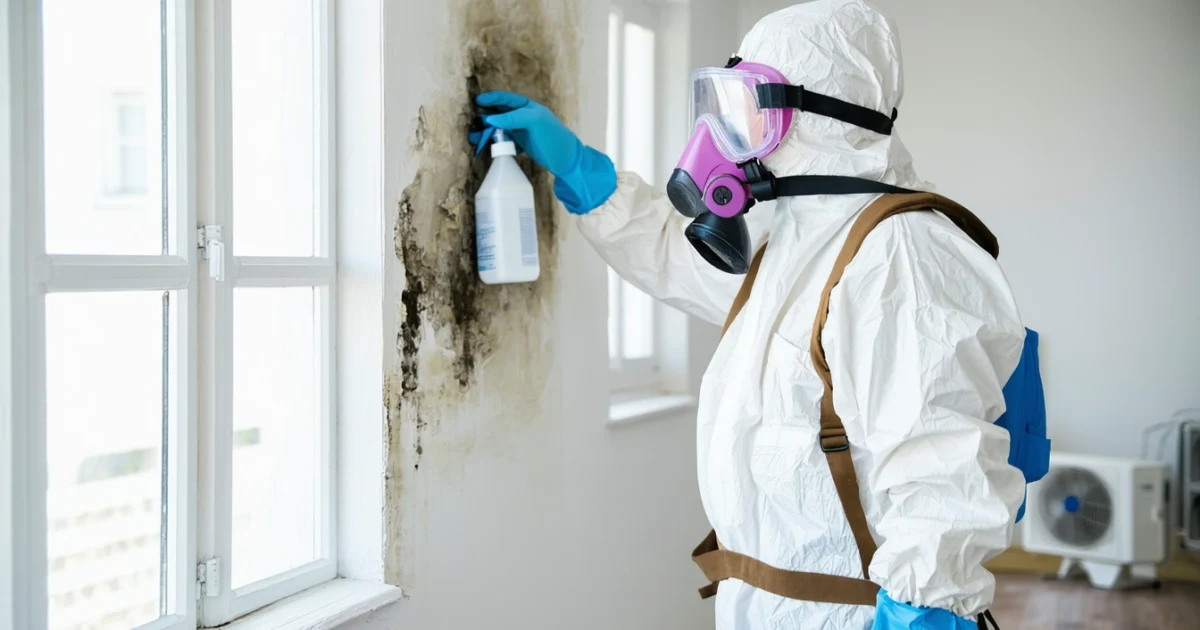
Essential Safety Preparation and Equipment
Proper safety preparation protects you from mould spores and prevents contamination during cleaning. Furthermore, adequate preparation ensures effective removal while minimising health risks and cross-contamination throughout your home.
Personal Protective Equipment Requirements
Respiratory protection forms the cornerstone of safe mould removal. Additionally, an N95 mask or higher-grade respirator prevents inhalation of airborne spores during cleaning activities. However, cloth masks or surgical masks provide insufficient protection against microscopic mould particles.
Disposable nitrile gloves protect your hands from cleaning chemicals and direct mould contact. Moreover, safety goggles shield your eyes from splashing cleaning solutions and airborne spores. Long-sleeved clothing and covered shoes complete your protective barrier against contamination.
Critical Safety Note
Room Preparation and Ventilation Setup
Adequate ventilation removes airborne spores and chemical fumes during cleaning. Therefore, open windows and position fans to create cross-ventilation that directs air outside rather than into other rooms. Consequently, proper airflow prevents spore redistribution throughout your home.
Remove furniture, artwork, and soft furnishings from the affected area before starting. Subsequently, cover remaining items with plastic sheeting to prevent contamination. Additionally, turn off HVAC systems to prevent spore circulation through ductwork during cleaning activities.
Containment Measures to Prevent Spore Spread
Plastic sheeting creates effective barriers between contaminated and clean areas. Furthermore, seal doorways with 6-mil plastic and painter’s tape to prevent spore migration during removal. Similarly, cover air vents and returns within the work area to maintain containment.
- Seal doorways with plastic sheeting and tape
- Cover air vents and HVAC returns
- Create negative pressure with exhaust fans
- Establish clean entry and exit procedures
- Designate contaminated material disposal area
Negative pressure prevents spore escape by ensuring air flows into the contained area rather than out. Additionally, position exhaust fans in windows to draw contaminated air outside while maintaining lower pressure inside the work zone.
Tools and Materials for Effective Cleaning
Essential cleaning supplies include antimicrobial solutions, scrub brushes, and microfiber cloths for thorough removal. Moreover, proper cleaning techniques require specific tools designed for different wall surfaces and mould severity levels.
| Category | Essential Items | Purpose |
|---|---|---|
| Cleaning Solutions | Bleach solution, white vinegar, commercial fungicide | Kill mould and remove stains |
| Application Tools | Spray bottles, scrub brushes, sponges | Apply solutions and remove growth |
| Collection Materials | Microfiber cloths, paper towels, vacuum with HEPA filter | Capture spores and debris |
| Disposal Supplies | Heavy-duty bin bags, sealable containers | Safely contain contaminated materials |
A HEPA-filtered vacuum captures microscopic spores during preliminary cleaning. Subsequently, stiff-bristled brushes remove stubborn growth from textured surfaces without damaging underlying paint. Finally, disposable materials prevent cross-contamination between different areas during the cleaning process.
Commercial fungicidal cleaners provide stronger antimicrobial action than household solutions for severe infestations. However, natural alternatives like white vinegar effectively kill most common mould species while remaining safer for indoor use. Therefore, choose cleaning agents based on mould severity, wall material, and household safety considerations.
Natural Cleaning Methods: Vinegar, Baking Soda, and Tea Tree Oil
Natural cleaning solutions provide effective antimicrobial action against wall mould while avoiding harsh chemical exposure. Furthermore, household ingredients like white vinegar, baking soda, and tea tree oil offer proven fungicidal properties for safe indoor use.
White Vinegar Solution: Preparation and Application
White vinegar contains acetic acid that kills approximately 82% of mould species through pH disruption. Additionally, this natural fungicide penetrates porous surfaces to eliminate root structures beneath visible growth.
Create the cleaning solution by mixing one part white vinegar with one part water in a spray bottle. However, use undiluted vinegar for severe infestations on non-porous surfaces like painted walls or tiles.
- Spray vinegar solution directly onto affected areas
- Allow contact time of 15-20 minutes for maximum penetration
- Scrub gently with a soft-bristled brush in circular motions
- Wipe clean with microfiber cloths to remove loosened spores
- Rinse with clean water and dry thoroughly
Test vinegar solutions on inconspicuous wall areas first since acidic properties may affect certain paint finishes. Moreover, ensure adequate ventilation during application to prevent overwhelming vinegar odours.
Baking Soda Paste for Stubborn Growth
Baking soda provides gentle abrasive action while creating alkaline conditions that inhibit mould reproduction. Consequently, this method works exceptionally well for textured wall surfaces where spores embed deeply.
Prepare cleaning paste by combining three parts baking soda with one part water until achieving thick consistency. Then, add two drops of liquid dish soap to enhance cleaning power and improve adhesion.
Apply paste generously to mouldy areas using a clean cloth or soft brush. Subsequently, allow the mixture to work for 30-45 minutes before scrubbing with circular motions. Finally, rinse thoroughly and dry completely to prevent moisture retention.
Pro Tip
Tea Tree Oil Treatment for Antimicrobial Action
Tea tree oil demonstrates powerful antifungal properties through natural compounds like terpinen-4-ol. Additionally, this essential oil prevents mould regrowth by creating hostile surface conditions for spore germination.
Create treatment solution by mixing 10-15 drops of tea tree oil per cup of water in a spray bottle. However, increase concentration to 20 drops per cup for severe infestations or highly porous wall materials.
Spray affected areas thoroughly and allow natural evaporation without rinsing. Therefore, tea tree oil residue continues providing antimicrobial protection long after initial application. Nevertheless, test on small areas first since some individuals experience sensitivity to essential oil vapours.
Effectiveness Comparison and Surface Compatibility
| Method | Effectiveness | Best Surfaces | Limitations |
|---|---|---|---|
| White Vinegar | 82% mould species | Painted walls, tiles | May damage natural stone |
| Baking Soda | Mechanical removal + pH control | Textured surfaces | Requires scrubbing effort |
| Tea Tree Oil | Broad-spectrum antifungal | All wall types | Higher cost, strong scent |
Vinegar solutions work fastest on smooth surfaces but require careful application on delicate materials. Conversely, baking soda paste provides gentle cleaning action suitable for painted walls without causing surface damage.
Tea tree oil offers the most comprehensive antimicrobial coverage while remaining safe for all wall materials. However, cost considerations and scent preferences may influence selection between these natural alternatives.
Combine multiple methods for maximum effectiveness: start with vinegar treatment, follow with baking soda scrubbing, then finish with tea tree oil protection. This layered approach addresses immediate removal while preventing future mould development through sustained antimicrobial action.
Chemical Solutions: Bleach and Commercial Mould Removers
Chemical treatments provide powerful antimicrobial action against stubborn mould infestations that resist natural cleaning methods. Household bleach contains sodium hypochlorite, which destroys mould spores through oxidation while penetrating porous surfaces effectively. However, proper dilution ratios and safety protocols remain essential for successful wall cleaning without surface damage.
Proper Bleach Dilution and Application
Standard bleach solutions require careful mixing to achieve optimal cleaning strength while preventing wall damage. Mix one part household bleach with ten parts water for painted walls, creating approximately 0.5% sodium hypochlorite concentration. Furthermore, increase concentration to one part bleach with five parts water for severe mould growth on non-porous surfaces.
Apply diluted bleach using spray bottles or clean cloths, ensuring complete coverage of affected areas. Therefore, bleach penetrates mould root systems while eliminating visible surface growth simultaneously. Allow solutions to remain on walls for 10-15 minutes before wiping clean with damp cloths.
Important Safety Note
Commercial Mould Spray Selection
Commercial mould removers contain specialized fungicides designed for specific wall materials and mould species. Products containing quaternary ammonium compounds provide broad-spectrum antimicrobial action while remaining gentler on painted surfaces than bleach solutions. Additionally, enzyme-based cleaners break down organic matter that feeds mould growth.
Select products specifically formulated for wall cleaning rather than general-purpose cleaners. Professional-grade sprays often contain penetrating agents that reach deeper into porous materials like drywall or textured paint. Moreover, some formulations include preventive compounds that inhibit future mould development.
Read product labels carefully to ensure compatibility with your specific wall materials. Consequently, some commercial cleaners may discolor certain paint types or damage wallpaper adhesives. Deep cleaning techniques often require similar surface compatibility considerations.
Surface Testing and Paint Protection
Test cleaning solutions on inconspicuous wall areas before treating visible mould growth. Apply small amounts of chosen cleaner to hidden corners or areas behind furniture to assess potential paint damage. Wait 24 hours to observe any discoloration, texture changes, or paint lifting.
Document test results by photographing treated areas under natural lighting conditions. Therefore, visual documentation helps identify subtle color changes that might not appear immediately obvious. Furthermore, testing reveals whether additional protective measures become necessary during full-scale cleaning operations.
- Flat paint finishes show highest vulnerability to chemical damage
- Semi-gloss surfaces typically resist most cleaning solutions
- Textured walls may trap cleaning residues requiring thorough rinsing
- Wallpaper requires specialized low-moisture cleaning approaches
Ventilation Requirements for Safe Chemical Use
Adequate ventilation prevents dangerous chemical vapor accumulation while improving cleaning effectiveness through enhanced evaporation. Open all windows and doors in treatment areas to create cross-ventilation patterns that remove airborne contaminants. Additionally, position fans to direct contaminated air away from occupied spaces.
Maintain continuous airflow throughout cleaning operations and for 2-4 hours afterward to ensure complete vapor dissipation. Chemical fumes can accumulate in poorly ventilated spaces, causing respiratory irritation or more serious health effects. Therefore, never use chemical cleaners in confined spaces without proper ventilation systems.
Monitor air quality by observing for strong chemical odors that persist despite ventilation efforts. Consequently, overwhelming chemical smells indicate insufficient air exchange requiring additional ventilation measures. Consider postponing cleaning operations during calm weather conditions that prevent natural air circulation.
Pros
- Kills 99% of mould spores effectively
- Works on severe infestations
- Fast-acting antimicrobial properties
- Readily available and affordable
Cons
- May damage paint or wallpaper
- Requires extensive safety precautions
- Strong chemical odors
- Potential health risks if misused
Step-by-Step Cleaning Process for Different Wall Types
Different wall surfaces require specific cleaning approaches to effectively remove mould while preserving the underlying material. Moreover, understanding these variations prevents damage that could create more extensive problems requiring costly repairs.
Painted Walls: Gentle Techniques to Preserve Finish
Painted surfaces demand careful handling to maintain their protective finish and appearance. Start by gently brushing away loose mould spores using a soft-bristled brush to prevent surface scratching. Subsequently, apply your chosen cleaning solution using a barely damp microfiber cloth rather than saturating the area.
Work in small sections using circular motions, allowing each area to dry completely before moving to adjacent sections. Flat paint finishes show particular vulnerability to water damage, requiring extra caution during application. Therefore, test cleaning solutions on inconspicuous areas first to ensure paint compatibility.
- Semi-gloss paint: tolerates mild detergent solutions and gentle scrubbing
- Flat paint: requires minimal moisture and immediate drying
- Textured paint: needs soft brushes to reach crevices without damage
- Fresh paint: avoid cleaning for 30 days after application
Rinse treated areas with a clean, barely damp cloth to remove cleaning residues that could attract future mould growth. Finally, inspect the paint surface for any signs of damage or discoloration that might require touch-up work.
Wallpapered Surfaces: Removal vs Cleaning Decisions
Wallpaper cleaning presents unique challenges because moisture can penetrate seams and cause adhesive failure. Assess whether the wallpaper shows extensive mould penetration or surface-only contamination before choosing your approach. Additionally, consider the wallpaper’s age, condition, and replacement cost when making this decision.
Pros
- Surface cleaning preserves existing decoration
- Minimal disruption to room use
- Cost-effective for light contamination
Cons
- May not eliminate deep mould penetration
- Risk of wallpaper damage from moisture
- Potential for hidden mould growth behind paper
For surface cleaning, use dry brushing followed by minimal moisture application with antimicrobial solutions. However, vinyl wallpapers tolerate gentle cleaning better than paper-based materials. Test cleaning methods on hidden areas first to check for color bleeding or adhesive softening.
Complete removal becomes necessary when mould extends behind the wallpaper or covers more than 25% of the surface area. Furthermore, removal allows thorough wall treatment and prevents recurring contamination from hidden mould colonies.
Porous Materials: Deep Cleaning Considerations
Porous wall materials like unsealed brick, concrete, or plaster require intensive treatment because mould penetrates deep into their structure. These surfaces absorb cleaning solutions readily, necessitating longer contact times for effective mould elimination. Consequently, plan for extended drying periods and potential repeat treatments.
Apply cleaning solutions generously to ensure penetration into porous structures where mould roots establish. Brick walls particularly benefit from steam cleaning or pressure washing when accessible, as these methods reach deep into mortar joints. Similarly, deep cleaning techniques prove essential for eliminating embedded contamination.
| Material Type | Penetration Depth | Treatment Method | Drying Time |
|---|---|---|---|
| Unsealed brick | 5-10mm | Steam cleaning + antimicrobial | 24-48 hours |
| Concrete block | 3-8mm | Pressure wash + sealant | 12-24 hours |
| Plaster | 2-5mm | Chemical treatment + primer | 6-12 hours |
| Drywall | 1-3mm | Surface cleaning + sealing | 4-8 hours |
Consider applying penetrating sealers after cleaning to reduce future moisture absorption and mould susceptibility. However, ensure complete drying before sealer application to avoid trapping residual moisture within the material structure.
Drying and Inspection Procedures
Thorough drying prevents immediate mould regrowth and allows accurate assessment of cleaning effectiveness. Position fans to create airflow across treated surfaces while maintaining room ventilation throughout the drying process. Additionally, use dehumidifiers to reduce ambient moisture levels that could slow evaporation.
Monitor surface moisture using a moisture meter to ensure complete drying before declaring cleaning complete. Residual moisture provides ideal conditions for rapid mould reestablishment, potentially requiring complete treatment repetition. Therefore, patience during drying prevents costly rework and ensures lasting results.
- Initial inspection: check for visible mould remnants after 2-4 hours
- Moisture testing: verify surface dryness using appropriate meters
- Odor assessment: confirm elimination of musty smells indicating mould presence
- Final evaluation: examine treated areas under bright lighting for missed spots
- Documentation: photograph results for future reference and warranty purposes
Conduct follow-up inspections at 48-72 hours to identify any mould regrowth that indicates incomplete treatment. Furthermore, schedule weekly monitoring for the first month to catch early signs of recurring contamination. This systematic approach ensures cleaning success and prevents extensive future remediation requirements.
Addressing Root Causes: Moisture Control and Ventilation
Successful mould removal requires eliminating the underlying moisture conditions that enable fungal growth. Simply cleaning visible mould without addressing root causes leads to rapid recontamination within weeks. Therefore, comprehensive moisture control forms the foundation of permanent mould prevention strategies.
Identifying Common Moisture Sources
Water infiltration creates ideal breeding conditions for mould spores that naturally exist in indoor environments. Plumbing leaks behind walls often remain undetected until extensive mould colonies establish themselves. Additionally, roof leaks can channel moisture down through wall cavities, creating hidden contamination zones.
Condensation forms when warm, humid air contacts cold surfaces like exterior walls or single-glazed windows. Furthermore, inadequate insulation allows thermal bridging that creates persistent condensation points. Poor ventilation compounds these issues by preventing moisture-laden air from escaping living spaces.
- Check behind toilets, under sinks, and around washing machines for hidden leaks
- Inspect window frames and door seals for water penetration
- Examine basement walls for groundwater seepage or foundation cracks
- Look for discoloured ceiling patches indicating roof problems
- Monitor bathroom and kitchen areas where steam accumulates regularly
Humidity Management and Monitoring
Indoor humidity levels directly influence mould growth rates and contamination severity. Relative humidity above 60% provides optimal conditions for most mould species to thrive. Consequently, maintaining humidity between 30-50% significantly reduces mould establishment risks while preserving indoor comfort.
Digital hygrometers provide accurate humidity readings that enable proactive moisture management. Moreover, smart humidity monitors can alert homeowners when levels exceed safe thresholds. Regular monitoring helps identify seasonal patterns and problem areas requiring targeted intervention.
Optimal Humidity Levels
Ventilation Improvements and Air Circulation
Proper ventilation removes moisture-laden air before condensation occurs on wall surfaces. Extractor fans in bathrooms and kitchens should operate during and after moisture-generating activities. However, many existing fans lack sufficient capacity or run for inadequate durations to achieve effective moisture removal.
Natural ventilation through window opening provides cost-effective moisture control when outdoor conditions permit. Cross-ventilation creates air movement that prevents stagnant zones where humidity accumulates. Additionally, maintaining clean extractor fan filters ensures optimal performance and prevents reduced airflow capacity.
Mechanical ventilation systems offer consistent moisture control regardless of weather conditions. Positive input ventilation introduces filtered outdoor air while displacing humid indoor air through natural leakage points. Similarly, heat recovery ventilation exchanges stale indoor air with fresh outdoor air while conserving energy.
| Room Type | Minimum Ventilation Rate | Recommended Fan Capacity |
|---|---|---|
| Bathroom | 15 litres/second | 80-120 cubic metres/hour |
| Kitchen | 30 litres/second | 150-300 cubic metres/hour |
| Utility Room | 30 litres/second | 150-200 cubic metres/hour |
| Living Areas | 8 litres/second per person | Background ventilation |
Structural Issues Requiring Professional Assessment
Certain moisture problems exceed DIY capabilities and require professional intervention to prevent recurring mould contamination. Foundation settlement can create cracks that allow groundwater infiltration into basement walls. Similarly, building envelope failures may require extensive repairs to restore moisture barriers.
Professional building surveyors can identify hidden moisture pathways using thermal imaging and moisture detection equipment. Furthermore, HVAC system deficiencies often require specialist assessment to determine appropriate ventilation upgrades. Structural engineers may need to evaluate load-bearing modifications required for major ventilation installations.
Persistent mould problems despite repeated cleaning efforts indicate underlying structural moisture issues. Professional mould remediation specialists possess specialized equipment and expertise to address complex contamination scenarios. Additionally, they can identify building code violations that contribute to moisture accumulation and recommend corrective measures.
Pros
- Professional assessment identifies hidden moisture sources
- Structural repairs provide permanent solutions
- Building code compliance ensures long-term effectiveness
- Warranty protection for major remediation work
Cons
- Higher upfront costs than DIY approaches
- Potential disruption during major renovation work
- May require temporary relocation during extensive repairs
- Professional scheduling constraints may delay completion
Prevention Strategies for Long-Term Mould Control
Effective mould prevention requires a comprehensive approach that addresses moisture sources, environmental conditions, and protective measures. Moreover, successful long-term control combines regular maintenance with proactive monitoring to prevent recurrence. These strategies work together to create an environment where mould cannot establish or thrive on wall surfaces.
Regular Cleaning and Maintenance Schedules
Establishing consistent cleaning routines prevents mould spores from accumulating and colonising wall surfaces. Weekly surface cleaning with antimicrobial solutions removes organic matter that feeds mould growth. Additionally, monthly deep cleaning of high-risk areas like bathrooms and kitchens eliminates hidden moisture pockets.
Maintenance schedules should include regular inspection of potential problem areas where moisture accumulates. Furthermore, quarterly checks of window seals, pipe joints, and ventilation systems identify early signs of moisture intrusion. Professional maintenance services can supplement homeowner efforts with specialised equipment and expertise.
- Weekly surface cleaning with antifungal solutions
- Monthly deep cleaning of high-moisture areas
- Quarterly inspection of seals and joints
- Annual professional HVAC maintenance
- Seasonal gutter and drainage system checks
Environmental Controls and Ventilation Systems
Dehumidifiers maintain optimal humidity levels below 60% to prevent mould growth on wall surfaces. Strategic placement of dehumidifiers in basements, bathrooms, and other moisture-prone areas creates unfavourable conditions for spore germination. Similarly, whole-house dehumidification systems provide comprehensive moisture control throughout the property.
Mechanical ventilation systems remove moisture-laden air before condensation occurs on walls. Proper fan maintenance ensures optimal performance and prevents system failures that lead to humidity buildup. Additionally, heat recovery ventilation systems provide fresh air circulation while conserving energy and maintaining temperature control.
Humidity Control Tip
Natural ventilation strategies complement mechanical systems by promoting air movement and moisture removal. Cross-ventilation through strategically opened windows creates airflow patterns that prevent stagnant air conditions. However, outdoor humidity levels must be considered to avoid introducing additional moisture into indoor spaces.
Antimicrobial Paints and Protective Coatings
Specialised paints containing antimicrobial additives create hostile surfaces that resist mould colonisation. These formulations incorporate fungicidal compounds that actively prevent spore attachment and growth on painted walls. Furthermore, moisture-resistant primers provide additional protection by sealing porous surfaces that might otherwise harbour moisture.
Bathroom-specific paints offer enhanced moisture resistance and mould prevention properties for high-humidity environments. Similarly, basement wall coatings provide vapour barriers that prevent moisture migration through masonry surfaces. Professional application ensures proper coverage and maximum effectiveness of these protective systems.
| Coating Type | Application Area | Protection Level | Lifespan |
|---|---|---|---|
| Antimicrobial Paint | Living Areas | Moderate | 5-7 years |
| Bathroom Paint | High-Moisture Zones | High | 3-5 years |
| Basement Coating | Below-Grade Walls | Very High | 10-15 years |
| Primer-Sealer | All Surfaces | Foundation | Permanent |
Early Detection and Monitoring Systems
Digital moisture meters provide accurate readings of wall moisture content to identify problem areas before visible mould appears. Regular monitoring establishes baseline measurements and tracks changes that indicate developing moisture issues. Additionally, infrared thermography reveals hidden moisture patterns and thermal bridges that promote condensation.
Smart home sensors continuously monitor humidity levels and alert homeowners to conditions that favour mould growth. These systems can trigger automatic responses like activating dehumidifiers or ventilation fans when humidity thresholds are exceeded. Furthermore, data logging capabilities track environmental conditions over time to identify patterns and problem periods.
Visual inspection techniques help identify early signs of mould development before extensive contamination occurs. Musty odours often indicate hidden mould growth behind walls or in concealed spaces. Professional mould testing services can confirm the presence of airborne spores and identify specific mould species for targeted treatment approaches.
Pros
- Prevents costly remediation
- Protects health and property
- Maintains indoor air quality
- Reduces cleaning frequency
Cons
- Requires initial investment
- Needs ongoing maintenance
- May require professional installation
- Technology can malfunction
Integrated prevention strategies combine multiple approaches for maximum effectiveness against mould recurrence. Consequently, homeowners who implement comprehensive prevention programs experience significantly fewer mould problems and maintain healthier indoor environments. These proactive measures prove more cost-effective than reactive cleaning and remediation efforts.
When to Call Professionals and Restoration Considerations
Recognising when professional intervention becomes necessary protects your family’s health and prevents extensive property damage. While many homeowners successfully clean minor mould patches, certain situations require expert assessment and remediation services. Understanding these indicators helps you make informed decisions about professional assistance.
Extensive Infestation Indicators
Professional mould removal becomes essential when contaminated areas exceed 10 square feet or span multiple rooms throughout your property. Additionally, mould growth behind walls, under flooring, or within HVAC systems requires specialised equipment and expertise for safe removal. Structural damage from moisture infiltration often accompanies extensive infestations, necessitating comprehensive restoration services.
Recurring mould growth despite repeated cleaning efforts indicates underlying moisture problems that require professional diagnosis. Furthermore, black mould species like Stachybotrys chartarum produce dangerous mycotoxins that demand expert handling with proper containment procedures. Professional remediation specialists possess industrial-grade equipment and protective gear necessary for safe removal of hazardous mould varieties.
Professional Assessment Required
Health Concerns and Vulnerable Populations
Households containing vulnerable family members require professional mould assessment even for minor contamination. Infants, elderly individuals, and people with compromised immune systems face heightened risks from mould exposure. Similarly, residents with asthma, allergies, or respiratory conditions should avoid DIY mould removal that could trigger severe health reactions.
Persistent symptoms including chronic coughing, headaches, or skin irritation that correlate with time spent indoors indicate potential mould-related health impacts. Professional mould testing identifies specific species and spore concentrations to assess health risks accurately. Moreover, medical professionals may recommend temporary relocation during extensive remediation to protect vulnerable household members from exposure.
- Pregnant women should avoid mould exposure due to potential complications
- Children under 5 years have developing respiratory systems more susceptible to damage
- Immunocompromised individuals face serious infection risks from certain mould species
- Elderly residents may experience exacerbated existing health conditions
Insurance Documentation and Claims
Proper documentation proves essential for insurance claim approval when mould damage results from covered perils like burst pipes or storm damage. Professional mould assessments provide detailed reports that insurance companies require for claim processing. However, most policies exclude mould damage from gradual moisture problems or maintenance neglect.
Photograph all affected areas before beginning any cleaning or remediation work to preserve evidence for insurance purposes. Additionally, maintain detailed records of cleaning products used, professional services hired, and replacement costs for damaged materials. Prompt reporting to your insurance provider prevents claim denials based on delayed notification requirements.
Professional restoration companies often work directly with insurance adjusters to streamline the claims process. These specialists understand insurance requirements and provide documentation that supports coverage decisions. Furthermore, certified remediation services may offer warranties that protect against future mould recurrence.
Post-Cleaning Assessment and Repainting
Thorough assessment following mould removal determines whether affected surfaces require replacement or refinishing. Porous materials like drywall often retain mould spores even after surface cleaning, necessitating removal and replacement. Professional moisture testing confirms that underlying moisture problems have been resolved before proceeding with restoration work.
Successful mould remediation requires complete drying of all affected areas before applying new finishes. Moisture content levels must return to normal ranges (typically below 16% for wood materials) to prevent future mould growth. Consequently, rushing the restoration process often leads to recurring contamination problems.
Specialised mould-resistant primers and paints provide additional protection against future growth when properly applied to clean, dry surfaces. These products contain antimicrobial additives that inhibit mould development while maintaining decorative appeal. However, proper surface preparation and moisture control remain more important than relying solely on resistant coatings for prevention.
Pros
- Professional equipment removes hidden mould
- Certified specialists ensure safe handling
- Insurance documentation supports claims
- Warranty protection against recurrence
Cons
- Higher upfront costs than DIY methods
- Temporary displacement during extensive work
- Scheduling delays during peak seasons
- Potential for unnecessary upselling
Professional restoration services typically include air quality testing to verify successful mould removal before project completion. This final verification provides peace of mind that your home environment has returned to safe conditions. Additionally, many companies provide ongoing monitoring services to detect early signs of moisture problems that could lead to future mould issues.
Frequently Asked Questions
How do you get mould off painted walls?
To remove mould from painted walls, start by wearing protective equipment including a mask, gloves, and eye protection. Mix a solution of white vinegar and water (1:1 ratio) or use a mild detergent solution. Spray the affected area, let it sit for 10-15 minutes, then scrub gently with a soft brush. Rinse with clean water and dry thoroughly. For stubborn mould, use a baking soda paste or commercial mould remover designed for painted surfaces.
What kills mold off walls?
Several effective solutions kill mould on walls:
- White vinegar – Natural acid that kills most mould species
- Bleach solution – 1 part bleach to 10 parts water for non-porous surfaces
- Tea tree oil – Natural antifungal properties
- Hydrogen peroxide – 3% solution effective against mould spores
- Commercial mould removers – Specially formulated for different wall types
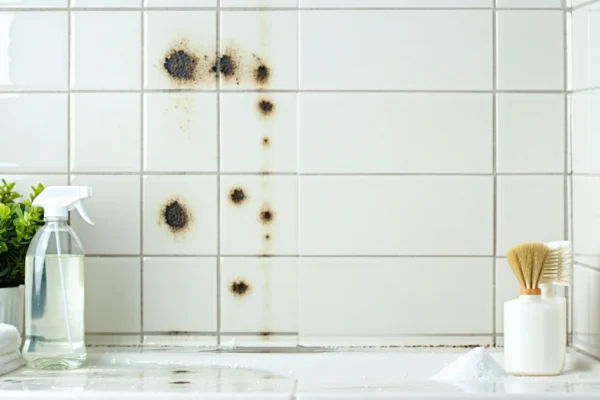
How do you get rid of black mould on walls?
Black mould requires careful handling due to potential health risks. Wear full protective equipment and ensure proper ventilation. Use a bleach solution (1:10 ratio) or commercial black mould remover. Apply the solution, let it sit for 15-20 minutes, then scrub with a stiff brush. For extensive black mould growth exceeding one square metre, contact professional mould remediation services as it may indicate deeper structural issues.
What kills mold permanently?
Permanent mould elimination requires addressing the root cause of moisture rather than just surface cleaning. Fix water leaks, improve ventilation, maintain humidity below 60%, and ensure proper insulation. Use antimicrobial primers and paints after cleaning to prevent regrowth. Regular monitoring and maintenance of moisture levels provide the most effective long-term solution.
How to remove mould from walls without damaging paint?
To protect paint while removing mould, use gentle cleaning methods. Start with a mild vinegar solution (1:3 ratio with water) and soft microfiber cloth. Avoid abrasive scrubbing and harsh chemicals like undiluted bleach. Test cleaning solutions on an inconspicuous area first. Use dabbing motions rather than scrubbing, and work from outside the mould patch inward to prevent spreading.
How to get rid of mould on walls permanently naturally?
Natural permanent mould removal combines effective cleaning with moisture control:
- Clean with white vinegar or tea tree oil solutions
- Use baking soda paste for stubborn areas
- Improve natural ventilation with fans and open windows
- Use dehumidifiers to maintain optimal humidity levels
- Apply natural antimicrobial treatments like grapefruit seed extract
- Address underlying moisture sources permanently
What causes mold on walls in bedroom?
Bedroom mould typically results from poor ventilation combined with moisture sources. Common causes include condensation from breathing and body heat, inadequate air circulation, water leaks from plumbing or roofing, high humidity levels, and insufficient heating. Cold walls meeting warm, humid air create ideal conditions for mould growth, especially in corners and behind furniture.
How to remove mold from walls without bleach?
Effective bleach-free mould removal options include:
- White vinegar – Spray undiluted, let sit 1 hour, scrub and rinse
- Baking soda solution – 1 teaspoon per cup of water
- Tea tree oil – 1 teaspoon per cup of water
- Hydrogen peroxide – 3% solution in spray bottle
- Borax solution – 1 cup per gallon of water
How to clean mould off walls with vinegar?
Vinegar cleaning method: Use undiluted white vinegar for maximum effectiveness. Spray the mouldy area thoroughly, ensuring complete coverage. Let the vinegar sit for at least one hour to penetrate and kill mould spores. Scrub gently with a soft brush, then wipe clean with a damp cloth. Rinse with water and dry completely. The vinegar smell dissipates quickly, leaving walls mould-free.
When should I call professionals for mould removal?
Contact professional mould remediation services when:
- Mould covers more than one square metre
- You have health conditions affecting immunity or breathing
- Mould returns repeatedly after cleaning
- Structural damage is visible (soft walls, peeling paint)
- Strong musty odours persist after cleaning
- Water damage involves contaminated water sources
How to prevent mould on walls permanently?
Permanent mould prevention requires comprehensive moisture management:
- Maintain humidity below 60% using dehumidifiers
- Ensure proper ventilation in all rooms, especially bathrooms and kitchens
- Fix water leaks immediately
- Use antimicrobial paints and primers
- Improve insulation to prevent condensation
- Clean and maintain HVAC systems regularly
- Monitor problem areas weekly
What safety equipment do I need for mould cleaning?
Essential safety equipment includes:
- N95 or P100 respirator mask to prevent spore inhalation
- Rubber gloves extending to mid-forearm
- Safety goggles without ventilation holes
- Long-sleeved clothing and long pants
- Disposable shoe covers
- Plastic sheeting to contain spores
How long does it take for mould to grow on walls?
Mould can begin growing on walls within 24-48 hours under ideal conditions of moisture, warmth, and organic material. Visible growth typically appears within 3-7 days in consistently damp environments. However, mould spores can remain dormant for months or years until moisture conditions become favourable. This rapid growth timeline emphasizes the importance of addressing water damage and moisture issues immediately.
You May Also Like
How to Clean Shower Tiles: Complete Guide for 2026
How to Clean Shower Mold: Complete Removal Guide 2026