The floor looked fine until the afternoon sun came through the kitchen window. Then you could see it: a dull grey film over the red, a darker patch where something was spilled last winter, and a pale bloom along the edge of the units that returns a few days after every mop. You have tried the usual bucket and cloth. The marks have not moved, and the floor somehow feels grubbier afterwards.
That is the quarry tile experience for most households. The tiles are tough, but the surface is unglazed and porous, so a small coffee splash or a film of cooking oil soaks in before you notice it. The good news is that almost every quarry tile floor can be recovered, as long as you work out what type of tile it is first and do the steps in the right order.
Quarry tiles are one of several old floor types, for Victorian, encaustic and general period tiles, see our guide to cleaning old and Victorian floor tiles.
This guide runs from the easy end (a routine that stops dirt settling) to the heavy end (stripping decades of wax from Victorian tiles). Start with the weekly routine. Move on to deep cleaning only if the floor still looks wrong, and keep sealing for last.
Know your tiles before you pick up a mop
Before you grab a mop and bucket, you need to know what type of quarry tiles you’re actually dealing with. This matters more than you might think, because the wrong approach can make things worse rather than better.
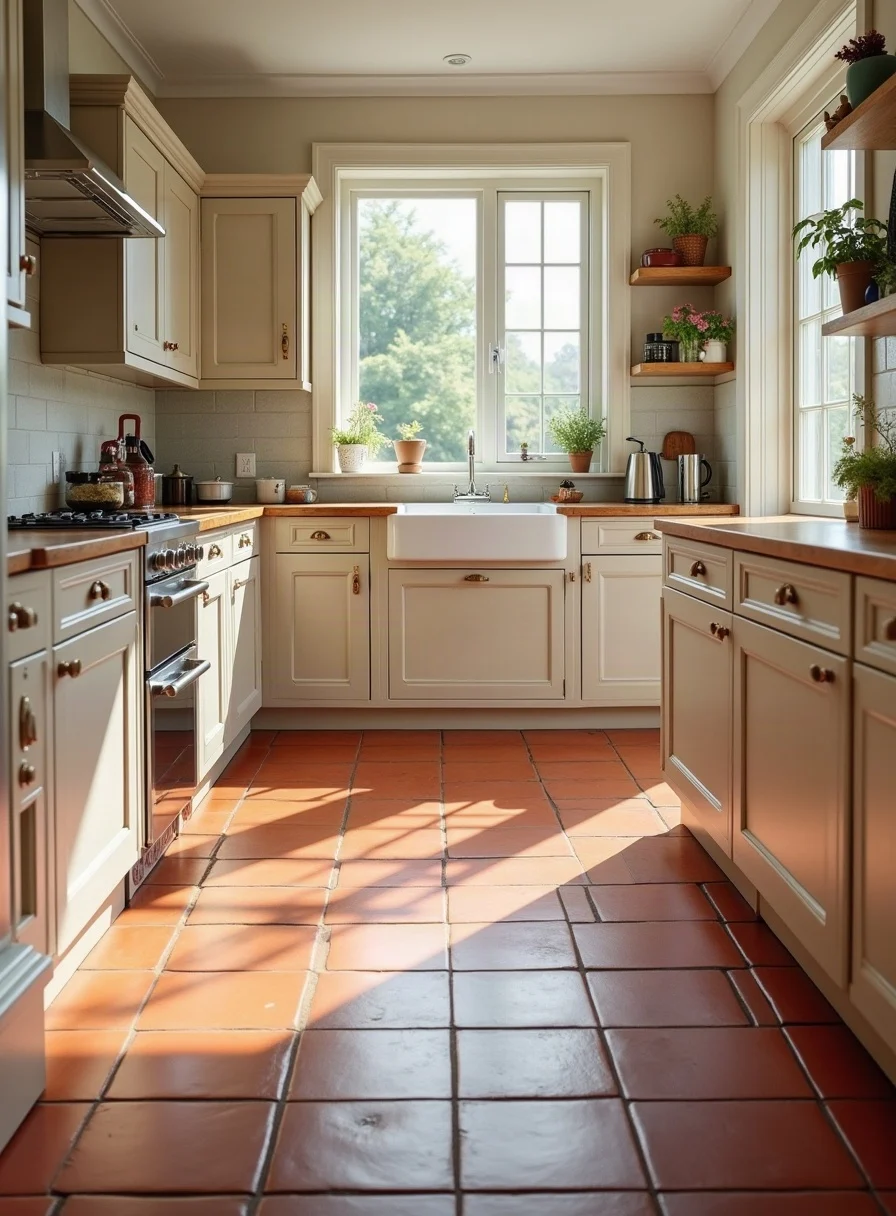
What Actually Are Quarry Tiles?
Here’s something that surprises most people: quarry tiles aren’t dug out of quarries despite the name. They’re manufactured from natural materials like feldspar, clay, and shale (which are quarried, hence the confusion). These materials get ground up, mixed into a wet paste, extruded into shape, cut to size, and then fired in a kiln at incredibly high temperatures.
The key difference between quarry tiles and regular ceramic tiles? Most quarry tiles don’t have that shiny glaze on top. This unglazed surface gives them fantastic slip resistance and that lovely rustic look, but it also makes them more porous. Think of it like comparing glazed pottery to terracotta plant pots. The unglazed surface can absorb liquids, which is why cleaning them requires a different approach.
Modern Tiles vs Victorian Tiles: Completely Different Beasts
Not all quarry tiles are created equal. If your home has original Victorian quarry tiles, you’re dealing with something quite different from modern tiles laid in the past few decades.
Modern Quarry Tiles (Anything After 1940)
These are the easier ones to deal with. They’re manufactured to consistent sizes, have relatively smooth surfaces, and are less porous thanks to higher firing temperatures. Many modern quarry tiles actually have a subtle glaze applied during manufacturing, which gives them some built-in protection. You can usually clean these with standard floor cleaning equipment, they dry reasonably quickly (24-48 hours), and they’re generally more forgiving if you make a mistake.
Victorian and Older Quarry Tiles (Pre-1940)
Now these are a different story altogether. Victorian quarry tiles are wonderful pieces of history, but they need special care. They vary in size by several millimetres, have ridges and recesses in the surface, and are extremely porous. For over a century, they’ve been absorbing whatever’s been put on them (traditionally beeswax and linseed oil), and all that buildup sits deep in the tile body.
The other challenge with Victorian tiles? You can’t use rotary floor machines on them. The inconsistent surface means the machine skips over the lower bits, and the rough tile edges shred the cleaning pads. It is hands and knees work, but the results are worth it.
Tip: Not sure if your tiles are Victorian or modern? Look at the size variations. Grab a tape measure and check several tiles. Victorian tiles can vary by 3-5mm between different tiles, whilst modern ones are manufactured to within a millimetre of consistency.
Why These Tiles Stain So Easily
The porosity issue is what catches most people out. When you spill red wine on glazed ceramic tiles, it sits on the surface and wipes up easily. Spill it on unglazed quarry tiles? It starts soaking in within minutes. The same goes for cooking oil, coffee, mud from shoes, and just about everything else that hits the floor.
Common problems you’ll encounter:
- Oil and grease from cooking (especially in kitchens)
- Wax buildup from years of traditional floor polishes
- Cement and grout haze left over from installation
- Efflorescence, those white salt deposits that appear mysteriously
- General grime that’s worked its way into the tile pores
This is exactly why regular maintenance matters so much. Once stains penetrate deep into the tile, they’re much harder to shift.
The weekly routine that keeps quarry tiles from clogging up
Right, let’s start with the boring but essential part. Daily maintenance might not sound exciting, but it’s genuinely the best thing you can do for your quarry tiles. Ten minutes a day prevents ten hours of scrubbing later.
Sweeping and Vacuuming
Every single day, you want to get rid of loose dirt and grit. Just sweep with a soft-bristle broom or run the vacuum over high-traffic areas. This stops grit from being ground into the tile surface, which causes tiny scratches that make tiles look dull over time.
Here’s a trick that makes a massive difference: put decent quality door mats at every entrance to rooms with quarry tiles. Not those flimsy decorative ones, but proper dirt-trapping mats. That cuts the grit reaching the floor, and grit is what scratches and dulls the surface over time.
Dealing With Spills Immediately
This is the golden rule for quarry tile cleaning: wipe spills the second they happen. Don’t leave them until after dinner or after your TV programme finishes. Oil, wine, coffee, fruit juice… they’re all soaking into your tiles right now.
For quick spills, here’s what works:
- Blot it up with kitchen roll (don’t wipe, which spreads it around)
- Use warm water with a tiny drop of washing-up liquid
- Wipe the area with a damp cloth
- Rinse with clean water
- Dry it thoroughly
That last step, drying, matters more than you’d think. Quarry tiles can stay damp for ages, and standing water can cause its own staining problems.
Weekly Mopping (Done Properly)
Once a week, your quarry tiles need a proper mop. But the type of mop you use makes a huge difference.
Don’t Use These: Old string mops are useless on quarry tiles. The textured surface just shreds them to bits, leaving fibres everywhere and not actually cleaning much. You’ll be picking mop strings out of your grout lines for days.
Do Use These:
- Microfibre mops with stitched ends
- Looped-end knit mops that hold together
- Synthetic tube mops designed for textured floors
The mopping technique matters too. Fill your bucket with warm water and add a small amount of pH-neutral cleaner (more on products in a moment). Dampen your mop, but really wring it out well. You want it damp, not dripping wet. Mop in overlapping strokes, and change your water when it starts looking properly dirty rather than carrying on with grey mucky water.
Once you’ve mopped the whole floor, do it again with clean water to rinse off any cleaner residue. Then, and this is crucial, dry the floor with a clean dry mop or towels.
Warning: Never leave quarry tiles wet after mopping. The porous surface absorbs water, which can lead to staining and even mould growth in corners and under furniture. Always finish by drying the floor properly.
Best Products for Regular Cleaning
Choose a pH-neutral cleaner made for natural stone, terracotta or porous tiles, and read the label to confirm that quarry tiles are listed. Three products that fit the brief are below, and they suit different jobs.
For a floor that is dull or has lost colour, HG Terracotta Clean & Shine is a concentrated cleaner made for terracotta and porous tiles. It is meant to lift dirt while restoring some colour and sheen, so it suits kitchens and hallways that look tired. Dilute it as the label says, because stronger is not better and a heavy solution leaves residue.
For a quick, low-effort weekly mop, Lakeland Stone & Tile Floor Cleaner is sold as a streak-free cleaner for stone, ceramic and tile floors that does not need a separate rinse. Even so, a damp-mop with plain water afterwards is wise on a porous floor.
If you have a large area, a concentrated stone and tile floor cleaner costs less per litre of mixed solution, because a small measure makes a bucket. Check that the label includes quarry tile or unglazed tile before you buy.
If you’d rather make your own, mix half a cup of bicarbonate of soda into a large bucket of warm water and add a few drops of washing-up liquid. This gentle solution handles everyday dirt without harsh chemicals.
Similar to how you’d approach cleaning a stainless steel sink with gentle products, quarry tiles respond better to regular mild cleaning than occasional harsh treatments.
Deep cleaning, one step at a time
Even with perfect daily maintenance, quarry tiles eventually need a proper deep clean. Maybe you’ve just moved into a house with neglected floors, or perhaps years of foot traffic have finally taken their toll. Either way, it’s time to roll up your sleeves.
Getting Ready
Before you start slapping cleaner everywhere, take time to prepare properly. Clear everything out of the room if possible, or at least push furniture to one side so you can work in sections. Give the floor a thorough sweep or vacuum to get rid of loose dirt.
Gather your supplies before you start. Nothing’s more annoying than being halfway through cleaning and realising you’ve run out of clean water or forgotten your scrubbing brush. You’ll need buckets (plural), cleaning products, brushes, rubber gloves, and plenty of old towels for drying.
Safety gear matters, especially if you’re using professional-strength cleaners. Rubber gloves (proper thick ones, not washing-up gloves), safety goggles for anything acidic or alkaline, and knee pads if you’re planning to hand-scrub. Knee pads make a long session on the floor much more bearable.
Here’s the most important step many people skip: test your chosen cleaner on a hidden bit of tile first. Under a kitchen cupboard, behind the fridge, anywhere that doesn’t show. Wait 24 hours to make sure nothing bad happens. Discovering your cleaner has bleached your tiles after you’ve done the whole floor is not a fun experience.
Tip: When testing products, take a photo of the test area before and after. Sometimes changes are subtle and you only notice them when you compare photos side by side.
The quickest way to avoid a nasty surprise is to read the cleaner label for the words quarry tile, unglazed tile or natural stone, and test on a hidden patch first. If you are cleaning a sealed floor, check what the sealer maker recommends, since strong cleaners can strip a sealer as well as dirt.
Modern quarry tiles
- Sweep and vacuum so loose grit is not ground in as you scrub.
- Apply a tile cleaner made for porous floors, diluted as the label says, using a mop or sponge. Work in sections of two or three square metres so it never dries on the tiles.
- Leave it for the dwell time on the label, usually a few minutes, so the cleaner does the work rather than your arm.
- Scrub with a stiff-bristled brush, paying particular attention to the grout lines, where dirt collects.
- Lift the dirty water with a wet vacuum or mop and change your rinse water often.
- Rinse the whole floor at least twice with clean water. Residue left behind causes stickiness and attracts dirt.
- Dry and leave to cure. Remove standing water, then allow at least 24 to 48 hours before sealing or putting furniture back.
For very dirty or greasy modern tiles, Intensive Tile Cleaner Maximum Power is described as suitable for textured and porous tiles and can be used diluted, with stronger dilution for badly soiled floors. Follow the label dilution for your floor, and use the stronger setting only after a patch test. For kitchen floors with oil and grease, Smartseal Heavy Duty Tile & Stone Cleaner is aimed at hard surfaces including quarry tile, slate and porcelain.
Grout needs its own attention, especially in kitchens, where grease builds up. A grout and cement residue remover such as GLEAN Grout & Cement Residue Remover is made for grout haze and cement film. These are acidic products, so wear goggles and gloves, patch test, keep them off any surface the label does not name, and rinse thoroughly. Our guide to cleaning grout covers gentler options for everyday grout staining.
Apply your grout cleaner, use a dedicated grout brush (or an old toothbrush for small areas), and scrub in circular motions. Let it sit for a few minutes if the grout’s really grotty, then rinse thoroughly.
Drying Time
After all that rinsing, remove as much water as possible. A wet vacuum is brilliant for this if you have one. Otherwise, mop repeatedly with dry towels. Then leave the floor to dry for at least 24 hours, preferably 48 hours, before you seal it or put furniture back.
Victorian and older quarry tiles
Right, this is where things get more involved. Victorian tiles can’t be cleaned the same way as modern ones, and there’s no quick shortcut.
Why Normal Methods Don’t Work
Victorian quarry tiles have inconsistent surfaces full of little ridges and valleys. A rotary floor machine just skates over the high points and misses the low spots. Plus, the rough tile surface shreds the cleaning pads to ribbons. There’s only one method that truly works: getting down on your hands and knees and hand-scrubbing every tile.
Yes, it’s hard work. Yes, it takes ages. But the results are genuinely transformative, and there’s something satisfying about bringing 100-year-old tiles back to their former glory.
The Supplies You’ll Need
Get yourself a detail scrubbing brush (the type professional tile cleaners use), hand scouring pads, knee pads (seriously, don’t skip these), several buckets, and patience. Lots of patience.
The order matters, because each stage prepares the tile for the next. In short:
- Strip wax and oil with an alkaline cleaner, working a small area at a time and never letting it dry.
- Treat any hardened wax or old varnish patches separately, with ventilation and strict attention to the product label.
- Rinse thoroughly until no alkaline residue remains.
- Only if cement, lime or salt deposits remain, use an acid-based product that names quarry tile, after a patch test.
- Brush away efflorescence as it appears while the floor dries.
- Let the floor dry for a minimum of five days before sealing.
Step One: Alkaline Cleaning
Victorian tiles were traditionally maintained with natural beeswax and linseed oil. Over a century, these substances have soaked deep into the tiles and turned into a grimy, sticky buildup that attracts dirt. You need to strip all this out before anything else.
Use a heavy-duty alkaline cleaner designed for stripping wax and oil. Apply it with a spray bottle or mop, working in small sections. Don’t let it dry out. You want a wet slurry to work with, so if it starts drying, spray on more cleaner or water.
Now get down on your knees and scrub. Use your detail brush in circular motions, really working the cleaner into all those little ridges and recesses. Clean the grout lines whilst you’re there. Work one square metre at a time.
Wipe up the dirty liquid with a cloth or sponge, rinsing it frequently in a bucket of clean water. Don’t let the dirty solution dry back onto the tiles or you’ll be doing it again. Once you’ve done a section, rinse it with clean water several times.
This is genuinely hard work. If you’ve got 50 square metres of Victorian tiles, budget a full weekend for this step alone. Put on some music, take regular breaks, and remember the end result will be worth it.
Hardened wax and old varnish
Some floors carry patches of wax that the alkaline stage will not shift, and occasionally an old polyurethane or yacht varnish was applied, which is a different problem altogether. For hardened wax, use a proprietary wax remover made for tile or stone, in small patches, exactly as the label directs, and follow it with the alkaline cleaner to remove any trace. Solvent-based products are flammable and their fumes are harmful.
Warning: Open all windows and doors, keep every source of ignition away, wear thick chemical-resistant gloves and eye protection, and never leave a solvent sitting on the tiles. If the finish is a varnish or polyurethane coating, this is the point to get a specialist quote rather than escalating to stronger chemicals yourself.
Step Three: Acid Cleaning
Once all the wax and oil are gone, it’s time for acid treatment. This removes cement residue, old lime plaster, efflorescence (white salt deposits), and general mineral buildup.
But here’s the critical bit: test the acid in a hidden spot first. Always. Some very old tiles can react unexpectedly to acids, even though proper quarry tiles should be acid-resistant.
If cement or lime deposits are left after the alkaline stage, an acid-based cement residue remover such as GLEAN Grout & Cement Residue Remover is made for exactly that. Test it in a hidden spot first, because some very old tiles react unpredictably, and follow the label for dilution and contact time.
Make absolutely certain you’ve rinsed away all the alkaline cleaner first. Acids and alkalis neutralise each other, so if there’s still alkaline cleaner present, the acid won’t work properly.
Apply your acid cleaner and watch for reactions. It might fizz or “bloom” when it encounters cement-based materials, which is normal and shows it’s working. Agitate with your stiff brush, leave it for 5-10 minutes (don’t let it dry), then rinse immediately with loads of clean water.
For stubborn areas, you can repeat the process. Just make sure you rinse thoroughly each time.
Step Four: Efflorescence (Those White Patches)
After cleaning old tiles, you’ll often see white powdery deposits appearing on the surface. This is efflorescence, basically salts from deep in the tiles being drawn to the surface by moisture. Don’t panic. It’s completely normal and not a sign you’ve done something wrong.
You can brush it away with a stiff brush, vacuum it up, or give it a light wash with diluted acid cleaner. It might reappear several times during the drying process. Just keep brushing or vacuuming it away each time it shows up.
Step Five: The Long Dry
Victorian tiles need serious drying time. We’re not talking overnight. We’re talking a minimum of five days, often longer in winter or damp conditions. Sometimes up to two weeks.
Test whether they’re dry enough by taping a small square of plastic sheeting to the floor overnight. If there’s condensation underneath it in the morning, the tiles need more drying time. Only when you get no condensation are they ready for sealing.
This waiting is frustrating, but sealing damp tiles traps moisture inside, which causes all sorts of problems later. Be patient.
Stubborn marks and gentler fixes
Different messes need different approaches. Here’s how to tackle the most common quarry tile problems.
Oil and Grease (The Kitchen Nightmare)
Fresh spills are easy: blot immediately with kitchen roll, sprinkle on bicarbonate of soda to absorb the oil, leave it 15 minutes, then wipe with warm soapy water. Rinse and dry.
But old, set-in grease? That needs serious products.
For old, set-in grease, Smartseal Heavy Duty Tile & Stone Cleaner can be applied to greasy areas and left for the time on the label before you scrub with a stiff brush. Rinse really thoroughly, because heavy-duty cleaners can leave a film.
Very greasy floors sometimes need a strong alkaline degreaser. Use only a product sold for floors, dilute it exactly as the manufacturer says, wear goggles and gloves, never mix it with another cleaner and rinse until no film remains. Too strong a mix can leave a white mineral film that is hard to remove.
Grout Haze and Cement Residue
After laying new tiles or re-grouting, you often get a cement film on the tile surface.
For stubborn grout haze or cement film after laying new tiles or re-grouting, use a product made for the purpose, such as the cement residue remover mentioned above, with the dwell time on its label, and rinse thoroughly before sealing.
For fresh grout haze (within 30 minutes of grouting), you can often wipe it straight off with a damp cloth and a bit of diluted cleaner. This is why professional tilers clean as they go.
Wax Buildup
Years of traditional wax polishes create a yellowed, sticky mess that attracts dirt like a magnet. Stripping it off requires patience.
You’ll need a multi-purpose alkaline stripper with a long dwell time. Apply it generously, leave it 15-20 minutes to penetrate, then scrub hard with a stiff brush. You’ll probably need several applications for heavy wax buildup. Rinse thoroughly between applications.
Steam cleaning combined with alkaline cleaners can also work. The heat melts the wax whilst the cleaner breaks it down chemically.
Rust Marks
Got rust stains from metal furniture legs or tools left on the floor? You’ll need a specialist rust remover designed for natural stone.
Apply it to the rust marks, scrub with a stiff brush, and watch for the solution turning purple as it reacts with the iron. Don’t let it dry on the surface. Rinse it off within minutes. You need to work quickly with rust removers.
Faded and Discoloured Tiles
Victorian tiles often look washed out, with black tiles appearing grey-blue and red tiles looking pink. This isn’t damage. It’s just the loss of natural oils that used to enhance the colour.
The good news? Proper sealing with colour-enhancing products brings the colour right back, often looking better than the old wax coating ever did. We’ll cover sealing products shortly.
Paint Splashes
Paint on quarry tiles happens, especially if you’ve been decorating.
Use a plastic or sharp scraper to remove the bulk of dried paint carefully. Soak the remainder with warm water or Intensive Tile Cleaner. For stubborn paint, a paint stripper is a last resort that needs excellent ventilation, a patch test and the label followed to the letter.
Scrub with a brush and rinse extensively afterwards.
Gentler, lower-risk cleaning
Not everyone wants strong chemicals, and for light or localised dirt you often do not need them. These options work on quarry tiles with some limits.
The Vinegar Soak Method
White vinegar is surprisingly effective for deep cleaning old tiles, and it’s about as natural as you can get.
For tiles already laid and sealed, don’t use vinegar. It’ll damage the sealer. But for unsealed tiles or tiles you’re planning to relay, it works brilliantly.
Mix equal parts white vinegar and water, apply it to the tiles, leave it 10-15 minutes, scrub with a stiff brush, rinse thoroughly, and dry completely. The smell is pretty pungent, so open windows.
Vinegar is acidic, so it can dull cement grout and damage some sealers. Keep it for lifted tiles or unsealed floors, never use it on a floor you have sealed, and rinse it away fully.
- Put the lifted tiles in a lidded container and cover them completely with white vinegar.
- Seal the lid to contain the smell and leave them soaking for two to three weeks or more.
- Take them out and scrub hard with a wire brush, wearing gloves and eye protection.
- Rinse in clean water, then rinse again in a second bucket of fresh water.
- Dry them completely, ideally outdoors in the sun, and store them somewhere dry until relaying.
The smell is absolutely horrible, fair warning. But the results can be amazing for heavily soiled old tiles. Just make sure you dry them properly in sunshine rather than stacking them wet, or you’ll get black mould between the tiles.
Bicarbonate of Soda Paste
For spot stains and smaller problem areas, bicarbonate of soda is brilliant.
Mix bicarbonate of soda with just enough water to make a thick paste. Apply it to the stained area, leave it 15-30 minutes, scrub gently with a soft brush, rinse with clean water, and dry thoroughly.
This gentle method works well on organic stains and general discolouration without any harsh chemicals whatsoever.
Simple Washing-Up Liquid
For light cleaning and regular maintenance, honest washing-up liquid does a perfectly good job.
Add a few drops to warm water, mop or scrub as usual, rinse with clean water, and dry properly. It’s not going to shift heavy soiling, but for everyday dirt it’s effective and costs virtually nothing.
Wire Brushing (After Vinegar)
After soaking tiles in vinegar, you need a good scrub to finish the job.
Use a stiff wire brush with clean water, scrubbing tiles vigorously one at a time. Rinse each tile in a bucket of clean water, then do a final rinse in a second bucket of fresh water. Dry them in direct sunshine if you can, spacing them apart on a flat surface so air circulates around them.
Tip: When drying tiles outdoors, don’t stack them whilst they’re wet. Lay them flat with small gaps between each tile. Wet tiles stacked together develop black mould spots that need extra cleaning.
| Job | Method | Caution |
|---|---|---|
| Weekly | Sweep, then damp mop with a pH-neutral cleaner | Choose a cleaner that does not leave a film |
| Deep clean | Warm water and a mild alkaline cleaner for oil and wax | Patch test first and rinse several times |
| Old sealer or wax | A wax or sealer remover made for tile | Do not scrape with metal tools |
| Cement film, lime, salts | An acid-based remover that names quarry tile | Patch test, ventilate, rinse thoroughly, never mix with other products |
| White bloom (efflorescence) | Dry brush or vacuum as it appears | Do not flood the floor with water |
| Paint splashes | Scrape gently, soften with warm water | Stripper only as a last resort, with ventilation |
Sealing: do it once the floor is properly dry
Once your quarry tiles are spotlessly clean and completely dry, sealing them protects your hard work and makes future cleaning much easier.
Do You Actually Need to Seal?
Modern glazed quarry tiles might not need sealing since the glaze provides protection. But unglazed modern tiles benefit from it, especially in kitchens or high-traffic areas. Victorian and old quarry tiles absolutely need sealing after cleaning. There’s no debate on that one.
The benefits are significant:
- Stains can’t soak in because they sit on the sealed surface
- Dirt doesn’t penetrate the tile, making cleaning much easier
- Many sealers restore and deepen the natural tile colours
- Water resistance matters particularly for outdoor tiles
- Your tiles last longer with proper protection
Getting the Timing Right
This is crucial: never seal damp tiles. You’ll trap moisture inside, which causes problems you don’t want to deal with.
For modern tiles, wait at least 24-48 hours after your final cleaning. For Victorian tiles, wait at least 5-7 days, longer in winter. Test dryness with the plastic sheet method we mentioned earlier. Only seal when you get no condensation overnight.
Best Sealers for Different Finishes
For most quarry tiles you need a sealer made for porous natural materials, usually from a tile specialist rather than a supermarket, with brands such as LTP, Lithofin, Tile Doctor or Fila making well-known ranges. Check the label to see that it suits your tile, whether it is for indoor or outdoor use, and what finish it gives. If you prefer to compare options in one place, a quarry tile sealer search shows what is available, but do check the label before you buy.
For a Low Sheen Finish Indoors
Water-based acrylic sealers that give a subtle sheen work well. You’ll typically need 4-5 coats, allowing drying time between each coat. These are popular choices for traditional-looking floors.
For Damp Issues or Outdoor Tiles
Breathable sealers allow moisture vapour to escape, which matters when there’s no damp-proof membrane or for outdoor tiles. Look for products specifically marked as breathable or suitable for external use. Apply 4-5 coats.
For a Natural Matte Finish
Penetrating sealers with no surface sheen are excellent. You typically only need 2-3 coats. They’re brilliant for external areas and keep that natural look whilst providing water and oil repellency.
For Colour Enhancement
Solvent-based colour-enhancing sealers intensify natural tile colours beautifully. They’re particularly effective on faded Victorian tiles, especially red ones. Despite enhancing colour, quality products remain breathable.
How to Apply Sealer Properly
Sealing isn’t complicated, but you need to do it carefully.
Make absolutely sure the surface is bone-dry. Test with the plastic sheet method if you’re uncertain. No visible dampness whatsoever.
Use a paint pad applicator with a tray (recommended) or a soft cloth. Some people use foam brushes for edges and corners. Apply the first coat in thin, even coverage across the whole floor. Don’t create puddles or apply it too thickly. Make sure you don’t miss any spots.
Let it dry according to the manufacturer’s instructions, typically 2-4 hours between coats. Keep windows open for ventilation.
Apply subsequent coats the same way. Most products need 2-5 coats total depending on the specific sealer. More coats generally mean better protection. Make sure the final coat is completely even.
After the last coat, allow 24 hours before walking on it lightly. Wait 48-72 hours before heavy use or putting furniture back.
Test the cure with a water bead test. A drop of water should form a perfect bead on fully sealed tiles. If it soaks in, you need another coat.
Traditional Wax Polish for Authentic Victorian Look
If you want that authentic Victorian appearance, consider wax polish after sealing. Traditional beeswax-based polishes give a gorgeous deep lustre and a lovely smell. Apply with a soft cloth, buff to a shine, and reapply every few months to maintain that beautiful finish.
Just like when you’re cleaning brass at home, the right finishing product makes all the difference to the final appearance.
Kit worth having for the job
Having proper tools makes the job considerably easier and produces better results.
Cleaning Tools Worth Buying
Mops: Get a microfibre mop with stitched ends, a looped-end knit mop, or a synthetic tube mop. Don’t bother with old string mops. They’re useless on quarry tiles.
Brushes: You’ll want a stiff-bristle scrubbing brush for general work, a detail scrubbing brush for hand-scrubbing Victorian tiles, a wire brush if you’re using the vinegar soak method, a grout brush or V-shaped tile brush, and a soft-bristle broom for daily sweeping.
Everything Else: Multiple buckets (keep clean and dirty water separate), spray bottles for applying cleaners, a wet vacuum if you can stretch to one (makes life much easier but isn’t essential), plenty of cloths and sponges, kitchen roll, plastic sheeting for moisture testing, a paint pad and tray for sealing, and a sharp scraper for stubborn residue.
Safety Gear You Shouldn’t Skip
Don’t mess about with safety equipment. Chemical burns, respiratory irritation, and eye damage happen quickly.
Get heavy-duty rubber gloves (not thin washing-up gloves), safety goggles for anything acidic or alkaline, knee pads for hand-scrubbing (your knees will be grateful), a respirator mask for strong chemicals or poor ventilation, and old clothes you don’t mind ruining.
A gentle cleaner, a stiff brush and a sealer cover most quarry tile jobs.
If the floor still looks wrong
Most failed jobs come down to a handful of causes. Work through these before you reach for something stronger.
Using the Wrong Products
Don’t use acidic cleaners without testing first. Some old tiles react badly. Don’t use no-rinse enzymatic cleaners, which can permanently damage grout. Bleach-based products are ineffective on quarry tiles and can damage grout. And never use wax on outdoor tiles.
Always use products specifically designed for quarry tiles or natural stone.
Drowning Your Tiles
The porous nature of quarry tiles means excess water causes problems. It can stain the tiles, lead to mould growth, bring efflorescence to the surface, and delay sealing for ages.
Wring your mop out properly and always dry tiles after cleaning. This simple step prevents so many problems.
Wrong Tools for the Job
String mops shred and leave fibres everywhere. Rotary machines on Victorian tiles skip the low spots and wreck the cleaning pads. Abrasive scrubbers that are too harsh cause scratches.
Match your tools to your specific tile type.
Skipping Important Steps
The biggest mistakes people make:
- Not rinsing after acid cleaning (leaves residue that affects sealer)
- Sealing before tiles are completely dry (traps moisture)
- Not testing products first (discovers problems after treating whole floor)
- Insufficient rinsing of cleaning products (causes sticky residue)
- Rushing the drying process on Victorian tiles (causes sealer failure)
Expecting Miracles Overnight
Victorian tile restoration takes time. A lot of time. Expecting to finish it in an afternoon leads to cutting corners, getting poor results, and having to do it all again.
Budget a full weekend for the cleaning plus 5-7 days drying time. That’s just reality.
Sometimes cleaning doesn’t go to plan. Here’s how to rescue the situation.
Tiles Still Look Mucky After Cleaning
This usually means old sealer buildup creating a dirty appearance, cleaner not strong enough for the level of soiling, insufficient scrubbing, or dirt embedded deep in the tile pores.
Try a stronger product like Intensive Tile Cleaner Maximum Power or Smartseal Heavy Duty Cleaner. Apply alkaline stripper to remove old sealer. Consider the vinegar soak method for unsealed tiles. Scrub harder and for longer. If nothing works, it might be time to call professionals.
White Haze Appeared
This is either grout haze from recent grouting, efflorescence (salt deposits), cleaner residue that wasn’t rinsed properly, or too much caustic soda leaving a mineral film.
Use GLEAN Grout & Cement Residue Remover for grout haze. Rinse more thoroughly with multiple clean water changes. Brush or vacuum away efflorescence. If a mineral film has formed from an over-strong alkaline cleaner, use an acid-based product only as its label directs, after a patch test.
The Tiles Lost Their Colour
This happens when you remove old wax and oils that were enhancing colour, through natural aging, and it’s particularly common with Victorian tiles.
Don’t worry. This is actually normal and not permanent damage. The tiles are now in their true natural state. Sealing with colour-enhancing products restores and deepens the colour. The result often looks better than the old wax coating.
Grout Lines Still Dirty
This indicates deep staining, not enough scrubbing specifically on grout, or damaged/deteriorating grout.
Use GLEAN Grout & Cement Residue Remover and a proper grout brush. Apply the cleaner and allow longer dwell time. Scrub grout lines individually by hand. For very stubborn staining, consider a grout pen or whitener. If the grout is actually damaged, you might need to re-grout.
Sticky or Tacky Floor
This means cleaner residue wasn’t fully rinsed away, old wax softened but didn’t get removed, or too much sealer was applied.
Rinse extensively with clean water (multiple changes). Re-clean with just fresh water. If it’s a wax issue, strip it completely with alkaline stripper. If it’s excess sealer, you might need to strip and re-seal properly.
Dark Patches in Some Areas
This is usually uneven drying (those areas are still damp), uneven sealer application, or some tiles being more porous than others.
If you’ve just cleaned, allow more drying time. Dark areas are where moisture remains. If you’ve sealed, you might need additional sealer on lighter areas. Victorian tiles often vary in porosity naturally, so some variation is normal.
DIY or a specialist, and how to keep up afterwards
When DIY makes sense
Tackle it yourself for regular maintenance and upkeep, light to moderate soiling, small to medium areas (under 20 square metres), modern quarry tiles in decent condition, and when you’ve got time, patience, and physical ability.
Costs depend heavily on the area and the condition of the floor, so work out a rough shopping list first: a suitable cleaner, a stiff brush, a good mop, thick gloves, goggles, knee pads and a sealer. Buying one cleaner for routine care and one stronger product for the deep clean is usually enough.
When to bring in a specialist
Get professional help for very old Victorian tiles with heavy buildup, large commercial areas, polyurethane or yacht varnish removal (not a DIY job), deeply ingrained stains you can’t shift, important deadlines such as a house sale or event, physical limitations that prevent hands-and-knees work, and time constraints.
Specialists have rotary machines, wet vacuums and stronger-grade products, and can usually clean, seal and finish in one visit. Quotes vary with the size of the floor, the condition of the tiles and your location, so get several in writing, check that the quote covers cleaning, sealing and finishing, and ask whether they have experience with quarry or Victorian tiles specifically.
A rough rule of thumb: do the routine care and light deep cleaning of modern tiles yourself, and consider a specialist for Victorian tile restoration, heavily soiled floors or very large areas. The same principle applies to cleaning double-glazed windows, where professional equipment can justify the cost.
Keeping a schedule
Establishing a routine prevents major problems and keeps your quarry tiles looking brilliant year-round.
Daily (High-Traffic Areas)
- Sweep or vacuum loose debris
- Wipe spills immediately
- Spot clean with damp cloth as needed
Weekly
- Damp mop with pH-neutral cleaner like Lakeland Stone & Tile Floor Cleaner or HG Terracotta Clean & Shine
- Dry thoroughly afterwards
- Check for new stains or problems
Monthly
- Deep mop with appropriate cleaner
- Clean grout lines with grout brush
- Inspect for damage or wear
- Check sealer condition with water bead test
Quarterly
- Intensive cleaning with Intensive Tile Cleaner or Smartseal Heavy Duty Cleaner
- Address any stubborn stains
- Clean under furniture and in corners
- Assess whether re-sealing is approaching
Annually
- Professional inspection (optional but recommended)
- Re-seal if water no longer beads on surface
- Full assessment of grout condition
- Plan for any restoration needs
For Victorian Tiles Specifically
- More frequent inspection for problems
- Earlier intervention when stains occur
- Gentle regular maintenance beats harsh occasional cleaning
- Balance effectiveness with preserving tile character
- Annual wax polish application if using traditional finish
Similar to cleaning your washing machine regularly, establishing habits early prevents small issues becoming major problems.
For related surfaces, our guides to cleaning old and Victorian tile floors and cleaning limestone use similar principles: patch test, gentle first, rinse well and keep the stone dry.
Quarry tile questions that come up again and again
How often should quarry tiles be resealed? It depends on traffic and the products used, but a common rule of thumb is every few years. The reliable check is the water bead test: drop a little water on the floor. If it beads, the sealer is working. If it soaks in and darkens the tile, it is time to reseal. Busy hallways and kitchens usually need it sooner than a spare room.
Can you use a steam cleaner on quarry tiles? Often yes, particularly on unsealed modern tiles with an alkaline cleaner to break down wax. Steam puts a lot of moisture into porous tiles, so ventilate and dry the floor thoroughly afterwards. On sealed tiles, check the sealer manufacturer’s advice first, because some sealers do not tolerate heat.
Can you use bleach on quarry tiles? It is not recommended. Bleach does not clean the porous body of the tile well, can discolour or weaken grout and is harsh on lungs and skin. Never mix it with any acid or other cleaner. A purpose-made tile cleaner does the job better and more safely.
Should outdoor quarry tiles be sealed? Usually yes, since rain, frost and dirt hit them harder than indoor tiles. Choose a breathable sealer sold for external use so moisture vapour can escape, and avoid wax-based finishes outdoors, which weather badly. Our patio cleaning guide covers general outdoor cleaning.
Can I use my normal floor cleaner on quarry tiles? Most supermarket floor cleaners are made for glazed ceramic or vinyl, and on porous quarry tiles they can leave residue that builds up and dulls the floor. No-rinse and enzyme-type products in particular can be a problem. Use a pH-neutral cleaner that names quarry tile, terracotta or natural stone.