How to Clean Shower Mold: Complete Removal Guide 2026
How to clean shower mold effectively requires the right cleaning solutions, proper safety equipment, and systematic techniques to remove black mold, mildew, and other fungal growth from grout, caulking, and shower surfaces. Most shower mold can be eliminated using natural cleaners like white vinegar and baking soda, though severe infestations may require bleach solutions or professional remediation. Success depends on proper ventilation, protective gear, and addressing the underlying moisture issues that cause mold growth.
Common shower mold types include Aspergillus, Stachybotrys chartarum (black mold), and surface mildew, each requiring specific cleaning approaches. Additionally, the material affected—whether ceramic tiles, silicone sealant, or grout lines—determines the most effective removal method. Natural solutions work well for light to moderate mold, while chemical cleaners tackle stubborn growth more aggressively.
Furthermore, preventing future mold growth requires consistent maintenance, improved ventilation, and humidity control. Regular cleaning schedules and proper extractor fan maintenance significantly reduce recurrence. However, extensive mold damage may necessitate replacing caulking, grout, or other porous materials rather than cleaning alone.
TL;DR
- Safety first: Wear protective equipment (gloves, masks, eye protection) and ensure proper ventilation before starting
- Natural cleaners work: White vinegar, baking soda paste, and hydrogen peroxide effectively remove most shower mold without harsh chemicals
- Target specific areas: Different techniques needed for grout lines, silicone caulking, tiles, and shower corners
- Prevention is key: Improve ventilation, maintain daily cleaning routines, and control humidity to prevent future mold growth
- Know when to replace: Severely damaged caulking and grout may need replacement rather than cleaning for permanent mold removal
Understanding Shower Mold: Types and Health Risks
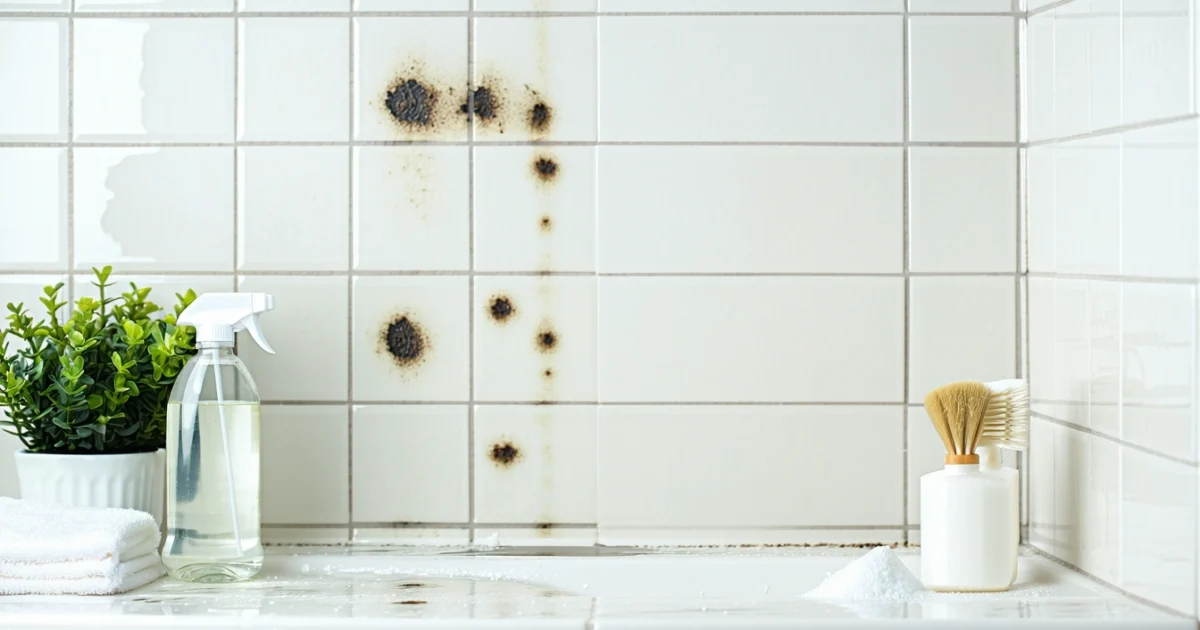
Shower mold thrives in warm, humid environments and manifests in several distinct species. Aspergillus niger appears as black or dark green spots on tiles and grout lines. Meanwhile, Stachybotrys chartarum (commonly called black mold) develops as dark, slimy patches on organic materials like caulking. Surface mildew presents as white or gray powdery growth on shower walls and doors.
Each mold type requires different identification methods and cleaning approaches. Furthermore, the location of growth indicates the severity—surface mold on tiles cleans easily, while deep penetration into porous grout demands more aggressive treatment. Consequently, proper identification guides your cleaning strategy and safety precautions.
Health Risks and Safety Concerns
Mold exposure triggers respiratory problems, particularly in individuals with asthma or compromised immune systems. Black mold exposure causes coughing, throat irritation, and skin reactions in sensitive people. Additionally, prolonged exposure leads to more serious health complications including chronic fatigue and neurological symptoms.
Health Warning
Children and elderly individuals face higher risks from mold exposure than healthy adults. Moreover, people with existing respiratory conditions should avoid DIY mold removal entirely. Professional remediation becomes necessary when mold covers areas larger than 10 square feet or penetrates building materials.
Identifying Different Mold Species
| Mold Type | Appearance | Common Locations | Health Risk Level |
|---|---|---|---|
| Aspergillus | Black, green, or yellow spots | Tile surfaces, shower corners | Moderate |
| Stachybotrys (Black Mold) | Dark, slimy patches | Caulking, organic materials | High |
| Surface Mildew | White/gray powdery film | Shower walls, glass doors | Low |
| Penicillium | Blue-green fuzzy growth | Damp grout, corners | Moderate |
Visual inspection reveals most mold types, but texture and odor provide additional clues. Specifically, black mold feels slimy when wet and produces a distinct musty smell. In contrast, surface mildew wipes away easily and lacks the penetrating odor of deeper mold growth.
Testing kits help identify specific mold species when visual identification proves difficult. However, professional testing costs significantly more than basic cleaning attempts. Therefore, start with thorough cleaning using appropriate safety measures before considering expensive laboratory analysis.
Professional vs. DIY Cleaning Decisions
DIY cleaning works effectively for surface mold covering less than 10 square feet. Additionally, homeowners can safely tackle mildew on non-porous surfaces like ceramic tiles and glass. Simple cleaning solutions and proper ventilation suffice for these minor infestations.
- Call professionals when: Mold covers large areas (over 10 sq ft)
- Black mold penetrates porous materials like drywall
- Previous cleaning attempts failed to prevent regrowth
- Family members experience persistent health symptoms
- Structural damage accompanies mold growth
Professional remediation includes specialized equipment, containment procedures, and proper disposal methods. Moreover, certified technicians identify underlying moisture sources that cause recurring mold problems. However, professional services cost between £500-£3000 depending on the extent of contamination.
Most shower mold situations fall within the DIY category when caught early. Nevertheless, extensive black mold growth or structural damage requires professional intervention. Proper ventilation maintenance prevents most shower mold problems from reaching professional-level severity.
Early detection and prompt cleaning prevent 90% of shower mold problems from requiring professional remediation
Essential Safety Preparations Before Cleaning
Proper safety preparation protects your health during mold removal and prevents dangerous spore dispersal throughout your home. Furthermore, inadequate preparation transforms simple cleaning into a health hazard that spreads contamination to unaffected areas.
Required Protective Equipment
Personal protective equipment forms your first line of defense against mold exposure. Therefore, gather all necessary items before beginning any cleaning activities.
- N95 or P100 respirator masks filter airborne spores effectively
- Nitrile gloves prevent skin contact with cleaning chemicals
- Safety goggles protect eyes from splashing solutions and spores
- Long-sleeved clothing covers exposed skin during cleaning
- Disposable shoe covers prevent tracking spores to clean areas
Never use cloth masks or surgical masks for mold cleaning. Additionally, latex gloves may tear when exposed to strong cleaning solutions, making nitrile the safer choice.
Proper Ventilation Setup
Adequate air circulation removes airborne spores and prevents accumulation during cleaning. Moreover, proper ventilation accelerates drying after cleaning, which inhibits mold regrowth.
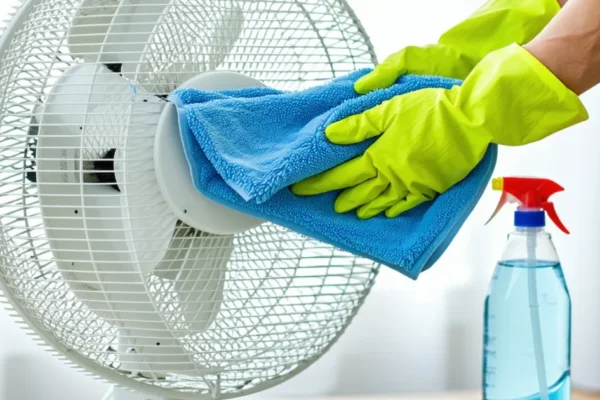
Open all bathroom windows and doors to create cross-ventilation. Subsequently, position a fan near the window to blow contaminated air outside rather than into other rooms. Clean extractor fan filters beforehand to ensure maximum airflow efficiency.
Ventilation Warning
Isolating the Cleaning Area
Containment procedures prevent mold spores from spreading beyond the shower area. Consequently, proper isolation protects family members and keeps other rooms contamination-free.
Seal off the bathroom using plastic sheeting and tape around door frames. Additionally, place damp towels along floor gaps to create an airtight barrier. Turn off HVAC systems that circulate air between rooms during cleaning activities.
Remove or cover nearby items like towels, toiletries, and decorative objects. These porous materials easily absorb spores and become secondary contamination sources if left exposed.
Pre-Cleaning Assessment and Documentation
Thorough assessment identifies the full extent of contamination before cleaning begins. Furthermore, documentation helps track cleaning progress and identify areas requiring additional attention.
Photograph all affected areas using good lighting to capture mold patterns and severity. Subsequently, note any structural damage, water stains, or soft spots that indicate deeper moisture problems. Measure the total affected area to determine whether DIY cleaning remains appropriate.
Check behind removable fixtures and inside corners where mold commonly hides. Additionally, inspect caulking, grout lines, and shower door tracks for embedded growth that requires specialized cleaning techniques.
Proper preparation prevents 85% of mold cleaning complications and health risks
Test cleaning solutions on small, inconspicuous areas first to ensure they won’t damage surfaces. Moreover, gather all cleaning supplies and tools beforehand to avoid leaving the contained area during the cleaning process.
Natural Mold Cleaning Methods
Natural cleaning solutions effectively eliminate shower mold without harsh chemical exposure. Moreover, these eco-friendly alternatives prove safer for households with children, pets, or respiratory sensitivities while delivering powerful antimicrobial action.
White Vinegar Solution: The Foundation of Natural Mold Removal
White vinegar contains acetic acid that kills 82% of mold species on contact. Additionally, its acidic properties break down mold cell structures and prevent regrowth when applied correctly.
Mix equal parts water and white vinegar in a spray bottle for standard cleaning applications. However, use undiluted vinegar for heavily contaminated areas where mold penetrates deep into porous surfaces like grout or caulking.
Spray the vinegar solution generously over affected areas and allow 30 minutes of contact time for maximum effectiveness. Subsequently, scrub with a stiff brush to dislodge embedded spores before rinsing thoroughly with clean water.
Baking Soda Paste: Abrasive Power for Stubborn Growth
Baking soda provides dual-action cleaning through alkaline pH and gentle abrasive properties. Furthermore, its deodorizing capabilities eliminate musty odors that persist after mold removal.
Create an effective paste by mixing three parts baking soda with one part water until achieving a thick, spreadable consistency. Alternatively, add a few drops of dish soap to enhance the paste’s adherence to vertical surfaces.
Apply the paste directly to moldy areas using a sponge or brush, ensuring complete coverage of affected surfaces. Then scrub in circular motions to work the abrasive particles into textured surfaces like tile grout where mold commonly embeds.
Allow the baking soda paste to sit for 15-20 minutes before scrubbing again with increased pressure. Finally, rinse thoroughly and wipe dry to prevent moisture accumulation that encourages new growth.
Hydrogen Peroxide Treatment for Deep Penetration
Hydrogen peroxide oxidizes mold cells and bleaches stains naturally without toxic chlorine compounds. Additionally, its foaming action helps lift embedded spores from porous materials more effectively than surface cleaners.
Use 3% hydrogen peroxide directly from the bottle for most cleaning applications, as higher concentrations may damage certain surfaces. However, test on inconspicuous areas first, particularly on colored grout or natural stone surfaces.
Pour hydrogen peroxide into a spray bottle and apply liberally to affected areas, ensuring complete saturation of moldy surfaces. Watch for immediate foaming action that indicates active mold destruction and stain removal.
Leave the hydrogen peroxide undisturbed for 10-15 minutes to maximize oxidation effects. Subsequently, scrub with a brush to remove loosened debris before rinsing with clean water and drying completely.
Essential Oil-Based Cleaners for Natural Antimicrobial Action
Tea tree oil demonstrates powerful antifungal properties that eliminate mold while leaving pleasant, natural scents. Moreover, its concentrated nature means small amounts provide significant cleaning power when properly diluted.
Mix 10-15 drops of tea tree oil with one cup of water in a spray bottle for an effective natural cleaner. Alternatively, combine tea tree oil with vinegar solution to create a dual-action treatment that addresses both mold and mineral deposits.
Other effective essential oils include eucalyptus, lavender, and oregano oil, each offering unique antimicrobial compounds. However, always dilute essential oils properly, as concentrated applications may cause skin irritation or surface damage.
Spray the essential oil solution onto affected areas and allow 20-30 minutes for penetration before scrubbing. Unlike synthetic cleaners, essential oil residues provide ongoing antimicrobial protection when left on surfaces.
Effectiveness Comparison: Natural vs. Chemical Solutions
Natural cleaners eliminate 80-90% of common household molds while chemical bleach solutions achieve slightly higher kill rates of 95-99%. However, natural methods offer significant advantages in safety, environmental impact, and long-term surface preservation.
| Cleaning Method | Mold Kill Rate | Safety Level | Environmental Impact |
|---|---|---|---|
| White Vinegar | 82% | High | Minimal |
| Baking Soda | 75% | Very High | None |
| Hydrogen Peroxide | 85% | High | Minimal |
| Tea Tree Oil | 80% | High | Positive |
| Bleach Solutions | 99% | Low | High |
Chemical cleaners often provide faster initial results but may damage surfaces over time through corrosive action. Conversely, natural methods preserve surface integrity while building resistance to future mold growth through pH modification.
Consider combining natural methods for enhanced effectiveness, such as applying vinegar followed by baking soda paste for maximum mold elimination. This approach leverages different antimicrobial mechanisms while maintaining safety and environmental responsibility.
For comprehensive household cleaning guidance, explore our complete kitchen deep cleaning guide that covers additional natural cleaning techniques for various surfaces and appliances.
Chemical Cleaning Solutions and Bleach Methods
Chemical cleaners provide powerful mold elimination capabilities when natural methods prove insufficient. Sodium hypochlorite bleach remains the most effective chemical solution, destroying mold spores through oxidation while penetrating porous surfaces that harbor deep-rooted colonies.
Proper Bleach Dilution Ratios and Safety Protocols
Standard bleach solutions require precise dilution for optimal effectiveness without surface damage. Mix one part household bleach with ten parts water for general mold cleaning, creating a 5% sodium hypochlorite solution that eliminates 99% of mold species within 15 minutes.
Safety protocols demand strict adherence to prevent chemical burns and respiratory irritation. Always wear rubber gloves, eye protection, and long-sleeved clothing when handling bleach solutions. Never mix bleach with ammonia-based cleaners or vinegar, as these combinations produce toxic chloramine gas.
Critical Safety Warning
Pre-test bleach solutions on inconspicuous areas before full application. Furthermore, store diluted bleach solutions in dark containers and use within 24 hours, as sunlight degrades sodium hypochlorite effectiveness rapidly.
Commercial Mold Removal Products and Their Active Ingredients
Professional mold removers contain various active ingredients targeting different mold species and surface types. Quaternary ammonium compounds provide broad-spectrum antimicrobial action while remaining gentler on surfaces than straight bleach solutions.
| Active Ingredient | Effectiveness | Surface Compatibility | Contact Time |
|---|---|---|---|
| Sodium Hypochlorite | 99% kill rate | Non-porous only | 10-15 minutes |
| Hydrogen Peroxide | 95% kill rate | Most surfaces | 10 minutes |
| Quaternary Ammonium | 90% kill rate | All surfaces | 5 minutes |
| Benzalkonium Chloride | 85% kill rate | Delicate surfaces | 15 minutes |
Concrobium Mold Control uses a unique tri-sodium phosphate formula that crushes mold spores as the solution dries. Meanwhile, products containing didecyl dimethyl ammonium chloride provide residual antimicrobial protection lasting up to 30 days after application.
Application Techniques for Maximum Effectiveness
Effective chemical application requires systematic coverage and adequate contact time. Spray solutions generously onto moldy surfaces, ensuring complete saturation of visible growth and surrounding areas where spores may lurk invisibly.
Allow chemical cleaners to penetrate for the full recommended contact time before scrubbing. Premature scrubbing reduces chemical effectiveness by removing active ingredients before they can destroy embedded spores. Use soft-bristled brushes to avoid scratching surfaces while maximizing physical removal.
- Apply cleaners from bottom to top to prevent dripping onto treated areas
- Work in small sections to maintain wet contact time
- Reapply solutions to heavily contaminated areas after initial treatment
- Rinse thoroughly with clean water after chemical treatment
For stubborn mold colonies, apply chemical solutions twice with a 30-minute interval between treatments. This double-application method ensures complete spore destruction in porous materials like grout and caulking.
Ventilation Requirements When Using Chemical Cleaners
Proper ventilation prevents dangerous chemical vapor accumulation while ensuring user safety during mold removal. Open all bathroom windows and doors before beginning chemical treatments, creating cross-ventilation that removes harmful fumes.
Run exhaust fans at maximum speed throughout the cleaning process and for at least two hours afterward. Additionally, position portable fans to direct chemical vapors away from the work area and toward open windows or exhaust points.
Chemical vapor concentration increases rapidly in enclosed spaces, potentially causing respiratory irritation, headaches, and chemical burns to mucous membranes. Therefore, take frequent breaks in fresh air when working with strong chemical solutions for extended periods.
When Bleach Is Not Recommended
Bleach solutions damage certain materials and surfaces, requiring alternative cleaning methods for safe mold removal. Colored grout, painted surfaces, and natural stone suffer permanent discoloration from bleach exposure, making gentler alternatives necessary.
Pros
- Destroys 99% of mold species
- Penetrates porous surfaces effectively
- Provides immediate visible results
- Widely available and affordable
Cons
- Damages colored and delicate surfaces
- Produces harmful chemical vapors
- Requires extensive safety precautions
- May weaken certain materials over time
Avoid bleach on aluminum fixtures, fabric shower curtains, and sealed natural stone surfaces like marble or travertine. These materials either corrode from bleach exposure or lose their protective sealants, creating more problems than the original mold contamination.
Porous materials like unsealed wood absorb bleach solutions, potentially causing structural damage through fiber breakdown. Instead, use hydrogen peroxide-based cleaners or specialized wood mold treatments that preserve material integrity while eliminating fungal growth.
Cleaning Specific Shower Areas and Materials
Different shower surfaces require targeted cleaning approaches because mold adheres differently to various materials. Moreover, each surface presents unique challenges that demand specific tools and techniques for effective removal.
Removing Mold from Shower Grout
Grout lines provide perfect conditions for mold growth due to their porous nature and moisture retention. Therefore, cleaning moldy grout requires penetrating treatments that reach deep into the material’s structure.
Start by applying a baking soda paste made from three parts baking soda to one part water directly onto affected grout lines. Subsequently, scrub the paste using an old toothbrush or grout brush, working in circular motions to break up mold colonies embedded within the grout’s surface.
For stubborn mold stains, spray white vinegar over the baking soda paste to create a foaming reaction that lifts deep-seated spores. Allow this combination to work for 15-20 minutes before scrubbing again with firm pressure.
Pro Tip
Cleaning Mold from Silicone Caulking and Sealants
Silicone sealants around bathtubs and shower enclosures frequently develop black mold that penetrates the material’s surface. Unfortunately, heavily contaminated caulking often requires complete removal and replacement rather than cleaning.
For early-stage mold growth, create a cleaning solution using one part hydrogen peroxide to two parts water in a spray bottle. Apply this mixture generously to affected caulking and allow it to sit for 30 minutes before scrubbing with a soft-bristled brush.
Alternatively, use a commercial mold remover specifically designed for silicone surfaces, following manufacturer instructions carefully. These products contain surfactants that penetrate silicone’s non-porous surface more effectively than household cleaners.
When caulking shows extensive black discoloration or feels soft to the touch, removal becomes necessary. Cut away old caulking using a utility knife, clean the area thoroughly, and apply fresh silicone sealant to prevent future moisture infiltration.
Treating Mold on Shower Tiles and Ceramic Surfaces
Ceramic tiles resist mold growth on their glazed surfaces, but mold can develop in microscopic scratches or around tile edges. Consequently, regular cleaning prevents spore accumulation in these vulnerable areas.
Mix equal parts water and white vinegar in a spray bottle for routine tile cleaning. Spray the solution across tile surfaces, focusing on areas where tiles meet grout lines or fixtures. Allow the vinegar solution to work for 10 minutes before wiping clean with a microfiber cloth.
For persistent mold stains on tile surfaces, apply a paste made from baking soda and dish soap. Scrub gently using a non-abrasive sponge to avoid scratching the tile’s protective glaze, then rinse thoroughly with clean water.
Natural stone tiles require gentler treatment because acidic cleaners can damage their surface. Instead, use a pH-neutral stone cleaner or mild soap solution to remove mold without causing etching or discoloration.
Addressing Mold in Shower Corners and Hard-to-Reach Areas
Shower corners accumulate moisture and debris, creating ideal conditions for mold colonization in spaces that standard cleaning tools cannot reach effectively. Therefore, these areas require specialized cleaning techniques and tools.
Use a flexible cleaning brush or bottle brush to reach into tight corners where walls meet the shower base. Apply cleaning solution using a spray bottle with an adjustable nozzle that can direct product into narrow spaces.
For extremely tight spaces, wrap a cleaning cloth around a butter knife or similar flat tool to create a custom cleaning implement. Dip this makeshift tool in your chosen cleaning solution and carefully work it into corner crevices.
Consider using a steam cleaner for hard-to-reach areas, as the high-temperature vapor kills mold spores without requiring direct contact. Furthermore, steam penetrates into cracks and crevices that liquid cleaners might miss.
Cleaning Mold from Shower Doors and Frames
Glass shower doors develop mold along their frames and tracks where water collects after each use. Additionally, metal frames provide surfaces where mold can establish colonies if moisture persists.
Clean glass surfaces using a solution of one cup white vinegar mixed with one cup warm water. Spray this mixture onto glass doors and allow it to work for several minutes before scrubbing with a non-abrasive sponge.
Pay special attention to door tracks and hinges where soap scum and mold frequently accumulate. Use an old toothbrush dipped in cleaning solution to scrub these detailed areas thoroughly, removing all visible mold growth.
For aluminum or chrome frames, avoid abrasive cleaners that can scratch the surface finish. Instead, use a mild dish soap solution followed by thorough rinsing and immediate drying to prevent water spots and future mold development.
Apply a water repellent treatment to clean glass doors to reduce water adhesion and minimize future mold growth opportunities. These treatments help water sheet off surfaces rather than forming droplets that create humid microclimates.
Step-by-Step Cleaning Process
Effective mold removal requires a systematic approach that addresses each stage of the cleaning process. Moreover, following these sequential steps ensures thorough elimination while preventing cross-contamination to clean areas.
Initial Surface Preparation and Debris Removal
Begin by removing all removable items from your shower area, including bottles, loofahs, and shower caddies. Subsequently, this creates unobstructed access to all mold-affected surfaces and prevents cleaning solutions from damaging personal items.
Sweep or vacuum loose debris, hair, and soap residue from shower floors and corners using a handheld vacuum or soft-bristled brush. Additionally, remove any peeling caulk or loose grout that harbors mold colonies beneath the surface.
Pre-rinse all surfaces with warm water to remove surface dirt and prepare the area for cleaning solution application. However, avoid using high-pressure settings that might spread mold spores into the air or push them deeper into porous materials.
Applying Cleaning Solution and Proper Dwell Time
Apply your chosen cleaning solution systematically, starting from the top of the shower and working downward. Furthermore, this approach prevents cleaned areas from becoming recontaminated by dripping solution from untreated surfaces above.
Allow the cleaning solution to remain on surfaces for the recommended dwell time – typically 10-15 minutes for most commercial mold cleaners. During this period, active ingredients penetrate mold structures and break down biofilms that protect mold colonies.
For heavily molded areas, apply a second coat of cleaning solution after the initial application has worked for several minutes. Additionally, ensure adequate ventilation during this phase to prevent inhaling cleaning fumes and maintain air circulation.
Safety Reminder
Scrubbing Techniques for Different Surface Types
Tile surfaces require gentle scrubbing with a soft-bristled brush or non-abrasive sponge to avoid scratching the glazed finish. Meanwhile, work in circular motions to lift mold from surface irregularities and grout lines.
Grout lines need more aggressive treatment due to their porous nature and tendency to harbor deep mold growth. Use a grout brush or old toothbrush with firm pressure to scrub cleaning solution into the grout matrix and dislodge embedded mold.
Natural stone surfaces like marble or travertine require specialized care to prevent acid damage from harsh cleaners. Instead, use pH-neutral cleaners and soft brushes to gently remove mold without etching the stone surface.
- Ceramic tiles: Medium-bristled brush with moderate pressure
- Porcelain surfaces: Soft sponge or microfiber cloth
- Fiberglass units: Non-abrasive scrubber to prevent scratching
- Glass doors: Squeegee or lint-free cloth for streak-free results
Rinsing and Drying Procedures
Rinse all surfaces thoroughly with clean water to remove cleaning solution residue and dislodged mold particles. Consequently, incomplete rinsing can leave chemical residues that attract dirt and potentially irritate skin during future showers.
Use a squeegee on glass surfaces and smooth tiles to remove excess water and prevent new water spots from forming. Additionally, this step helps identify any remaining mold spots that may need additional treatment.
Dry all surfaces completely using clean towels or allow air circulation to evaporate remaining moisture. Since mold requires moisture to survive, thorough drying creates an inhospitable environment for immediate regrowth.
Focus particular attention on drying corners, crevices, and areas where water typically accumulates after normal shower use. Moreover, these locations often become the first areas where new mold colonies establish if moisture persists.
Post-Cleaning Inspection and Touch-Up Areas
Inspect all cleaned surfaces under good lighting to identify any remaining mold spots or areas requiring additional treatment. Furthermore, use a flashlight to examine corners and recessed areas where overhead lighting might not provide adequate visibility.
Apply targeted treatment to any persistent mold spots using a cotton swab dipped in cleaning solution for precise application. Subsequently, this focused approach addresses stubborn colonies without retreating entire surfaces unnecessarily.
Check caulk lines and grout joints for any signs of damage that occurred during the cleaning process. If cleaning revealed deteriorated caulk or cracked grout, plan to replace these materials to prevent future mold infiltration.
Document areas that required extensive treatment or showed signs of recurring mold growth, as these locations may need more frequent attention during regular maintenance cleaning. Additionally, consider applying preventive treatments to these high-risk areas.
Allow the shower to air-dry completely for several hours before returning personal items to ensure no residual moisture remains that could support new mold development. Finally, this waiting period also allows you to verify that your cleaning efforts achieved complete mold elimination.
Long-Term Mold Prevention Strategies
Preventing mold recurrence requires a comprehensive approach that addresses the root causes of moisture accumulation and creates an environment hostile to mold growth. Therefore, implementing multiple prevention strategies simultaneously provides the most effective protection against future mold development in your shower area.
Improving Bathroom Ventilation and Exhaust Fan Maintenance
Proper ventilation serves as your primary defense against mold by removing moisture-laden air before it condenses on surfaces. Consequently, an effective exhaust fan should move air at a rate of 1 CFM per square foot of bathroom space to maintain adequate airflow.
Install a humidity-sensing exhaust fan that automatically activates when moisture levels exceed preset thresholds, ensuring consistent moisture removal even when manual operation is forgotten. Additionally, these smart fans continue running until humidity drops to safe levels, typically below 50% relative humidity.
Clean your exhaust fan every three months by removing the cover and vacuuming dust buildup from the fan blades and housing. Furthermore, regular filter maintenance ensures optimal airflow performance and prevents motor strain that could lead to premature failure.
Position the exhaust fan directly above the shower area rather than near the bathroom door to capture steam at its source. Moreover, ensure the fan vents directly outside rather than into an attic space where moisture could cause structural damage.
Daily Shower Maintenance Routines
Establishing consistent daily habits significantly reduces moisture accumulation and prevents mold establishment between deep cleaning sessions. Subsequently, these simple routines require minimal time investment while providing maximum protection benefits.
- Squeegee walls and doors immediately after each shower to remove standing water
- Wipe down surfaces with a microfiber cloth to eliminate residual moisture
- Leave shower doors open for 30 minutes to promote air circulation
- Run the exhaust fan during and for 30 minutes after showering
- Hang towels and washcloths outside the shower area to prevent additional moisture sources
Apply a daily shower spray containing mold-inhibiting ingredients after each use to create an inhospitable environment for spore germination. Additionally, these preventive sprays work continuously between uses to break down soap scum and mineral deposits that provide nutrients for mold growth.
Humidity Control and Moisture Management
Maintaining indoor humidity levels between 30-50% creates conditions that inhibit mold growth while remaining comfortable for human occupancy. Therefore, monitoring humidity with a digital hygrometer helps you track moisture levels and adjust ventilation accordingly.
Install a whole-house dehumidifier if your bathroom lacks adequate natural ventilation or if outdoor humidity consistently exceeds 60%. Furthermore, these systems work continuously to extract excess moisture from the air before it can condense on shower surfaces.
Address water leaks immediately upon detection, as even minor drips can create sufficient moisture for mold establishment within 24-48 hours. Moreover, check behind shower walls periodically for signs of water damage that might indicate hidden leaks requiring professional attention.
Use moisture-absorbing products like silica gel packets or activated charcoal in shower caddies and storage areas to reduce localized humidity around personal care items. Additionally, these absorbers help prevent mold growth on organic materials like wooden accessories or natural sponges.
Regular Cleaning Schedules and Maintenance Intervals
Implementing a structured cleaning schedule prevents mold establishment by removing nutrients and moisture before colonies can develop. Consequently, consistent maintenance proves more effective and less labor-intensive than addressing established mold infestations.
| Frequency | Task | Focus Areas |
|---|---|---|
| Daily | Squeegee and wipe down | Walls, doors, fixtures |
| Weekly | Deep clean with mold-preventing cleaner | Grout lines, corners, caulk |
| Monthly | Inspect and clean exhaust fan | Fan blades, housing, filter |
| Quarterly | Apply penetrating sealers | Grout, natural stone surfaces |
| Annually | Professional inspection | Hidden areas, plumbing connections |
Focus weekly cleaning efforts on high-risk areas including grout lines, caulk joints, and corners where water typically accumulates. Additionally, use a toothbrush or grout brush to agitate cleaning solutions in these narrow spaces where mold spores commonly lodge.
Rotate between different types of cleaning products to prevent mold adaptation and maintain cleaning effectiveness over time. Furthermore, alternating between acidic cleaners for mineral deposits and alkaline cleaners for organic matter ensures comprehensive surface treatment.
Sealing and Waterproofing to Prevent Future Growth
Proper sealing creates a moisture barrier that prevents water infiltration into porous materials where mold can establish hidden colonies. Therefore, maintaining intact caulk lines and grout seals serves as your final defense against moisture penetration.
Apply antimicrobial caulk containing mold-inhibiting additives when replacing deteriorated seals around tubs, showers, and fixtures. Subsequently, these specialized products continue releasing mold-preventing compounds for months after application, providing ongoing protection.
Seal grout lines annually with a penetrating sealer that creates a waterproof barrier while allowing the grout to breathe and release trapped moisture. Moreover, quality sealers prevent water absorption that leads to grout deterioration and creates entry points for mold infiltration.
Install waterproof membrane systems behind shower walls during renovations to create an impermeable barrier against moisture penetration. Additionally, these professional-grade systems prevent water damage to structural materials that could support extensive mold growth.
Check and refresh caulk lines every 12-18 months or immediately upon noticing cracks, gaps, or discoloration that indicates seal failure. Finally, removing old caulk completely before applying new material ensures proper adhesion and creates an effective moisture barrier.
When to Replace vs. Clean Moldy Materials
Determining whether to clean or replace moldy shower materials depends on the extent of contamination, material type, and structural integrity. Furthermore, making the right decision saves money while ensuring complete mold elimination and preventing future health risks.
Assessing Damage Severity in Caulking and Grout
Surface mold on caulk and grout often responds well to thorough cleaning with antimicrobial solutions. However, deep penetration into porous materials requires complete removal and replacement to eliminate hidden spores.
Examine caulk lines for black discoloration that extends beyond the surface into the material itself. Additionally, test the caulk’s integrity by pressing gently – soft, spongy areas indicate water damage and mold penetration that cleaning cannot address.
Check grout for structural deterioration including crumbling, cracking, or powdery texture that indicates extensive mold colonization. Moreover, grout that remains discolored after aggressive cleaning typically harbors deep-rooted mold requiring replacement.
Signs That Indicate Replacement Is Necessary
Replace caulk immediately when it shows visible gaps, cracks, or separation from surfaces that allow water infiltration behind the seal. Consequently, these compromised barriers create ideal conditions for extensive mold growth in hidden areas.
- Persistent odors that remain after thorough cleaning indicate deep mold colonization
- Recurring mold growth within weeks of cleaning suggests inadequate removal
- Structural damage including soft spots, crumbling, or loss of adhesion
- Extensive black staining that penetrates throughout the material thickness
Grout replacement becomes necessary when cleaning fails to restore the original color or when the material crumbles during scrubbing. Similarly, wall surfaces showing extensive mold penetration require professional assessment and potential replacement.
Cost-Benefit Analysis of Cleaning vs. Replacement
Cleaning costs typically range from £10-30 for cleaning supplies and personal time investment. In contrast, professional caulk replacement costs £150-300 for an average bathroom, while DIY replacement requires £30-60 in materials.
| Approach | Cost Range | Time Investment | Success Rate |
|---|---|---|---|
| Surface cleaning | £10-30 | 2-4 hours | 70% for surface mold |
| DIY replacement | £30-60 | 4-8 hours | 95% when done properly |
| Professional replacement | £150-300 | 2-4 hours | 99% with warranty |
Consider replacement when cleaning attempts fail repeatedly or when health concerns arise from persistent mold exposure. Additionally, factor in the long-term costs of recurring cleaning products and time investment against one-time replacement expenses.
Professional Remediation Considerations for Extensive Mold
Professional mold remediation becomes essential when contamination exceeds 10 square feet or when mold growth appears behind walls or in HVAC systems. Furthermore, professionals possess specialized equipment and training to safely contain and remove extensive mold colonies.
Seek professional assessment when family members experience respiratory symptoms, allergic reactions, or persistent health issues that correlate with shower use. Moreover, professionals can identify hidden moisture sources and structural damage that homeowners might overlook.
When to Call Professionals
Professional services include containment procedures, air filtration, and post-remediation testing that ensure complete mold elimination. Additionally, certified remediators provide documentation and warranties that protect property values and ensure insurance compliance.
What's the best homemade shower mold cleaner?
n
The most effective homemade shower mold cleaner combines white vinegar and baking soda. Create a paste with baking soda and water, apply to moldy areas, then spray with undiluted white vinegar. The fizzing reaction helps lift mold from surfaces. For a spray solution, mix equal parts water and white vinegar with a few drops of dish soap. Hydrogen peroxide (3% solution) also works excellently as a standalone natural mold killer without the strong vinegar odor.
nn
How long does it take to remove shower mold completely?
n
Complete shower mold removal typically takes 1-3 hours for surface cleaning, depending on the extent of growth. Allow 30 minutes to 1 hour for cleaning solutions to work before scrubbing. Severe infestations may require multiple treatment sessions over several days. Drying time is crucial – ensure the area is completely dry for 24-48 hours after cleaning to prevent immediate regrowth. Replacement of heavily damaged materials like caulking or grout adds additional time to the process.
When should I call a professional for shower mold removal?
n
Call a professional mold remediation service when:
nn
- n
- Mold covers more than 10 square feet
- Black mold is present in large quantities
- Mold has penetrated building materials like drywall
- You have health conditions that make DIY removal risky
- Mold keeps returning despite proper cleaning
- There’s structural damage from water intrusion
n
n
n
n
n
n
nn
Professional remediation ensures safe removal and addresses underlying moisture issues that cause recurring mold problems.
nn
What's the best homemade shower mold cleaner?
n
The most effective homemade shower mold cleaner combines white vinegar and baking soda. Create a paste with baking soda and water, apply to moldy areas, then spray with undiluted white vinegar. The fizzing reaction helps lift mold from surfaces. For a spray solution, mix equal parts water and white vinegar with a few drops of dish soap. Hydrogen peroxide (3% solution) also works excellently as a standalone natural mold killer without the strong vinegar odor.
nn
How long does it take to remove shower mold completely?
n
Complete shower mold removal typically takes 1-3 hours for surface cleaning, depending on the extent of growth. Allow 30 minutes to 1 hour for cleaning solutions to work before scrubbing. Severe infestations may require multiple treatment sessions over several days. Drying time is crucial – ensure the area is completely dry for 24-48 hours after cleaning to prevent immediate regrowth. Replacement of heavily damaged materials like caulking or grout adds additional time to the process.
How do I prevent mold from returning in my shower?
n
Prevent shower mold recurrence with these strategies:
nn
- n
- Improve ventilation – use exhaust fans during and after showers
- Control humidity – keep bathroom humidity below 50%
- Daily maintenance – wipe down surfaces after each use
- Fix leaks promptly – repair any plumbing issues immediately
- Regular cleaning – weekly cleaning with mold-preventing solutions
- Replace old caulking – every 1-2 years or when damaged
n
n
n
n
n
n
nn
Prevention is more effective and less costly than repeated mold removal.
nn
When should I call a professional for shower mold removal?
n
Call a professional mold remediation service when:
nn
- n
- Mold covers more than 10 square feet
- Black mold is present in large quantities
- Mold has penetrated building materials like drywall
- You have health conditions that make DIY removal risky
- Mold keeps returning despite proper cleaning
- There’s structural damage from water intrusion
n
n
n
n
n
n
nn
Professional remediation ensures safe removal and addresses underlying moisture issues that cause recurring mold problems.
nn
What's the best homemade shower mold cleaner?
n
The most effective homemade shower mold cleaner combines white vinegar and baking soda. Create a paste with baking soda and water, apply to moldy areas, then spray with undiluted white vinegar. The fizzing reaction helps lift mold from surfaces. For a spray solution, mix equal parts water and white vinegar with a few drops of dish soap. Hydrogen peroxide (3% solution) also works excellently as a standalone natural mold killer without the strong vinegar odor.
nn
How long does it take to remove shower mold completely?
n
Complete shower mold removal typically takes 1-3 hours for surface cleaning, depending on the extent of growth. Allow 30 minutes to 1 hour for cleaning solutions to work before scrubbing. Severe infestations may require multiple treatment sessions over several days. Drying time is crucial – ensure the area is completely dry for 24-48 hours after cleaning to prevent immediate regrowth. Replacement of heavily damaged materials like caulking or grout adds additional time to the process.
What safety equipment do I need for shower mold removal?
n
Essential safety equipment for shower mold removal includes:
nn
- n
- N95 or P100 respirator mask to prevent inhalation
- Rubber gloves to protect skin from mold and cleaning chemicals
- Safety goggles to protect eyes from splashing
- Long-sleeved clothing to minimize skin exposure
- Proper ventilation – open windows and use exhaust fans
n
n
n
n
n
nn
Never attempt mold removal without proper protective equipment, especially when dealing with black mold or using chemical cleaners.
nn
How do I prevent mold from returning in my shower?
n
Prevent shower mold recurrence with these strategies:
nn
- n
- Improve ventilation – use exhaust fans during and after showers
- Control humidity – keep bathroom humidity below 50%
- Daily maintenance – wipe down surfaces after each use
- Fix leaks promptly – repair any plumbing issues immediately
- Regular cleaning – weekly cleaning with mold-preventing solutions
- Replace old caulking – every 1-2 years or when damaged
n
n
n
n
n
n
nn
Prevention is more effective and less costly than repeated mold removal.
nn
When should I call a professional for shower mold removal?
n
Call a professional mold remediation service when:
nn
- n
- Mold covers more than 10 square feet
- Black mold is present in large quantities
- Mold has penetrated building materials like drywall
- You have health conditions that make DIY removal risky
- Mold keeps returning despite proper cleaning
- There’s structural damage from water intrusion
n
n
n
n
n
n
nn
Professional remediation ensures safe removal and addresses underlying moisture issues that cause recurring mold problems.
nn
What's the best homemade shower mold cleaner?
n
The most effective homemade shower mold cleaner combines white vinegar and baking soda. Create a paste with baking soda and water, apply to moldy areas, then spray with undiluted white vinegar. The fizzing reaction helps lift mold from surfaces. For a spray solution, mix equal parts water and white vinegar with a few drops of dish soap. Hydrogen peroxide (3% solution) also works excellently as a standalone natural mold killer without the strong vinegar odor.
nn
How long does it take to remove shower mold completely?
n
Complete shower mold removal typically takes 1-3 hours for surface cleaning, depending on the extent of growth. Allow 30 minutes to 1 hour for cleaning solutions to work before scrubbing. Severe infestations may require multiple treatment sessions over several days. Drying time is crucial – ensure the area is completely dry for 24-48 hours after cleaning to prevent immediate regrowth. Replacement of heavily damaged materials like caulking or grout adds additional time to the process.
How to clean mold in shower without bleach?
n
Clean shower mold without bleach using these effective alternatives:
nn
- n
- White vinegar – spray undiluted and let sit for 30 minutes
- Hydrogen peroxide – use 3% solution in spray bottle
- Baking soda paste – mix with water and scrub affected areas
- Borax solution – mix 1 cup borax with 1 gallon water
- Tea tree oil – natural antifungal properties
n
n
n
n
n
nn
These natural alternatives are safer for regular use and don’t produce harmful fumes like bleach.
nn
What safety equipment do I need for shower mold removal?
n
Essential safety equipment for shower mold removal includes:
nn
- n
- N95 or P100 respirator mask to prevent inhalation
- Rubber gloves to protect skin from mold and cleaning chemicals
- Safety goggles to protect eyes from splashing
- Long-sleeved clothing to minimize skin exposure
- Proper ventilation – open windows and use exhaust fans
n
n
n
n
n
nn
Never attempt mold removal without proper protective equipment, especially when dealing with black mold or using chemical cleaners.
nn
How do I prevent mold from returning in my shower?
n
Prevent shower mold recurrence with these strategies:
nn
- n
- Improve ventilation – use exhaust fans during and after showers
- Control humidity – keep bathroom humidity below 50%
- Daily maintenance – wipe down surfaces after each use
- Fix leaks promptly – repair any plumbing issues immediately
- Regular cleaning – weekly cleaning with mold-preventing solutions
- Replace old caulking – every 1-2 years or when damaged
n
n
n
n
n
n
nn
Prevention is more effective and less costly than repeated mold removal.
nn
When should I call a professional for shower mold removal?
n
Call a professional mold remediation service when:
nn
- n
- Mold covers more than 10 square feet
- Black mold is present in large quantities
- Mold has penetrated building materials like drywall
- You have health conditions that make DIY removal risky
- Mold keeps returning despite proper cleaning
- There’s structural damage from water intrusion
n
n
n
n
n
n
nn
Professional remediation ensures safe removal and addresses underlying moisture issues that cause recurring mold problems.
nn
What's the best homemade shower mold cleaner?
n
The most effective homemade shower mold cleaner combines white vinegar and baking soda. Create a paste with baking soda and water, apply to moldy areas, then spray with undiluted white vinegar. The fizzing reaction helps lift mold from surfaces. For a spray solution, mix equal parts water and white vinegar with a few drops of dish soap. Hydrogen peroxide (3% solution) also works excellently as a standalone natural mold killer without the strong vinegar odor.
nn
How long does it take to remove shower mold completely?
n
Complete shower mold removal typically takes 1-3 hours for surface cleaning, depending on the extent of growth. Allow 30 minutes to 1 hour for cleaning solutions to work before scrubbing. Severe infestations may require multiple treatment sessions over several days. Drying time is crucial – ensure the area is completely dry for 24-48 hours after cleaning to prevent immediate regrowth. Replacement of heavily damaged materials like caulking or grout adds additional time to the process.
How to remove mold from shower caulking naturally?
n
Remove mold from shower caulking naturally using these methods:
nn
- n
- Apply baking soda paste and let sit for 15 minutes
- Spray with white vinegar and scrub with an old toothbrush
- Use hydrogen peroxide (3% solution) for stubborn mold
- Try tea tree oil solution (1 teaspoon per cup of water)
- Apply grapefruit seed extract mixed with water
n
n
n
n
n
nn
If natural methods fail or mold returns quickly, the caulking may need replacement.
nn
How to clean mold in shower without bleach?
n
Clean shower mold without bleach using these effective alternatives:
nn
- n
- White vinegar – spray undiluted and let sit for 30 minutes
- Hydrogen peroxide – use 3% solution in spray bottle
- Baking soda paste – mix with water and scrub affected areas
- Borax solution – mix 1 cup borax with 1 gallon water
- Tea tree oil – natural antifungal properties
n
n
n
n
n
nn
These natural alternatives are safer for regular use and don’t produce harmful fumes like bleach.
nn
What safety equipment do I need for shower mold removal?
n
Essential safety equipment for shower mold removal includes:
nn
- n
- N95 or P100 respirator mask to prevent inhalation
- Rubber gloves to protect skin from mold and cleaning chemicals
- Safety goggles to protect eyes from splashing
- Long-sleeved clothing to minimize skin exposure
- Proper ventilation – open windows and use exhaust fans
n
n
n
n
n
nn
Never attempt mold removal without proper protective equipment, especially when dealing with black mold or using chemical cleaners.
nn
How do I prevent mold from returning in my shower?
n
Prevent shower mold recurrence with these strategies:
nn
- n
- Improve ventilation – use exhaust fans during and after showers
- Control humidity – keep bathroom humidity below 50%
- Daily maintenance – wipe down surfaces after each use
- Fix leaks promptly – repair any plumbing issues immediately
- Regular cleaning – weekly cleaning with mold-preventing solutions
- Replace old caulking – every 1-2 years or when damaged
n
n
n
n
n
n
nn
Prevention is more effective and less costly than repeated mold removal.
nn
When should I call a professional for shower mold removal?
n
Call a professional mold remediation service when:
nn
- n
- Mold covers more than 10 square feet
- Black mold is present in large quantities
- Mold has penetrated building materials like drywall
- You have health conditions that make DIY removal risky
- Mold keeps returning despite proper cleaning
- There’s structural damage from water intrusion
n
n
n
n
n
n
nn
Professional remediation ensures safe removal and addresses underlying moisture issues that cause recurring mold problems.
nn
What's the best homemade shower mold cleaner?
n
The most effective homemade shower mold cleaner combines white vinegar and baking soda. Create a paste with baking soda and water, apply to moldy areas, then spray with undiluted white vinegar. The fizzing reaction helps lift mold from surfaces. For a spray solution, mix equal parts water and white vinegar with a few drops of dish soap. Hydrogen peroxide (3% solution) also works excellently as a standalone natural mold killer without the strong vinegar odor.
nn
How long does it take to remove shower mold completely?
n
Complete shower mold removal typically takes 1-3 hours for surface cleaning, depending on the extent of growth. Allow 30 minutes to 1 hour for cleaning solutions to work before scrubbing. Severe infestations may require multiple treatment sessions over several days. Drying time is crucial – ensure the area is completely dry for 24-48 hours after cleaning to prevent immediate regrowth. Replacement of heavily damaged materials like caulking or grout adds additional time to the process.
Is black mold in shower dangerous?
n
Yes, black mold in showers can be dangerous, especially for individuals with respiratory conditions, compromised immune systems, or allergies. Stachybotrys chartarum (black mold) exposure can cause coughing, throat irritation, skin reactions, and in severe cases, chronic fatigue and neurological symptoms. Children and elderly individuals face higher risks. If black mold covers more than 10 square feet or keeps returning despite cleaning, professional remediation is recommended.
nn
How to remove mold from shower caulking naturally?
n
Remove mold from shower caulking naturally using these methods:
nn
- n
- Apply baking soda paste and let sit for 15 minutes
- Spray with white vinegar and scrub with an old toothbrush
- Use hydrogen peroxide (3% solution) for stubborn mold
- Try tea tree oil solution (1 teaspoon per cup of water)
- Apply grapefruit seed extract mixed with water
n
n
n
n
n
nn
If natural methods fail or mold returns quickly, the caulking may need replacement.
nn
How to clean mold in shower without bleach?
n
Clean shower mold without bleach using these effective alternatives:
nn
- n
- White vinegar – spray undiluted and let sit for 30 minutes
- Hydrogen peroxide – use 3% solution in spray bottle
- Baking soda paste – mix with water and scrub affected areas
- Borax solution – mix 1 cup borax with 1 gallon water
- Tea tree oil – natural antifungal properties
n
n
n
n
n
nn
These natural alternatives are safer for regular use and don’t produce harmful fumes like bleach.
nn
What safety equipment do I need for shower mold removal?
n
Essential safety equipment for shower mold removal includes:
nn
- n
- N95 or P100 respirator mask to prevent inhalation
- Rubber gloves to protect skin from mold and cleaning chemicals
- Safety goggles to protect eyes from splashing
- Long-sleeved clothing to minimize skin exposure
- Proper ventilation – open windows and use exhaust fans
n
n
n
n
n
nn
Never attempt mold removal without proper protective equipment, especially when dealing with black mold or using chemical cleaners.
nn
How do I prevent mold from returning in my shower?
n
Prevent shower mold recurrence with these strategies:
nn
- n
- Improve ventilation – use exhaust fans during and after showers
- Control humidity – keep bathroom humidity below 50%
- Daily maintenance – wipe down surfaces after each use
- Fix leaks promptly – repair any plumbing issues immediately
- Regular cleaning – weekly cleaning with mold-preventing solutions
- Replace old caulking – every 1-2 years or when damaged
n
n
n
n
n
n
nn
Prevention is more effective and less costly than repeated mold removal.
nn
When should I call a professional for shower mold removal?
n
Call a professional mold remediation service when:
nn
- n
- Mold covers more than 10 square feet
- Black mold is present in large quantities
- Mold has penetrated building materials like drywall
- You have health conditions that make DIY removal risky
- Mold keeps returning despite proper cleaning
- There’s structural damage from water intrusion
n
n
n
n
n
n
nn
Professional remediation ensures safe removal and addresses underlying moisture issues that cause recurring mold problems.
nn
What's the best homemade shower mold cleaner?
n
The most effective homemade shower mold cleaner combines white vinegar and baking soda. Create a paste with baking soda and water, apply to moldy areas, then spray with undiluted white vinegar. The fizzing reaction helps lift mold from surfaces. For a spray solution, mix equal parts water and white vinegar with a few drops of dish soap. Hydrogen peroxide (3% solution) also works excellently as a standalone natural mold killer without the strong vinegar odor.
nn
How long does it take to remove shower mold completely?
n
Complete shower mold removal typically takes 1-3 hours for surface cleaning, depending on the extent of growth. Allow 30 minutes to 1 hour for cleaning solutions to work before scrubbing. Severe infestations may require multiple treatment sessions over several days. Drying time is crucial – ensure the area is completely dry for 24-48 hours after cleaning to prevent immediate regrowth. Replacement of heavily damaged materials like caulking or grout adds additional time to the process.
How to clean shower mold with baking soda?
n
Create a baking soda paste by mixing 3 parts baking soda with 1 part water. Apply the paste to moldy areas and let it sit for 15-20 minutes. Scrub gently with a brush or sponge, focusing on grout lines and corners. Rinse thoroughly with water. For extra cleaning power, spray with white vinegar after applying the baking soda paste. The fizzing reaction helps lift mold from porous surfaces. Baking soda is particularly effective on grout and caulking.
nn
Is black mold in shower dangerous?
n
Yes, black mold in showers can be dangerous, especially for individuals with respiratory conditions, compromised immune systems, or allergies. Stachybotrys chartarum (black mold) exposure can cause coughing, throat irritation, skin reactions, and in severe cases, chronic fatigue and neurological symptoms. Children and elderly individuals face higher risks. If black mold covers more than 10 square feet or keeps returning despite cleaning, professional remediation is recommended.
nn
How to remove mold from shower caulking naturally?
n
Remove mold from shower caulking naturally using these methods:
nn
- n
- Apply baking soda paste and let sit for 15 minutes
- Spray with white vinegar and scrub with an old toothbrush
- Use hydrogen peroxide (3% solution) for stubborn mold
- Try tea tree oil solution (1 teaspoon per cup of water)
- Apply grapefruit seed extract mixed with water
n
n
n
n
n
nn
If natural methods fail or mold returns quickly, the caulking may need replacement.
nn
How to clean mold in shower without bleach?
n
Clean shower mold without bleach using these effective alternatives:
nn
- n
- White vinegar – spray undiluted and let sit for 30 minutes
- Hydrogen peroxide – use 3% solution in spray bottle
- Baking soda paste – mix with water and scrub affected areas
- Borax solution – mix 1 cup borax with 1 gallon water
- Tea tree oil – natural antifungal properties
n
n
n
n
n
nn
These natural alternatives are safer for regular use and don’t produce harmful fumes like bleach.
nn
What safety equipment do I need for shower mold removal?
n
Essential safety equipment for shower mold removal includes:
nn
- n
- N95 or P100 respirator mask to prevent inhalation
- Rubber gloves to protect skin from mold and cleaning chemicals
- Safety goggles to protect eyes from splashing
- Long-sleeved clothing to minimize skin exposure
- Proper ventilation – open windows and use exhaust fans
n
n
n
n
n
nn
Never attempt mold removal without proper protective equipment, especially when dealing with black mold or using chemical cleaners.
nn
How do I prevent mold from returning in my shower?
n
Prevent shower mold recurrence with these strategies:
nn
- n
- Improve ventilation – use exhaust fans during and after showers
- Control humidity – keep bathroom humidity below 50%
- Daily maintenance – wipe down surfaces after each use
- Fix leaks promptly – repair any plumbing issues immediately
- Regular cleaning – weekly cleaning with mold-preventing solutions
- Replace old caulking – every 1-2 years or when damaged
n
n
n
n
n
n
nn
Prevention is more effective and less costly than repeated mold removal.
nn
When should I call a professional for shower mold removal?
n
Call a professional mold remediation service when:
nn
- n
- Mold covers more than 10 square feet
- Black mold is present in large quantities
- Mold has penetrated building materials like drywall
- You have health conditions that make DIY removal risky
- Mold keeps returning despite proper cleaning
- There’s structural damage from water intrusion
n
n
n
n
n
n
nn
Professional remediation ensures safe removal and addresses underlying moisture issues that cause recurring mold problems.
nn
What's the best homemade shower mold cleaner?
n
The most effective homemade shower mold cleaner combines white vinegar and baking soda. Create a paste with baking soda and water, apply to moldy areas, then spray with undiluted white vinegar. The fizzing reaction helps lift mold from surfaces. For a spray solution, mix equal parts water and white vinegar with a few drops of dish soap. Hydrogen peroxide (3% solution) also works excellently as a standalone natural mold killer without the strong vinegar odor.
nn
How long does it take to remove shower mold completely?
n
Complete shower mold removal typically takes 1-3 hours for surface cleaning, depending on the extent of growth. Allow 30 minutes to 1 hour for cleaning solutions to work before scrubbing. Severe infestations may require multiple treatment sessions over several days. Drying time is crucial – ensure the area is completely dry for 24-48 hours after cleaning to prevent immediate regrowth. Replacement of heavily damaged materials like caulking or grout adds additional time to the process.
How to clean shower mold with vinegar?
n
Clean shower mold with vinegar by using undiluted white vinegar in a spray bottle. Spray the affected areas thoroughly and let the vinegar sit for at least 30 minutes to penetrate the mold. Scrub with a brush or sponge, then rinse with water. For enhanced effectiveness, combine with baking soda by applying baking soda paste first, then spraying with vinegar for a fizzing reaction that helps lift mold from surfaces. Vinegar works best on non-porous surfaces like tiles and glass.
nn
How to clean shower mold with baking soda?
n
Create a baking soda paste by mixing 3 parts baking soda with 1 part water. Apply the paste to moldy areas and let it sit for 15-20 minutes. Scrub gently with a brush or sponge, focusing on grout lines and corners. Rinse thoroughly with water. For extra cleaning power, spray with white vinegar after applying the baking soda paste. The fizzing reaction helps lift mold from porous surfaces. Baking soda is particularly effective on grout and caulking.
nn
Is black mold in shower dangerous?
n
Yes, black mold in showers can be dangerous, especially for individuals with respiratory conditions, compromised immune systems, or allergies. Stachybotrys chartarum (black mold) exposure can cause coughing, throat irritation, skin reactions, and in severe cases, chronic fatigue and neurological symptoms. Children and elderly individuals face higher risks. If black mold covers more than 10 square feet or keeps returning despite cleaning, professional remediation is recommended.
nn
How to remove mold from shower caulking naturally?
n
Remove mold from shower caulking naturally using these methods:
nn
- n
- Apply baking soda paste and let sit for 15 minutes
- Spray with white vinegar and scrub with an old toothbrush
- Use hydrogen peroxide (3% solution) for stubborn mold
- Try tea tree oil solution (1 teaspoon per cup of water)
- Apply grapefruit seed extract mixed with water
n
n
n
n
n
nn
If natural methods fail or mold returns quickly, the caulking may need replacement.
nn
How to clean mold in shower without bleach?
n
Clean shower mold without bleach using these effective alternatives:
nn
- n
- White vinegar – spray undiluted and let sit for 30 minutes
- Hydrogen peroxide – use 3% solution in spray bottle
- Baking soda paste – mix with water and scrub affected areas
- Borax solution – mix 1 cup borax with 1 gallon water
- Tea tree oil – natural antifungal properties
n
n
n
n
n
nn
These natural alternatives are safer for regular use and don’t produce harmful fumes like bleach.
nn
What safety equipment do I need for shower mold removal?
n
Essential safety equipment for shower mold removal includes:
nn
- n
- N95 or P100 respirator mask to prevent inhalation
- Rubber gloves to protect skin from mold and cleaning chemicals
- Safety goggles to protect eyes from splashing
- Long-sleeved clothing to minimize skin exposure
- Proper ventilation – open windows and use exhaust fans
n
n
n
n
n
nn
Never attempt mold removal without proper protective equipment, especially when dealing with black mold or using chemical cleaners.
nn
How do I prevent mold from returning in my shower?
n
Prevent shower mold recurrence with these strategies:
nn
- n
- Improve ventilation – use exhaust fans during and after showers
- Control humidity – keep bathroom humidity below 50%
- Daily maintenance – wipe down surfaces after each use
- Fix leaks promptly – repair any plumbing issues immediately
- Regular cleaning – weekly cleaning with mold-preventing solutions
- Replace old caulking – every 1-2 years or when damaged
n
n
n
n
n
n
nn
Prevention is more effective and less costly than repeated mold removal.
nn
When should I call a professional for shower mold removal?
n
Call a professional mold remediation service when:
nn
- n
- Mold covers more than 10 square feet
- Black mold is present in large quantities
- Mold has penetrated building materials like drywall
- You have health conditions that make DIY removal risky
- Mold keeps returning despite proper cleaning
- There’s structural damage from water intrusion
n
n
n
n
n
n
nn
Professional remediation ensures safe removal and addresses underlying moisture issues that cause recurring mold problems.
nn
What's the best homemade shower mold cleaner?
n
The most effective homemade shower mold cleaner combines white vinegar and baking soda. Create a paste with baking soda and water, apply to moldy areas, then spray with undiluted white vinegar. The fizzing reaction helps lift mold from surfaces. For a spray solution, mix equal parts water and white vinegar with a few drops of dish soap. Hydrogen peroxide (3% solution) also works excellently as a standalone natural mold killer without the strong vinegar odor.
nn
How long does it take to remove shower mold completely?
n
Complete shower mold removal typically takes 1-3 hours for surface cleaning, depending on the extent of growth. Allow 30 minutes to 1 hour for cleaning solutions to work before scrubbing. Severe infestations may require multiple treatment sessions over several days. Drying time is crucial – ensure the area is completely dry for 24-48 hours after cleaning to prevent immediate regrowth. Replacement of heavily damaged materials like caulking or grout adds additional time to the process.
How can you get rid of black mold in the shower?
n
Getting rid of black mold in the shower requires a systematic approach. First, ensure proper safety equipment and ventilation. Clean surface mold with natural solutions like vinegar or baking soda paste. For deeper penetration, use hydrogen peroxide or diluted bleach solutions. Address the root cause by improving ventilation, fixing leaks, and controlling humidity. Severely affected materials like caulking or grout may need complete replacement rather than cleaning.
nn
How to clean shower mold with vinegar?
n
Clean shower mold with vinegar by using undiluted white vinegar in a spray bottle. Spray the affected areas thoroughly and let the vinegar sit for at least 30 minutes to penetrate the mold. Scrub with a brush or sponge, then rinse with water. For enhanced effectiveness, combine with baking soda by applying baking soda paste first, then spraying with vinegar for a fizzing reaction that helps lift mold from surfaces. Vinegar works best on non-porous surfaces like tiles and glass.
nn
How to clean shower mold with baking soda?
n
Create a baking soda paste by mixing 3 parts baking soda with 1 part water. Apply the paste to moldy areas and let it sit for 15-20 minutes. Scrub gently with a brush or sponge, focusing on grout lines and corners. Rinse thoroughly with water. For extra cleaning power, spray with white vinegar after applying the baking soda paste. The fizzing reaction helps lift mold from porous surfaces. Baking soda is particularly effective on grout and caulking.
nn
Is black mold in shower dangerous?
n
Yes, black mold in showers can be dangerous, especially for individuals with respiratory conditions, compromised immune systems, or allergies. Stachybotrys chartarum (black mold) exposure can cause coughing, throat irritation, skin reactions, and in severe cases, chronic fatigue and neurological symptoms. Children and elderly individuals face higher risks. If black mold covers more than 10 square feet or keeps returning despite cleaning, professional remediation is recommended.
nn
How to remove mold from shower caulking naturally?
n
Remove mold from shower caulking naturally using these methods:
nn
- n
- Apply baking soda paste and let sit for 15 minutes
- Spray with white vinegar and scrub with an old toothbrush
- Use hydrogen peroxide (3% solution) for stubborn mold
- Try tea tree oil solution (1 teaspoon per cup of water)
- Apply grapefruit seed extract mixed with water
n
n
n
n
n
nn
If natural methods fail or mold returns quickly, the caulking may need replacement.
nn
How to clean mold in shower without bleach?
n
Clean shower mold without bleach using these effective alternatives:
nn
- n
- White vinegar – spray undiluted and let sit for 30 minutes
- Hydrogen peroxide – use 3% solution in spray bottle
- Baking soda paste – mix with water and scrub affected areas
- Borax solution – mix 1 cup borax with 1 gallon water
- Tea tree oil – natural antifungal properties
n
n
n
n
n
nn
These natural alternatives are safer for regular use and don’t produce harmful fumes like bleach.
nn
What safety equipment do I need for shower mold removal?
n
Essential safety equipment for shower mold removal includes:
nn
- n
- N95 or P100 respirator mask to prevent inhalation
- Rubber gloves to protect skin from mold and cleaning chemicals
- Safety goggles to protect eyes from splashing
- Long-sleeved clothing to minimize skin exposure
- Proper ventilation – open windows and use exhaust fans
n
n
n
n
n
nn
Never attempt mold removal without proper protective equipment, especially when dealing with black mold or using chemical cleaners.
nn
How do I prevent mold from returning in my shower?
n
Prevent shower mold recurrence with these strategies:
nn
- n
- Improve ventilation – use exhaust fans during and after showers
- Control humidity – keep bathroom humidity below 50%
- Daily maintenance – wipe down surfaces after each use
- Fix leaks promptly – repair any plumbing issues immediately
- Regular cleaning – weekly cleaning with mold-preventing solutions
- Replace old caulking – every 1-2 years or when damaged
n
n
n
n
n
n
nn
Prevention is more effective and less costly than repeated mold removal.
nn
When should I call a professional for shower mold removal?
n
Call a professional mold remediation service when:
nn
- n
- Mold covers more than 10 square feet
- Black mold is present in large quantities
- Mold has penetrated building materials like drywall
- You have health conditions that make DIY removal risky
- Mold keeps returning despite proper cleaning
- There’s structural damage from water intrusion
n
n
n
n
n
n
nn
Professional remediation ensures safe removal and addresses underlying moisture issues that cause recurring mold problems.
nn
What's the best homemade shower mold cleaner?
n
The most effective homemade shower mold cleaner combines white vinegar and baking soda. Create a paste with baking soda and water, apply to moldy areas, then spray with undiluted white vinegar. The fizzing reaction helps lift mold from surfaces. For a spray solution, mix equal parts water and white vinegar with a few drops of dish soap. Hydrogen peroxide (3% solution) also works excellently as a standalone natural mold killer without the strong vinegar odor.
nn
How long does it take to remove shower mold completely?
n
Complete shower mold removal typically takes 1-3 hours for surface cleaning, depending on the extent of growth. Allow 30 minutes to 1 hour for cleaning solutions to work before scrubbing. Severe infestations may require multiple treatment sessions over several days. Drying time is crucial – ensure the area is completely dry for 24-48 hours after cleaning to prevent immediate regrowth. Replacement of heavily damaged materials like caulking or grout adds additional time to the process.
What should I clean my moldy shower with?
n
The best cleaning solutions for moldy showers depend on the severity of growth. For light to moderate mold, use natural cleaners like white vinegar, baking soda paste, or hydrogen peroxide. For stubborn black mold, a diluted bleach solution (1:10 ratio) works effectively. Commercial mold removers containing quaternary ammonium compounds are also effective. Always prioritize safety with proper ventilation and protective equipment regardless of the cleaning solution chosen.
nn
How can you get rid of black mold in the shower?
n
Getting rid of black mold in the shower requires a systematic approach. First, ensure proper safety equipment and ventilation. Clean surface mold with natural solutions like vinegar or baking soda paste. For deeper penetration, use hydrogen peroxide or diluted bleach solutions. Address the root cause by improving ventilation, fixing leaks, and controlling humidity. Severely affected materials like caulking or grout may need complete replacement rather than cleaning.
nn
How to clean shower mold with vinegar?
n
Clean shower mold with vinegar by using undiluted white vinegar in a spray bottle. Spray the affected areas thoroughly and let the vinegar sit for at least 30 minutes to penetrate the mold. Scrub with a brush or sponge, then rinse with water. For enhanced effectiveness, combine with baking soda by applying baking soda paste first, then spraying with vinegar for a fizzing reaction that helps lift mold from surfaces. Vinegar works best on non-porous surfaces like tiles and glass.
nn
How to clean shower mold with baking soda?
n
Create a baking soda paste by mixing 3 parts baking soda with 1 part water. Apply the paste to moldy areas and let it sit for 15-20 minutes. Scrub gently with a brush or sponge, focusing on grout lines and corners. Rinse thoroughly with water. For extra cleaning power, spray with white vinegar after applying the baking soda paste. The fizzing reaction helps lift mold from porous surfaces. Baking soda is particularly effective on grout and caulking.
nn
Is black mold in shower dangerous?
n
Yes, black mold in showers can be dangerous, especially for individuals with respiratory conditions, compromised immune systems, or allergies. Stachybotrys chartarum (black mold) exposure can cause coughing, throat irritation, skin reactions, and in severe cases, chronic fatigue and neurological symptoms. Children and elderly individuals face higher risks. If black mold covers more than 10 square feet or keeps returning despite cleaning, professional remediation is recommended.
nn
How to remove mold from shower caulking naturally?
n
Remove mold from shower caulking naturally using these methods:
nn
- n
- Apply baking soda paste and let sit for 15 minutes
- Spray with white vinegar and scrub with an old toothbrush
- Use hydrogen peroxide (3% solution) for stubborn mold
- Try tea tree oil solution (1 teaspoon per cup of water)
- Apply grapefruit seed extract mixed with water
n
n
n
n
n
nn
If natural methods fail or mold returns quickly, the caulking may need replacement.
nn
How to clean mold in shower without bleach?
n
Clean shower mold without bleach using these effective alternatives:
nn
- n
- White vinegar – spray undiluted and let sit for 30 minutes
- Hydrogen peroxide – use 3% solution in spray bottle
- Baking soda paste – mix with water and scrub affected areas
- Borax solution – mix 1 cup borax with 1 gallon water
- Tea tree oil – natural antifungal properties
n
n
n
n
n
nn
These natural alternatives are safer for regular use and don’t produce harmful fumes like bleach.
nn
What safety equipment do I need for shower mold removal?
n
Essential safety equipment for shower mold removal includes:
nn
- n
- N95 or P100 respirator mask to prevent inhalation
- Rubber gloves to protect skin from mold and cleaning chemicals
- Safety goggles to protect eyes from splashing
- Long-sleeved clothing to minimize skin exposure
- Proper ventilation – open windows and use exhaust fans
n
n
n
n
n
nn
Never attempt mold removal without proper protective equipment, especially when dealing with black mold or using chemical cleaners.
nn
How do I prevent mold from returning in my shower?
n
Prevent shower mold recurrence with these strategies:
nn
- n
- Improve ventilation – use exhaust fans during and after showers
- Control humidity – keep bathroom humidity below 50%
- Daily maintenance – wipe down surfaces after each use
- Fix leaks promptly – repair any plumbing issues immediately
- Regular cleaning – weekly cleaning with mold-preventing solutions
- Replace old caulking – every 1-2 years or when damaged
n
n
n
n
n
n
nn
Prevention is more effective and less costly than repeated mold removal.
nn
When should I call a professional for shower mold removal?
n
Call a professional mold remediation service when:
nn
- n
- Mold covers more than 10 square feet
- Black mold is present in large quantities
- Mold has penetrated building materials like drywall
- You have health conditions that make DIY removal risky
- Mold keeps returning despite proper cleaning
- There’s structural damage from water intrusion
n
n
n
n
n
n
nn
Professional remediation ensures safe removal and addresses underlying moisture issues that cause recurring mold problems.
nn
What's the best homemade shower mold cleaner?
n
The most effective homemade shower mold cleaner combines white vinegar and baking soda. Create a paste with baking soda and water, apply to moldy areas, then spray with undiluted white vinegar. The fizzing reaction helps lift mold from surfaces. For a spray solution, mix equal parts water and white vinegar with a few drops of dish soap. Hydrogen peroxide (3% solution) also works excellently as a standalone natural mold killer without the strong vinegar odor.
nn
How long does it take to remove shower mold completely?
n
Complete shower mold removal typically takes 1-3 hours for surface cleaning, depending on the extent of growth. Allow 30 minutes to 1 hour for cleaning solutions to work before scrubbing. Severe infestations may require multiple treatment sessions over several days. Drying time is crucial – ensure the area is completely dry for 24-48 hours after cleaning to prevent immediate regrowth. Replacement of heavily damaged materials like caulking or grout adds additional time to the process.
How do you get black mold out of shower grout?
n
Remove black mold from shower grout by making a thick paste with baking soda and water. Apply the paste to grout lines and let it sit for 10-15 minutes. Spray with undiluted white vinegar and scrub with a grout brush or old toothbrush. For persistent mold, use hydrogen peroxide (3% solution) instead of vinegar. Rinse thoroughly and dry completely. If mold has penetrated deeply into porous grout, you may need to remove and replace the grout entirely.
nn
What should I clean my moldy shower with?
n
The best cleaning solutions for moldy showers depend on the severity of growth. For light to moderate mold, use natural cleaners like white vinegar, baking soda paste, or hydrogen peroxide. For stubborn black mold, a diluted bleach solution (1:10 ratio) works effectively. Commercial mold removers containing quaternary ammonium compounds are also effective. Always prioritize safety with proper ventilation and protective equipment regardless of the cleaning solution chosen.
nn
How can you get rid of black mold in the shower?
n
Getting rid of black mold in the shower requires a systematic approach. First, ensure proper safety equipment and ventilation. Clean surface mold with natural solutions like vinegar or baking soda paste. For deeper penetration, use hydrogen peroxide or diluted bleach solutions. Address the root cause by improving ventilation, fixing leaks, and controlling humidity. Severely affected materials like caulking or grout may need complete replacement rather than cleaning.
nn
How to clean shower mold with vinegar?
n
Clean shower mold with vinegar by using undiluted white vinegar in a spray bottle. Spray the affected areas thoroughly and let the vinegar sit for at least 30 minutes to penetrate the mold. Scrub with a brush or sponge, then rinse with water. For enhanced effectiveness, combine with baking soda by applying baking soda paste first, then spraying with vinegar for a fizzing reaction that helps lift mold from surfaces. Vinegar works best on non-porous surfaces like tiles and glass.
nn
How to clean shower mold with baking soda?
n
Create a baking soda paste by mixing 3 parts baking soda with 1 part water. Apply the paste to moldy areas and let it sit for 15-20 minutes. Scrub gently with a brush or sponge, focusing on grout lines and corners. Rinse thoroughly with water. For extra cleaning power, spray with white vinegar after applying the baking soda paste. The fizzing reaction helps lift mold from porous surfaces. Baking soda is particularly effective on grout and caulking.
nn
Is black mold in shower dangerous?
n
Yes, black mold in showers can be dangerous, especially for individuals with respiratory conditions, compromised immune systems, or allergies. Stachybotrys chartarum (black mold) exposure can cause coughing, throat irritation, skin reactions, and in severe cases, chronic fatigue and neurological symptoms. Children and elderly individuals face higher risks. If black mold covers more than 10 square feet or keeps returning despite cleaning, professional remediation is recommended.
nn
How to remove mold from shower caulking naturally?
n
Remove mold from shower caulking naturally using these methods:
nn
- n
- Apply baking soda paste and let sit for 15 minutes
- Spray with white vinegar and scrub with an old toothbrush
- Use hydrogen peroxide (3% solution) for stubborn mold
- Try tea tree oil solution (1 teaspoon per cup of water)
- Apply grapefruit seed extract mixed with water
n
n
n
n
n
nn
If natural methods fail or mold returns quickly, the caulking may need replacement.
nn
How to clean mold in shower without bleach?
n
Clean shower mold without bleach using these effective alternatives:
nn
- n
- White vinegar – spray undiluted and let sit for 30 minutes
- Hydrogen peroxide – use 3% solution in spray bottle
- Baking soda paste – mix with water and scrub affected areas
- Borax solution – mix 1 cup borax with 1 gallon water
- Tea tree oil – natural antifungal properties
n
n
n
n
n
nn
These natural alternatives are safer for regular use and don’t produce harmful fumes like bleach.
nn
What safety equipment do I need for shower mold removal?
n
Essential safety equipment for shower mold removal includes:
nn
- n
- N95 or P100 respirator mask to prevent inhalation
- Rubber gloves to protect skin from mold and cleaning chemicals
- Safety goggles to protect eyes from splashing
- Long-sleeved clothing to minimize skin exposure
- Proper ventilation – open windows and use exhaust fans
n
n
n
n
n
nn
Never attempt mold removal without proper protective equipment, especially when dealing with black mold or using chemical cleaners.
nn
How do I prevent mold from returning in my shower?
n
Prevent shower mold recurrence with these strategies:
nn
- n
- Improve ventilation – use exhaust fans during and after showers
- Control humidity – keep bathroom humidity below 50%
- Daily maintenance – wipe down surfaces after each use
- Fix leaks promptly – repair any plumbing issues immediately
- Regular cleaning – weekly cleaning with mold-preventing solutions
- Replace old caulking – every 1-2 years or when damaged
n
n
n
n
n
n
nn
Prevention is more effective and less costly than repeated mold removal.
nn
When should I call a professional for shower mold removal?
n
Call a professional mold remediation service when:
nn
- n
- Mold covers more than 10 square feet
- Black mold is present in large quantities
- Mold has penetrated building materials like drywall
- You have health conditions that make DIY removal risky
- Mold keeps returning despite proper cleaning
- There’s structural damage from water intrusion
n
n
n
n
n
n
nn
Professional remediation ensures safe removal and addresses underlying moisture issues that cause recurring mold problems.
nn
What's the best homemade shower mold cleaner?
n
The most effective homemade shower mold cleaner combines white vinegar and baking soda. Create a paste with baking soda and water, apply to moldy areas, then spray with undiluted white vinegar. The fizzing reaction helps lift mold from surfaces. For a spray solution, mix equal parts water and white vinegar with a few drops of dish soap. Hydrogen peroxide (3% solution) also works excellently as a standalone natural mold killer without the strong vinegar odor.
nn
How long does it take to remove shower mold completely?
n
Complete shower mold removal typically takes 1-3 hours for surface cleaning, depending on the extent of growth. Allow 30 minutes to 1 hour for cleaning solutions to work before scrubbing. Severe infestations may require multiple treatment sessions over several days. Drying time is crucial – ensure the area is completely dry for 24-48 hours after cleaning to prevent immediate regrowth. Replacement of heavily damaged materials like caulking or grout adds additional time to the process.
How do I clean black mold in shower silicone?
n
To clean black mold from shower silicone, first ensure proper ventilation and wear protective gear including gloves, mask, and eye protection. Create a paste using baking soda and water, apply it to the affected silicone, and let it sit for 15 minutes. Then spray with white vinegar and scrub gently with an old toothbrush. For stubborn mold, use a bleach solution (1 part bleach to 10 parts water) but ensure adequate ventilation. If the silicone is severely damaged or mold keeps returning, replacement may be necessary.
nn
How do you get black mold out of shower grout?
n
Remove black mold from shower grout by making a thick paste with baking soda and water. Apply the paste to grout lines and let it sit for 10-15 minutes. Spray with undiluted white vinegar and scrub with a grout brush or old toothbrush. For persistent mold, use hydrogen peroxide (3% solution) instead of vinegar. Rinse thoroughly and dry completely. If mold has penetrated deeply into porous grout, you may need to remove and replace the grout entirely.
nn
What should I clean my moldy shower with?
n
The best cleaning solutions for moldy showers depend on the severity of growth. For light to moderate mold, use natural cleaners like white vinegar, baking soda paste, or hydrogen peroxide. For stubborn black mold, a diluted bleach solution (1:10 ratio) works effectively. Commercial mold removers containing quaternary ammonium compounds are also effective. Always prioritize safety with proper ventilation and protective equipment regardless of the cleaning solution chosen.
nn
How can you get rid of black mold in the shower?
n
Getting rid of black mold in the shower requires a systematic approach. First, ensure proper safety equipment and ventilation. Clean surface mold with natural solutions like vinegar or baking soda paste. For deeper penetration, use hydrogen peroxide or diluted bleach solutions. Address the root cause by improving ventilation, fixing leaks, and controlling humidity. Severely affected materials like caulking or grout may need complete replacement rather than cleaning.
nn
How to clean shower mold with vinegar?
n
Clean shower mold with vinegar by using undiluted white vinegar in a spray bottle. Spray the affected areas thoroughly and let the vinegar sit for at least 30 minutes to penetrate the mold. Scrub with a brush or sponge, then rinse with water. For enhanced effectiveness, combine with baking soda by applying baking soda paste first, then spraying with vinegar for a fizzing reaction that helps lift mold from surfaces. Vinegar works best on non-porous surfaces like tiles and glass.
nn
How to clean shower mold with baking soda?
n
Create a baking soda paste by mixing 3 parts baking soda with 1 part water. Apply the paste to moldy areas and let it sit for 15-20 minutes. Scrub gently with a brush or sponge, focusing on grout lines and corners. Rinse thoroughly with water. For extra cleaning power, spray with white vinegar after applying the baking soda paste. The fizzing reaction helps lift mold from porous surfaces. Baking soda is particularly effective on grout and caulking.
nn
Is black mold in shower dangerous?
n
Yes, black mold in showers can be dangerous, especially for individuals with respiratory conditions, compromised immune systems, or allergies. Stachybotrys chartarum (black mold) exposure can cause coughing, throat irritation, skin reactions, and in severe cases, chronic fatigue and neurological symptoms. Children and elderly individuals face higher risks. If black mold covers more than 10 square feet or keeps returning despite cleaning, professional remediation is recommended.
nn
How to remove mold from shower caulking naturally?
n
Remove mold from shower caulking naturally using these methods:
nn
- n
- Apply baking soda paste and let sit for 15 minutes
- Spray with white vinegar and scrub with an old toothbrush
- Use hydrogen peroxide (3% solution) for stubborn mold
- Try tea tree oil solution (1 teaspoon per cup of water)
- Apply grapefruit seed extract mixed with water
n
n
n
n
n
nn
If natural methods fail or mold returns quickly, the caulking may need replacement.
nn
How to clean mold in shower without bleach?
n
Clean shower mold without bleach using these effective alternatives:
nn
- n
- White vinegar – spray undiluted and let sit for 30 minutes
- Hydrogen peroxide – use 3% solution in spray bottle
- Baking soda paste – mix with water and scrub affected areas
- Borax solution – mix 1 cup borax with 1 gallon water
- Tea tree oil – natural antifungal properties
n
n
n
n
n
nn
These natural alternatives are safer for regular use and don’t produce harmful fumes like bleach.
nn
What safety equipment do I need for shower mold removal?
n
Essential safety equipment for shower mold removal includes:
nn
- n
- N95 or P100 respirator mask to prevent inhalation
- Rubber gloves to protect skin from mold and cleaning chemicals
- Safety goggles to protect eyes from splashing
- Long-sleeved clothing to minimize skin exposure
- Proper ventilation – open windows and use exhaust fans
n
n
n
n
n
nn
Never attempt mold removal without proper protective equipment, especially when dealing with black mold or using chemical cleaners.
nn
How do I prevent mold from returning in my shower?
n
Prevent shower mold recurrence with these strategies:
nn
- n
- Improve ventilation – use exhaust fans during and after showers
- Control humidity – keep bathroom humidity below 50%
- Daily maintenance – wipe down surfaces after each use
- Fix leaks promptly – repair any plumbing issues immediately
- Regular cleaning – weekly cleaning with mold-preventing solutions
- Replace old caulking – every 1-2 years or when damaged
n
n
n
n
n
n
nn
Prevention is more effective and less costly than repeated mold removal.
nn
When should I call a professional for shower mold removal?
n
Call a professional mold remediation service when:
nn
- n
- Mold covers more than 10 square feet
- Black mold is present in large quantities
- Mold has penetrated building materials like drywall
- You have health conditions that make DIY removal risky
- Mold keeps returning despite proper cleaning
- There’s structural damage from water intrusion
n
n
n
n
n
n
nn
Professional remediation ensures safe removal and addresses underlying moisture issues that cause recurring mold problems.
nn
What's the best homemade shower mold cleaner?
n
The most effective homemade shower mold cleaner combines white vinegar and baking soda. Create a paste with baking soda and water, apply to moldy areas, then spray with undiluted white vinegar. The fizzing reaction helps lift mold from surfaces. For a spray solution, mix equal parts water and white vinegar with a few drops of dish soap. Hydrogen peroxide (3% solution) also works excellently as a standalone natural mold killer without the strong vinegar odor.
nn
How long does it take to remove shower mold completely?
n
Complete shower mold removal typically takes 1-3 hours for surface cleaning, depending on the extent of growth. Allow 30 minutes to 1 hour for cleaning solutions to work before scrubbing. Severe infestations may require multiple treatment sessions over several days. Drying time is crucial – ensure the area is completely dry for 24-48 hours after cleaning to prevent immediate regrowth. Replacement of heavily damaged materials like caulking or grout adds additional time to the process.
Frequently Asked Questions
nn
How do I clean black mold in shower silicone?
n
To clean black mold from shower silicone, first ensure proper ventilation and wear protective gear including gloves, mask, and eye protection. Create a paste using baking soda and water, apply it to the affected silicone, and let it sit for 15 minutes. Then spray with white vinegar and scrub gently with an old toothbrush. For stubborn mold, use a bleach solution (1 part bleach to 10 parts water) but ensure adequate ventilation. If the silicone is severely damaged or mold keeps returning, replacement may be necessary.
nn
How do you get black mold out of shower grout?
n
Remove black mold from shower grout by making a thick paste with baking soda and water. Apply the paste to grout lines and let it sit for 10-15 minutes. Spray with undiluted white vinegar and scrub with a grout brush or old toothbrush. For persistent mold, use hydrogen peroxide (3% solution) instead of vinegar. Rinse thoroughly and dry completely. If mold has penetrated deeply into porous grout, you may need to remove and replace the grout entirely.
nn
What should I clean my moldy shower with?
n
The best cleaning solutions for moldy showers depend on the severity of growth. For light to moderate mold, use natural cleaners like white vinegar, baking soda paste, or hydrogen peroxide. For stubborn black mold, a diluted bleach solution (1:10 ratio) works effectively. Commercial mold removers containing quaternary ammonium compounds are also effective. Always prioritize safety with proper ventilation and protective equipment regardless of the cleaning solution chosen.
nn
How can you get rid of black mold in the shower?
n
Getting rid of black mold in the shower requires a systematic approach. First, ensure proper safety equipment and ventilation. Clean surface mold with natural solutions like vinegar or baking soda paste. For deeper penetration, use hydrogen peroxide or diluted bleach solutions. Address the root cause by improving ventilation, fixing leaks, and controlling humidity. Severely affected materials like caulking or grout may need complete replacement rather than cleaning.
nn
How to clean shower mold with vinegar?
n
Clean shower mold with vinegar by using undiluted white vinegar in a spray bottle. Spray the affected areas thoroughly and let the vinegar sit for at least 30 minutes to penetrate the mold. Scrub with a brush or sponge, then rinse with water. For enhanced effectiveness, combine with baking soda by applying baking soda paste first, then spraying with vinegar for a fizzing reaction that helps lift mold from surfaces. Vinegar works best on non-porous surfaces like tiles and glass.
nn
How to clean shower mold with baking soda?
n
Create a baking soda paste by mixing 3 parts baking soda with 1 part water. Apply the paste to moldy areas and let it sit for 15-20 minutes. Scrub gently with a brush or sponge, focusing on grout lines and corners. Rinse thoroughly with water. For extra cleaning power, spray with white vinegar after applying the baking soda paste. The fizzing reaction helps lift mold from porous surfaces. Baking soda is particularly effective on grout and caulking.
nn
Is black mold in shower dangerous?
n
Yes, black mold in showers can be dangerous, especially for individuals with respiratory conditions, compromised immune systems, or allergies. Stachybotrys chartarum (black mold) exposure can cause coughing, throat irritation, skin reactions, and in severe cases, chronic fatigue and neurological symptoms. Children and elderly individuals face higher risks. If black mold covers more than 10 square feet or keeps returning despite cleaning, professional remediation is recommended.
nn
How to remove mold from shower caulking naturally?
n
Remove mold from shower caulking naturally using these methods:
nn
- n
- Apply baking soda paste and let sit for 15 minutes
- Spray with white vinegar and scrub with an old toothbrush
- Use hydrogen peroxide (3% solution) for stubborn mold
- Try tea tree oil solution (1 teaspoon per cup of water)
- Apply grapefruit seed extract mixed with water
n
n
n
n
n
nn
If natural methods fail or mold returns quickly, the caulking may need replacement.
nn
How to clean mold in shower without bleach?
n
Clean shower mold without bleach using these effective alternatives:
nn
- n
- White vinegar – spray undiluted and let sit for 30 minutes
- Hydrogen peroxide – use 3% solution in spray bottle
- Baking soda paste – mix with water and scrub affected areas
- Borax solution – mix 1 cup borax with 1 gallon water
- Tea tree oil – natural antifungal properties
n
n
n
n
n
nn
These natural alternatives are safer for regular use and don’t produce harmful fumes like bleach.
nn
What safety equipment do I need for shower mold removal?
n
Essential safety equipment for shower mold removal includes:
nn
- n
- N95 or P100 respirator mask to prevent inhalation
- Rubber gloves to protect skin from mold and cleaning chemicals
- Safety goggles to protect eyes from splashing
- Long-sleeved clothing to minimize skin exposure
- Proper ventilation – open windows and use exhaust fans
n
n
n
n
n
nn
Never attempt mold removal without proper protective equipment, especially when dealing with black mold or using chemical cleaners.
nn
How do I prevent mold from returning in my shower?
n
Prevent shower mold recurrence with these strategies:
nn
- n
- Improve ventilation – use exhaust fans during and after showers
- Control humidity – keep bathroom humidity below 50%
- Daily maintenance – wipe down surfaces after each use
- Fix leaks promptly – repair any plumbing issues immediately
- Regular cleaning – weekly cleaning with mold-preventing solutions
- Replace old caulking – every 1-2 years or when damaged
n
n
n
n
n
n
nn
Prevention is more effective and less costly than repeated mold removal.
nn
When should I call a professional for shower mold removal?
n
Call a professional mold remediation service when:
nn
- n
- Mold covers more than 10 square feet
- Black mold is present in large quantities
- Mold has penetrated building materials like drywall
- You have health conditions that make DIY removal risky
- Mold keeps returning despite proper cleaning
- There’s structural damage from water intrusion
n
n
n
n
n
n
nn
Professional remediation ensures safe removal and addresses underlying moisture issues that cause recurring mold problems.
nn
What's the best homemade shower mold cleaner?
n
The most effective homemade shower mold cleaner combines white vinegar and baking soda. Create a paste with baking soda and water, apply to moldy areas, then spray with undiluted white vinegar. The fizzing reaction helps lift mold from surfaces. For a spray solution, mix equal parts water and white vinegar with a few drops of dish soap. Hydrogen peroxide (3% solution) also works excellently as a standalone natural mold killer without the strong vinegar odor.
nn
How long does it take to remove shower mold completely?
n
Complete shower mold removal typically takes 1-3 hours for surface cleaning, depending on the extent of growth. Allow 30 minutes to 1 hour for cleaning solutions to work before scrubbing. Severe infestations may require multiple treatment sessions over several days. Drying time is crucial – ensure the area is completely dry for 24-48 hours after cleaning to prevent immediate regrowth. Replacement of heavily damaged materials like caulking or grout adds additional time to the process.
You May Also Like
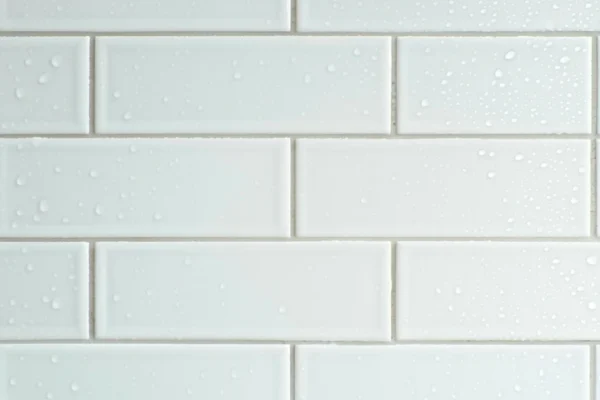
How to Clean Shower Tiles: Complete Guide for 2026
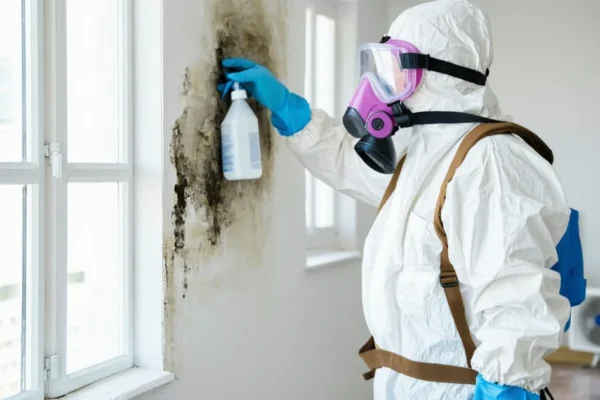
How to Clean Mould Off Walls: Complete Removal Guide 2026