How to Clean Silver Necklace: Complete Guide 2026
How to clean silver necklace effectively requires understanding the tarnishing process and using the right household items or specialized products. Silver jewelry naturally develops a dark, dull appearance when exposed to sulfur compounds in air, but several proven methods can restore its original shine. Whether you’re dealing with light tarnish or heavily blackened pieces, gentle cleaning techniques using baking soda, aluminum foil baths, or simple soap and water can bring back your necklace’s brilliance.
Most silver tarnishing occurs due to oxidation when sterling silver reacts with moisture and sulfur in the environment. However, proper cleaning doesn’t require expensive products or professional services. Simple household items like mild dish soap, soft cloths, and baking soda can effectively remove tarnish without damaging delicate chains or pendants.
The key to successful silver cleaning lies in choosing the right method for your specific situation. Light tarnish responds well to gentle soap cleaning, while heavily blackened pieces may need specialized tarnish removal techniques. Additionally, understanding when to avoid certain methods prevents damage to valuable or antique pieces.
TL;DR
- Basic cleaning: Use warm water, mild dish soap, and soft cloths for regular maintenance
- Heavy tarnish: Try baking soda paste or aluminum foil bath methods for blackened silver
- Gentle approach: Avoid harsh chemicals, abrasive materials, and excessive scrubbing to prevent damage
- Prevention: Store silver in anti-tarnish containers and clean regularly to maintain shine
Understanding Silver Tarnish: Why Your Necklace Loses Its Shine
Silver tarnish develops when your necklace reacts with sulfur compounds naturally present in air, creating a dark layer on the surface. This oxidation process occurs faster in humid environments, near household chemicals, or when silver comes into contact with perfumes and lotions. Understanding why tarnishing happens helps you recognize normal wear versus potential damage.
The tarnishing process begins when hydrogen sulfide in the atmosphere bonds with silver atoms, forming silver sulfide. This chemical reaction creates the characteristic black or gray discoloration that dulls your jewelry’s shine. Additionally, exposure to rubber, wool, and certain foods accelerates tarnish formation on silver surfaces.
Sterling Silver vs Pure Silver: Different Tarnishing Patterns
Sterling silver contains 92.5% pure silver mixed with other metals like copper, making it more prone to tarnishing than pure silver. The copper content reacts more readily with sulfur compounds, causing faster discoloration. However, this alloy composition also makes sterling silver more durable for everyday jewelry wear.
Pure silver tarnishes much slower but remains too soft for most jewelry applications. Meanwhile, sterling silver develops tarnish patterns that vary based on the specific metals in the alloy. Some pieces may show uniform darkening, while others develop spotty discoloration depending on their composition.
Recognizing When Your Silver Necklace Needs Cleaning
Several visual signs indicate your silver necklace requires attention. Black spots or patches signal heavy tarnish buildup, while overall dullness suggests lighter oxidation across the surface. Yellow or brown discoloration may indicate exposure to specific chemicals or environmental factors.
- Light tarnish: Slight dullness or loss of mirror-like shine
- Moderate tarnish: Gray or yellow discoloration across the surface
- Heavy tarnish: Black spots, patches, or complete darkening
- Uneven tarnish: Spotty discoloration in specific areas
Furthermore, tarnish often accumulates faster in crevices, around clasps, and where chains link together. These areas trap moisture and pollutants, creating ideal conditions for accelerated oxidation. Regular inspection of these vulnerable spots helps you catch tarnish early.
Normal Tarnish vs Damage: What to Watch For
Normal tarnishing affects only the surface layer and reverses completely with proper cleaning methods. This natural process doesn’t weaken the metal structure or create permanent changes to your necklace. Most tarnish responds well to gentle cleaning techniques without requiring professional intervention.
Conversely, certain signs indicate potential damage rather than simple tarnish. Green discoloration suggests copper corrosion, while pitting or rough textures may indicate acid damage. Additionally, if tarnish returns immediately after cleaning, this could signal underlying metal deterioration.
When to Seek Professional Help
Environmental factors also influence tarnish severity and patterns. Excessive humidity, chemical exposure, or storage in inappropriate materials can accelerate oxidation beyond normal levels. Understanding these factors helps you distinguish between natural aging and preventable damage to your silver jewelry.
Essential Supplies for Cleaning Silver Necklaces
Successful silver necklace cleaning requires the right supplies and proper workspace preparation. Therefore, gathering appropriate materials before starting ensures effective tarnish removal while protecting your jewelry from damage. Most cleaning supplies already exist in typical households, making silver maintenance both accessible and affordable.
Basic Household Items for Silver Cleaning
Soft microfiber cloths form the foundation of safe silver cleaning. These lint-free fabrics remove tarnish without scratching delicate surfaces, unlike paper towels or rough textiles. Additionally, having multiple cloths allows you to separate cleaning from polishing tasks.
Warm water serves as the primary cleaning medium for most silver maintenance tasks. Water temperature should feel comfortable to touch but not hot enough to cause thermal shock. Furthermore, distilled water prevents mineral deposits that tap water might leave behind.
Mild dish soap provides gentle cleaning action without harsh chemicals that damage silver. Dawn, Fairy, or similar brands work effectively for removing oils and light tarnish. However, avoid antibacterial soaps containing triclosan, which can accelerate tarnishing processes.
- Cotton swabs for detailed cleaning around clasps and intricate designs
- Soft-bristled toothbrush for gentle scrubbing of chain links
- Small bowls for soaking solutions
- Clean towels for drying and workspace protection
Specialized Silver Cleaning Products
Commercial silver cleaners offer targeted solutions for stubborn tarnish that household items cannot address. Silver polishing cloths contain embedded cleaning compounds that remove oxidation while adding protective coatings. These cloths work particularly well for regular maintenance between deep cleaning sessions.
Silver cleaning solutions like Weiman Silver Cleaner or Goddard’s Silver Polish tackle heavy tarnishing effectively. Moreover, these products often include anti-tarnish agents that slow future oxidation. Always choose cleaners specifically formulated for silver rather than generic metal polishes.
Baking soda paste creates an effective homemade alternative for moderate tarnish removal. Mix three parts baking soda with one part water to form a gentle abrasive paste. Similarly, cleaning tarnished silver often benefits from this natural approach when commercial products aren’t available.
When to Use Specialized Products
Tools and Materials to Avoid
Certain cleaning tools cause irreversible damage to silver necklaces despite appearing effective initially. Steel wool, wire brushes, and scouring pads scratch silver surfaces permanently, removing the protective layer and creating areas prone to accelerated tarnishing.
Bleach and ammonia-based cleaners chemically attack silver, causing pitting and discoloration that professional restoration cannot always repair. Additionally, these harsh chemicals react unpredictably with different silver alloys, potentially weakening structural integrity.
Abrasive toothpastes containing whitening agents or baking soda create microscopic scratches that dull silver’s natural luster. While toothpaste to clean silver remains a popular home remedy, the risks outweigh potential benefits for valuable jewelry pieces.
- Rough paper towels or tissues that leave lint residue
- Hot water that can loosen gemstone settings
- Ultrasonic cleaners without proper silver settings
- Lemon juice or vinegar that can pit silver surfaces
Setting Up Your Cleaning Workspace
Proper workspace preparation prevents accidents and ensures thorough cleaning results. Choose a well-lit area with natural light or bright LED illumination to identify tarnish patterns and cleaning progress accurately. Furthermore, adequate lighting helps you spot potential damage before it worsens.
Cover your work surface with clean towels or soft cloth to cushion dropped jewelry and absorb spilled cleaning solutions. This protective layer also prevents necklaces from sliding during cleaning procedures. Additionally, having a designated workspace keeps cleaning supplies organized and accessible.
Ensure adequate ventilation when using commercial silver cleaners, as fumes can irritate respiratory systems. Open windows or work near exhaust fans to maintain air circulation. Moreover, keep pets and children away from the cleaning area to prevent accidental exposure to chemicals.
Prepare separate containers for different cleaning stages: one for initial soaking, another for rinsing, and a third for final polishing solutions. This systematic approach prevents cross-contamination and ensures each cleaning step achieves maximum effectiveness without compromising jewelry safety.
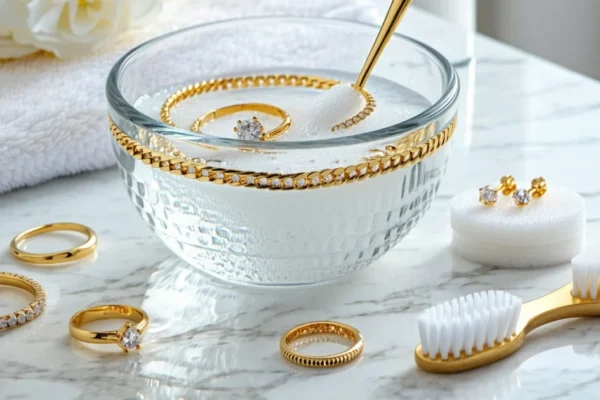
Method 1: Gentle Soap and Water Cleaning
The gentle soap and water method provides the safest approach for cleaning silver necklaces without risking damage to delicate chains or precious gemstone settings. This fundamental technique removes everyday dirt, oils, and light tarnish while preserving your jewelry’s structural integrity. Moreover, this method works effectively for regular maintenance cleaning sessions.
Professional jewelers recommend this approach as the first-line cleaning method because it eliminates most surface contaminants without harsh chemicals. Additionally, soap and water cleaning serves as an excellent preparation step before applying specialized silver polishes or treatments.
Step-by-Step Cleaning Process
Begin by filling a small bowl with lukewarm water and adding two to three drops of mild dish soap. Avoid hot water, which can expand metal components and loosen gemstone settings in vintage or delicate pieces. Furthermore, excessive heat may cause thermal shock in certain silver alloys.
- Submerge the silver necklace completely in the soapy solution
- Allow the jewelry to soak for 5-10 minutes to soften accumulated grime
- Gently agitate the necklace using your fingers to dislodge particles
- Use a soft-bristled toothbrush for intricate chain links and detailed pendants
- Brush in circular motions with minimal pressure to avoid scratching
- Pay special attention to clasps and connection points where dirt accumulates
The soaking process allows soap molecules to penetrate and lift away body oils, cosmetic residues, and environmental pollutants. Consequently, this preliminary step reduces the mechanical cleaning effort required and minimizes potential scratching during brushing.
Handling Delicate Chains and Pendants
Delicate silver chains require extra care during cleaning to prevent link damage or chain breakage. Support the necklace’s weight by holding different sections while cleaning, rather than allowing the entire piece to hang freely. This technique distributes stress evenly across the chain structure.
For intricate pendants with detailed engravings or filigree work, use cotton swabs dipped in the cleaning solution to reach narrow crevices. Rotate the swab gently to extract trapped debris without applying excessive pressure. Similarly, cleaning tarnished silver requires patience and gentle techniques to preserve surface details.
Chain Safety Tip
Vintage or antique silver necklaces often feature fragile solder joints that require minimal agitation during cleaning. Test a small, inconspicuous area first to ensure the cleaning solution doesn’t affect any protective coatings or patina finishes.
Proper Drying and Polishing Techniques
Thorough rinsing removes all soap residue that could attract dirt or cause spotting when dried. Use clean, lukewarm water to rinse the necklace completely, ensuring no soap film remains on the surface. Inadequate rinsing leaves behind residues that dull silver’s natural luster.
Pat the silver necklace dry immediately using a clean, lint-free cloth to prevent water spots and minimize air exposure that accelerates tarnishing. Avoid rubbing motions that can create micro-scratches; instead, use gentle blotting actions to absorb moisture.
- Lay the necklace flat on a clean towel for initial drying
- Use a soft polishing cloth to restore shine and remove water marks
- Polish in straight lines rather than circular motions
- Store immediately in anti-tarnish pouches or jewelry boxes
The polishing phase enhances silver’s reflective properties and provides a protective barrier against future tarnishing. Professional-grade polishing cloths contain micro-abrasives that smooth surface irregularities while depositing protective compounds.
When This Method Is Most Effective
Gentle soap and water cleaning works best for lightly tarnished silver necklaces and routine maintenance cleaning sessions. This method effectively removes everyday contaminants without requiring harsh chemicals or specialized equipment. Therefore, it serves as an ideal weekly or bi-weekly cleaning routine.
This technique proves particularly suitable for silver necklaces with gemstones, pearls, or other delicate materials that might react negatively to stronger cleaning agents. Additionally, newly purchased silver jewelry benefits from gentle cleaning to remove manufacturing residues and protective coatings.
Pros
- Safe for all silver types and gemstone settings
- Requires only household materials
- Gentle enough for frequent use
- Preserves original finish and patina
Cons
- Limited effectiveness on heavy tarnish
- Requires more time than chemical cleaners
- May need multiple treatments for stubborn dirt
However, this method shows limited effectiveness against heavy tarnishing, deep scratches, or embedded dirt that requires more aggressive treatment approaches. In such cases, consider this gentle cleaning as a preliminary step before applying specialized silver restoration techniques.
Method 2: Baking Soda Paste Treatment
Baking soda paste treatment provides a more intensive cleaning solution for heavily tarnished silver necklaces that resist gentle soap and water methods. This alkaline compound neutralizes acidic tarnish while its mild abrasive properties remove stubborn discoloration without damaging the underlying silver.
Creating the Right Baking Soda to Water Ratio
The optimal baking soda paste requires three parts baking soda to one part water for effective tarnish removal. Measure three tablespoons of baking soda into a small bowl, then gradually add one tablespoon of lukewarm water while stirring continuously. This ratio creates a thick, spreadable consistency that adheres properly to silver surfaces.
Mix the paste thoroughly until it reaches a smooth, uniform texture without lumps or dry spots. The paste should hold its shape when applied but remain pliable enough for easy spreading. If the mixture appears too thick, add water drop by drop until achieving the proper consistency.
Application Technique for Heavily Tarnished Pieces
Apply the baking soda paste to tarnished areas using clean fingertips or a soft cloth, working in small sections to maintain control over the cleaning process. Focus particularly on heavily blackened areas where tarnish appears most concentrated. Cover the entire surface evenly, ensuring paste reaches into crevices and detailed areas.
Allow the paste to sit on the silver for 5-10 minutes depending on tarnish severity. During this time, the alkaline properties break down tarnish compounds while moisture softens stubborn deposits. However, never exceed 15 minutes as prolonged exposure may cause surface etching on delicate silver pieces.
Gentle Scrubbing with Soft-Bristled Toothbrush
Use a clean, soft-bristled toothbrush to gently work the paste into tarnished areas using circular motions. The bristles reach into detailed engravings and chain links where tarnish commonly accumulates. Apply light pressure to avoid scratching the silver surface while allowing the abrasive action to lift stubborn discoloration.
Pay special attention to areas where the chain connects to clasps or pendants, as these joints often harbor concentrated tarnish buildup. Work systematically across the entire necklace, refreshing the paste as needed to maintain cleaning effectiveness. The scrubbing action activates the baking soda’s cleaning properties while physically removing loosened tarnish particles.
Thorough Rinsing and Drying Process
Rinse the necklace thoroughly under lukewarm running water to remove all baking soda residue, which can leave white deposits if not completely eliminated. Use your fingers to gently rub away any remaining paste while the water flows over the silver. Continue rinsing until the water runs clear and no paste residue remains visible.
Pat the necklace dry immediately with a clean, lint-free cloth to prevent water spots from forming on the newly cleaned surface. Subsequently, polish the silver with a dedicated jewelry cloth to restore its natural luster and create a protective barrier against future tarnishing. This final polishing step enhances the cleaning results and maintains the necklace’s appearance.
Important Safety Note
This method proves particularly effective for sterling silver necklaces that have developed significant tarnishing over time. The combination of chemical and physical cleaning action addresses both surface discoloration and embedded tarnish that gentle methods cannot remove. For comprehensive silver care techniques, explore our detailed guide on how to clean tarnished silver for additional restoration methods.
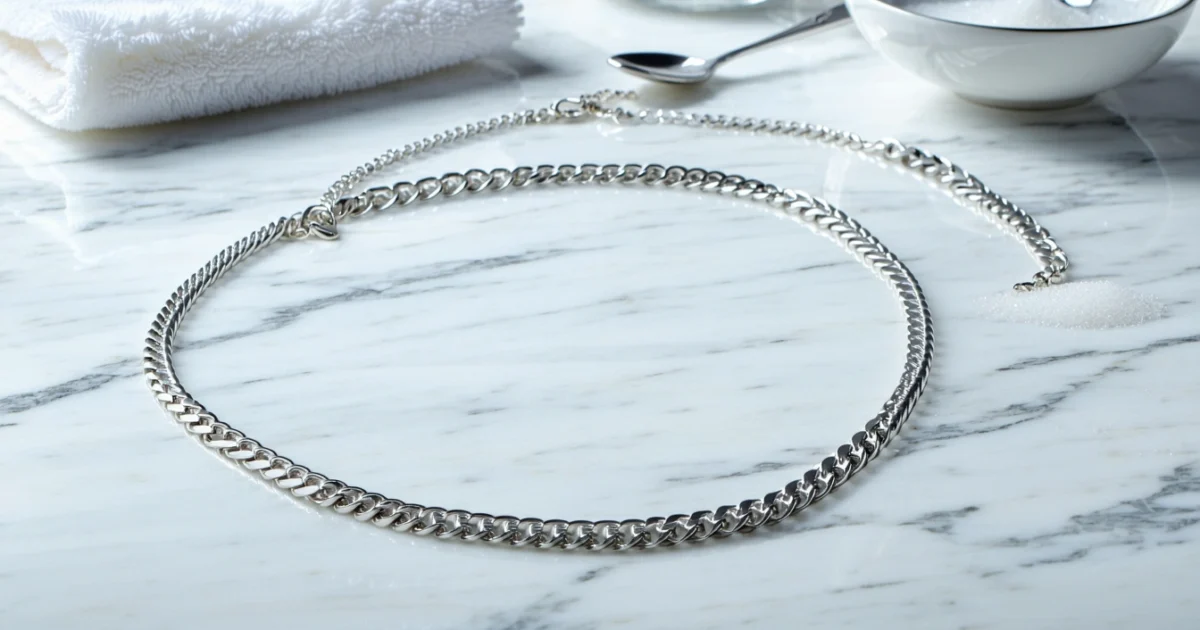
Method 3: Aluminum Foil and Baking Soda Bath
The aluminum foil and baking soda bath creates an electrochemical reaction that reverses silver tarnishing at the molecular level. This method effectively removes severe black tarnish that has turned your silver necklace completely dark. The process transfers sulfur compounds from the silver back to the aluminum through an ionic exchange.
Setting Up the Electrochemical Cleaning Process
Line a glass or ceramic bowl with aluminum foil, ensuring the shiny side faces upward to maximize conductivity. The bowl must be large enough to completely submerge your necklace without overcrowding. Avoid using metal bowls, as they interfere with the electrochemical process and reduce cleaning effectiveness.
Add one tablespoon of baking soda per cup of water you plan to use. The baking soda acts as an electrolyte, facilitating the transfer of ions between the aluminum and silver. Stir the mixture gently to dissolve the baking soda completely before proceeding to the next step.
Proper Water Temperature and Chemical Ratios
Heat water to approximately 80-90°C (176-194°F) for optimal reaction speed without damaging delicate silver chains. Hot water accelerates the electrochemical process, allowing faster tarnish removal than room temperature solutions. However, avoid boiling water, which can cause thermal shock to gemstones or damage soldered joints.
Pour the hot water slowly over the baking soda in the foil-lined bowl, creating immediate fizzing as the reaction begins. The proper ratio maintains one tablespoon of baking soda per cup of water to ensure adequate electrolyte concentration. Too little baking soda slows the process, while excess amounts waste materials without improving results.
How Long to Leave Jewelry in the Solution
Submerge the tarnished necklace completely, ensuring every part touches the aluminum foil for proper electrical contact. The reaction begins immediately, often producing a sulfur smell as tarnish compounds break down. Most light to moderate tarnishing clears within 1-3 minutes of contact with the solution.
Severely blackened silver necklaces may require 5-10 minutes for complete restoration, depending on tarnish depth and silver purity. Monitor the process closely, as the reaction continues until all accessible tarnish dissolves. Remove the necklace once the desired brightness returns, avoiding overexposure that might dull the silver’s natural luster.
Why This Method Works for Severe Tarnishing
The electrochemical bath reverses the tarnishing process by converting silver sulfide back to pure silver through ionic exchange. When silver touches aluminum in the alkaline solution, electrons flow from aluminum to silver, breaking the chemical bonds that create black tarnish. This process removes tarnish without abrading the silver surface like mechanical polishing methods.
Unlike paste cleaners that work through friction, this method penetrates intricate chain links and detailed patterns where manual scrubbing cannot reach. The solution flows into every crevice, ensuring uniform cleaning across complex jewelry designs. Additionally, the process preserves the silver’s original thickness since no material removal occurs during cleaning.
Important Safety Note
After treatment, rinse the necklace under cool running water to remove any residual baking soda solution. Pat dry with a soft cloth and polish with a jewelry cloth to restore maximum shine. This method proves particularly effective for sterling silver chains that have turned completely black from extended exposure to sulfur compounds in the environment.
Alternative Household Cleaning Methods
Beyond commercial silver cleaners and aluminum foil baths, several household items can effectively restore silver necklaces. However, these alternative methods require careful consideration of their effectiveness and potential risks to your jewelry. Understanding each approach helps you choose the safest option for your specific silver pieces.
Toothpaste Method: Effectiveness and Risks
Non-gel toothpaste contains mild abrasives that can remove light tarnish from silver surfaces. The microscopic particles in regular toothpaste act as a gentle polishing compound, buffing away surface oxidation. Apply a small amount to a soft cloth and gently rub the silver in circular motions for best results.
Nevertheless, this method carries significant risks for delicate jewelry. Whitening toothpastes contain stronger abrasives that can scratch silver surfaces permanently. Additionally, toothpaste residue may lodge in chain links or intricate designs, requiring thorough rinsing to prevent buildup.
Pros
- Readily available household item
- Effective for light surface tarnish
- Works quickly on small areas
Cons
- Can scratch soft silver surfaces
- Whitening formulas too abrasive
- Difficult to rinse from intricate designs
- May damage plated jewelry
Salt and Lemon Juice Treatment
The combination of salt and fresh lemon juice creates a mildly acidic cleaning solution that dissolves tarnish through chemical action. Mix equal parts salt and lemon juice to form a paste, then apply it to tarnished areas using a soft brush. The citric acid breaks down silver sulfide while salt provides gentle abrasion.
This natural approach works particularly well for heavily tarnished chains that have turned completely black. Allow the mixture to sit for 10-15 minutes before scrubbing gently with a soft toothbrush. Rinse thoroughly with cool water and dry immediately to prevent water spots.
However, prolonged exposure to acidic solutions can damage silver over time. Furthermore, the salt crystals may scratch delicate surfaces if applied with excessive pressure. Always test this method on an inconspicuous area first, especially with vintage or antique pieces.
Coca-Cola Cleaning: Myth vs. Reality
The popular belief that Coca-Cola cleans silver stems from its phosphoric acid content, which can indeed dissolve some types of tarnish. Submerging a silver necklace in cola for several hours may produce slight improvements in heavily oxidized pieces. The carbonation also helps lift debris from surface crevices.
Despite these mild benefits, Coca-Cola proves largely ineffective compared to proper silver cleaning methods. The phosphoric acid concentration remains too low for significant tarnish removal, while the high sugar content creates sticky residues. Additionally, the dark coloring may temporarily stain lighter silver alloys.
Professional jewelers strongly advise against using carbonated beverages for silver care. The sticky syrup residue requires extensive cleaning to remove completely, potentially causing more problems than the original tarnish. Dedicated silver cleaning methods deliver superior results without risking damage to your jewelry.
White Vinegar and Baking Soda Combination
White vinegar mixed with baking soda creates a powerful cleaning reaction that effectively removes stubborn tarnish from silver jewelry. The acetic acid in vinegar dissolves oxidation while baking soda neutralizes acids and provides gentle scrubbing action. This combination works through both chemical and mechanical cleaning processes.
Create the cleaning solution by mixing two tablespoons of white vinegar with one tablespoon of baking soda in a small bowl. The mixture will foam vigorously as the acid and base react. Soak the silver necklace for 2-3 hours, then scrub gently with a soft brush to remove loosened tarnish.
This method proves particularly effective for sterling silver chains with heavy tarnishing that resists other household treatments. The chemical reaction penetrates deep into oxidized layers, breaking down silver sulfide compounds at the molecular level. Rinse thoroughly with clean water and polish with a jewelry cloth for optimal shine.
Important Safety Note
While these alternative methods can restore silver necklaces, they require more caution than commercial silver cleaners. Test any household cleaning solution on a small, hidden area before treating the entire piece. When in doubt, consult a professional jeweler to avoid permanent damage to valuable or sentimental jewelry.
Cleaning Specific Silver Necklace Types
Different types of silver necklaces require tailored cleaning approaches to maintain their beauty and integrity. Each variation presents unique challenges that demand specific techniques and precautions. Understanding these differences ensures effective cleaning without causing damage to your precious jewelry.
Sterling Silver Chains and Pendants
Sterling silver necklaces contain 92.5% pure silver mixed with other metals, typically copper, which makes them more durable but also more prone to tarnishing. The copper content accelerates oxidation when exposed to air and moisture. Therefore, sterling silver pieces require regular maintenance to prevent heavy tarnish buildup.
Clean sterling silver chains using the aluminum foil method or commercial silver cleaners specifically formulated for sterling silver. These pieces can withstand more aggressive cleaning techniques than other silver types. However, intricate chain links require gentle brushing with a soft-bristled toothbrush to remove tarnish from crevices.
Sterling silver pendants often feature detailed engravings or textures that trap tarnish and dirt. Use cotton swabs dipped in cleaning solution to reach these detailed areas. Additionally, polish sterling silver pieces with a microfiber cloth after cleaning to restore their natural luster and create a protective barrier against future tarnishing.
Silver-Plated Jewelry Considerations
Silver-plated necklaces feature a thin layer of silver over a base metal, making them significantly more delicate than solid silver pieces. Aggressive cleaning methods can strip away the silver plating, exposing the underlying metal and ruining the jewelry permanently. Consequently, these pieces demand extremely gentle treatment.
Use only mild soap and warm water for silver-plated jewelry, avoiding harsh chemicals or abrasive materials. Gently clean with a soft cloth, applying minimal pressure to prevent wearing through the plating. Never use baking soda, toothpaste, or aluminum foil methods on plated pieces, as these techniques can damage the delicate surface coating.
Dry silver-plated necklaces immediately after cleaning to prevent water spots and corrosion of the base metal. Store these pieces separately in anti-tarnish pouches to minimize exposure to air and moisture. Furthermore, limit wearing silver-plated jewelry during activities that cause excessive sweating or exposure to chemicals.
Antique or Vintage Silver Pieces
Antique silver necklaces possess historical value that makes preservation paramount over aggressive cleaning. These pieces often feature unique patinas and age-related characteristics that contribute to their authenticity and value. Overzealous cleaning can destroy these valuable attributes and significantly reduce the piece’s worth.
Consult a professional jeweler or antique specialist before cleaning valuable vintage silver jewelry. Many antique pieces benefit from gentle cleaning with distilled water and a soft brush only. Avoid commercial cleaners unless specifically recommended by an expert, as modern formulations may react poorly with historical silver alloys.
Document the necklace’s condition with photographs before any cleaning attempt. This practice protects against potential insurance claims and provides reference points for restoration work. Moreover, some collectors prefer the natural patina on antique silver, viewing it as evidence of the piece’s age and authenticity.
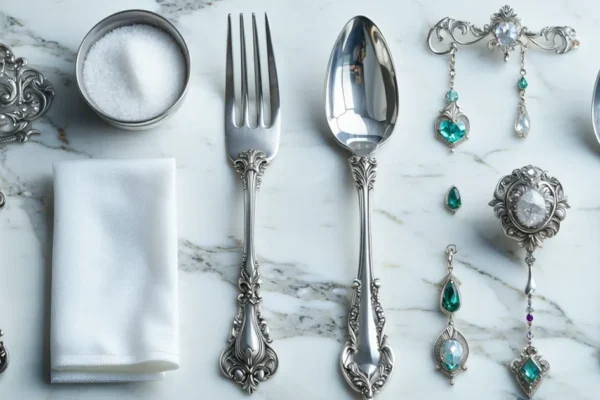
Silver Necklaces with Gemstones or Pearls
Silver necklaces featuring gemstones or pearls require specialized cleaning approaches that protect both the metal and the decorative elements. Different stones possess varying hardness levels and chemical sensitivities that influence cleaning method selection. Pearls, in particular, are extremely delicate and can be damaged by acids or harsh chemicals.
Clean the silver portions carefully while avoiding contact with gemstones or pearls. Use a small brush or cotton swab to apply cleaning solution only to the metal areas. For more comprehensive guidance on cleaning other jewelry types, reference our complete gold jewelry cleaning guide, which covers similar mixed-material considerations.
| Stone Type | Cleaning Method | Precautions |
|---|---|---|
| Diamonds | Gentle soap solution | Avoid harsh scrubbing |
| Emeralds | Damp cloth only | No soaking or chemicals |
| Pearls | Dry cloth buffing | Never use water or cleaners |
| Turquoise | Professional cleaning | Extremely porous and fragile |
Rinse mixed-material necklaces with minimal water, focusing the stream away from sensitive stones. Dry immediately with a soft cloth, paying special attention to areas where water might collect around stone settings. Store these pieces in individual compartments to prevent scratching and chemical interactions between different materials.
Professional vs. DIY Cleaning: When to Seek Help
Determining whether to clean your silver necklace at home or seek professional restoration requires careful assessment of several key factors. While basic tarnish removal suits most everyday pieces, certain conditions indicate that professional jewelry cleaning services provide the safest approach for valuable or delicate items.
Signs Your Necklace Needs Professional Restoration
Several warning signs indicate that DIY cleaning methods may cause more harm than good to your silver jewelry. Heavy black tarnishing that covers the entire surface often requires specialized equipment and professional-grade cleaning solutions for safe removal. Additionally, pieces with loose stones, damaged clasps, or weakened links need expert attention before any cleaning begins.
Antique silver necklaces frequently require professional assessment to determine appropriate cleaning methods that preserve their historical value. Furthermore, pieces with intricate engravings, filigree work, or delicate chain construction benefit from professional cleaning techniques that protect fine details. When home cleaning attempts have failed or worsened the condition, professional intervention becomes essential.
- Extensive black tarnishing covering entire surface
- Loose or damaged gemstone settings
- Broken or weakened chain links
- Antique pieces with historical significance
- Previous cleaning damage or discoloration
- Intricate decorative elements requiring specialized care
Valuable or Sentimental Pieces Requiring Expert Care
High-value silver necklaces, particularly those from renowned designers like Tiffany & Co. or antique pieces, warrant professional cleaning to maintain their worth and integrity. Sentimental jewelry passed down through generations deserves expert handling to preserve both its physical condition and emotional significance. Professional jewelers possess specialized knowledge about different silver alloys and appropriate restoration techniques.
Insurance considerations also influence the decision between DIY and professional cleaning approaches. Many insurance policies require professional maintenance for high-value items, and amateur cleaning attempts may void coverage if damage occurs. Consequently, documenting professional care helps maintain insurance validity and resale value.
Insurance Alert
Cost Comparison of Professional vs. Home Cleaning
Understanding the financial implications helps determine the most cost-effective cleaning approach for your specific situation. Home cleaning costs typically range from £2-10 for basic supplies like baking soda, aluminum foil, or commercial silver cleaners. However, professional cleaning services charge £15-50 depending on the piece’s complexity and condition.
| Cleaning Method | Initial Cost | Per-Use Cost | Risk Level |
|---|---|---|---|
| DIY Basic (baking soda) | £2-5 | £0.10 | Low-Medium |
| Commercial cleaner | £8-15 | £0.50 | Medium |
| Professional service | £15-50 | £15-50 | Very Low |
| Professional restoration | £50-200+ | £50-200+ | Minimal |
While home cleaning appears more economical initially, potential damage costs must factor into the equation. Replacing a damaged vintage necklace or repairing stone settings can cost hundreds of pounds, making professional cleaning the more economical choice for valuable pieces. Moreover, regular professional maintenance extends jewelry lifespan and preserves value over time.
Finding Reputable Jewelry Cleaning Services
Selecting qualified jewelry professionals ensures safe and effective cleaning results for your silver necklaces. Look for certified gemologists or jewelers with established reputations and positive customer reviews. Additionally, ask about their specific experience with silver cleaning and restoration techniques before entrusting valuable pieces to their care.
Reputable services provide detailed assessments before beginning work and offer guarantees on their cleaning results. Furthermore, they use professional-grade ultrasonic cleaners and specialized solutions unavailable to consumers. Many established jewelers also provide insurance coverage during the cleaning process, protecting against accidental damage.
- Check professional certifications and credentials
- Read customer reviews and testimonials
- Request before-and-after examples of previous work
- Verify insurance coverage during service
- Compare pricing and service guarantees
- Ask about turnaround times and pickup procedures
Local jewelry stores often provide cleaning services alongside their retail operations, offering convenient access and established community relationships. However, specialized restoration services may require shipping to expert facilities, particularly for antique or heavily tarnished silver pieces requiring extensive work. Always obtain written estimates and service agreements before proceeding with professional cleaning.
Pros
- Professional expertise and specialized equipment
- Insurance protection during cleaning process
- Guaranteed results with warranty coverage
- Safe handling of valuable or antique pieces
Cons
- Higher cost per cleaning session
- Longer turnaround time than home methods
- Need to transport jewelry to service location
- May require advance booking for busy periods
Preventing Future Tarnish and Proper Storage
Proper storage prevents silver tarnish formation and maintains your necklace’s brilliance between cleanings. Moreover, implementing preventive measures reduces the frequency of intensive cleaning sessions and preserves the metal’s integrity over time.
Anti-Tarnish Storage Solutions and Containers
Anti-tarnish pouches provide the most effective protection for silver jewelry storage. These specially treated fabric bags contain silver-protective compounds that neutralize sulfur compounds in the air. Furthermore, they offer individual protection for each piece, preventing scratching and tangling.
Jewelry boxes with anti-tarnish lining create protective environments for multiple pieces simultaneously. Additionally, these containers often feature separate compartments that prevent jewelry from rubbing against each other. Many professional-grade boxes include moisture-absorbing materials and airtight seals for maximum protection.
- Silica gel packets absorb excess moisture in storage containers
- Activated charcoal strips neutralize harmful gases and odors
- Anti-tarnish strips release protective vapors continuously
- Flannel-lined boxes provide soft, non-abrasive surfaces
- Ziplock bags with chalk offer budget-friendly protection options
Controlling Humidity and Air Exposure
Humidity control plays a crucial role in preventing silver tarnish formation. Therefore, maintain storage areas below 50% relative humidity whenever possible. Consequently, basements and bathrooms make poor storage locations due to their naturally high moisture levels.
Air circulation accelerates tarnishing by exposing silver to sulfur compounds and oxygen. Thus, airtight containers provide superior protection compared to open jewelry stands or dishes. However, ensure containers remain completely dry before sealing to prevent trapped moisture damage.
Storage Temperature Tip
Regular Maintenance Schedule for Silver Jewelry
Establishing a regular maintenance routine prevents heavy tarnish buildup and extends your silver necklace’s lifespan. Consequently, weekly inspections allow early detection of tarnish formation before it becomes difficult to remove.
| Frequency | Maintenance Task | Purpose |
|---|---|---|
| Weekly | Visual inspection and gentle wiping | Early tarnish detection |
| Monthly | Thorough cleaning with silver cloth | Remove light tarnish |
| Quarterly | Deep cleaning with appropriate method | Restore full brilliance |
| Annually | Professional assessment and cleaning | Expert evaluation and care |
Gentle polishing with a microfiber cloth after each wearing removes oils and prevents buildup. Similarly, immediate cleaning after exposure to perfumes, lotions, or cleaning products prevents chemical damage. Professional silver cleaning techniques become necessary when home methods prove insufficient.
Products to Avoid When Wearing Silver Necklaces
Certain chemical substances accelerate silver tarnishing and should be avoided when wearing silver jewelry. Moreover, understanding these harmful products helps prevent damage and maintains your necklace’s appearance longer.
Perfumes and colognes contain alcohol and sulfur compounds that react with silver surfaces. Therefore, apply fragrances before putting on jewelry and allow them to dry completely. Additionally, hairsprays and styling products create similar reactions when they contact silver surfaces.
- Chlorinated water from pools and hot tubs causes severe discoloration
- Household cleaners containing bleach or ammonia damage silver
- Rubber materials release sulfur compounds that accelerate tarnishing
- Latex gloves leave residues that promote tarnish formation
- Acidic foods like citrus fruits can cause spotting and discoloration
Sweat and body oils naturally contain sulfur compounds that promote tarnishing. Consequently, remove silver jewelry before exercising, swimming, or engaging in activities that cause heavy perspiration. Furthermore, clean jewelry immediately after accidental exposure to any harmful substances.
Proper storage and preventive care reduce silver cleaning frequency by up to 75%
Troubleshooting Common Silver Cleaning Problems
Even experienced silver cleaners encounter challenging situations that require specialized solutions. Furthermore, understanding how to address these problems prevents permanent damage and restores your necklace’s original beauty.
Dealing with Stubborn Black Tarnish
Heavy black tarnish requires more aggressive cleaning methods than standard maintenance routines. Additionally, this severe discoloration often develops when silver necklaces remain unworn for extended periods or experience exposure to sulfur-rich environments.
Create a stronger aluminum foil solution by combining one tablespoon of baking soda with one tablespoon of salt in hot water. Moreover, increase the soaking time to 10-15 minutes for heavily tarnished pieces. The chemical reaction between aluminum and silver sulfide removes even stubborn black deposits effectively.
Commercial silver cleaners containing thiourea or phosphoric acid tackle severe tarnishing when home remedies fail. However, use these products sparingly and follow manufacturer instructions precisely. Professional jewelers recommend testing any commercial cleaner on a hidden area first.
Important Safety Note
Fixing Scratches from Improper Cleaning
Abrasive cleaning materials create microscopic scratches that dull silver surfaces and trap dirt particles. Consequently, these scratches require specific polishing techniques to restore the original finish without causing additional damage.
Silver polishing cloths impregnated with fine abrasives remove light scratches through gentle buffing motions. Additionally, work in straight lines rather than circular patterns to minimize visible scratch marks. Professional jewelers use this technique to restore luster to damaged pieces.
For deeper scratches, jeweler’s rouge applied with a soft cloth provides more aggressive polishing action. Furthermore, this traditional compound contains iron oxide particles that smooth surface irregularities without removing excessive silver material. Apply minimal pressure and work gradually to avoid over-polishing.
- Use only back-and-forth motions, never circular rubbing
- Apply polishing compound sparingly to prevent buildup
- Clean thoroughly after polishing to remove residue
- Test techniques on inconspicuous areas first
Restoring Shine to Dull Silver
Dull silver surfaces result from accumulated microscopic scratches, oxidation, or residue buildup from improper cleaning products. Moreover, restoring brilliance requires systematic cleaning followed by proper polishing techniques.
Begin with thorough cleaning using warm soapy water to remove surface contaminants that mask the silver’s natural luster. Subsequently, dry completely and inspect for remaining tarnish or residue that requires additional treatment.
Professional silver polish contains fine abrasives and protective agents that restore shine while creating a barrier against future tarnishing. Additionally, quality polishes leave invisible protective films that slow oxidation processes. Learn more about comprehensive tarnish removal techniques for severely dulled pieces.
The polishing process requires patience and proper technique. Therefore, apply polish with a soft cloth using light pressure and straight-line motions. Allow the polish to dry slightly before buffing with a clean section of cloth until the desired shine appears.
When Cleaning Methods Don't Work
Some silver damage exceeds the capabilities of home cleaning methods and requires professional intervention. Furthermore, recognizing when to seek expert help prevents further damage from aggressive cleaning attempts.
Deep corrosion that penetrates the silver surface cannot be reversed through cleaning alone. Additionally, pieces with loose stones, damaged clasps, or structural weaknesses need professional repair before cleaning. Attempting to clean damaged jewelry often worsens existing problems.
| Problem | Home Solution | Professional Required |
|---|---|---|
| Light tarnish | Baking soda paste | No |
| Heavy black tarnish | Aluminum foil method | Sometimes |
| Deep scratches | Limited success | Yes |
| Corrosion pitting | Not effective | Yes |
| Loose stones | Never attempt | Always |
Professional jewelers possess specialized equipment including ultrasonic cleaners and rotary tumblers that safely restore heavily damaged pieces. Moreover, they can assess whether restoration costs justify the expense compared to replacement value.
Antique or valuable silver necklaces always warrant professional cleaning to preserve their worth and historical integrity. Consequently, improper home cleaning can permanently reduce value and damage irreplaceable pieces.
Frequently Asked Questions
How do you clean a silver necklace at home?
You can clean a silver necklace at home using warm water and mild dish soap. Soak the necklace for a few minutes, then gently scrub with a soft-bristled toothbrush. Rinse thoroughly and dry with a soft cloth. For light tarnish, this simple method is often sufficient to restore shine.
How to get silver chain shiny again?
To restore shine to a silver chain, try the aluminum foil bath method. Line a bowl with aluminum foil, add hot water and a tablespoon of baking soda, then place your chain in the solution. The chemical reaction will remove tarnish and restore the original shine within minutes.
How do you clean sterling silver gone black?
For heavily blackened sterling silver, create a baking soda paste using three parts baking soda to one part water. Apply the paste gently with a soft cloth, working in circular motions. Rinse thoroughly and dry completely. This method effectively removes heavy tarnish without damaging the silver.
Will Coca-Cola clean silver?
While Coca-Cola contains phosphoric acid that can remove some tarnish, it’s not recommended for cleaning silver jewelry. The sticky residue and sugar content can damage delicate pieces and attract dirt. Stick to proven methods like soap and water or baking soda for safer results.
Can you use toothpaste to clean silver?
Regular toothpaste can clean silver, but use non-abrasive, whitening-free toothpaste only. Apply a small amount to a soft cloth and gently rub the silver surface. However, specialized silver cleaners or household methods like baking soda are generally safer and more effective.
How often should I clean my silver necklace?
Clean your silver necklace every 2-3 months with regular wear, or whenever you notice tarnishing. Pieces worn daily may need monthly cleaning, while occasionally worn jewelry can go 6 months between cleanings. Regular maintenance prevents heavy tarnish buildup.
What should I avoid when cleaning silver jewelry?
- Harsh chemicals like bleach or ammonia
- Abrasive materials such as steel wool or rough cloths
- Excessive scrubbing that can scratch the surface
- Ultrasonic cleaners for delicate or antique pieces
- Paper towels which can leave scratches
How do you clean silver necklace with foil?
The aluminum foil method involves lining a bowl with foil, adding hot water and baking soda, then placing your silver necklace in the solution. The electrochemical reaction between aluminum and silver removes tarnish quickly. Leave for 2-5 minutes, then rinse and dry thoroughly.
Can I clean my Tiffany silver necklace at home?
Yes, you can clean Tiffany silver jewelry at home using gentle methods only. Use warm soapy water and a soft cloth, avoiding harsh chemicals or abrasive materials. For valuable pieces, consider using Tiffany’s professional cleaning service or their recommended silver polish for best results.
How do you clean silver necklace with salt?
Create a salt cleaning solution by mixing salt, baking soda, and hot water in an aluminum foil-lined bowl. The combination creates a powerful tarnish-removing reaction. Submerge your necklace for a few minutes, then rinse thoroughly and dry with a soft cloth.
Why does my silver necklace turn black so quickly?
Rapid blackening occurs due to exposure to sulfur compounds in perfumes, lotions, household chemicals, or humid environments. Sterling silver with higher copper content tarnishes faster than pure silver. Store your necklace in anti-tarnish pouches and avoid contact with chemicals to slow tarnishing.
How do you prevent silver necklaces from tarnishing?
- Store in anti-tarnish pouches or airtight containers
- Keep away from moisture and humidity
- Avoid contact with perfumes and lotions
- Clean regularly to prevent buildup
- Use silica gel packets in storage containers
Is it safe to use bicarbonate of soda on silver?
Yes, bicarbonate of soda (baking soda) is safe for cleaning silver when used properly. Create a gentle paste with water or use it in the aluminum foil bath method. It’s mildly abrasive, so use gentle circular motions and avoid excessive scrubbing on delicate pieces.
What's the difference between cleaning sterling silver and pure silver?
Sterling silver (92.5% silver) tarnishes faster due to copper content and requires more frequent cleaning. Pure silver tarnishes slowly but is softer and more delicate. Use gentler pressure and methods for pure silver pieces to avoid damage.
When should I take my silver necklace to a professional?
Seek professional cleaning for antique or valuable pieces, jewelry with gemstones, severely damaged silver, or when home methods fail. Professional jewelers have specialized equipment and expertise to safely restore heavily tarnished or delicate pieces without causing damage.
You May Also Like
How to Clean Rust Off Metal: Complete Removal Guide 2026
How to Clean Tarnished Silver: Complete Guide for 2026