How to Clean Double Glazed Windows: Complete Guide for Streak-Free Results (Inside, Outside & Between Panes)

Double glazed windows are brilliant at keeping your home warm and quiet, but they can be surprisingly tricky to clean properly. If you’ve ever noticed streaks after cleaning, or worse, condensation and dirt trapped between the panes, you’re not alone. The confusion usually starts with one simple question: what exactly does “cleaning inside double glazed windows” mean?
The truth is, when people talk about cleaning the “inside” of double glazed windows, they’re often referring to two completely different things. There’s the interior glass surface you can reach from your room, and then there’s the sealed space between the two panes. Only one of these is actually cleanable without professional help.
In this guide, we’ll clear up the confusion and show you exactly how to clean every accessible part of your double glazed windows. You’ll learn the best techniques for streak-free glass, how to maintain your frames and seals, what to do about condensation between the panes, and when it’s time to call in the professionals.
Quick Summary
Time needed: 20-30 minutes per window
Difficulty: Easy for accessible surfaces, professional help needed for between-pane issues
You’ll need: Microfibre cloths, spray bottle, white vinegar, mild washing-up liquid, squeegee
Key takeaway: You can clean the interior and exterior glass surfaces yourself, but dirt or condensation between the sealed panes indicates a failed seal that requires professional repair.
Understanding Your Double Glazed Windows
Before grabbing your cleaning supplies, it’s helpful to understand what you’re working with. Double glazed windows consist of two panes of glass separated by a sealed gap, usually filled with air or an insulating gas like argon. This sealed space is what makes these windows so effective at keeping your home warm and reducing outside noise.
The seal between the panes is critical. It’s designed to be completely airtight, preventing moisture, dust, and dirt from getting into that gap. When your windows are functioning properly, this seal stays intact for years, and you’ll only ever need to clean the surfaces you can reach – the interior glass facing your room and the exterior glass facing outside.
What "Inside" Really Means
Here’s where the confusion happens. When you search for “how to clean inside double glazed windows,” you might be asking about:
- The interior-facing glass – the surface you can touch from inside your room (this is cleanable)
- The exterior-facing glass – the surface facing outside (also cleanable)
- The space between the two panes – the sealed cavity (NOT accessible without breaking the seal)
If you can simply wipe away what you’re seeing, it’s on an accessible surface. If there’s fogging, condensation, or dirt that won’t budge no matter which side you clean from, that’s between the panes – and that’s a seal failure problem, not a cleaning problem.
Signs Your Seal Has Failed
You’ll know you have a seal failure if you notice:
- Condensation or water droplets between the glass that won’t wipe away
- Foggy or cloudy appearance that persists regardless of cleaning
- Visible dirt or dust floating inside the sealed space
- A milky or hazy film between the panes
If you’re seeing any of these signs, skip ahead to our section on condensation between panes. For normal cleaning of accessible surfaces, let’s get started with the proper technique.
Cleaning the Accessible Surfaces (Without Streaks)
The key to sparkling double glazed windows is using the right materials and technique. Most streaks happen because of three common mistakes: using too much cleaner, working in direct sunlight, or using dirty cloths. Avoid these pitfalls, and you’ll get professional-looking results.
What You'll Need
Essential Tools:
- Microfibre cloths – at least two (one for cleaning, one for buffing). These are superior to paper towels as they don’t leave lint behind
- Squeegee with rubber blade – the secret weapon for streak-free windows
- Spray bottle – for your cleaning solution
- Vacuum cleaner with brush attachment – for removing dust before cleaning
- Soft-bristled brush – an old toothbrush works brilliantly for corners
Cleaning Solutions (Choose One):
- Distilled water – surprisingly effective on its own and leaves no residue
- White vinegar solution – 1 part white vinegar to 2 parts water (eco-friendly and excellent for cutting through grime)
- Mild washing-up liquid solution – just a few drops in warm water
- Commercial glass cleaner – choose a non-abrasive formula
What to AVOID:
- Bleach (especially on uPVC frames – it causes brown discolouration)
- Ammonia-based cleaners
- Cream cleaners or scouring powders
- Wire wool or abrasive sponges
- Newspaper (despite old wives’ tales, it can leave ink residue on modern frames)
Step-by-Step Cleaning Process
Step 1: Choose the Right Time
Timing makes a massive difference to your results. Clean your windows on a cloudy day or when they’re in shade. Direct sunlight causes your cleaning solution to evaporate too quickly, leaving streaks before you can wipe them away. Early morning or evening works well, or take advantage of overcast days.
Step 2: Remove Dust and Debris First
This step prevents scratches and makes the actual cleaning much easier:
- Vacuum the frames and sills using a soft brush attachment. Pay special attention to corners where dust accumulates.
- Brush away loose dirt from the glass surface with a dry microfibre cloth or soft brush.
- Clean corners and edges thoroughly – this is where most grime hides.
Why bother? Because if you spray water onto a dusty window, you’ll create muddy streaks that are harder to remove than the original dust.
Step 3: Start with the Exterior Glass
Always clean the outside first. This gives you a clear view through the glass when you tackle the interior, making it easier to spot any remaining marks.
- Spray your cleaning solution lightly across the glass (don’t drench it – less is more)
- Wipe in sections using a damp microfibre cloth, working from top to bottom
- Use your squeegee in an S-pattern or overlapping vertical strokes, wiping the blade clean after each pass
- Buff any remaining moisture with a dry microfibre cloth
For ground-floor windows, this is straightforward. For first-floor windows or higher, consider using an extension pole with a squeegee attachment, or simply stick to cleaning what you can safely reach. There’s no shame in calling professional window cleaners for high or hard-to-reach windows – it’s much safer.
Step 4: Clean the Interior Glass
Now for the inside surface:
- Spray your solution onto the glass (or onto your cloth to avoid overspray on windowsills)
- Wipe in circular motions or from top to bottom, working in small sections
- Use the squeegee technique – start at the top corner and pull down in straight, overlapping strokes
- Wipe the squeegee blade with a clean cloth after each stroke
- Buff with a dry microfibre cloth to eliminate any remaining streaks
- Check your work in natural light from different angles
Step 5: Final Inspection
Stand back and look at your windows from different angles. Natural light will reveal any streaks or smudges you’ve missed. If you spot any, simply buff them away with a clean, dry microfibre cloth. Don’t re-wet the glass unless absolutely necessary.
Why Streaks Happen (And How to Prevent Them)
Even with the right technique, streaks can still appear. Here’s why:
Too Much Cleaning Solution Using excessive cleaner leaves residue that dries into streaks. A light mist is all you need – your cloth should be damp, not dripping.
Dirty Cloths Once a microfibre cloth is saturated with dirt, it just redistributes grime across your windows. Switch to a fresh cloth when the first one gets dirty, and always use a completely dry cloth for final buffing.
Hard Water If you’re using tap water in your cleaning solution, minerals can leave spots. Switch to distilled water for better results.
Rushing the Process Taking your time and working in small sections gives you better control. Trying to clean an entire large window in one go usually results in the solution drying before you can wipe it properly.
Wrong Temperature Both very hot and very cold temperatures can affect how your cleaning solution works. Room temperature or slightly warm water is ideal.
If you’re interested in more professional techniques, check out our guide on what window cleaners use to clean windows for additional insights.
Cleaning Window Frames and Seals
Sparkling glass only looks its best when the frames are clean too. Different frame materials need different approaches, but the golden rule is the same: gentle cleaning with non-abrasive materials.
Cleaning uPVC Window Frames
uPVC (unplasticised polyvinyl chloride) is the most common frame material for modern double glazed windows in the UK. It’s popular because it’s low-maintenance and durable, but it does require regular cleaning to prevent discolouration.
The Basic Method:
- Mix warm water with a few drops of washing-up liquid in a bowl or spray bottle
- Dip a soft cloth or sponge in the solution and wring out excess water
- Wipe down all frame surfaces, paying attention to corners and crevices
- Rinse with clean water on a fresh cloth
- Dry thoroughly with a clean, dry cloth
For Stubborn Dirt on uPVC:
If warm soapy water isn’t shifting the grime, try this vinegar method:
- Mix 1 cup of white vinegar with 4 cups of hot water in a spray bottle
- Spray the solution onto the uPVC frames
- Leave for 10 minutes to allow the vinegar to break down the dirt
- Wipe clean with a soft cloth
- Rinse with clean water and dry
Alternatively, baby wipes are surprisingly effective for quick cleaning of uPVC frames. They’re gentle, pre-moistened with a mild solution, and convenient for regular maintenance.
Commercial uPVC Cleaners:
For heavily soiled frames, you can use a dedicated uPVC cleaner from your local hardware shop. Follow the manufacturer’s instructions carefully, and always test on an inconspicuous area first.
Cleaning Wooden Frames
Wooden frames require a gentler touch because excess moisture can cause swelling, warping, or rot.
- Use a barely damp cloth with a tiny amount of mild wood cleaner or washing-up liquid
- Wipe down the frames gently
- Dry immediately and thoroughly with a clean cloth
- Never soak wooden frames or leave them wet
For stubborn marks on wood, use a specialist wood cleaner designed for painted or varnished surfaces. Avoid anything too harsh that might strip the protective coating.
Cleaning Aluminium Frames
Aluminium frames are robust and weather-resistant, but they can sometimes develop a white powdery substance (oxidation).
- Wipe down with warm, soapy water using a soft cloth
- For oxidation, use a specialist aluminium cleaner or a very mild abrasive (though test first)
- Rinse thoroughly and dry
Cleaning Rubber Seals
The rubber seals around your windows are crucial for keeping moisture out and warmth in. They’re also dust magnets, and dirty seals can degrade faster.
How to Clean Rubber Seals:
- Use warm, soapy water and a soft cloth or sponge
- For stubborn dirt in crevices, use a soft brush (like an old toothbrush) to gently dislodge debris
- Wipe clean and dry thoroughly
- Avoid harsh chemicals that can cause the rubber to perish, discolour, or peel
Inspect While You Clean:
As you clean your seals, check for:
- Cracks or splits in the rubber
- Sections pulling away from the frame
- Hardening or loss of flexibility
- Mould growth
If you notice significant damage, the seals may need professional replacement to maintain your windows’ energy efficiency.
Cleaning Window Sills
Don’t forget the sills – they accumulate dust, dead insects, and grime.
- Vacuum or brush away loose debris first
- Wipe with warm, soapy water using a non-abrasive cloth or sponge
- For stubborn dirt, let the soapy water sit for 5 minutes before scrubbing gently
- Rinse with clean water and dry
For more detailed guidance on cleaning the entire window area, including tracks and sills, see our comprehensive guide on how to clean window tracks.
Opening Windows for Easier Cleaning
Many modern double glazed windows have an “easy clean” mechanism that tilts the window inward, allowing you to clean the exterior glass from inside your home. This is particularly useful for upper-floor windows.
Understanding Easy Clean Windows
If your windows have this feature, you’ll find special tabs or buttons on the window mechanism – usually one at the top and one at the bottom of the hinge side.
How to Activate Easy Clean Mode
- Open your window fully as you normally would
- Locate the grooved metal tabs marked “easy clean” on the inside mechanism (usually top and bottom)
- Press both tabs down simultaneously – this releases an extra portion of the sliding mechanism
- Push the window open further – it should now tilt inward, bringing the exterior glass within easy reach
- Clean the exterior surface from the safety of inside your home
Returning to Normal Position
- Close the window most of the way while keeping the tabs depressed
- Allow the tabs to click back into place – you should hear and feel them engage
- Test that the window opens normally – if it only opens partially, you haven’t engaged the mechanism properly
When You Don't Have Easy Clean
If your windows don’t have this mechanism:
- Use a long-handled squeegee and cloth from inside for the exterior surface
- Clean what you can safely reach from ground level
- Consider professional window cleaners for upper floors – they have the proper equipment and insurance
Dealing with Condensation Between Panes
This is perhaps the most frustrating double glazed window problem. You’ve probably landed on this article specifically because you’ve noticed condensation, fogging, or even dirt trapped between your window panes, and you’re wondering if there’s a way to clean it out.
The Hard Truth
If you have moisture or dirt between your window panes, your seal has failed. This isn’t something you can clean away with a cloth and some vinegar. The hermetic seal that kept the space between the panes airtight has developed a breach, allowing moisture to creep in.
Once moisture gets into that sealed space, it’s trapped there. On cold mornings, you’ll see it condense as droplets or fog. Even if it temporarily evaporates when the sun warms the window, it’s still there in the air between the panes, ready to condense again.
Why Seals Fail
Double glazed window seals can fail for several reasons:
- Age and wear – seals naturally degrade over 15-20 years
- Poor installation – if windows weren’t fitted correctly from the start
- Thermal stress – repeated expansion and contraction from temperature changes
- Water damage – if moisture reaches the seal from outside
- Structural movement – settlement in the building can stress window frames
Temporary Solutions (They're Truly Temporary)
Some DIY enthusiasts suggest temporary fixes to reduce the appearance of condensation. These don’t repair the seal, but they might buy you time before professional repair:
Using a Dehumidifier:
Place a dehumidifier near the affected window and run it regularly. This can help reduce the overall moisture in the room and may draw some moisture out if the seal breach is significant. However, it won’t fix the underlying problem.
Moisture Absorbers:
Silica gel packets, moisture absorber boxes, or “window snakes” placed along the bottom of the window might reduce visible condensation slightly. Again, this is masking the symptom, not fixing the cause.
Heat from Hairdryer or Space Heater:
Directing warm air at the window can evaporate visible condensation temporarily. By the time you’ve finished breakfast, it’ll likely be back.
Permanent Solutions
There are really only two proper fixes for failed seals:
1. Sealed Unit Replacement (Most Common):
A professional can remove the existing glass unit (both panes together) from your window frame and install a new sealed unit. This is usually the most cost-effective solution if your frames are still in good condition.
- Cost: Typically £100-£300 per window, depending on size and glass type
- Time: Often completed in a few hours
- Benefit: Restores full insulation and clarity
2. Complete Window Replacement:
If your frames are old, damaged, or you have multiple seal failures, replacing the entire window might make more sense.
- Cost: £300-£800+ per window, depending on size, style, and materials
- Time: Usually a day for multiple windows
- Benefit: Brand new windows with warranties, improved energy efficiency, fresh seals throughout
Prevention Tips
While you can’t prevent seal failure forever, you can extend your windows’ lifespan:
- Keep rooms well-ventilated – excessive humidity speeds up seal degradation
- Maintain consistent indoor temperatures – extreme temperature fluctuations stress seals
- Clean regularly – removing dirt and grime from seals helps them last longer
- Address any leaks promptly – water damage around frames can compromise seals
- Inspect annually – catch small problems before they become big ones
Fixing Other Common Problems
Beyond condensation between panes, double glazed windows can develop other issues that affect their appearance and performance.
Removing Haze from Windows
A hazy appearance can occur on the accessible glass surfaces from:
- Residue from cleaning products
- Hard water deposits
- Built-up dirt and pollution
- Scratches that scatter light
If the haze is on the outside or inside surface you can reach:
- Mix equal parts white vinegar and water in a spray bottle
- Spray onto the affected glass
- Wipe gently with a microfibre cloth in circular motions
- For persistent haze, try a commercial glass cleaner designed for hard water deposits
- Buff dry with a clean cloth
If the haze is between the panes:
This indicates seal failure. The haze is likely condensation residue or degraded desiccant material that’s trapped in the sealed cavity. This requires professional repair – surface cleaning won’t help.
Dealing with Scratches
Light surface scratches can sometimes be reduced or removed, but deep scratches are usually permanent.
For Light Scratches:
- Purchase cerium oxide or iron oxide polish (available online or at specialist glass shops)
- Apply a small amount to a soft cloth
- Rub gently in circular motions over the scratch
- Wipe clean and assess
- Repeat if necessary
Prevention is Better:
- Remove rings and bracelets before cleaning windows
- Keep pets away from windows during cleaning
- Be careful with ladders and tools near glass
- Use proper window cleaning tools, not abrasive materials
Removing Specific Stains and Marks
Hard Water Stains:
Mix white vinegar with water (1:1 ratio), spray on, leave for 5 minutes, then wipe clean. For stubborn deposits, use a commercial lime scale remover designed for glass.
Bird Droppings:
Soak with warm water first to soften, then wipe gently. Never scrape when dry – you’ll scratch the glass. A dedicated bird dropping remover works well for regular problems.
Paint Splatters:
For water-based paint, warm soapy water should work. For dried gloss or emulsion, use a razor blade scraper held at a very shallow angle (almost flat against the glass) and work carefully. Always keep the glass wet while scraping.
Sticky Residue (from tape or labels):
Use a small amount of white spirit on a cloth, rubbing gently. Wash the area thoroughly with soapy water afterwards.
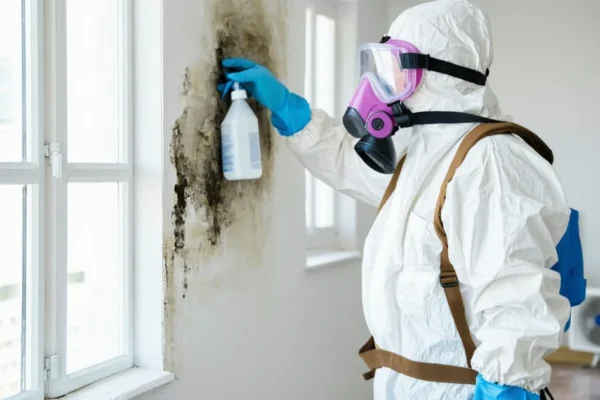
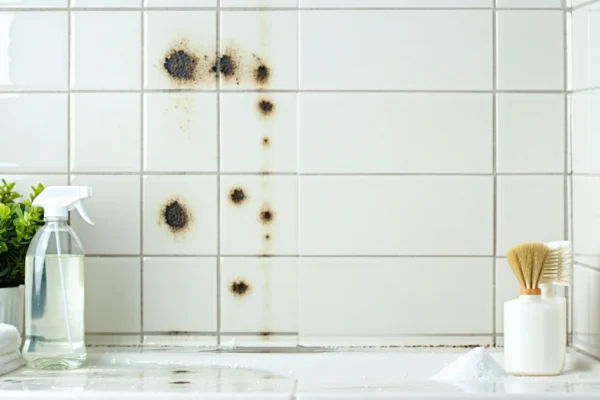
Addressing Mould on Frames and Seals
Mould appears when there’s excess moisture and poor ventilation. It’s not just unsightly – it’s a health concern and indicates an underlying dampness problem.
To Remove Mould:
- Mix 1 cup of white vinegar with 4 cups of hot water in a spray bottle
- Spray the affected areas
- Leave for 10 minutes
- Wipe clean with a cloth
- Dry thoroughly
For stubborn mould:
- Use a specialist anti-mould cleaner
- Ensure good ventilation during and after cleaning
- Wear gloves and a mask if the mould is extensive
Preventing Mould:
- Open windows regularly (even in winter, just for 10-15 minutes)
- Use extractor fans in bathrooms and kitchens
- Keep rooms adequately heated
- Wipe away condensation from window surfaces daily
- Use a dehumidifier if necessary
Maintenance Schedule and Best Practices
Regular maintenance keeps your windows looking great and helps you catch problems early before they become expensive repairs.
How Often Should You Clean?
Interior Glass: Monthly or as needed A quick wipe with a microfibre cloth takes just minutes and keeps your view clear.
Exterior Glass: Quarterly (at minimum) Urban areas with more pollution may need monthly cleaning. Rural locations might manage with twice yearly.
Frames and Seals: Quarterly A proper clean four times a year prevents buildup and helps you spot any developing issues.
Deep Clean: Twice yearly Spring and autumn are ideal times for a thorough clean of all window components.
Seasonal Considerations
Spring: Perfect time for a deep clean after winter grime. Check seals for winter damage.
Summer: Quick, regular cleans to remove pollen and dust. Easier to spot streaks in good light.
Autumn: Remove fallen leaves and debris from sills. Prepare windows for winter weather.
Winter: Wipe away condensation daily to prevent mould. Clean less frequently but monitor for problems.
Quick Clean vs. Deep Clean
Quick Clean (15 minutes):
- Wipe interior glass with microfibre cloth
- Quick frame dust-off
- Check for obvious issues
Deep Clean (30-45 minutes):
- Full interior and exterior glass cleaning
- Thorough frame cleaning
- Seal inspection and cleaning
- Sill and track cleaning
- Hardware check and lubrication
What to Avoid
Even with the best intentions, these common mistakes can damage your windows:
❌ Using abrasive materials – scratches are permanent
❌ Pressure washing – damages seals and can force water into frames
❌ Harsh chemicals – especially bleach, which ruins uPVC
❌ Scraping without liquid – creates scratches
❌ Reaching dangerously – upper windows need proper equipment
❌ Ignoring seal problems – they only get worse and more expensive
❌ Over-wetting wooden frames – causes swelling and rot
Keep Your Hardware in Good Condition
While you’re cleaning, spend a moment on window hardware:
- Hinges: Vacuum out dust, then add a drop of multi-purpose oil
- Locks: Keep mechanism clean and lubricated for smooth operation
- Handles: Wipe clean and tighten any loose screws
- Drainage holes: Check these aren’t blocked (they let water escape from the frame)
For more general window cleaning tips and techniques, our guide on the best way to clean windows covers additional methods you might find useful.
When to Call Professionals
Some window cleaning and repair tasks are definitely worth leaving to the experts.
Signs You Need Professional Help
For Cleaning:
- Windows above ground floor that you can’t safely access
- Very large or heavy windows that are difficult to manoeuvre
- Windows in awkward locations (above conservatories, over extensions)
- Regular maintenance for rental or commercial properties
For Repairs:
- Multiple windows with seal failures
- Condensation between any panes
- Cracked or damaged glass
- Frames showing signs of rot or significant damage
- Locks or mechanisms not working properly
- Windows that stick or won’t open/close properly
What Professionals Can Do
Window Cleaners:
- Access to high and difficult windows safely
- Professional-grade equipment (water-fed poles, safety harnesses)
- Faster, more efficient cleaning
- Regular maintenance contracts
Window Repairers:
- Seal repair or replacement
- Glass unit replacement
- Frame repairs
- Hardware replacement
- Professional diagnosis of problems
Cost Considerations
Professional Window Cleaning:
- £3-£10 per window for exterior only
- £50-£100 for a full house (varies by size and location)
- Regular contracts often reduce per-visit costs
Seal Repair/Replacement:
- £100-£300 per window for sealed unit replacement
- £300-£800+ for full window replacement
- Often cheaper to do multiple windows at once
DIY vs. Professional:
Consider professional help when:
- Safety is a concern (height, access)
- You lack the time or physical ability
- The problem is beyond your expertise
- The cost of mistakes exceeds the cost of professional service
DIY makes sense when:
- You can safely access all windows
- You enjoy the task
- You have the right tools and materials
- It’s routine cleaning rather than repairs
Conclusion
Cleaning double glazed windows doesn’t have to be complicated, but it does require understanding what you’re working with. The most important takeaway is knowing the difference between cleaning accessible surfaces – which you can absolutely do yourself – and dealing with problems between the sealed panes, which need professional attention.
For routine cleaning, the method is straightforward: use gentle cleaning solutions, microfibre cloths, and a good squeegee. Clean on cloudy days, work in sections, and don’t use too much liquid. Your frames need regular attention too, especially if they’re uPVC, and your rubber seals deserve a gentle clean every few months.
If you’re seeing condensation or dirt between your window panes, don’t waste time trying DIY fixes that won’t work. That’s a seal failure, and the only proper solution is professional repair or replacement. It might feel like an expense you’d rather avoid, but functioning seals are crucial for your windows’ energy efficiency – failed seals can significantly increase your heating bills.
Regular maintenance is your friend. A quick clean every month, a deeper clean quarterly, and an annual inspection of seals and hardware will keep your windows in top condition for years to come. And remember, there’s no shame in calling professionals for high windows, difficult access, or repairs beyond your expertise. Your safety and your windows’ longevity are worth the investment.
With the techniques in this guide, you should be able to keep your double glazed windows sparkling clean, spot problems early, and know exactly when it’s time to bring in expert help. Here’s to clear views and streak-free glass!
Frequently Asked Questions
Can you clean between double glazed windows?
No, you cannot clean between double glazed windows without professional help. The space between the two panes is hermetically sealed to trap insulating air or gas. If you’re seeing dirt, condensation, or fogging between the panes, this means the seal has failed.
The only proper solutions are:
- Sealed unit replacement – a professional removes and replaces just the glass unit (£100-£300 per window)
- Complete window replacement – if frames are also damaged (£300-£800+ per window)
Some DIY guides suggest drilling holes to clean between the panes, but this destroys the window’s insulating properties and usually voids any warranty. It’s a false economy that creates more problems than it solves.
How do I clean double glazed windows without leaving streaks?
The secret to streak-free windows is getting three things right:
1. Timing: Clean on a cloudy day or when windows are in shade. Direct sunlight causes cleaning solution to dry too quickly, leaving streaks.
2. Technique:
- Use minimal cleaning solution (a light mist, not drenching)
- Wipe with a microfibre cloth in sections
- Use a squeegee with overlapping strokes
- Buff dry with a separate clean, dry microfibre cloth
3. Materials:
- Distilled water (no minerals to leave spots)
- White vinegar solution (1 part vinegar to 2 parts water)
- Clean microfibre cloths (dirty cloths just spread grime)
- Proper squeegee with rubber blade
The biggest mistake people make is using too much cleaner. Less really is more when it comes to window cleaning.
What's the best cleaner for double glazed windows?
You don’t need expensive specialist products. The best cleaners are simple and inexpensive:
For regular cleaning:
- Distilled water – surprisingly effective on its own and leaves zero residue
- White vinegar solution – 1 part vinegar to 2 parts water, brilliant for cutting through grime
- Mild washing-up liquid – just a few drops in warm water
For stubborn grime:
- Non-abrasive commercial glass cleaner
- Dedicated uPVC cleaner for frames (if warm soapy water isn’t enough)
Never use:
- Bleach (turns uPVC brown)
- Ammonia-based cleaners
- Cream cleaners or abrasive powders
- Anything containing solvents like white spirits or methylated spirits
Distilled water with a good microfibre cloth and squeegee will give you professional results for pennies.
Can I use bleach on uPVC window frames?
Absolutely not. Bleach is one of the worst things you can use on uPVC frames. It causes permanent damage:
- Turns white uPVC yellow or brown (discolouration cannot be reversed)
- Breaks down the surface of the material
- Leaves frames looking dull and matt
- Can cause the material to become brittle over time
Even diluted bleach should be avoided. The chemical reaction between bleach and uPVC is irreversible.
Use instead:
- Warm soapy water (washing-up liquid)
- White vinegar solution (1 cup vinegar to 4 cups water)
- Dedicated uPVC cleaner from a hardware shop
- Baby wipes for quick cleans
Other products to avoid on uPVC include white spirits, methylated spirits, WD-40, and cream cleaners containing abrasives.
How do I stop condensation in double glazed windows?
The answer depends on where the condensation appears:
Condensation on the room-facing glass (interior surface): This is normal and caused by humidity in your home meeting cold glass. You can reduce it by:
- Improving ventilation (open windows for 10-15 minutes daily)
- Using extractor fans when cooking or showering
- Maintaining consistent heating (cold spots encourage condensation)
- Using a dehumidifier if humidity is consistently high
- Wiping windows dry each morning to prevent mould
Condensation between the two panes of glass: This indicates seal failure and cannot be fixed with better ventilation. The hermetic seal keeping the cavity dry has been compromised. The only solutions are professional repair or window replacement.
If you’re getting excessive condensation on interior surfaces despite good ventilation, it might indicate your windows aren’t performing efficiently, or there’s a broader dampness problem in your home.
How often should I clean double glazed windows?
A sensible cleaning schedule keeps your windows in top condition without becoming a burden:
Interior glass: Monthly or as needed Quick wipe with a microfibre cloth takes just a few minutes and keeps your view clear.
Exterior glass:
- Urban areas: Monthly (pollution and grime build up faster)
- Suburban areas: Quarterly (every 3 months)
- Rural areas: Twice yearly (spring and autumn)
Frames and seals: Quarterly A proper clean every three months prevents buildup and helps you spot developing problems early.
Full deep clean: Twice yearly Spring and autumn are ideal for thorough cleaning of all window components, checking hardware, and inspecting seals.
Quick daily wipe: As needed If you get condensation on interior surfaces, wipe it away each morning to prevent mould developing.
If your windows are exposed to heavy pollution, sea spray, or you live near a busy road, you might need to clean more frequently.
Can I drill holes in double glazed windows to clean them?
Technically yes, but practically it’s a terrible idea that professional window installers strongly advise against.
Why some people suggest it: The theory is that drilling small holes allows you to insert desiccant packets to absorb moisture, or flush the cavity with rubbing alcohol to remove condensation and dirt.
Why it’s a bad idea:
- Destroys insulation: The gas or air that provides insulation escapes, leaving you with poorly performing windows
- Voids warranties: Manufacturers won’t honour warranties on drilled windows
- Risk of cracking: Glass can crack during drilling or later due to stress
- Doesn’t fix the seal: The original seal failure remains, so moisture will return
- Visible damage: Holes leave permanent marks on your glass
- Temporary fix: Even if successful initially, the problem comes back
Better alternatives:
- Sealed unit replacement by a professional (£100-£300 per window)
- Full window replacement if frames are old too (£300-£800+)
- Temporary use of dehumidifiers while you save for proper repair
The money you might save trying to DIY with drilling rarely justifies the risk of completely ruining your windows.
What causes fogging between window panes?
Fogging between double glazed window panes is always caused by seal failure. Understanding why helps you prevent it:
How seals fail:
- Age and wear – seals typically last 15-20 years before degrading naturally
- Poor installation – windows not fitted correctly from the outset
- Thermal stress – repeated expansion and contraction from temperature fluctuations weakens seals over time
- Water damage – moisture reaching the seal from outside compromises it
- Structural movement – house settlement can stress window frames
- Manufacturing defects – occasionally seals are faulty from new
What happens when seals fail:
The hermetic seal breaks down, allowing outside air (which contains moisture) to enter the cavity between the panes. When temperature drops, this moisture condenses into visible water droplets or fog. Even when it evaporates in warm weather, it’s still trapped in the cavity, ready to condense again.
Can it be prevented?
While you can’t prevent seal failure forever, you can extend window lifespan:
- Keep rooms well-ventilated
- Maintain consistent temperatures
- Clean frames and seals regularly
- Fix any water leaks near windows promptly
- Choose quality windows from reputable installers
Once fogging appears, only professional repair or replacement will fix it properly.
How do I clean rubber seals on double glazed windows?
Rubber seals need gentle care to avoid damage while keeping them clean and functional:
Basic cleaning method:
- Use warm, soapy water – a few drops of washing-up liquid in warm water is perfect
- Wipe with a soft cloth or sponge – avoid anything abrasive
- Get into crevices – use a soft-bristled brush (old toothbrush works brilliantly) to dislodge dirt
- Rinse with clean water on a fresh cloth
- Dry thoroughly – moisture left on seals can encourage mould
For stubborn dirt or mould:
- Mix 1 cup white vinegar with 4 cups hot water
- Spray onto the seals
- Leave for 5-10 minutes
- Wipe clean and rinse
- Dry thoroughly
What to avoid:
- Harsh chemicals (bleach, solvents, abrasive cleaners)
- Scouring pads or wire wool
- Excessive force when scrubbing
- Leaving seals wet
While cleaning, inspect for:
- Cracks or splits in the rubber
- Sections pulling away from the frame
- Loss of flexibility (seals becoming hard)
- Persistent mould (indicates moisture problems)
If seals are damaged, they may need professional replacement to maintain your windows’ energy efficiency and weather protection.
Should I hire a professional window cleaner?
Whether to hire professionals depends on several factors. Here’s when each approach makes sense:
DIY is sensible when:
- All your windows are easily and safely accessible
- You’re physically able and have the time
- You enjoy the task
- It’s routine cleaning rather than repairs
- Windows are ground floor only or you have safe easy-clean mechanisms
Professionals are worth it when:
Safety concerns:
- Upper-floor windows without easy-clean functionality
- Windows above conservatories or extensions
- Large, heavy windows difficult to manoeuvre
- Any situation requiring ladders or leaning out
Technical issues:
- Seal failures requiring repair
- Condensation between panes
- Cracked or damaged glass
- Frame repairs needed
- Hardware problems
Practical considerations:
- You lack time or physical ability
- Regular maintenance for rental/commercial properties
- Very dirty windows needing specialist equipment
- Cost of proper equipment exceeds professional service cost
Typical costs:
- Professional cleaning: £3-£10 per window (exterior only)
- Full house: £50-£100 (varies by size and location)
- Sealed unit replacement: £100-£300 per window
- Regular contracts often reduce per-visit costs
Best approach:
Many homeowners do routine interior cleaning themselves and hire professionals quarterly or bi-annually for exterior cleaning, especially for upper floors. This balances cost with safety and convenience.
For anything involving repairs, seal failures, or difficult access, professional help is almost always the better choice. Your safety and your windows’ longevity are worth the investment.
You May Also Like
How to Clean Shower Tiles: Complete Guide for 2026
How to Clean Shower Mold: Complete Removal Guide 2026