How to Clean Car Seats: Complete UK Guide for 2026
How to clean car seats effectively requires the right tools, techniques, and understanding of your seat materials to restore them to pristine condition. Whether you’re dealing with fabric upholstery, leather seats, or stubborn stains, proper cleaning methods can dramatically improve your vehicle’s interior appearance and hygiene.
Different seat materials demand specific approaches. Fabric seats benefit from deep cleaning with appropriate solutions and extraction methods. Meanwhile, leather requires gentle cleaners and conditioning to prevent cracking. Success depends on proper preparation, including thorough vacuuming and spot-testing products.
From tackling food spills and pet odours to maintaining seats long-term, this comprehensive guide covers professional techniques you can apply at home. Additionally, understanding when to attempt DIY cleaning versus seeking professional help ensures optimal results without damaging your upholstery.
TL;DR
- Essential tools include vacuum with upholstery attachments, microfibre cloths, appropriate cleaning solutions, and soft-bristled brushes
- Material-specific methods: fabric seats need deep cleaning and extraction, leather requires gentle cleaners plus conditioning
- Pre-cleaning preparation involves identifying seat type, thorough vacuuming, and spot-testing products in inconspicuous areas
- Stain removal techniques vary by type: food spills, grease, pet hair, and persistent odours each need targeted approaches
- Regular maintenance with protective measures and seasonal cleaning prevents damage and extends seat lifespan
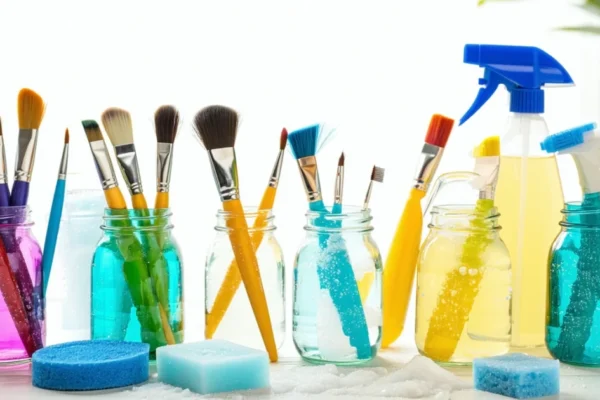
Essential Tools and Products for Car Seat Cleaning
Professional-quality car seat cleaning requires the right equipment and products to achieve optimal results. Furthermore, having proper tools prevents damage while ensuring thorough cleaning across different upholstery materials. The following essential items form the foundation of effective car seat maintenance.
Vacuum Cleaner with Upholstery Attachments
A powerful vacuum cleaner serves as your primary tool for removing loose debris, dirt, and hair from car seats. Additionally, specialised upholstery attachments enable thorough cleaning of crevices and seams where dirt accumulates. The crevice tool reaches tight spaces between seat cushions, whilst the brush attachment gently lifts embedded particles from fabric surfaces.
Cordless vacuum cleaners offer excellent manoeuvrability for car interiors. Moreover, models with HEPA filtration capture allergens and fine dust particles effectively. Shop vacuum cleaners provide superior suction power for heavy-duty cleaning tasks, particularly when dealing with pet hair or ground-in dirt.
Microfibre Cloths and Cleaning Towels
Microfibre cloths excel at cleaning car seats without scratching delicate surfaces or leaving lint residue. Similarly, these cloths absorb moisture effectively whilst trapping dirt particles within their fibres. Different cloth types serve specific purposes: smooth microfibre for leather conditioning and textured varieties for scrubbing fabric upholstery.
Quality cleaning towels complement microfibre cloths for drying and buffing surfaces. Additionally, having multiple cloths prevents cross-contamination between cleaning products and different seat areas. Always use separate cloths for cleaning and drying to maintain hygiene standards throughout the process.
Appropriate Cleaning Solutions for Different Materials
Selecting the correct cleaning solutions depends entirely on your seat material type. Fabric upholstery requires different products compared to leather or vinyl surfaces. Universal cleaners may damage sensitive materials, making material-specific products essential for safe cleaning.
| Material Type | Recommended Cleaner | Key Benefits |
|---|---|---|
| Fabric Seats | Upholstery foam cleaner | Deep penetration, stain removal |
| Leather Seats | pH-neutral leather cleaner | Gentle cleaning, preserves oils |
| Vinyl/Synthetic | All-purpose interior cleaner | Versatile, cost-effective |
| Alcantara | Specialised suede cleaner | Maintains texture, prevents matting |
Enzymatic cleaners prove particularly effective for organic stains such as food spills, vomit, or pet accidents. These products break down stain molecules at the source, eliminating odours rather than masking them. Always test cleaning products in an inconspicuous area before applying to visible surfaces.
Soft-Bristled Brushes and Detailing Tools
Soft-bristled brushes agitate cleaning solutions without damaging upholstery fibres or leather surfaces. Furthermore, different brush types serve specific functions: wide brushes for large areas and narrow brushes for seams and detailed work. Natural bristles work best on leather, whilst synthetic bristles suit fabric cleaning.
Detailing brushes with varying stiffness levels provide versatility for different cleaning challenges. Additionally, foam applicators distribute leather conditioners evenly across surfaces. Similar techniques used for carpet cleaning apply to car seat maintenance, particularly for fabric upholstery.
Steam Cleaner for Deep Cleaning (Optional)
A steam cleaner provides chemical-free deep cleaning for heavily soiled car seats. Moreover, high-temperature steam kills bacteria, dust mites, and other allergens whilst loosening embedded dirt. Handheld steam cleaners offer convenience for car interior cleaning, though larger units provide more consistent steam output.
Steam cleaning works exceptionally well on fabric seats but requires caution with leather surfaces. Additionally, proper ventilation ensures moisture evaporates quickly, preventing mould or mildew formation. Always allow seats to dry completely before using the vehicle to prevent humidity-related issues.
Protective Equipment and Ventilation Considerations
Personal protective equipment ensures safe handling of cleaning chemicals and prevents skin irritation. Disposable gloves protect hands from harsh cleaners, whilst safety glasses shield eyes from splashing solutions. Additionally, dust masks prevent inhalation of particles during vacuuming or brushing.
Adequate ventilation prevents chemical fume buildup during cleaning sessions. Therefore, keep car doors and windows open whilst working with cleaning products. Portable fans accelerate drying times and improve air circulation within the vehicle interior. Never clean car seats in enclosed spaces without proper ventilation to avoid health risks.
Professional detailers emphasise that 80% of successful car seat cleaning depends on having the right tools and products before starting the process.
Pre-Cleaning Preparation and Assessment
Proper preparation determines the success of your car seat cleaning project. Furthermore, thorough assessment prevents damage and ensures you select appropriate cleaning methods for your specific seat materials. Taking time to prepare correctly saves both effort and potential costly mistakes.
Identifying Seat Material Types
Fabric seats represent the most common upholstery type in UK vehicles. These materials include cloth, polyester blends, and microfibre surfaces that absorb liquids readily. Additionally, fabric seats show stains more visibly but respond well to water-based cleaning solutions.
Leather seats require specialised care due to their porous nature and sensitivity to harsh chemicals. Natural leather develops a patina over time, whilst synthetic leather offers greater durability against spills. However, both types need pH-neutral cleaners to prevent cracking or discolouration.
Vinyl seats provide the easiest cleaning experience among upholstery types. This synthetic material resists stains effectively and tolerates stronger cleaning products. Moreover, vinyl surfaces wipe clean with minimal effort, making maintenance straightforward for busy car owners.
Removing Loose Items and Debris
Clear all personal items from seats before beginning the cleaning process. Remove coins, papers, toys, and other objects from seat pockets and crevices. Subsequently, check under seats for forgotten items that might interfere with thorough cleaning access.
Shake out removable seat covers or cushions to dislodge embedded debris. Additionally, use a soft brush to sweep away surface dirt, crumbs, and pet hair before applying any cleaning solutions. This preliminary step prevents grinding particles deeper into upholstery fibres during cleaning.
Thorough Vacuuming Technique and Crevice Cleaning
Start vacuuming with broad strokes across seat surfaces using an upholstery attachment. Work systematically from top to bottom, overlapping passes to ensure complete debris removal. Proper vacuuming removes 70% of loose dirt before wet cleaning begins.
Use crevice tools to extract debris from tight spaces between seat cushions and backrests. Pay special attention to areas where seat belts retract and around adjustment mechanisms. Furthermore, vacuum door panels and armrests adjacent to seats for comprehensive interior cleaning, similar to techniques used when learning how to clean carpet thoroughly.
Employ different vacuum attachments for various surfaces and textures. Brush attachments work effectively on fabric seats, whilst smooth tools suit leather and vinyl surfaces. Additionally, adjust suction power to prevent damage to delicate materials whilst maintaining effective debris removal.
Spot-Testing Cleaning Products
Select an inconspicuous area for testing cleaning products before full application. Common test locations include areas under seat cushions or behind headrests where potential discolouration remains hidden. Allow test spots to dry completely before assessing results.
Apply a small amount of chosen cleaner to the test area using a clean cloth. Wait 10-15 minutes to observe any adverse reactions such as colour bleeding, fabric shrinkage, or surface damage. Document successful products for future reference and avoid those causing negative reactions.
Test multiple cleaning solutions if you plan to use different products for various stain types. However, avoid testing overlapping areas that might create chemical interactions. This methodical approach prevents widespread damage from incompatible cleaning products.
Assessing Stain Types and Severity
Protein-based stains from food, blood, or bodily fluids require enzyme-based cleaners for effective removal. These organic stains often appear brown or yellowish and may emit odours if left untreated. Additionally, heat sets protein stains permanently, making immediate treatment crucial.
Oil-based stains from makeup, food grease, or mechanical fluids create dark, spreading marks on fabric surfaces. These stains repel water-based cleaners and require solvent-based solutions for effective removal. Moreover, oil stains often attract additional dirt, making them appear worse over time.
Water-based stains from beverages, mud, or general spills typically respond well to standard upholstery cleaners. However, tannin stains from tea, coffee, or wine may require specialised treatment to prevent permanent discolouration. Furthermore, sugar-based stains become sticky and attract insects if not cleaned promptly.
Document stain locations, sizes, and suspected causes before beginning treatment. Take photographs for reference, especially for valuable or classic vehicles where professional cleaning might be necessary. This assessment helps prioritise cleaning efforts and select appropriate treatment methods for each specific stain type.
Cleaning Fabric Car Seats
Fabric car seats demand specific cleaning approaches that differ significantly from leather or vinyl surfaces. The porous nature of fabric fibres traps dirt, odours, and stains deep within the material structure. Consequently, effective fabric cleaning requires penetrating solutions and thorough extraction methods to achieve professional results.
Choosing Appropriate Fabric Cleaners and Solutions
Upholstery-specific cleaners provide the safest option for fabric car seats, as manufacturers formulate these products specifically for automotive textiles. These cleaners contain surfactants that lift dirt without damaging fibres or causing colour bleeding. Moreover, automotive upholstery cleaners often include fabric protectors that help repel future stains.
Commercial carpet cleaners work effectively on fabric car seats, particularly for heavily soiled areas. However, dilute these products according to manufacturer instructions to prevent residue buildup. Additionally, enzyme-based cleaners excel at removing organic stains and odours from pet accidents or food spills.
Homemade solutions using white vinegar and water (1:1 ratio) provide an eco-friendly alternative for light cleaning tasks. This mixture neutralises odours and removes surface dirt without harsh chemicals. Furthermore, adding a few drops of dish soap creates a gentle cleaning solution suitable for regular maintenance.
Avoid bleach-based products, which weaken fabric fibres and cause permanent discolouration. Similarly, harsh chemicals like ammonia can damage seat foam and create toxic fumes in enclosed vehicles. Always check product labels for fabric compatibility before application.
Step-by-Step Cleaning Process and Technique
Begin by removing all loose debris using a vacuum cleaner with upholstery attachments. Focus on crevices between seat cushions where crumbs and dirt accumulate. Additionally, use a soft brush attachment to lift embedded particles without damaging fabric fibres.
- Pre-treat visible stains with appropriate cleaning solutions
- Apply cleaner to small sections working from top to bottom
- Allow cleaning solution to dwell for recommended contact time
- Agitate gently using circular motions with soft brush
- Extract solution using clean, damp microfibre cloths
- Repeat process for heavily soiled areas as needed
Work systematically across each seat surface to ensure complete coverage. Start with the seat back, then move to the seat cushion and finally the sides. This methodical approach prevents missing areas and ensures consistent cleaning results throughout the vehicle interior.
Working Cleaning Solution into Fabric Fibres
Agitation techniques determine cleaning effectiveness by helping solutions penetrate deep into fabric structures. Use a soft-bristled brush or clean cloth to work cleaner into fibres using gentle, circular motions. However, excessive scrubbing can damage delicate fabrics or cause pilling on synthetic materials.
Spray cleaning solutions evenly across fabric surfaces, maintaining consistent coverage without oversaturating areas. Oversaturation can cause water damage to seat foam and create ideal conditions for mould growth. Instead, apply cleaner in thin, even coats that penetrate without pooling.
Allow cleaning solutions to dwell for 5-10 minutes depending on soil level and product specifications. This contact time enables surfactants to break down dirt and stains effectively. Meanwhile, keep treated areas damp by misting lightly if solutions begin drying prematurely.
Similar to carpet cleaning techniques, fabric car seats benefit from multiple light applications rather than single heavy treatments. This approach prevents damage while achieving superior cleaning results through gradual soil removal.
Extraction and Rinsing Methods
Wet extraction removes both cleaning solutions and dissolved dirt from fabric fibres most effectively. Use clean, damp microfibre cloths to blot treated areas, working from outside stains toward centres to prevent spreading. Replace cloths frequently as they become soiled to avoid redistributing dirt.
Portable carpet extractors provide professional-level cleaning for heavily soiled fabric seats. These machines inject clean water while simultaneously extracting dirty solution, removing more soil than manual methods. However, ensure proper ventilation during extraction to prevent moisture buildup.
Rinse treated areas with clean water to remove cleaning product residues that attract future dirt. Use spray bottles to apply clean water sparingly, then extract immediately with dry cloths. Residue removal proves crucial for maintaining fabric appearance and preventing rapid re-soiling.
Steam cleaning offers chemical-free extraction for sensitive individuals or eco-conscious cleaning approaches. The high temperature sanitises fabric surfaces while loosening embedded dirt. Nevertheless, test steam cleaning on inconspicuous areas first, as heat can shrink certain fabric types.
Drying Process and Air Circulation Tips
Proper air circulation prevents mould and mildew growth while ensuring complete moisture removal from fabric seats. Open all vehicle doors and windows to create cross-ventilation that accelerates drying times. Position portable fans strategically to direct airflow across wet surfaces.
Avoid direct sunlight exposure during drying, which can cause fabric colours to fade or fibres to shrink. Instead, park vehicles in shaded areas with good ventilation for optimal drying conditions. Additionally, remove floor mats and other interior items to improve air circulation throughout the cabin.
Use moisture absorbers like activated charcoal or commercial desiccants to speed drying in humid conditions. Place these products under seats or in cup holders to draw excess moisture from the air. Furthermore, run vehicle air conditioning systems on fresh air mode to circulate dry air through the interior.
Complete drying typically requires 4-8 hours depending on fabric thickness, humidity levels, and ventilation quality. Test fabric dampness by pressing clean, dry cloths against seat surfaces. Any moisture transfer indicates incomplete drying that could lead to odour or mould problems.
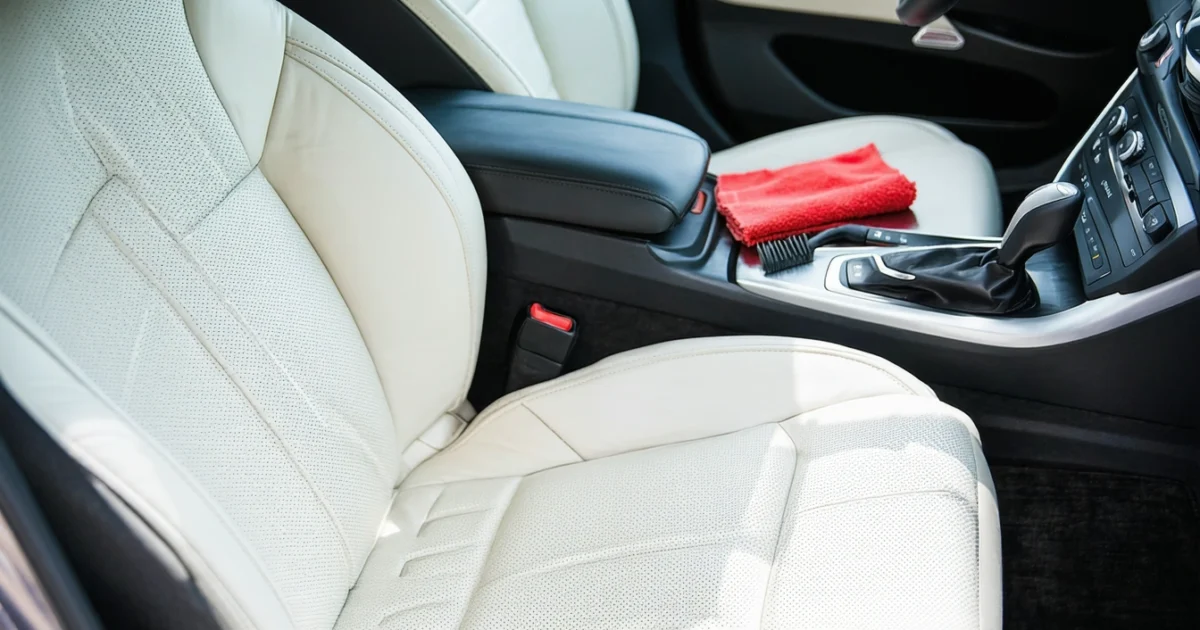
Cleaning Leather Car Seats
Leather car seats require specialised cleaning approaches that differ significantly from fabric seat maintenance. Moreover, proper leather care prevents cracking, fading, and premature deterioration that commonly affects untreated surfaces. Understanding the unique properties of automotive leather ensures effective cleaning while preserving the material’s natural flexibility and appearance.
Selecting Leather-Specific Cleaning Products
pH-balanced leather cleaners provide the safest cleaning solution for automotive leather surfaces. These products maintain the leather’s natural acid balance while removing dirt and oils effectively. Consequently, avoid household cleaners, soap solutions, or harsh chemicals that can strip natural oils from leather fibres.
Commercial leather cleaning products typically contain lanolin or glycerine to maintain moisture levels during cleaning. Furthermore, these formulations include gentle surfactants that lift dirt without penetrating deeply into leather pores. Always check product labels for compatibility with your specific leather type before application.
Test cleaning products on inconspicuous areas first, such as seat backs or side panels hidden from view. This precautionary step reveals potential colour changes or surface damage before treating visible areas. Additionally, allow test areas to dry completely before evaluating results.
Gentle Cleaning Technique to Avoid Damage
Begin leather cleaning by vacuuming loose debris from seat crevices and surface areas using soft brush attachments. This preliminary step prevents dirt particles from scratching leather during the cleaning process. Subsequently, wipe surfaces with slightly damp microfibre cloths to remove surface dust.
Apply leather cleaner sparingly using circular motions with clean microfibre cloths or soft-bristled brushes. Work in small sections to maintain control over product application and prevent over-saturation. Excessive moisture penetration can cause leather stiffening or water staining.
Remove cleaning residue immediately with clean, damp cloths before products dry on leather surfaces. This technique prevents cleaner build-up that can create sticky residues or discolouration. Allow cleaned sections to air dry naturally before proceeding to conditioning steps.
Conditioning Leather After Cleaning
Leather conditioning restores natural oils removed during cleaning while maintaining surface flexibility. Quality leather conditioners contain natural waxes and oils that penetrate leather fibres to prevent cracking. Apply conditioner only after cleaning products have completely dried from leather surfaces.
Use thin, even coats of conditioner applied with clean microfibre cloths in overlapping strokes. This application method ensures uniform coverage without creating thick build-up that attracts dirt. Work conditioner into leather grain patterns using gentle pressure to encourage absorption.
Allow conditioning products to penetrate for 15-20 minutes before buffing excess material with clean cloths. This timing enables proper absorption while preventing surface residue that can transfer to clothing. Properly conditioned leather feels supple and exhibits a subtle, natural sheen.
Protecting Leather from Cracking and Fading
UV radiation causes the most significant damage to automotive leather through colour fading and surface cracking. Therefore, use window tinting or sunshades to reduce direct sunlight exposure during parking. These protective measures significantly extend leather lifespan compared to unprotected surfaces.
Temperature extremes stress leather fibres, causing expansion and contraction that leads to cracking. Park vehicles in shaded areas whenever possible to minimise heat exposure. Similarly, avoid leaving leather seats exposed to freezing temperatures for extended periods.
Apply leather protection products containing UV inhibitors every three to six months for optimal surface protection. These treatments create invisible barriers that reflect harmful radiation while maintaining leather breathability. Regular protection application prevents irreversible sun damage that requires professional restoration.
Maintenance Schedule for Leather Seats
Establish a monthly cleaning routine for leather seats to prevent dirt accumulation and maintain appearance. This frequency prevents deep staining while keeping leather supple through regular conditioning. However, adjust cleaning frequency based on usage patterns and environmental conditions.
| Maintenance Task | Frequency | Purpose |
|---|---|---|
| Vacuuming and dusting | Weekly | Remove surface debris |
| Deep cleaning | Monthly | Remove embedded dirt |
| Conditioning treatment | Quarterly | Restore natural oils |
| UV protection application | Bi-annually | Prevent sun damage |
Professional leather treatment services provide deep conditioning and protection that exceeds home maintenance capabilities. Schedule professional treatments annually for high-end leather interiors or when home cleaning fails to restore leather condition. These services often include specialised products and techniques not available to consumers.
Document maintenance activities to track leather condition changes over time. This record-keeping helps identify when professional intervention becomes necessary. Furthermore, consistent maintenance documentation can support warranty claims for leather-related issues. Just as proper carpet cleaning requires specific techniques, leather care demands dedicated attention to preserve its unique properties and appearance.
Tackling Specific Stains and Odours
Car seat cleaning challenges vary dramatically depending on the specific contaminant type and fabric material. Different stains require targeted approaches to prevent permanent damage while ensuring complete removal. Understanding the chemical properties of various spills enables effective treatment selection for optimal results.
Food and Drink Spill Removal Techniques
Coffee and tea stains respond best to immediate cold water treatment followed by gentle blotting motions. Mix one tablespoon of white vinegar with two cups of cold water to neutralise tannin-based stains effectively. Never rub coffee spills, as this pushes the liquid deeper into seat fibres and creates larger stain areas.
Chocolate removal requires a two-stage approach targeting both the cocoa solids and fat content. First, scrape excess chocolate using a plastic card, then apply cold water to solidify remaining residue. Subsequently, treat the area with a mixture of dish soap and warm water to dissolve the fatty components completely.
Fruit juice stains contain natural acids that can permanently discolour fabrics if left untreated. Create a cleaning solution using one part white vinegar to three parts water for acidic juice removal. Additionally, enzyme-based cleaners break down fruit sugars that attract dirt and create sticky residues over time.
Dealing with Grease and Oil Stains
Automotive grease stains require immediate absorption treatment to prevent permanent fabric penetration. Sprinkle cornstarch or talcum powder generously over fresh grease stains and allow fifteen minutes for oil absorption. This technique draws grease away from fibres before it sets into the material structure.
Degreasing agents work more effectively when applied to warm surfaces, as heat opens fabric fibres for deeper penetration. Use a mixture of warm water and dish soap specifically designed for grease cutting properties. Work the solution into the stain using circular motions, then rinse thoroughly with clean water to prevent soap residue buildup.
Stubborn oil stains often require multiple treatment cycles for complete removal. Apply the degreasing solution, allow it to penetrate for ten minutes, then blot with clean cloths repeatedly. Furthermore, avoid using hot water on protein-based stains, as heat can set these contaminants permanently into seat materials.
Pet Hair Removal and Odour Elimination
Pet hair extraction requires mechanical removal techniques before addressing embedded odours in car seat fabrics. Use rubber gloves dampened with water to create static electricity that attracts pet hair effectively. This method works particularly well on fabric seats where hair becomes woven into textile fibres.
Lint rollers provide targeted hair removal for smaller areas and detailed cleaning around seat seams. However, vacuum cleaners with upholstery attachments offer more comprehensive hair extraction for entire seat surfaces. Additionally, fabric softener sheets can reduce static buildup that attracts future pet hair accumulation.
Pet odour neutralisation requires enzymatic cleaners that break down organic compounds causing persistent smells. Mix equal parts white vinegar and water in a spray bottle for natural odour elimination that doesn’t mask smells. Allow the solution to penetrate deeply into seat cushions, then extract moisture using clean towels or wet-dry vacuums.
Smoke and Persistent Odour Treatment
Cigarette smoke creates tar deposits that penetrate deep into seat materials and require intensive treatment protocols. Activated charcoal absorbs smoke particles effectively when placed in sealed containers within the vehicle overnight. This natural absorption method removes odour-causing compounds without introducing additional chemicals to the interior environment.
Baking soda treatment provides alkaline neutralisation of acidic smoke residues embedded in seat fibres. Sprinkle baking soda liberally across all seat surfaces and allow it to remain for several hours before vacuuming thoroughly. This process neutralises odour molecules while absorbing moisture that harbours persistent smells.
Professional ozone treatment eliminates stubborn smoke odours by oxidising odour-causing molecules at the molecular level. However, this treatment requires complete vehicle sealing and professional equipment operation. Moreover, ozone treatments can damage rubber seals and electronic components if not performed correctly by trained technicians.
Emergency Stain Treatment and Prevention
Immediate response protocols determine the success rate of stain removal efforts across all car seat materials. Keep emergency cleaning supplies including clean cloths, bottled water, and mild detergent readily available in your vehicle. Quick action prevents stains from setting permanently into seat fibres and reduces cleaning difficulty significantly.
Blotting techniques prove more effective than rubbing motions for emergency spill treatment across all fabric types. Press clean cloths firmly against spills to absorb liquid without spreading contamination to surrounding areas. Work from the outside edges of spills toward the centre to prevent stain expansion during treatment.
Preventive measures reduce the frequency and severity of car seat staining incidents through proactive protection strategies. Install seat covers or protective mats in high-risk areas where spills commonly occur. Similarly, regular vacuuming removes debris that can compound staining problems when combined with liquid spills. Just as carpet cleaning requires specific techniques for different materials, car seat protection demands tailored approaches for optimal preservation and cleanliness.
Professional vs DIY Cleaning Methods
Choosing between DIY car seat cleaning and professional automotive detailing depends on several critical factors including stain severity, material type, and available resources. Most car owners can successfully tackle light surface stains and routine maintenance cleaning using household products and basic techniques. However, deep-set stains, delicate leather seats, and extensive contamination typically require professional intervention for optimal results.
When DIY Cleaning Makes Sense
DIY approaches work effectively for fresh spills, light dust accumulation, and routine maintenance cleaning across most fabric seat types. Simple water-based stains respond well to immediate blotting and mild detergent treatment using standard household supplies. Additionally, regular vacuuming and spot cleaning help maintain seat appearance between professional services without significant time investment.
Cost considerations make DIY cleaning attractive for budget-conscious vehicle owners managing multiple cars or frequent cleaning needs. Basic cleaning supplies including microfibre cloths, mild detergents, and vacuum cleaners provide long-term value through repeated use across various cleaning tasks. Furthermore, DIY methods offer immediate availability when spills occur, preventing stains from setting permanently into seat materials.
Professional Detailing Advantages
Professional automotive detailing services deliver superior results through specialised equipment, advanced cleaning solutions, and extensive material expertise. Steam cleaning machines, extraction units, and commercial-grade products achieve deep cleaning levels impossible with household equipment. Moreover, professional technicians understand fabric compositions, leather treatments, and appropriate chemical applications for different seat materials.
Complex staining situations including protein-based stains, oil penetration, and odour elimination require professional intervention for complete resolution. Technicians possess specialised knowledge about enzyme treatments, leather conditioning, and fabric protection applications that preserve seat integrity during intensive cleaning processes. Similarly, vintage vehicles or luxury car interiors benefit from professional expertise to avoid damage during restoration efforts.
Cost and Time Investment Analysis
| Method | Initial Cost | Time Required | Results Quality |
|---|---|---|---|
| DIY Basic | £15-30 | 1-2 hours | Good for light cleaning |
| DIY Advanced | £50-100 | 3-4 hours | Very good for most stains |
| Professional Service | £80-200 | 2-4 hours | Excellent for all conditions |
DIY cleaning requires significant time investment including preparation, treatment application, drying periods, and cleanup activities. Professional services eliminate personal time commitment while delivering consistent results through established processes and efficient equipment operation. However, DIY approaches provide flexibility for immediate treatment and ongoing maintenance between professional appointments.
Equipment and Expertise Differences
Professional detailers utilise commercial-grade equipment including hot water extraction units, steam cleaners, and specialised brushes designed for automotive applications. These tools generate higher temperatures, stronger suction power, and precise chemical delivery compared to consumer-grade alternatives. Consequently, professional equipment achieves deeper penetration and more thorough contamination removal from seat materials.
Technical expertise distinguishes professional services through understanding of chemical interactions, material compatibility, and treatment sequencing for optimal results. Professionals recognise when specific treatments might damage seat materials and adjust approaches accordingly. Just as carpet cleaning requires specialised knowledge for different fibre types, car seat cleaning demands expertise about automotive-specific materials and construction methods.
Warranty and Insurance Considerations
Professional automotive detailing services typically provide service warranties covering workmanship quality and material damage protection during cleaning processes. These guarantees offer recourse if cleaning results prove unsatisfactory or if damage occurs during service delivery. Additionally, established detailing businesses carry liability insurance protecting customers against potential vehicle damage during professional treatment.
DIY cleaning attempts carry full personal responsibility for any damage occurring during treatment processes including colour bleeding, fabric shrinkage, or leather cracking. Vehicle warranties may not cover damage resulting from improper cleaning product use or incorrect treatment applications. Therefore, valuable vehicles or warranty-protected interiors often justify professional service costs through risk mitigation and guaranteed results.
Maintenance and Prevention Tips
Effective car seat maintenance prevents costly deep cleaning whilst extending upholstery lifespan through consistent preventive measures. Regular maintenance schedules reduce accumulated contamination and preserve seat appearance more effectively than reactive cleaning approaches.
Regular Cleaning Schedule Recommendations
Weekly maintenance involves vacuuming loose debris from seat surfaces, crevices, and underneath cushions using appropriate attachments. Subsequently, wipe down leather surfaces with microfibre cloths whilst fabric seats benefit from light brushing to maintain texture and appearance.
Monthly deep cleaning requires thorough vacuuming followed by appropriate cleaning treatments based on seat material composition. Furthermore, inspect seats for emerging stains or wear patterns requiring immediate attention before permanent damage occurs.
Seasonal maintenance schedules accommodate varying contamination levels throughout different weather conditions. Winter months demand increased cleaning frequency due to salt residue and moisture accumulation, whilst summer periods require attention to UV damage prevention and increased usage patterns.
Protective Measures and Seat Covers
Custom-fit seat covers provide primary protection against spills, wear, and UV exposure whilst maintaining seat accessibility and comfort. Quality covers feature breathable materials preventing moisture accumulation underneath protective layers.
Waterproof seat protectors offer superior spill protection for families with children or frequent food consumption in vehicles. Additionally, these protectors simplify cleaning processes by containing spills on removable surfaces rather than allowing penetration into seat materials.
UV protection films applied to windows reduce sun damage to seat materials, particularly leather surfaces susceptible to cracking and fading. Similarly, windscreen sun shades minimise direct sunlight exposure during parking periods.
Daily Habits to Prevent Stains and Wear
Immediate spill response prevents permanent staining through prompt blotting actions using clean cloths or paper towels. Never rub spills into seat materials; instead, blot from outside edges toward spill centres to prevent spreading contamination.
Proper entry and exit techniques reduce wear patterns by avoiding sliding across seat surfaces or placing excessive pressure on seat edges. Consequently, seats maintain structural integrity and appearance longer through mindful usage patterns.
Avoid eating messy foods in vehicles whilst keeping beverages in secure containers with tight-fitting lids. Moreover, remove items from pockets before sitting to prevent fabric snagging or pressure marks on seat surfaces.
Seasonal Cleaning Considerations
Winter cleaning protocols address salt residue removal and moisture management through increased vacuuming frequency and thorough drying procedures. Road salt accelerates material degradation if left untreated on seat surfaces.
Spring cleaning involves comprehensive deep cleaning to remove accumulated winter contamination whilst preparing seats for increased summer usage. This seasonal maintenance mirrors carpet cleaning approaches requiring thorough contamination removal after heavy usage periods.
Summer maintenance focuses on UV protection and sweat residue management through regular cleaning and conditioning treatments. Leather seats particularly require conditioning to prevent cracking from heat exposure and moisture loss.
Autumn preparation involves protective treatments before winter weather whilst addressing summer contamination from increased recreational activities and travel.
Long-term Seat Preservation Strategies
Professional conditioning treatments applied every six months maintain leather flexibility and prevent cracking through proper moisture balance restoration. Quality leather conditioners penetrate material surfaces whilst providing protective barriers against future contamination.
Fabric protection sprays create invisible barriers repelling liquids and preventing stain absorption into seat fibres. However, reapplication becomes necessary every three to six months depending on usage levels and environmental exposure.
Regular professional inspections identify emerging problems before requiring extensive restoration treatments. Early intervention prevents minor issues from developing into costly replacement scenarios whilst maintaining vehicle value through proper interior preservation.
Documentation of cleaning schedules and treatments provides valuable maintenance records for warranty claims and resale value preservation. Therefore, maintaining detailed cleaning logs demonstrates proper care whilst supporting insurance claims if damage occurs.
Frequently Asked Questions
How often should I clean my car seats?
For optimal maintenance, clean your car seats every 3-6 months depending on usage. High-traffic vehicles or those with pets and children may require monthly cleaning. Regular vacuuming should be done weekly to prevent dirt accumulation and extend the life of your upholstery.
Can I use household cleaners on my car seats?
Avoid household cleaners as they can damage car seat materials. Products like washing-up liquid or bleach may cause discolouration, fabric deterioration, or leave residues. Always use automotive-specific cleaners designed for your seat material type to ensure safe and effective cleaning.
What's the best way to remove pet hair from car seats?
Remove pet hair effectively using these methods:
- Use a vacuum with upholstery attachment for initial removal
- Apply rubber gloves dampened slightly and rub in circular motions
- Try a lint roller for stubborn hairs on fabric surfaces
- Use a squeegee on fabric seats to gather hair into clumps
Should I clean leather seats differently from fabric ones?
Yes, absolutely. Leather seats require pH-neutral cleaners and conditioning to prevent cracking and maintain suppleness. Fabric seats can handle deeper cleaning with extraction methods and stronger solutions. Never use leather cleaners on fabric or vice versa, as this can cause permanent damage.
How do I know if a cleaning product is safe for my seats?
Always spot-test any cleaning product in an inconspicuous area first, such as under the seat or on a hidden edge. Wait 24 hours to check for discolouration or damage. Additionally, check your vehicle’s manual for manufacturer recommendations and ensure the product matches your specific seat material type.
What should I do if water stains appear after cleaning?
Water stains typically result from over-wetting or uneven drying. To remedy this:
- Lightly mist the entire seat section with distilled water
- Blot immediately with clean microfibre cloths
- Ensure even drying with proper ventilation
- For leather, apply conditioner once completely dry
Can I speed up the drying process after cleaning?
Yes, but avoid direct heat sources like hair dryers which can damage materials. Instead, use fans for air circulation, park in a well-ventilated area, and leave windows slightly open. For faster results, use moisture-absorbing products like silica gel packets placed near the seats.
When should I seek professional car seat cleaning services?
Consider professional services for:
- Extensive staining or odours that persist after DIY attempts
- Expensive leather seats requiring specialised treatment
- Mould or mildew contamination
- When you lack proper equipment or time for thorough cleaning
- Before selling your vehicle to maximise resale value
You May Also Like
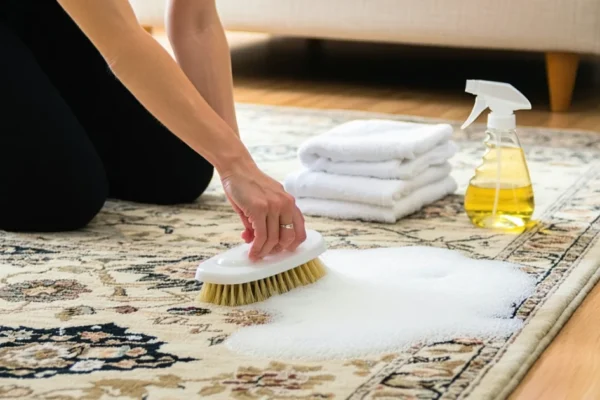
How to Clean a Rug: Complete DIY Guide for All Rug Types
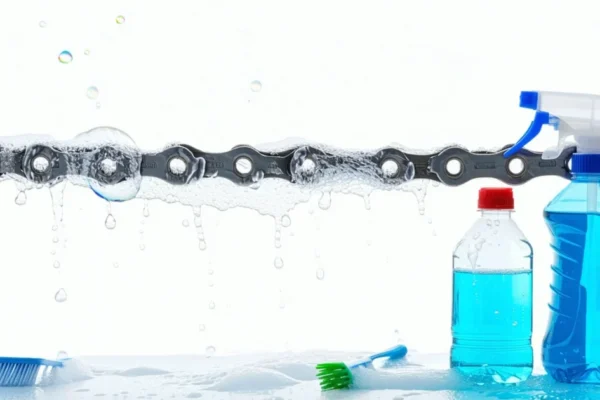
How to Clean Bike Chain: Complete Guide for 2026