How to Clean Washing Machine Filter: Complete Guide 2026
How to clean washing machine filter maintenance requires locating your machine’s filter, removing accumulated debris, and rinsing thoroughly with warm water. Most washing machines have either a drain pump filter in front-loading models or a lint trap in top-loading machines that should be cleaned monthly to prevent blockages and maintain optimal performance.
Regular filter cleaning prevents poor drainage, unpleasant odors, and reduced washing efficiency. Additionally, neglecting this simple maintenance task can lead to costly repairs and shortened machine lifespan.
Different brands like Samsung, LG, Beko, and Whirlpool have varying filter locations and access methods. However, the basic cleaning process remains consistent across most models.
TL;DR
- Monthly cleaning prevents blockages and maintains washing machine performance
- Front-loaders have drain pump filters; top-loaders typically have lint traps
- Essential tools include towels, shallow pan, soft brush, and warm water for thorough cleaning
- Brand-specific locations vary, but cleaning process involves removal, rinsing, and proper reinstallation
Understanding Your Washing Machine Filter: Types and Locations
Washing machine filters vary significantly between front-loading and top-loading models, with each design serving different filtration purposes. Front-loading machines typically feature a drain pump filter that captures debris before water exits the machine, while top-loading washers commonly use a lint trap that filters particles during the wash cycle.
Front-Loading vs Top-Loading Filter Systems
Front-loading washers contain drain pump filters located at the machine’s base, usually behind a small access panel. These filters prevent lint, coins, and small objects from entering the drain pump mechanism. Conversely, top-loading machines position their lint traps within the agitator or along the tub’s rim, where they collect fabric fibers during washing cycles.
The filtration systems operate differently based on water flow patterns. Front-loaders pump water through the drain filter during each cycle, making regular cleaning essential for proper drainage. Meanwhile, top-loading models circulate water past the lint trap, requiring periodic removal and cleaning to maintain washing efficiency.
Common Filter Locations by Machine Type
| Machine Type | Filter Location | Access Method |
|---|---|---|
| Front-Loading | Lower front panel | Remove access door or panel |
| Top-Loading (Traditional) | Inside agitator or tub rim | Lift out or unscrew |
| Top-Loading (HE) | Bottom front or inside tub | Access panel or removable component |
Most front-loading washers position their drain pump filters behind a rectangular or circular access door near the machine’s bottom right corner. However, some models place this filter on the left side or center, depending on the manufacturer’s design preferences.
Drain Pump Filter vs Lint Trap Identification
Identifying your machine’s filter type determines the cleaning approach and frequency required. Drain pump filters appear as cylindrical or rectangular components with threaded caps or twist-lock mechanisms, typically measuring 3-4 inches in diameter.
Lint traps vary more in design, ranging from mesh bags inside agitators to removable screens along the tub’s perimeter. These components focus on capturing fabric fibers rather than preventing drain blockages, making them structurally different from pump filters.
Quick Identification Tip
Brand-Specific Filter Designs
Samsung washing machines typically feature drain pump filters behind a rectangular access panel at the bottom front, secured with plastic clips or screws. Samsung’s design often includes a drainage tube alongside the filter for easier water removal during cleaning.
LG models commonly position their filters behind circular access doors with quarter-turn mechanisms. LG’s filter design frequently incorporates a twist-lock system that requires counterclockwise rotation for removal, with clear directional arrows molded into the plastic housing.
Beko washers utilize various filter configurations depending on the model series. Newer Beko machines feature self-cleaning pump systems, while older models require manual filter maintenance through front-panel access points similar to other European brands.
Whirlpool washing machines often integrate lint filters into the agitator assembly for top-loading models, while their front-loading units position drain filters behind removable kickplates. Whirlpool’s design philosophy emphasizes easy access, with most filters requiring minimal tools for removal.
Understanding these brand-specific variations helps locate your machine’s filter quickly and ensures proper cleaning technique. Therefore, consulting your owner’s manual provides the most accurate filter location and maintenance instructions for your specific model.
When and Why to Clean Your Washing Machine Filter
Regular washing machine filter maintenance prevents costly repairs and ensures optimal cleaning performance. Most manufacturers recommend cleaning the filter monthly to quarterly, depending on usage frequency and household size. However, families with heavy laundry loads or those washing particularly dirty items should inspect their filters more frequently.
Several warning signs indicate your washing machine filter requires immediate attention. Poor drainage represents the most common symptom, with water remaining in the drum after cycles complete. Additionally, persistent musty odors emanating from your machine signal trapped debris and bacterial growth within the filter system.
Recognizing Filter Problems
Your washing machine communicates filter issues through various performance indicators. Reduced washing efficiency becomes apparent when clothes emerge less clean than expected, often with lint or debris still attached. Furthermore, unusual noises during the spin cycle frequently indicate filter blockages restricting proper water flow.
- Drainage issues: Water pools in the drum after washing cycles
- Odor problems: Musty or sour smells from the machine interior
- Performance decline: Clothes remain dirty or retain excessive lint
- Mechanical symptoms: Unusual grinding or rattling sounds during operation
- Error codes: Drainage-related fault messages on digital displays
Extended cycles also signal filter problems, as blocked drainage systems force machines to work harder. Consequently, your washer may run longer than normal while struggling to complete rinse and spin phases effectively.
Consequences of Filter Neglect
Neglecting filter maintenance creates cascading problems throughout your washing machine system. Pump damage represents the most serious consequence, as debris-clogged filters force pumps to work against excessive resistance. This strain significantly shortens pump lifespan and necessitates expensive repairs.
Costly Consequences
Bacterial growth thrives in dirty filters, creating health concerns and persistent odors. Moreover, soap residue accumulates alongside debris, forming thick sludge that restricts water flow and reduces cleaning effectiveness. This buildup eventually spreads throughout the machine, contaminating internal components.
Energy efficiency suffers dramatically when filters remain uncleaned. Blocked drainage systems force motors to consume additional electricity while struggling to complete cycles. Therefore, dirty filters directly impact your utility bills through increased power consumption.
Impact on Machine Performance
Clean filters ensure optimal washing machine performance across multiple operational aspects. Water circulation improves significantly when filters allow unrestricted flow, enabling proper detergent distribution and soil removal. Conversely, blocked filters create stagnant water pockets that compromise cleaning effectiveness.
Machine lifespan extends considerably with proper filter maintenance, as clean filters reduce mechanical stress on pumps, motors, and drainage systems. Regular cleaning prevents premature component failure and maintains warranty coverage for many manufacturers.
Temperature regulation also benefits from clean filters, as proper water flow enables efficient heating and cooling cycles. Subsequently, your washing machine achieves target temperatures more quickly and maintains them consistently throughout wash programs.
Professional appliance technicians report that 80% of washing machine service calls relate to drainage issues caused by neglected filter maintenance. This statistic underscores the critical importance of regular cleaning schedules for preventing costly repairs and ensuring reliable operation.
Tools and Preparation for Filter Cleaning
Successful washing machine filter cleaning requires proper preparation and the right tools. Gathering essential equipment beforehand ensures a smooth, efficient cleaning process while preventing water damage to your home.
Essential Tools and Equipment
Every filter cleaning session demands specific tools for optimal results. Clean towels serve as your primary defense against water spillage, while a shallow pan or bowl catches debris and dirty water during filter removal. Additionally, a soft-bristled brush effectively removes stubborn lint without damaging filter mesh.
- Absorbent towels (at least 3-4 large ones)
- Shallow pan or bowl (wider than filter diameter)
- Soft brush (old toothbrush or dedicated cleaning brush)
- Warm water (for rinsing and soaking)
- Rubber gloves (optional but recommended)
- Flashlight or phone torch (for inspecting dark filter compartments)
Professional appliance technicians recommend keeping these tools in a dedicated cleaning kit. This approach streamlines the maintenance process and ensures you never skip cleaning due to missing equipment.
Critical Safety Precautions
Electrical safety takes priority during any washing machine maintenance. Always unplug the machine from the mains power supply before beginning filter cleaning. This precaution prevents accidental activation while your hands are near internal components.
Water supply disconnection provides additional safety for certain cleaning methods. Turn off the water inlet valves behind your machine, particularly when cleaning filters on older models. Furthermore, ensure the machine has completed its final spin cycle before starting maintenance work.
Safety Warning
Workspace Preparation
Effective workspace preparation minimizes water damage and creates an efficient cleaning environment. Lay multiple towels around the machine base, extending at least two feet in all directions. This protective barrier absorbs unexpected water releases during filter removal.
Position your shallow pan directly beneath the filter access point before opening the compartment. Many washing machine filters contain residual water that flows out immediately upon removal. Subsequently, keep additional towels within arm’s reach for quick response to spills.
Good lighting enhances safety and cleaning effectiveness. Use a flashlight or phone torch to illuminate the filter compartment, as many machines have poorly lit access areas. Clear visibility helps identify debris buildup and ensures thorough cleaning.
When to Clean Without Complete Removal
Certain situations require in-situ cleaning without complete filter removal. Older washing machines often have filters that integrate permanently with the pump housing. These filters require cleaning through access panels while remaining attached to the machine.
Heavily blocked filters may resist removal due to debris compression. In such cases, initial cleaning while the filter remains in place loosens accumulated material. Use warm water and gentle brushing to break down blockages before attempting removal.
Some top-loading machines feature filters accessible only through the agitator or drum interior. These designs necessitate cleaning without removal, using specialized tools to reach filter surfaces. Similar preparation techniques apply to other appliance maintenance tasks requiring careful workspace setup.
Emergency cleaning situations, such as mid-cycle blockages, sometimes require immediate attention without full preparation. However, always prioritize safety by unplugging the machine and allowing water levels to stabilize before proceeding with any maintenance work.
Step-by-Step Filter Cleaning Process
Following a systematic approach ensures thorough filter cleaning while protecting your washing machine from damage. This comprehensive process covers every stage from initial access to final reinstallation.
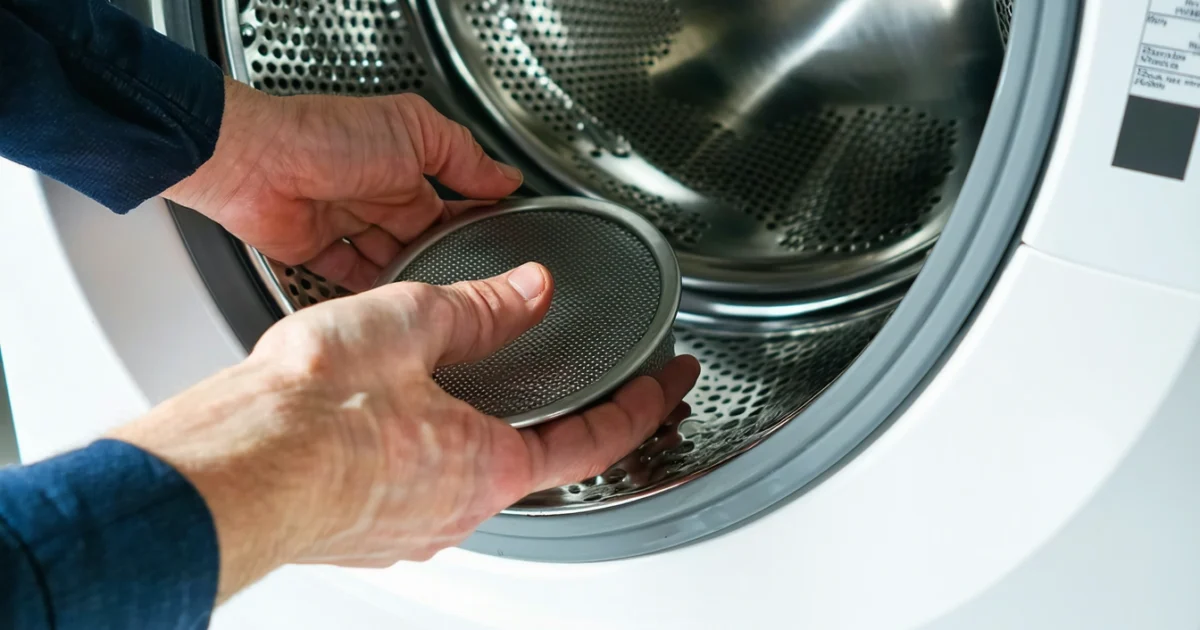
Locating and Accessing the Filter Compartment
Front-loading machines typically house filters behind a small access panel at the bottom front of the unit. This panel either clips off or requires a coin or screwdriver to open. Meanwhile, top-loading machines often position filters inside the drum or beneath the agitator assembly.
Look for manufacturer labels or symbols indicating the filter location. Most modern machines display a filter icon near the access point. Additionally, consult your user manual for model-specific guidance, as filter placement varies significantly between brands like Samsung, LG, and Beko.
Some machines feature multiple filters requiring different access methods. The main lint filter usually sits in an easily accessible location, while the pump filter may require panel removal. Furthermore, certain Whirlpool models integrate filters within the wash basket itself.
Safe Removal Techniques to Prevent Damage
Turn the filter counterclockwise slowly and steadily to begin removal. Never force a stuck filter, as excessive pressure damages the housing threads. Instead, apply gentle rocking motions while turning to loosen debris that may bind the filter in place.
Water will flow from the filter housing during removal. Consequently, position towels strategically and work at a controlled pace to manage spillage. Gravity assists drainage when you tilt the filter slightly downward as it emerges from the housing.
Support the filter with both hands once it loosens completely. Dropping the filter can crack the plastic housing or damage internal components. Moreover, sudden movements may cause remaining water to splash onto electrical components.
Proper Cleaning Methods: Rinsing and Scrubbing Debris
Begin cleaning by rinsing the filter under warm running water to remove loose debris and lint accumulation. Hold the filter at an angle to allow water flow through all mesh sections. This initial rinse reveals the extent of buildup and identifies areas requiring focused attention.
Use a soft-bristled brush to gently scrub stubborn deposits from filter surfaces. Toothbrushes work exceptionally well for detailed cleaning around mesh areas and crevices. However, avoid wire brushes or abrasive materials that scratch protective coatings or damage delicate filter components.
- Scrub in circular motions to dislodge embedded particles
- Pay special attention to mesh openings where lint accumulates
- Clean both sides thoroughly for complete debris removal
- Rinse frequently during scrubbing to wash away loosened material
For heavily soiled filters, soak in warm water with a small amount of mild detergent for 15-20 minutes before scrubbing. This soaking process softens hardened deposits and makes removal significantly easier. Subsequently, rinse thoroughly to eliminate all detergent residue.
Inspecting for Damage or Excessive Wear
Examine the filter carefully for cracks, tears, or deformation that compromise its effectiveness. Plastic components may develop stress fractures over time, while mesh sections can tear from excessive force during previous cleanings. These damages allow debris to bypass filtration and potentially damage the pump.
Check the rubber seal around the filter perimeter for deterioration or missing sections. A damaged seal allows unfiltered water to circulate, reducing cleaning efficiency and potentially causing mechanical problems. Furthermore, inspect the threading for wear or damage that prevents proper installation.
Look for signs of excessive lint accumulation that indicates inadequate cleaning frequency. Thick, compacted debris suggests the filter requires more frequent maintenance. Similarly, persistent odors after cleaning may indicate bacterial growth requiring replacement rather than continued use.
Correct Reinstallation and Securing
Ensure the filter is completely dry before reinstallation to prevent water spots and potential electrical issues. Shake out excess water and allow air drying for several minutes. Additionally, verify that all debris has been removed from both the filter and the housing cavity.
Insert the filter straight into the housing without tilting or forcing. The filter should slide in smoothly with minimal resistance. Once properly seated, turn clockwise until hand-tight, avoiding over-tightening that may damage threads or make future removal difficult.
Test the installation by gently tugging on the filter to ensure secure attachment. A properly installed filter shows no movement when pulled lightly. Finally, replace any access panels and run a short rinse cycle to verify proper operation and check for leaks around the filter area.
Professional Tip
Brand-Specific Cleaning Instructions
Different washing machine manufacturers design unique filter systems that require specific cleaning approaches. Understanding your machine’s brand-specific requirements ensures effective maintenance and prevents damage to delicate components. Moreover, following manufacturer guidelines maintains warranty coverage and optimal performance.
Samsung Washing Machine Filter Cleaning Procedures
Samsung front-loading machines typically position the filter behind a small access door at the bottom left corner. First, unplug the machine and place towels beneath the access area to catch water spillage. Next, turn the emergency drain cap counterclockwise to release trapped water before accessing the main filter.
Samsung’s debris filter requires gentle counterclockwise rotation for removal. The filter housing contains a spring mechanism that may cause resistance during extraction. Therefore, apply steady pressure while turning to avoid sudden release that could damage the threading.
Clean Samsung filters using warm water and a soft brush to remove accumulated lint and debris. Additionally, check the rubber gasket around the filter for tears or buildup that affects sealing. Samsung recommends cleaning every 2-3 months for optimal performance.
LG Front-Loader and Top-Loader Filter Maintenance
LG front-loading washers feature a pump filter located behind the kick plate at the machine’s base. Remove the access panel by pressing the tabs or lifting the cover, depending on your model. Subsequently, place a shallow container beneath the drain hose to collect residual water.
LG’s filter design includes a coin trap feature that captures small objects alongside lint and debris. Unscrew the filter slowly to prevent water from gushing out rapidly. Furthermore, inspect the coin trap section separately for foreign objects that could damage the pump.
LG top-loading machines position their filters differently, often inside the agitator or at the bottom of the wash basket. Remove the agitator cap by lifting or unscrewing, then extract the cylindrical filter beneath. These filters require thorough rinsing under running water to remove soap residue and fabric softener buildup.
Beko Filter Access and Cleaning Methods
Beko washing machines incorporate a unique filter system that combines pump protection with lint collection. The filter assembly sits behind a removable panel at the machine’s front base. Consequently, accessing Beko filters requires removing screws or clips that secure the access cover.
Beko’s pump filter features a large handle for easy gripping during removal. Turn the handle counterclockwise while supporting the filter body to prevent dropping. The filter’s mesh design captures fine particles that other systems might miss.
Clean Beko filters by soaking in warm, soapy water for 10-15 minutes before brushing away stubborn deposits. Additionally, rinse the filter housing cavity to remove accumulated debris that could impede proper seating. Beko recommends monthly cleaning for households with heavy washing loads.
Whirlpool Filter Location and Cleaning Steps
Whirlpool front-loading washers position their filters behind a hinged door at the bottom right corner. Open the access door and locate the black drain hose alongside the filter housing. First, drain excess water using the emergency drain feature before attempting filter removal.
Whirlpool’s filter design includes a self-cleaning mechanism that reduces maintenance frequency compared to other brands. However, manual cleaning remains necessary every 3-4 months to prevent complete blockage. The filter unscrews easily with minimal resistance when properly maintained.
Some Whirlpool top-loading models feature automatic lint disposal systems that eliminate traditional filters entirely. These machines use a special wash action that suspends debris for drain removal. Nevertheless, checking the drain hose connection prevents clogs that mimic filter blockages.
Universal Tips That Apply Across Brands
Regardless of brand, always disconnect power before accessing any filter system to prevent electrical hazards. Additionally, keep replacement parts readily available, as filter damage during cleaning requires immediate replacement to maintain washing efficiency.
Document your cleaning schedule using a maintenance log that tracks filter condition and replacement dates. This practice helps identify patterns in debris accumulation and optimizes cleaning frequency. Furthermore, photographing the filter assembly before disassembly aids in proper reassembly.
Use only mild detergents when cleaning filters, as harsh chemicals can degrade rubber seals and plastic components. Similarly, avoid high-pressure water that might damage delicate mesh materials or force debris deeper into the filter structure.
Store cleaned filters in a dry location if replacement is necessary, ensuring they remain free from dust and moisture. Additionally, consider purchasing brand-specific cleaning tools that match your machine’s filter design for more effective maintenance. Regular cleaning across all brands typically extends filter life by 40-60% compared to neglected systems.
Troubleshooting Common Filter Issues
Even with regular maintenance, washing machine filters occasionally present challenges that require specific troubleshooting approaches. Understanding these common issues helps you resolve problems quickly and prevents minor complications from becoming costly repairs.
Stuck or Difficult-to-Remove Filters
Stuck filters typically result from debris buildup that creates a seal between the filter and housing. First, ensure you’re turning the filter counterclockwise, as many people instinctively turn clockwise. Apply gentle, steady pressure rather than forcing the mechanism.
Spray penetrating oil around the filter threads if the component remains immobile after initial attempts. Allow the lubricant to work for 15-20 minutes before trying again. However, avoid excessive force that might crack the plastic housing or strip the threading.
Use rubber gloves or a rubber jar opener to improve grip on slippery filter surfaces. Additionally, gently tap the filter housing with a rubber mallet to break the debris seal. This technique works particularly well on Samsung and LG models where mineral deposits create stubborn blockages.
Excessive Lint and Debris Buildup
Heavy lint accumulation indicates either inadequate cleaning frequency or underlying washing habits that increase debris production. Overloading the machine forces fabric fibers through gaps in the filter mesh, creating dense blockages that resist normal cleaning.
Soak heavily clogged filters in warm water with enzyme-based detergent for 30-60 minutes before scrubbing. The enzymes break down protein-based stains and organic matter that trap lint particles. Use an old toothbrush to work cleaning solution into mesh openings systematically.
Consider washing heavily linting items like towels and fleece separately to reduce overall debris load. Furthermore, check garment pockets thoroughly before washing, as tissues and paper products create excessive lint that overwhelms filter capacity.
Water Not Draining After Filter Cleaning
Persistent drainage issues after filter cleaning often indicate problems beyond the filter itself. Check the drain hose connection for kinks or blockages that prevent proper water flow. Additionally, ensure the filter is properly seated and threaded correctly into its housing.
Examine the drain pump for foreign objects like coins or small clothing items that bypass the filter. These objects create mechanical blockages that cleaning the filter alone cannot resolve. Most front-loading machines provide access to the pump through the same panel as the filter.
Test the drain system by running a short cycle without clothes to isolate the problem. If water still doesn’t drain properly, the issue likely involves the pump mechanism or drain hose rather than filter contamination. Professional diagnosis becomes necessary when multiple components require attention.
Filter Damage and Replacement Considerations
Cracked or warped filters compromise washing machine performance and require immediate replacement. Inspect the filter housing threads carefully, as cross-threading during installation creates stress fractures that worsen over time. Similarly, check rubber seals for cuts or deterioration that allows debris bypass.
Replace filters showing mesh damage, as torn screening allows larger debris into the pump system. Genuine manufacturer parts ensure proper fit and filtration efficiency, while aftermarket alternatives may not meet original specifications. Keep the model number accessible when ordering replacements.
Document filter replacement dates to track component lifespan patterns. Most filters last 2-3 years with regular cleaning, though hard water areas may require more frequent replacement due to mineral buildup. Additionally, consider upgrading to higher-capacity filters if available for your model.
When to Call Professional Service
Contact professional service when filter problems persist despite proper cleaning and replacement. Recurring blockages within days of cleaning suggest internal pump damage or drain system complications that require specialized tools and expertise.
Electrical issues during filter maintenance, such as error codes that don’t clear after proper reassembly, indicate sensor problems or control board malfunctions. These components require professional diagnosis to prevent further damage to the washing machine’s electronic systems.
Schedule professional maintenance if you’re uncomfortable accessing the filter location or lack confidence in proper reassembly procedures. Improper installation can damage expensive components, making professional service more cost-effective than attempted DIY repairs. Additionally, warranty coverage may require professional service for certain filter-related issues.
Safety Warning
Maintaining Clean Filters and Prevention Tips
Establishing a regular maintenance schedule prevents filter blockages and extends washing machine lifespan. Clean your filter every 4-6 weeks for average household use, though large families or pet owners may require monthly cleaning. Heavy usage patterns, including daily loads or washing heavily soiled items, demand more frequent attention to prevent debris accumulation.
Mark filter cleaning dates on your calendar to maintain consistency. Additionally, seasonal changes often bring different laundry challenges – summer months with outdoor activities and winter with heavier fabrics – that may require schedule adjustments. Most importantly, never wait for visible problems before performing maintenance.
Pre-Washing Habits That Reduce Filter Buildup
Checking pockets thoroughly before loading clothes prevents common filter blockages. Tissues, coins, hair ties, and small toys frequently cause drainage problems when they reach the filter chamber. Furthermore, pet hair requires special attention – use a lint roller on heavily affected garments before washing.
Shake out loose debris from work clothes, gardening attire, and children’s play clothes outdoors. This simple step removes sand, grass, and other particles that would otherwise accumulate in your filter system. Moreover, treating stains promptly reduces the need for intensive wash cycles that stress the filtration system.
- Empty all pockets completely, including small compartments
- Remove loose buttons, pins, or decorative elements
- Brush off pet hair, lint, and visible debris
- Close zippers and fasten hooks to prevent snagging
- Turn heavily soiled items inside out when possible
Using Appropriate Detergent Amounts
Excessive detergent usage creates soap residue that clogs filters and reduces cleaning efficiency. Follow manufacturer guidelines precisely – typically 1-2 tablespoons for standard loads in modern high-efficiency machines. Concentrated formulas require even smaller amounts, often just one tablespoon per load.
Soft water areas need less detergent than hard water regions because soap dissolves more readily. Test your water hardness to determine optimal detergent quantities for your specific conditions. Additionally, powder detergents may leave more residue than liquid alternatives in certain water types.
Detergent Measurement Tip
Warning Signs for More Frequent Cleaning
Several indicators suggest your filter needs more frequent attention than standard schedules recommend. Slow drainage during spin cycles often signals early filter blockage, while unusual noises during operation may indicate debris interference with pump mechanisms.
Persistent odors despite regular cleaning cycles indicate trapped organic matter in the filter system. Similarly, clothes emerging with lint or debris attached suggest filter saturation beyond normal capacity. Water remaining in the drum after cycle completion definitely requires immediate filter inspection.
- Drainage takes longer than 2-3 minutes during final spin
- Gurgling or grinding sounds during operation
- Musty smells from the machine or freshly washed clothes
- Visible lint or debris on clean laundry
- Error codes related to drainage or pump function
- Water pooling in the drum after cycles complete
Seasonal Maintenance Considerations
Seasonal changes affect filter maintenance requirements significantly. Spring cleaning periods often involve washing stored bedding and seasonal clothing that may contain dust or storage-related debris. Summer months bring increased washing frequency due to outdoor activities and swimming gear that introduces sand and chlorine residues.
Winter washing includes heavier fabrics that shed more fibers, while holiday cooking and entertaining create additional laundry loads. Consequently, adjust your cleaning schedule to accommodate these seasonal variations. Deep cleaning your kitchen during these busy periods often coincides perfectly with washing machine maintenance schedules.
Document these patterns in a maintenance log to identify your household’s specific needs. This data helps optimize cleaning frequency and prevents unexpected breakdowns during peak usage periods.
Frequently Asked Questions
How do I clean my washing machine filter?
To clean your washing machine filter, first locate it (usually behind an access panel at the bottom front for front-loaders or inside the agitator for top-loaders). Turn off the machine and unplug it. Place towels and a shallow pan to catch water. Remove the filter by twisting counterclockwise or following your model’s specific instructions. Rinse the filter thoroughly with warm water, use a soft brush to remove debris, and reinstall it properly.
Do I really need to clean my washing machine filter?
Yes, cleaning your washing machine filter monthly is essential for optimal performance. Regular filter cleaning prevents poor drainage, unpleasant odors, and reduced washing efficiency. Neglecting this maintenance can lead to costly repairs and shortened machine lifespan, making it a critical household maintenance task.
How do you know if your washing machine filter is blocked?
Signs of a blocked washing machine filter include:
- Water not draining completely after cycles
- Unpleasant odors coming from the machine
- Clothes remaining excessively wet after spin cycle
- Visible lint or debris on freshly washed clothes
- Error codes related to drainage issues
- Longer wash cycles than normal
How to clean washing machine filter Samsung models?
Samsung washing machines typically have drain pump filters behind a rectangular access panel at the bottom front. Remove the panel (secured with plastic clips or screws), place towels underneath, and use the drainage tube to remove excess water. Twist the filter counterclockwise to remove, rinse with warm water, scrub gently with a soft brush, and reinstall by twisting clockwise until secure.
How to clean washing machine filter LG front loader?
LG front-loading washers commonly have filters behind circular access doors with quarter-turn mechanisms. Open the access door, place a shallow pan to catch water, and turn the filter counterclockwise to remove. Clean thoroughly with warm water and a soft brush, ensuring all debris is removed. Reinstall by turning clockwise until the filter is properly seated and secure.
How to clean washing machine filter top load models?
Top-loading washing machines typically have lint traps inside the agitator or along the tub rim rather than drain pump filters. Remove the lint trap by lifting it out or unscrewing it, depending on your model. Rinse the mesh or screen component with warm water, use a soft brush to remove accumulated lint and debris, and reinstall it properly before your next wash cycle.
How to clean washing machine filter without water everywhere?
To minimize water spillage when cleaning your filter:
- Run a spin cycle first to remove excess water
- Place multiple towels around the filter area
- Use a shallow pan or bowl to catch water
- Slowly unscrew the filter to control water flow
- Have additional towels ready for cleanup
- Consider using the drainage tube if your model has one
How to clean washing machine filter Beko models?
Beko washing machines typically position their drain pump filters behind an access panel at the bottom front. Open the panel, place towels underneath, and slowly turn the filter counterclockwise while supporting it to prevent dropping. Clean the filter with warm water and a soft brush, removing all lint and debris. Reinstall by turning clockwise until hand-tight, ensuring proper sealing.
How to clean washing machine filter Whirlpool machines?
Whirlpool washing machine filters vary by model type. Front-loading Whirlpool models typically have drain pump filters accessible through a bottom front panel. Top-loading models may have lint traps inside the agitator or along the tub. Consult your specific model’s manual for exact location and removal instructions, as Whirlpool designs can vary significantly between product lines.
What is the most expensive part to replace on a washing machine?
The most expensive parts to replace on a washing machine are typically the control board, motor, or transmission, which can cost $200-$500 or more depending on the model. The drain pump, while less expensive ($50-$150), can fail prematurely if filters aren’t cleaned regularly, making preventive maintenance crucial for avoiding costly repairs.
How often should I clean my washing machine filter?
Clean your washing machine filter monthly for optimal performance. However, if you wash heavily soiled items frequently, have pets that shed, or notice drainage issues, you may need to clean it more often. Regular monthly cleaning prevents blockages and maintains your machine’s efficiency and longevity.
What tools do I need to clean my washing machine filter?
Essential tools for cleaning your washing machine filter include:
- Multiple towels for water absorption
- Shallow pan or bowl to catch water
- Soft brush or old toothbrush for scrubbing
- Warm water for rinsing
- Flashlight for better visibility
- Rubber gloves for hygiene
Can I use washing machine cleaner instead of cleaning the filter?
No, washing machine cleaner cannot replace manual filter cleaning. While washing machine cleaners help remove soap residue and mineral buildup from internal components, they cannot remove physical debris like lint, coins, and small objects trapped in the filter. Both filter cleaning and machine cleaning are necessary for complete maintenance.
What happens if I don't clean my washing machine filter?
Neglecting filter cleaning can result in:
- Poor drainage and standing water
- Unpleasant odors from trapped debris
- Reduced washing efficiency and cleaning performance
- Damage to the drain pump from blockages
- Shortened machine lifespan
- Costly repair bills that could have been prevented
You May Also Like

How to Clean Artificial Grass: Complete Maintenance Guide
How to Clean Air Fryer Heating Element: Complete Guide 2026