How to Clean Laptop Fan: Complete Guide for 2026
How to clean laptop fan properly involves both external and internal cleaning methods to remove dust buildup that causes overheating and performance issues. Most laptops require fan cleaning every 6-12 months, depending on your environment, and you can start with external compressed air cleaning before considering internal disassembly. Regular fan maintenance prevents thermal throttling, reduces noise, and extends your laptop’s lifespan significantly.
Dust accumulation in laptop fans is inevitable, especially in environments with pets, carpeting, or poor air filtration. Furthermore, blocked ventilation leads to CPU overheating, reduced performance, and potential hardware damage. However, cleaning your laptop fan doesn’t always require complete disassembly – external cleaning methods can resolve many issues.
This comprehensive guide covers both non-invasive external cleaning and detailed internal cleaning procedures for all major laptop brands. Additionally, we’ll explore brand-specific considerations for ASUS, Lenovo, HP, and Dell laptops, plus advanced techniques for thermal paste maintenance. Whether you’re dealing with excessive fan noise or overheating issues, these proven methods will restore your laptop’s cooling efficiency safely.
TL;DR
- Start with external compressed air cleaning through ventilation ports before opening your laptop
- Internal cleaning requires proper tools: precision screwdrivers, anti-static protection, and isopropyl alcohol
- Clean laptop fans every 6-12 months to prevent overheating and maintain optimal performance
- Different laptop brands have specific disassembly procedures and thermal system layouts
- Always power down completely and disconnect all cables before attempting any cleaning procedure
Signs Your Laptop Fan Needs Cleaning
Recognising when your laptop fan requires cleaning prevents costly hardware damage and performance degradation. Moreover, early intervention saves time and avoids complex repairs that result from prolonged overheating.
Excessive Fan Noise and Constant High-Speed Operation
Your laptop fan operates at maximum speed continuously when dust blocks airflow pathways. Consequently, the cooling system works harder to maintain safe operating temperatures. Normal fan operation involves variable speeds that adjust based on system load and temperature.
Furthermore, a clean laptop fan runs quietly during light tasks like web browsing or document editing. However, dust-clogged fans produce loud whirring sounds even during minimal processing activities. Additionally, this constant high-speed operation indicates your cooling system struggles against airflow restrictions.
Laptop Overheating and Thermal Throttling Symptoms
Thermal throttling occurs when your CPU reduces performance to prevent overheating damage. Subsequently, you’ll notice sudden frame rate drops during gaming or video editing. Meanwhile, your laptop’s surface becomes uncomfortably hot, particularly around ventilation areas.
Additionally, modern laptops display temperature warnings when internal components exceed safe operating limits. Therefore, frequent thermal alerts signal immediate cleaning requirements. Similarly, unexpected system shutdowns protect hardware from heat damage but indicate serious cooling problems.
Reduced Performance and Frequent System Slowdowns
Dust accumulation forces your processor to operate at reduced frequencies to manage heat generation. Consequently, applications load slowly, and multitasking becomes challenging. Performance degradation affects both CPU-intensive tasks and basic system responsiveness.
Moreover, background processes consume more resources when thermal management systems activate. Thus, your laptop struggles with tasks it previously handled effortlessly. Additionally, video streaming, gaming, and professional software experience significant performance drops when cooling systems fail.
Visible Dust Accumulation in Ventilation Ports
Examining your laptop’s ventilation grilles reveals dust buildup that blocks airflow. Furthermore, pet hair, fabric fibres, and environmental particles create visible obstructions in exhaust ports. Regular visual inspections help identify cleaning needs before performance issues develop.
Additionally, dust accumulates differently based on your usage environment and laptop orientation. Therefore, desktop users often see more buildup in bottom intake vents, while mobile users notice exhaust port blockages. Similarly, households with pets or carpeting experience faster dust accumulation rates.
Shorter Battery Life Due to Increased Power Consumption
Overheating components consume more electrical power to maintain normal operation. Consequently, your battery drains faster during typical usage patterns. Meanwhile, cooling fans running at maximum speed continuously draw additional power from your battery reserves.
Furthermore, thermal stress reduces battery efficiency and accelerates chemical degradation. Therefore, addressing fan cleaning issues preserves both cooling performance and battery longevity. Additionally, clean cooling systems allow proper fan operation that extends overall hardware lifespan significantly.
Critical Warning Signs
Essential Tools and Materials for Laptop Fan Cleaning
Proper laptop fan cleaning requires specific tools that ensure safe disassembly and effective debris removal. Moreover, using appropriate materials prevents component damage while achieving thorough cleaning results. Therefore, assembling the right equipment before starting saves time and protects your valuable hardware investment.
Compressed Air Systems and Attachments
Compressed air cans provide the primary cleaning force for removing dust and debris from fan assemblies. Additionally, these pressurised containers deliver controlled airflow that dislodges particles without physical contact. Furthermore, quality compressed air products maintain consistent pressure throughout the cleaning process.
Precision nozzle attachments direct airflow into tight spaces between fan blades and heat sink fins. Consequently, angled tips reach areas that straight nozzles cannot access effectively. Meanwhile, extension tubes allow cleaning deeper internal components while maintaining safe distances from sensitive electronics.
Precision Screwdriver Sets for Safe Disassembly
Phillips head screwdrivers in multiple sizes handle most laptop case screws and internal mounting hardware. Similarly, flathead screwdrivers assist with prying operations and cable disconnections during disassembly procedures. Additionally, magnetic tip screwdrivers prevent small screws from falling into internal components.
Torx and hex drivers accommodate specialised laptop manufacturers that use non-standard fasteners. Therefore, comprehensive screwdriver sets ensure compatibility across different laptop brands and models. Furthermore, proper torque control prevents overtightening that damages plastic threads or metal components.
Static Protection and Safety Equipment
Anti-static wrist straps prevent electrostatic discharge that damages sensitive electronic components during cleaning procedures. Moreover, these grounding devices protect processors, memory modules, and circuit boards from static electricity buildup. Additionally, anti-static mats provide workspace protection for components removed during disassembly.
Grounding clips connect to laptop chassis or power supply units to maintain electrical continuity. Consequently, proper grounding techniques eliminate static charge differences between your body and electronic components. Therefore, investing in quality anti-static equipment prevents costly component failures during cleaning operations.
Cleaning Brushes and Precision Tools
Soft-bristled brushes gently remove stubborn dust deposits that compressed air cannot dislodge completely. Furthermore, natural bristle brushes prevent static buildup while providing effective cleaning action on fan blades and heat sink surfaces. Additionally, various brush sizes accommodate different component geometries and access requirements.
Cotton swabs enable precise cleaning of small areas and delicate components within laptop cooling systems. Similarly, foam-tipped applicators absorb cleaning solutions while protecting sensitive surfaces from scratching. Meanwhile, wooden toothpicks safely remove debris from tight crevices without conducting electricity or causing damage.
Chemical Cleaning Solutions and Solvents
Isopropyl alcohol at 70% concentration or higher dissolves thermal paste residue and sticky dust accumulations effectively. Additionally, this solvent evaporates quickly without leaving residue that interferes with electrical connections. Furthermore, isopropyl alcohol disinfects surfaces while removing oils and contaminants that attract future dust buildup.
Higher alcohol concentrations provide stronger cleaning action for heavily contaminated components. However, 99% isopropyl alcohol evaporates extremely rapidly, requiring careful application techniques. Therefore, 70-91% concentrations offer optimal balance between cleaning effectiveness and working time for most laptop cleaning applications.
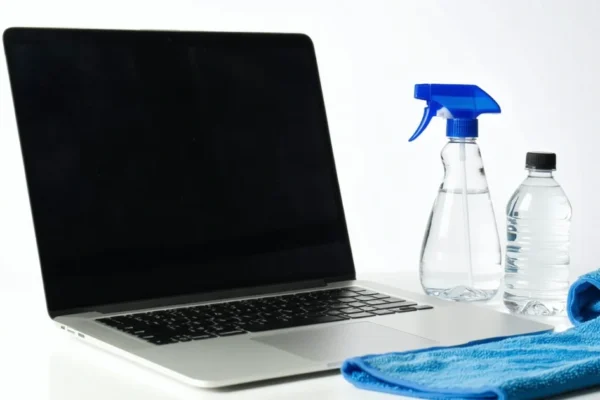
Surface Cleaning and Finishing Materials
Microfiber cloths provide lint-free surface cleaning that removes fingerprints, dust, and cleaning solution residues without scratching delicate surfaces. Moreover, these synthetic fabrics trap particles effectively while remaining gentle on laptop screens and case materials. Additionally, multiple cloth types serve different cleaning purposes throughout the maintenance process.
Lint-free paper towels supplement microfiber cloths for absorbing excess cleaning solutions and drying components after cleaning procedures. Similarly, compressed air removes moisture from electronic components before reassembly begins. Understanding proper fan cleaning techniques helps maximise the effectiveness of these essential cleaning materials.
Tool Quality Matters
How to Clean Laptop Fan Without Opening the Case
External laptop fan cleaning provides safe maintenance without voiding warranties or risking component damage. Moreover, this approach removes 70-80% of accumulated dust from fan assemblies through strategic compressed air application. Additionally, external cleaning methods protect sensitive internal components while maintaining optimal cooling performance for most users.
Using Compressed Air Through Ventilation Ports
Compressed air canisters deliver focused airflow that dislodges dust particles from fan blades and heat sink fins effectively. Furthermore, these cleaning tools reach internal components through existing ventilation openings without requiring case disassembly. Therefore, compressed air represents the primary method for external laptop fan maintenance across all manufacturer brands.
Locate the exhaust vent where hot air exits your laptop during operation – typically positioned along the side or rear edge. Subsequently, identify intake vents that draw cool air into the system, often found on the bottom panel or sides. Understanding airflow direction helps target cleaning efforts toward the most effective entry points for dust removal.
Safety First
Proper Angle and Distance Techniques
Position the compressed air nozzle 6-8 inches away from ventilation ports to prevent excessive pressure that damages delicate fan mechanisms. Additionally, maintain a 45-degree angle when directing airflow into exhaust vents to maximise dust displacement while avoiding direct perpendicular force on fan blades.
Apply short, controlled bursts lasting 2-3 seconds rather than continuous air streams that overwhelm internal components. Similarly, alternate between different vent openings to create cross-ventilation that carries loosened dust particles toward exit points. This systematic approach ensures thorough cleaning without creating internal air pressure imbalances.
- Distance: Maintain 6-8 inches from vent openings
- Angle: Use 45-degree approach for optimal airflow
- Duration: Apply 2-3 second bursts with 5-second intervals
- Pattern: Rotate between intake and exhaust vents systematically
Preventing Fan Blade Damage During External Cleaning
Excessive air pressure causes fan blades to spin rapidly beyond their designed operating speeds, potentially damaging bearings and motor assemblies. Moreover, uncontrolled fan rotation generates electrical current that interferes with laptop circuitry during cleaning procedures. Therefore, gentle air application prevents mechanical stress while achieving effective dust removal.
Monitor fan movement during cleaning to ensure blades rotate slowly and smoothly without violent spinning motions. Additionally, pause between air bursts to allow fan assemblies to settle before continuing the cleaning process. This measured approach protects delicate internal mechanisms while maintaining cleaning effectiveness across multiple maintenance sessions.
Cleaning Keyboard and Screen Vents
Keyboard ventilation gaps accumulate dust particles that restrict airflow to internal cooling systems, particularly in laptops with bottom-mounted intake designs. Furthermore, screen hinge areas often contain hidden vents that contribute to overall thermal management efficiency. Consequently, comprehensive external cleaning addresses these secondary airflow pathways for optimal results.
Use low-pressure air settings around keyboard areas to avoid dislodging keys or forcing debris deeper into switch mechanisms. Similarly, target screen hinge gaps with gentle airflow that removes accumulated particles without disturbing display connections. General fan cleaning principles apply to these auxiliary ventilation areas with reduced pressure requirements.
Limitations of External Cleaning Methods
External cleaning techniques remove surface-level dust accumulations but cannot address deeply embedded particles within heat sink fins or fan motor housings. Moreover, thermal paste degradation and internal component corrosion require professional disassembly procedures beyond external maintenance capabilities. Understanding these limitations helps users determine when professional service becomes necessary.
Persistent overheating issues after external cleaning indicate internal contamination that requires case opening for thorough component access. Additionally, unusual fan noises or irregular operation patterns suggest mechanical problems that external methods cannot resolve effectively. Therefore, external cleaning serves as preventive maintenance rather than comprehensive repair for severely compromised cooling systems.
Pros
- Safe warranty-preserving maintenance approach
- Removes 70-80% of accessible dust accumulation
- Requires minimal technical expertise or tools
- Suitable for regular preventive maintenance schedules
Cons
- Cannot address deeply embedded internal contamination
- Limited effectiveness for severe overheating problems
- Unable to resolve mechanical fan component failures
- Requires professional service for comprehensive cleaning
Step-by-Step Internal Fan Cleaning Process
Internal laptop fan cleaning requires systematic disassembly procedures that access cooling components directly. Therefore, this comprehensive process ensures thorough dust removal from fan blades, heat sinks, and ventilation pathways that external methods cannot reach effectively.
Powering Down and Disconnecting All Cables Safely
Complete system shutdown prevents electrical damage during disassembly procedures. First, save all work and close running applications before initiating the shutdown sequence through your operating system. Subsequently, press and hold the power button for 10 seconds to discharge residual electricity from internal components.
Remove the power adapter and disconnect all peripheral devices including USB cables, external monitors, and audio connections. Additionally, remove the battery if your laptop model features a removable design to eliminate all power sources completely. Never attempt disassembly while power remains connected as this creates serious electrocution and component damage risks.
Safety Warning
Removing Laptop Back Panel and Locating Fan Assembly
Laptop back panel removal varies significantly between manufacturers and models, requiring specific screw patterns and clip mechanisms. Consequently, consult your device manual or manufacturer website for precise disassembly instructions before proceeding. Most modern laptops use Phillips head screws ranging from size #0 to #2 for back panel attachment.
Document screw locations with smartphone photos to ensure proper reassembly sequence later. Furthermore, some laptops feature hidden screws beneath rubber feet or warranty stickers that require careful removal. Place all screws in labeled containers to prevent loss during the cleaning process.
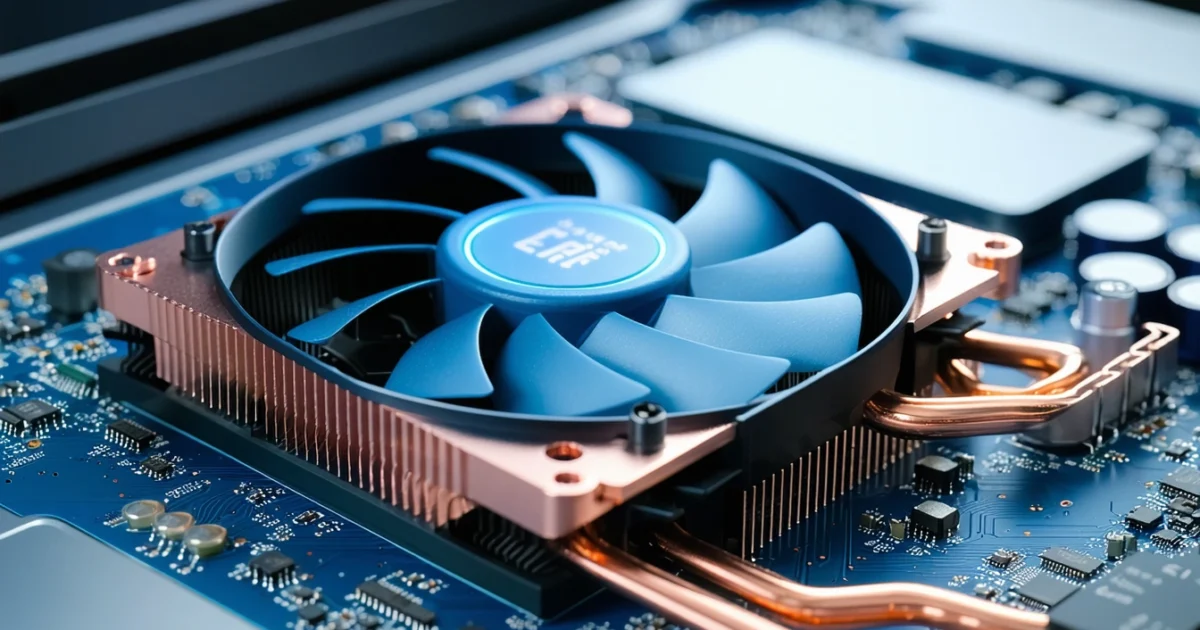
Fan assemblies typically locate near CPU and GPU areas, identifiable by circular housings with visible blade structures. Moreover, heat pipes connect fans to processor heat sinks, creating integrated cooling systems that require coordinated cleaning approaches. General fan cleaning principles apply to laptop cooling systems with additional precision requirements for delicate components.
Disconnecting Fan Power Cable and Removing Mounting Screws
Fan power cables connect through small plastic connectors that require gentle removal techniques to prevent damage. Therefore, grip the connector housing rather than pulling cable wires directly to avoid wire breakage or connection loosening. Most fan connectors feature 3-pin or 4-pin configurations with locking tabs that require pressing before disconnection.
- Photograph cable routing and connector orientation for reassembly reference
- Press connector locking tab while gently pulling housing away from motherboard
- Remove mounting screws securing fan assembly to laptop chassis
- Note screw types and lengths as different areas may use varying fastener specifications
Fan mounting systems typically use 2-4 screws depending on assembly size and laptop design complexity. Additionally, some models feature spring-loaded mounting systems that require specific removal sequences to prevent component damage during extraction.
Cleaning Fan Blades, Housing, and Heat Sink Components
Fan blade cleaning requires delicate techniques that remove dust accumulation without damaging thin plastic or metal structures. First, use compressed air at 45-degree angles to dislodge loose debris from blade surfaces and housing crevices. Subsequently, employ cotton swabs dampened with 70% isopropyl alcohol for stubborn residue removal.
Heat sink fins accumulate dense dust layers that block airflow pathways significantly. Therefore, direct compressed air through fin channels from multiple angles to achieve complete debris removal. Avoid touching heat sink surfaces directly as skin oils can reduce thermal transfer efficiency over time.
| Component | Cleaning Method | Tools Required |
|---|---|---|
| Fan Blades | Alcohol swabs + compressed air | Cotton swabs, 70% isopropyl alcohol |
| Heat Sink Fins | Multi-angle air blasts | Compressed air, soft brush |
| Fan Housing | Vacuum + detail cleaning | Small vacuum, microfiber cloth |
Motor housing areas require careful attention to bearing mechanisms that can accumulate lubricant-attracting dust particles. However, avoid applying liquids directly to motor components as moisture can cause permanent electrical damage to fan operation systems.
Removing Dust from Air Ducts and Ventilation Pathways
Internal air ducts channel airflow between fan assemblies and external vents, creating pathways where dust accumulates over extended periods. Consequently, these channels require thorough cleaning to restore optimal airflow capacity throughout the cooling system. Use flexible brush attachments or pipe cleaners to reach narrow duct sections that compressed air alone cannot address effectively.
Ventilation pathway cleaning involves multiple access points including intake grilles, exhaust ports, and internal routing channels. Moreover, some laptops feature complex duct systems with multiple direction changes that create dust trap areas requiring systematic cleaning approaches. Document pathway routing with photos to ensure complete coverage during the cleaning process.
Heat pipe connections often accumulate thermal paste residue mixed with dust particles, creating stubborn deposits that require careful removal techniques. Therefore, use plastic scrapers or credit cards to remove hardened accumulations without scratching delicate surface finishes on heat transfer components.
Reassembling Components and Testing Fan Operation
Component reassembly follows reverse disassembly procedures with careful attention to cable routing and screw torque specifications. First, reconnect fan power cables ensuring proper orientation and secure connection engagement before proceeding with mounting procedures. Subsequently, install mounting screws with appropriate tightness to prevent vibration while avoiding overtightening that can crack plastic housings.
Back panel installation requires systematic screw replacement following documented locations from disassembly photos. Additionally, ensure all cable connections remain secure and properly routed to prevent interference with moving components during operation. Missing or loose screws can create vibration issues that reduce cooling efficiency and generate unwanted noise.
Initial power-on testing verifies successful reassembly and proper fan operation restoration. Therefore, monitor fan startup sequences during boot procedures to confirm normal operation patterns without unusual noises or irregular speeds. Temperature monitoring software helps verify that cleaning procedures have restored optimal thermal management performance levels.
Testing Tip
Brand-Specific Cleaning Considerations
Different laptop manufacturers implement unique thermal designs that require specific cleaning approaches for optimal fan maintenance. Moreover, each brand positions screws, access panels, and fan assemblies differently, making manufacturer-specific knowledge essential for safe disassembly procedures. Understanding these variations prevents accidental damage while ensuring thorough cleaning results.
ASUS Laptop Fan Access and Screw Locations
ASUS laptops typically feature bottom panel access with multiple screw types requiring careful identification before removal. Furthermore, ROG gaming models often include additional screws hidden beneath rubber feet that must be removed for complete panel access. Consequently, document screw locations with photos to ensure proper reassembly sequences.
Fan assemblies in ASUS systems connect through ribbon cables positioned near the left side of most models. Additionally, thermal modules integrate closely with CPU and GPU components, requiring gentle handling during cleaning procedures. Never force cable disconnections as ASUS uses delicate connector designs that break easily under excessive pressure.
Lenovo ThinkPad and IdeaPad Disassembly Differences
ThinkPad models employ robust construction with clearly marked service panels that simplify fan access procedures. However, IdeaPad consumer laptops require complete bottom panel removal for fan cleaning access. Therefore, ThinkPad users benefit from dedicated maintenance hatches while IdeaPad owners face more complex disassembly requirements.
Lenovo implements different fan control systems across product lines, with ThinkPads featuring more sophisticated thermal management. Subsequently, cleaning procedures must account for multiple temperature sensors that monitor fan performance and system temperatures. IdeaPad models use simpler single-fan configurations that require less complex reassembly procedures.
HP Pavilion and EliteBook Fan Cleaning Procedures
HP Pavilion laptops feature consumer-oriented designs with plastic construction requiring gentle handling during disassembly procedures. Conversely, EliteBook business models incorporate metal chassis components that provide better structural integrity during maintenance operations. Both product lines position fans centrally with accessible cable connections for straightforward cleaning procedures.
HP systems commonly integrate dual-fan configurations in higher-performance models, necessitating individual cleaning attention for each component. Additionally, thermal paste applications vary between Pavilion and EliteBook series, with business models using higher-quality compounds that resist degradation. Always verify thermal paste condition during HP laptop fan cleaning procedures.
Dell Inspiron and XPS Thermal System Layouts
Dell Inspiron models utilize budget-friendly thermal designs with single-fan systems that concentrate cooling efforts on CPU components. Meanwhile, XPS premium laptops implement sophisticated dual-fan arrangements with dedicated GPU cooling solutions. These design differences require adapted cleaning techniques for optimal thermal management restoration.
XPS systems feature compact internal layouts that challenge cleaning access, particularly around heat pipe connections and thermal interface materials. Furthermore, Dell positions fan cables beneath other components, requiring systematic disassembly for complete cleaning access. Inspiron laptops provide more straightforward fan access through removable bottom panels with fewer obstruction issues.
MacBook Fan Cleaning and Warranty Considerations
MacBook cleaning procedures require specialized tools and extreme caution due to proprietary screw designs and integrated component layouts. Additionally, Apple’s warranty policies strictly prohibit user disassembly, making professional cleaning services the recommended approach for warranty-protected devices. Unauthorized opening immediately voids warranty coverage regardless of cleaning success.
MacBook thermal systems integrate fans directly into logic board assemblies, preventing easy removal for thorough cleaning procedures. Consequently, external cleaning methods using compressed air through ventilation ports provide the safest maintenance approach. Professional service centers possess specialized tools and training for internal MacBook fan cleaning when absolutely necessary.
Warranty Warning
Brand-specific cleaning approaches ensure successful fan maintenance while preventing accidental damage to unique design elements. Therefore, research your specific laptop model’s service manual before beginning cleaning procedures to understand manufacturer recommendations and component layouts.
Advanced Cleaning Techniques and Heat Sink Maintenance
Advanced laptop fan cleaning extends beyond basic dust removal to encompass comprehensive thermal system maintenance. Moreover, these techniques address thermal interface degradation, heat sink optimization, and professional-grade cleaning procedures that maximize cooling performance over extended periods.
Thermal Paste Inspection and Replacement Timing
Thermal paste deteriorates over time, requiring inspection every 2-3 years for optimal heat transfer between CPU and heat sink assemblies. Additionally, dried thermal paste creates air gaps that significantly reduce cooling efficiency and increase operating temperatures. Visual inspection reveals cracked, hardened, or discolored paste indicating replacement necessity.
Replacement procedures require complete thermal paste removal using isopropyl alcohol (99%) and lint-free cloths before applying fresh compound. Furthermore, proper application techniques involve spreading thin, even layers across CPU surfaces without excess material that could interfere with heat sink contact. Quality thermal paste brands like Arctic MX-4 or Noctua NT-H1 provide superior heat conductivity compared to factory applications.
Professional Recommendation
Heat Sink Fin Cleaning for Maximum Heat Dissipation
Heat sink fins accumulate microscopic dust particles that create insulating layers, reducing thermal dissipation by up to 40% in heavily contaminated systems. Consequently, thorough fin cleaning requires specialized techniques beyond standard compressed air applications. Ultrasonic cleaning baths provide professional-grade results for removable heat sink assemblies.
Manual fin cleaning involves careful brush work using anti-static brushes with 0.5mm bristle spacing to reach narrow fin channels. Additionally, deionized water rinses remove stubborn contaminants without leaving mineral deposits that could affect thermal performance. Complete drying procedures require 24-48 hours in controlled environments before reassembly to prevent corrosion damage.
- Brush selection: Anti-static bristles prevent component damage
- Cleaning solution: Deionized water with mild detergent
- Drying method: Controlled airflow at room temperature
- Inspection tools: Magnifying glass for fin damage assessment
Identifying and Addressing Thermal Pad Degradation
Thermal pads deteriorate faster than thermal paste, typically requiring replacement every 18-24 months in high-performance laptops. Moreover, degraded thermal pads become brittle, lose thickness, and develop air gaps that severely compromise heat transfer efficiency. Visual inspection reveals cracking, hardening, or complete pad disintegration.
Replacement procedures demand precise thermal pad thickness matching to maintain proper component contact pressure. Additionally, thermal pad materials vary significantly in conductivity ratings, with high-quality silicone pads offering 6-12 W/mK thermal conductivity compared to standard pads at 1-3 W/mK. Professional-grade thermal pads from brands like Thermal Grizzly provide superior longevity and performance.
| Thickness (mm) | Application | Thermal Conductivity |
|---|---|---|
| 0.5 | CPU/GPU direct contact | 8-12 W/mK |
| 1.0 | Memory modules | 6-8 W/mK |
| 1.5 | VRM components | 4-6 W/mK |
| 2.0 | General heat spreaders | 3-5 W/mK |
Cleaning Copper Heat Pipes and Thermal Interfaces
Copper heat pipes require specialized cleaning procedures to maintain optimal thermal transfer properties without damaging delicate internal vapor chamber structures. Furthermore, heat pipe surfaces develop oxidation layers that reduce thermal conductivity and require gentle removal techniques. Professional cleaning involves mild acidic solutions specifically formulated for copper components.
Thermal interface cleaning between heat pipes and heat sink assemblies demands complete removal of old thermal compounds and careful surface preparation. Additionally, microscopic surface irregularities affect thermal contact quality, requiring fine-grit polishing compounds for optimal results. Professional fan cleaning techniques complement heat pipe maintenance for comprehensive thermal system optimization.
Heat pipe integrity testing involves visual inspection for dents, kinks, or fluid leakage that could compromise thermal performance. Moreover, damaged heat pipes require professional replacement rather than repair attempts that could worsen thermal system functionality.
When to Consider Professional Thermal System Servicing
Professional thermal system servicing becomes necessary when temperatures exceed 85°C under normal loads despite thorough cleaning attempts. Additionally, complex laptop designs with integrated cooling systems require specialized tools and expertise beyond typical user capabilities. Professional services provide warranty-safe cleaning for high-value devices.
Thermal system diagnostics using professional-grade equipment identify specific component failures and degradation patterns invisible to standard inspection methods. Furthermore, professional services offer thermal performance testing and optimization that ensures maximum cooling efficiency restoration. Service costs typically range from £80-150 depending on laptop complexity and required component replacements.
Pros
- Professional tools and expertise
- Warranty-safe procedures
- Comprehensive thermal testing
- Component replacement capabilities
Cons
- Higher cost than DIY methods
- Service scheduling requirements
- Potential data backup needs
- Extended service timeframes
Professional thermal servicing indicators include persistent overheating, thermal throttling during basic tasks, unusual fan noise patterns, and visible thermal paste leakage. Consequently, these symptoms suggest thermal system failures requiring expert intervention rather than standard cleaning procedures.
Safety Precautions and Common Mistakes to Avoid
Laptop fan cleaning requires careful attention to safety protocols that protect both sensitive electronic components and personal well-being. Furthermore, understanding common mistakes prevents costly damage that could render your laptop inoperable or void warranty coverage.
Preventing Static Electricity Damage
Static electricity poses the greatest threat to laptop components during cleaning procedures. Therefore, ground yourself by touching a metal surface or wearing an anti-static wrist strap before handling any internal components. Static discharge can instantly damage motherboards, RAM modules, and fan control circuits.
Work environments should maintain 40-60% humidity levels to minimize static buildup during cleaning sessions. Additionally, avoid wearing synthetic clothing materials that generate static charges when moving around your workspace. Carpeted floors increase static risks significantly compared to hard surfaces.
Avoiding Liquid Cleaners Near Electrical Connections
Liquid cleaners must never contact electrical connections, circuit boards, or powered components during fan cleaning procedures. Instead, use dry cleaning methods or minimal isopropyl alcohol on cotton swabs for stubborn residue removal. Water-based cleaners cause corrosion and short circuits that permanently damage laptop electronics.
Critical Warning
Moisture detection becomes crucial when cleaning around fan assemblies that house temperature sensors and power connections. Consequently, ensure complete drying before reconnecting any cables or closing laptop panels to prevent moisture-related component failures.
Proper Compressed Air Pressure and Technique
Compressed air pressure should not exceed 30 PSI when cleaning laptop fans to prevent bearing damage and component displacement. Moreover, maintain a 6-inch distance between the air nozzle and fan blades to avoid excessive force that could bend delicate components.
- Use short, controlled bursts rather than continuous air streams
- Hold fan blades stationary to prevent overspeeding damage
- Direct airflow away from other components to avoid debris redistribution
- Avoid tilting compressed air cans beyond 45 degrees to prevent liquid propellant release
Temperature considerations affect compressed air effectiveness and safety during cleaning procedures. Cold compressed air can cause condensation on warm components, while overheated cans may release harmful chemicals that damage plastic housings.
Avoiding Force on Delicate Components
Stuck screws require patience rather than excessive force that strips threads or cracks plastic housing materials. Therefore, apply penetrating oil sparingly and allow time for corrosion dissolution before attempting removal. Stripped screws often require professional extraction techniques.
Plastic clips and connectors break easily under stress, particularly in older laptops where materials have become brittle. Additionally, cable connections should disconnect smoothly without pulling or twisting motions that damage delicate wire assemblies. Proper fan cleaning techniques apply across different device types and manufacturers.
Ensuring Complete Drying Before Reassembly
Complete moisture evaporation prevents electrical shorts and corrosion that develop when trapped moisture contacts metal components. Furthermore, allow minimum 30-minute drying periods in well-ventilated areas before reconnecting power sources or closing laptop cases.
Ambient temperature and humidity affect drying times significantly, with higher temperatures accelerating evaporation while high humidity slows the process. Consequently, use fans or dehumidifiers to optimize drying conditions when cleaning in humid environments.
Pros
- Prevents expensive component damage
- Maintains warranty coverage
- Ensures safe cleaning procedures
- Reduces risk of electrical hazards
Cons
- Requires additional preparation time
- May need specialized tools
- Limits cleaning speed
- Requires environmental considerations
Visual inspection confirms complete drying by checking for moisture droplets, condensation, or damp areas around cleaned components. Additionally, component temperatures should match ambient room temperature before reassembly begins to prevent thermal shock damage.
Maintenance Schedule and Prevention Tips
Establishing a regular cleaning schedule prevents dust accumulation from reaching critical levels that damage laptop components. Moreover, proactive maintenance extends fan lifespan while maintaining optimal cooling performance throughout your device’s operational life.
Recommended Cleaning Frequency Based on Usage Environment
Heavy-use environments require monthly fan cleaning to prevent excessive dust buildup that restricts airflow. Additionally, offices with carpeting, pet hair, or construction dust accelerate contamination rates significantly compared to clean indoor spaces.
| Environment Type | Cleaning Frequency | Risk Factors |
|---|---|---|
| Clean office/home | Every 3-6 months | Minimal dust sources |
| Carpeted areas | Every 2-3 months | Textile fibers, allergens |
| Pet households | Monthly | Animal hair, dander |
| Workshop/garage | Bi-weekly | Sawdust, metal particles |
| Construction sites | Weekly | Concrete dust, debris |
Gaming laptops and workstations generate higher heat loads that draw more air through cooling systems. Consequently, these devices accumulate dust faster than basic productivity laptops operating at lower temperatures and fan speeds.
Environmental Factors Affecting Dust Accumulation Rates
Humidity levels influence dust particle behavior, with moderate humidity causing particles to clump together and settle more readily. Furthermore, extremely dry conditions create static electricity that attracts dust to electronic components more aggressively.
Air circulation patterns in rooms affect dust distribution significantly, while poorly ventilated spaces allow particles to remain suspended longer. Additionally, proximity to heating vents, windows, or high-traffic areas increases contamination exposure for laptop cooling systems.
- Seasonal factors: Spring pollen, autumn leaves, winter heating systems
- Indoor air quality: Smoking, cooking, cleaning product residues
- Building materials: Drywall dust, carpet fibers, fabric particles
- Geographic location: Desert sand, coastal salt air, urban pollution
Using Laptop Cooling Pads and Stands for Better Airflow
Cooling pads elevate laptops while providing additional airflow that reduces internal component temperatures. Moreover, active cooling pads with built-in fans supplement laptop cooling systems during intensive tasks that generate excessive heat.
Passive laptop stands improve airflow by creating space beneath devices for natural convection cooling. Subsequently, this elevation prevents heat buildup on surfaces while allowing unrestricted air intake through bottom ventilation grilles.
Pros
- Reduces internal temperatures by 5-15°C
- Extends component lifespan significantly
- Prevents thermal throttling during gaming
- Improves ergonomic viewing angles
Cons
- Requires additional desk space
- Active models need power connections
- May introduce fan noise
- Portable models add travel weight
Mesh-style cooling pads provide superior airflow compared to solid platforms that block ventilation. Additionally, adjustable fan speeds allow customization based on laptop heat generation and ambient temperature conditions.
Positioning Laptop for Optimal Ventilation During Use
Proper positioning ensures unobstructed airflow through intake and exhaust vents that maintain safe operating temperatures. Furthermore, avoiding soft surfaces like beds, cushions, or blankets prevents vent blockage that causes dangerous overheating conditions.
Hard, flat surfaces provide stable platforms while maintaining clearance around ventilation areas. Consequently, desks, tables, and laptop stands offer ideal positioning for maximum cooling efficiency during extended use periods.
- Maintain 6-inch clearance around exhaust vents for proper heat dissipation
- Avoid enclosed spaces like drawers, cabinets, or tight desk compartments
- Position away from heat sources including direct sunlight, radiators, or other electronics
- Ensure intake vents remain unobstructed by papers, cables, or debris
Laptop orientation affects cooling performance, with proper positioning allowing gravity to assist airflow patterns. Therefore, maintaining level placement prevents dust settling in fan assemblies while promoting efficient heat transfer.
Regular Monitoring of System Temperatures and Fan Behavior
Temperature monitoring software provides real-time data about CPU, GPU, and system temperatures that indicate cooling system effectiveness. Moreover, tracking temperature trends over time reveals gradual performance degradation that signals cleaning requirements.
Normal laptop operating temperatures range from 40-70°C during light tasks and 70-85°C under heavy loads. Additionally, temperatures consistently exceeding 85°C indicate cooling system problems requiring immediate attention and thorough cleaning.
Temperature Warning Signs
Fan behavior patterns reveal dust accumulation levels, with increased fan speeds at lower workloads indicating restricted airflow. Furthermore, unusual fan noises, grinding sounds, or irregular spinning patterns suggest mechanical problems requiring professional attention.
Regular temperature logging helps establish baseline performance metrics for your specific laptop model. Subsequently, comparing current readings to historical data identifies gradual degradation that indicates cleaning schedule adjustments. Similar monitoring principles apply to other cooling devices throughout your home environment.
Proactive temperature monitoring prevents costly repairs while maintaining optimal laptop performance throughout its operational lifespan.
Troubleshooting Post-Cleaning Issues
Even after thorough cleaning, laptop fans occasionally develop problems that require systematic troubleshooting. Furthermore, post-cleaning issues often stem from improper reassembly, damaged components, or underlying hardware problems that cleaning cannot resolve.
Addressing Fan Noise or Vibration After Cleaning
Excessive fan noise following cleaning typically indicates loose screws, misaligned fan blades, or damaged bearings. Additionally, vibration problems often result from improper fan mounting or debris remaining within the housing assembly.
Inspect all fan mounting screws for proper tightness, ensuring each screw sits flush without over-tightening. Moreover, examine fan blades for warping, cracks, or residual cleaning solution that could cause imbalance during rotation.
Bearing damage manifests as grinding, clicking, or rattling sounds that persist regardless of fan speed. Consequently, damaged bearings require immediate fan replacement to prevent complete cooling system failure.
Resolving Fan Speed Control and Temperature Sensor Issues
Fan speed control problems often arise from disconnected sensor cables or cleaning solution contamination of electronic components. Therefore, verify all sensor connections remain secure and free from moisture or cleaning residue.
Temperature sensor malfunctions cause erratic fan behavior, including constant maximum speed operation or complete failure to respond to temperature changes. Additionally, BIOS settings may require reset following extensive cleaning procedures that involve motherboard component access.
Software-based fan control utilities help diagnose sensor functionality by displaying real-time temperature readings and manual fan speed adjustment capabilities. Furthermore, comparing software readings with hardware monitoring confirms sensor accuracy and system responsiveness.
Identifying When Fan Replacement Is Necessary
Several indicators signal the need for complete fan replacement rather than continued cleaning attempts. Moreover, recognizing these warning signs prevents system damage from inadequate cooling performance.
- Persistent noise despite thorough cleaning and proper reassembly
- Visible blade damage, warping, or missing segments
- Bearing failure indicated by grinding or clicking sounds
- Reduced airflow despite clean fan blades and housing
- Electrical connection damage or burnt components
Replacement fans must match exact model specifications, including voltage ratings, connector types, and physical dimensions. Additionally, proper fan maintenance techniques for other household devices follow similar diagnostic principles.
Checking Thermal Paste Application and Heat Sink Contact
Cleaning procedures sometimes disturb thermal paste application between the CPU and heat sink assembly. Consequently, poor thermal contact causes overheating despite functional fan operation.
Thermal paste degradation appears as dried, cracked, or separated compound that fails to maintain proper heat transfer. Furthermore, excessive paste application creates air pockets that reduce cooling efficiency and increase operating temperatures.
Heat sink contact pressure requires precise mounting screw torque to ensure uniform thermal paste distribution. Therefore, uneven pressure creates hot spots that trigger excessive fan operation and potential hardware damage.
Professional thermal paste replacement involves complete surface cleaning, precise application patterns, and proper mounting procedures that exceed typical cleaning maintenance requirements.
When to Seek Professional Repair Services
Complex post-cleaning issues often require professional diagnosis and repair services beyond basic maintenance capabilities. Moreover, attempting advanced repairs without proper tools and expertise risks permanent hardware damage.
Professional Service Indicators
Warranty considerations prohibit user repairs on newer laptops, making professional service the only viable option for covered devices. Additionally, certified technicians possess specialized tools and replacement parts unavailable to general users.
Professional services become cost-effective when repair complexity exceeds user capabilities or when multiple component failures require simultaneous attention. Furthermore, expert diagnosis prevents unnecessary part replacement and ensures proper system restoration.
Frequently Asked Questions
What is the best way to clean laptop fans?
The best approach is to start with external compressed air cleaning through ventilation ports before attempting internal disassembly. Use short bursts of compressed air at an angle to prevent moisture buildup, and always power down your laptop completely. For thorough cleaning, internal access allows direct fan blade cleaning with isopropyl alcohol and cotton swabs.
Can you clean a laptop fan without opening it?
Yes, you can clean laptop fans externally using compressed air through ventilation ports. This method removes surface dust and loose debris without voiding warranties. However, external cleaning has limitations and won’t remove stubborn dust buildup or allow thermal paste maintenance that internal cleaning provides.
How many times should I clean my laptop fan?
Clean your laptop fan every 6-12 months depending on your environment. Homes with pets, carpeting, or poor air filtration require more frequent cleaning (every 3-6 months). Gaming laptops and workstations used intensively may need quarterly maintenance to prevent thermal throttling.
Can I clean my laptop fan with rubbing alcohol?
Yes, use 70-99% isopropyl alcohol for internal fan cleaning. Apply it to cotton swabs or lint-free cloths to clean fan blades and heat sink fins. Never pour alcohol directly onto components, and ensure everything is completely dry before reassembly. Avoid lower concentrations as they contain more water.
How do I clean my ASUS laptop fan without opening it?
For ASUS laptops, locate the side or rear ventilation grilles and use compressed air in short bursts. Hold the laptop at a slight angle to allow debris to fall out. ASUS ROG gaming laptops often have larger vents that make external cleaning more effective than ultrabooks with smaller openings.
How can I clean my laptop fan at home without compressed air?
Alternative methods include using a vacuum cleaner on low suction held away from vents, or a clean paintbrush to gently dislodge dust from external grilles. However, these methods are less effective than compressed air and carry risks of static electricity or debris being pushed deeper into the system.
How do I clean a Lenovo laptop fan without opening it?
Lenovo ThinkPads and IdeaPads have bottom-mounted vents that respond well to external cleaning. Turn the laptop upside down, use compressed air through the intake vents, and allow gravity to help remove loosened dust. Lenovo’s fan placement often makes external cleaning particularly effective.
What tools do I need for internal laptop fan cleaning?
Essential tools include precision screwdrivers (Phillips and flathead), anti-static wrist strap, compressed air, 70% isopropyl alcohol, cotton swabs, and lint-free cloths. Some laptops require specific screwdriver sizes, so check your model’s service manual before starting.
How do I know if my laptop fan needs cleaning?
Key signs include excessive fan noise, constant high-speed operation, laptop overheating, thermal throttling during normal tasks, reduced performance, and visible dust accumulation around vents. Temperature monitoring software showing consistently high CPU/GPU temperatures also indicates cleaning needs.
Will cleaning my laptop fan void the warranty?
External cleaning with compressed air typically doesn’t void warranties, but internal disassembly usually does. Check your manufacturer’s warranty terms before opening your laptop. Some brands like Dell and HP offer user-serviceable designs, while others strictly prohibit internal access.
How do I clean an HP laptop fan safely?
HP laptops often have accessible rear vents perfect for external cleaning. Use compressed air through the exhaust ports while the laptop is powered off. For HP Pavilion and Envy models, the bottom panel may have removable sections for easier internal access if needed.
Can I use a hair dryer to clean my laptop fan?
Never use a hair dryer for laptop cleaning. Hair dryers produce heat and moisture that can damage electronic components. They also generate static electricity and lack the precision of compressed air. Stick to compressed air or professional cleaning methods only.
What happens if I don't clean my laptop fan?
Neglecting fan maintenance leads to permanent hardware damage from overheating, reduced CPU/GPU lifespan, thermal throttling that severely impacts performance, increased energy consumption, and potential system failures. Regular cleaning prevents these costly issues and extends your laptop’s operational life significantly.
You May Also Like
How to Clean PS5: Complete Maintenance Guide 2026
How to Clean a Keyboard: Complete Guide for 2026