How to Clean Shower Tiles: Complete Guide for 2026
How to clean shower tiles effectively requires understanding your tile material and using the right cleaning methods to remove soap scum, hard water stains, and mildew without causing damage. Whether you have ceramic, porcelain, natural stone, or glass tiles, proper cleaning techniques can restore your shower’s sparkle and prevent long-term buildup. Most shower tile cleaning can be accomplished with simple household items like white vinegar and baking soda, though stubborn stains may require commercial cleaners or specialized approaches.
Different tile materials respond differently to cleaning agents, making it crucial to identify your shower tiles before selecting products. Additionally, grout lines often harbor more dirt and mildew than the tiles themselves, requiring focused attention during cleaning. Understanding these basics helps prevent damage while achieving professional-level results.
This comprehensive guide covers everything from gentle daily maintenance to deep cleaning techniques for heavily stained tiles. Furthermore, you’ll learn which products to avoid and discover effective methods for removing shower mold that commonly affects tile surfaces.
TL;DR
- Natural cleaning with white vinegar and baking soda works effectively for most tile types and regular maintenance
- Identify your tile material first – ceramic and porcelain handle stronger cleaners better than natural stone or glass
- Focus on grout lines which collect more dirt and mildew than tile surfaces themselves
- Avoid abrasive tools like steel wool and harsh chemicals that can permanently damage tiles and grout
- Regular maintenance with proper ventilation prevents heavy buildup and reduces deep cleaning frequency
Understanding Your Shower Tile Type and Common Problems
Identifying your shower tile material determines which cleaning methods work safely and effectively. Moreover, different tile types accumulate specific problems that require targeted approaches.
Common Shower Tile Materials
Ceramic tiles represent the most common shower surface material. These fired clay tiles handle most cleaning products well and resist staining effectively. However, their porous nature means they absorb moisture over time, leading to discoloration around edges.
Porcelain tiles offer superior water resistance compared to ceramic options. Consequently, porcelain surfaces resist soap scum buildup better and clean more easily. Nevertheless, hard water minerals still accumulate on porcelain surfaces, creating cloudy films.
Natural stone tiles including marble, travertine, and slate require gentle cleaning approaches. Furthermore, acidic cleaners damage natural stone permanently by etching the surface. These materials also absorb stains more readily than manufactured tiles.
Glass tiles show water spots and soap residue most prominently. Additionally, glass surfaces scratch easily when cleaned with abrasive materials. Their non-porous nature prevents stain absorption but highlights every water mark.
Primary Shower Tile Problems
Soap scum buildup creates the most persistent cleaning challenge in shower environments. This waxy residue combines soap ingredients with hard water minerals, forming stubborn films. Regular soap scum accumulation makes tiles appear dull and grimy despite frequent rinsing.
Hard water stains manifest as white, chalky deposits on tile surfaces. These mineral deposits concentrate where water evaporates regularly, particularly around fixtures and corners. Over time, hard water stains etch into certain tile materials permanently.
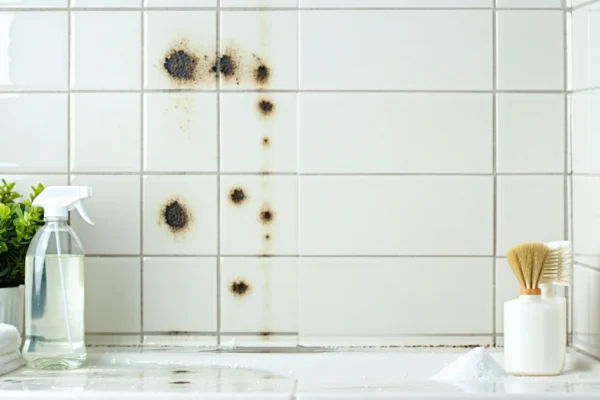
Mildew growth thrives in shower environments due to constant moisture and limited ventilation. Black or green mildew spots typically appear first in grout lines before spreading to tile surfaces. This fungal growth creates health concerns and unsightly discoloration.
Discoloration occurs when tiles absorb staining substances or react with cleaning chemicals. Yellow or brown stains often indicate iron deposits in water, while pink discoloration suggests bacterial growth. Some discoloration penetrates deeply enough to become permanent.
How Material Affects Cleaning Method Selection
Tile material properties dictate appropriate cleaning products and techniques. Understanding these relationships prevents damage while maximizing cleaning effectiveness.
| Tile Material | Safe Cleaners | Avoid | Special Considerations |
|---|---|---|---|
| Ceramic | Most commercial cleaners, vinegar, baking soda | Steel wool, harsh abrasives | Focus on grout protection |
| Porcelain | All-purpose cleaners, bleach solutions | Excessive scrubbing | Handles strongest products |
| Natural Stone | pH-neutral cleaners, mild soap | Vinegar, lemon, acidic products | Requires sealing maintenance |
| Glass | Glass cleaners, mild detergents | Abrasive pads, scouring powder | Shows streaks easily |
Acidic cleaners work excellently on ceramic and porcelain tiles for removing mineral deposits. However, these same products permanently damage marble, limestone, and other natural stone surfaces. Therefore, always test cleaning products in inconspicuous areas first.
Grout Lines: The Primary Problem Areas
Grout lines collect more dirt, soap residue, and mildew than tile surfaces due to their porous, textured nature. Additionally, grout sits recessed below tile level, creating spaces where debris accumulates. This positioning makes grout lines harder to clean during regular shower maintenance.
Unsealed grout absorbs moisture and staining substances rapidly. Consequently, shower mold establishes itself in grout lines first before spreading to surrounding surfaces. Once mold penetrates deeply into grout, surface cleaning becomes insufficient.
Grout discoloration progresses from light gray to dark brown or black over time. This color change indicates deep contamination that requires intensive cleaning or grout replacement. Furthermore, damaged grout allows water penetration behind tiles, potentially causing structural problems.
Grout Maintenance Alert
Essential Cleaning Supplies and Tools
Selecting the right cleaning supplies and tools determines the success of your shower tile cleaning project. Moreover, using appropriate materials prevents damage while ensuring thorough dirt removal. The following supplies work effectively across different tile types and grout conditions.
Basic Cleaning Supplies
Microfiber cloths provide superior cleaning power without scratching tile surfaces. These cloths trap dirt particles effectively and require minimal cleaning products to achieve excellent results. Additionally, microfiber cloths work well for both wet cleaning and final drying stages.
Soft-bristled brushes remove stubborn grime from grout lines without causing damage. Furthermore, angled brushes reach corner areas where dirt accumulates most heavily. Old toothbrushes serve as excellent tools for detailed grout cleaning work.
Spray bottles enable precise application of cleaning solutions to targeted areas. This controlled application prevents oversaturation while ensuring adequate coverage of dirty surfaces. Multiple spray bottles allow you to prepare different cleaning solutions simultaneously.
Natural Cleaning Agents
White vinegar dissolves mineral deposits and soap scum naturally without harsh chemicals. The acidic properties of vinegar break down calcium buildup effectively on ceramic and porcelain tiles. However, never use vinegar on natural stone tiles as it causes permanent etching damage.
Baking soda creates a gentle abrasive action that removes stains without scratching surfaces. This alkaline compound neutralizes acidic odors while providing mild scouring power. Additionally, baking soda paste works exceptionally well for treating discolored grout lines.
Lemon juice contains natural acids that brighten tiles and eliminate soap residue buildup. The citric acid in lemons provides similar cleaning benefits to vinegar while leaving a fresh scent. Nevertheless, avoid lemon juice on marble, limestone, or other acid-sensitive materials.
Commercial Cleaning Products
Tile-specific cleaners offer formulations designed for particular tile materials and common shower problems. These specialized products often contain surfactants that penetrate soap scum more effectively than general cleaners. Professional-grade tile cleaners typically deliver faster results with less scrubbing effort.
All-purpose cleaners provide versatile cleaning power for routine shower maintenance tasks. Quality all-purpose cleaners remove everyday dirt and light soap buildup without requiring specialized products. However, these cleaners may prove insufficient for heavy staining or mineral deposit removal.
Enzymatic cleaners break down organic matter like soap scum and body oils through biological action. These cleaners work slowly but effectively on stubborn organic stains that resist conventional cleaning methods. Furthermore, enzymatic products remain safe for septic systems and environmental health.
Tools and Materials to Avoid
Damage Prevention Warning
Abrasive scrubbers create microscopic scratches that trap dirt and make future cleaning more difficult. These scratches also provide breeding grounds for mold and bacteria growth. Instead, rely on chemical action and gentle mechanical cleaning for effective results.
Steel wool leaves metal particles embedded in grout lines that rust and create permanent staining. The aggressive action of steel wool also damages tile glazes and natural stone surfaces irreversibly. Consequently, professional cleaners never recommend steel wool for shower cleaning applications.
Harsh chemicals like bleach-based products can discolor grout and weaken tile adhesives over time. While these products provide immediate whitening effects, they often cause long-term damage that compromises shower integrity. Natural cleaning agents typically achieve similar results without structural risks.
Acidic drain cleaners accidentally splashed on tiles cause immediate and permanent damage to most surfaces. These products contain hydrochloric or sulfuric acid that etches tile glazes and dissolves grout materials. If you need to address shower drainage issues, consider our guide on how to clean sink drains for safer approaches.
Step-by-Step Cleaning Methods
Effective shower tile cleaning follows a systematic approach that maximizes cleaning power while protecting surfaces. Moreover, proper technique ensures thorough dirt removal without damaging delicate grout lines or tile finishes.
Pre-Cleaning Preparation
Remove all bottles, soap dispensers, and shower accessories before beginning the cleaning process. This step provides complete access to all tile surfaces and prevents cleaning products from damaging personal items. Additionally, clearing the area allows for thorough inspection of problem areas that require special attention.
Debris removal starts with sweeping or vacuuming loose hair, soap chips, and mineral deposits from corners and edges. Subsequently, rinse all surfaces with warm water to remove surface dirt and prepare tiles for deeper cleaning action. The initial rinse also helps identify areas with heavy soap scum or mineral buildup that need concentrated treatment.
Natural Cleaning Method
Vinegar and baking soda create a powerful cleaning combination that dissolves soap scum and mineral deposits naturally. Mix equal parts white vinegar and warm water in a spray bottle for the initial application. The acidic properties of vinegar break down calcium and lime deposits while remaining safe for most tile materials.
- Spray vinegar solution generously over all tile surfaces
- Allow the solution to penetrate for 10-15 minutes
- Sprinkle baking soda directly onto grout lines and stained areas
- Watch the fizzing reaction that lifts embedded dirt
- Let the combination work for an additional 5 minutes
This natural approach effectively cleans bathroom wall tiles without harsh chemicals that damage surfaces over time. Furthermore, the combination neutralizes odors while providing antimicrobial action against common shower bacteria.
Commercial Cleaner Application
Commercial shower cleaners require specific contact time to achieve maximum effectiveness against stubborn stains. Most products need between 5-15 minutes to break down soap scum and mineral deposits completely. However, never exceed manufacturer recommendations as prolonged exposure can damage grout or tile finishes.
Apply commercial cleaners in sections to maintain proper contact time across all surfaces. Start with the highest areas and work downward to prevent dripping onto already-cleaned sections. This systematic approach ensures even coverage while preventing waste of cleaning products.
Safety Note
Proper Scrubbing Technique
Gentle circular motions with a soft-bristled brush effectively remove dirt without scratching tile surfaces. Work in small sections to maintain control and ensure thorough cleaning of each area. Additionally, this technique prevents fatigue while delivering consistent cleaning pressure across all surfaces.
Grout lines require special attention with a dedicated grout brush or old toothbrush for precision cleaning. Use vertical and horizontal strokes along grout lines to remove embedded dirt and discoloration. The narrow bristles reach deep into grout channels where standard brushes cannot penetrate effectively.
Focus extra effort on corners and edges where soap scum accumulates most heavily. These areas often require additional scrubbing time to achieve the same cleanliness level as flat surfaces. Consequently, patience during this step prevents the need for repeated cleaning cycles.
Thorough Rinsing and Drying
Complete rinsing removes all cleaning residue that otherwise attracts new dirt and creates streaking on tile surfaces. Use warm water and work systematically from top to bottom to ensure no cleaning product remains behind. Inadequate rinsing leaves films that make tiles appear dull and attract soil more quickly.
Immediate drying prevents water spots and reduces humidity that encourages mold growth. Use a clean microfiber cloth or squeegee to remove excess water from all surfaces. Pay special attention to grout lines where standing water can cause discoloration and deterioration over time.
If persistent mold issues develop despite regular cleaning, consider consulting our comprehensive guide on how to clean shower mold for specialized treatment approaches. Proper ventilation after cleaning helps maintain the fresh, clean environment you’ve created through thorough tile maintenance.
Tackling Stubborn Stains and Heavy Buildup
When regular cleaning methods fail to restore your shower tiles, deep cleaning techniques become essential for removing years of accumulated grime and mineral deposits. Neglected shower tiles often develop multiple layers of soap scum, hard water stains, and mildew that require specialized approaches and stronger cleaning solutions to eliminate effectively.
Deep Cleaning Techniques for Neglected Shower Tiles
Start your deep cleaning process by creating a paste mixture using baking soda and water in a 3:1 ratio. This abrasive paste breaks down stubborn soap scum without scratching tile surfaces. Apply the paste generously across all tile surfaces, then allow it to sit for 15-20 minutes to penetrate embedded grime.
For heavily soiled areas, combine the baking soda treatment with white vinegar spray to create a fizzing reaction that lifts deep-set stains. The chemical reaction between these ingredients dissolves mineral deposits and soap residue more effectively than either product alone. However, never mix these ingredients in a container – apply them separately for safety.
Steam cleaning provides another powerful method for loosening stubborn buildup without harsh chemicals. Use a handheld steam cleaner or create steam with hot water and towels to soften hardened deposits before scrubbing. Subsequently, the softened grime removes more easily with standard cleaning tools.
Removing Hard Water Stains and Mineral Deposits
Hard water stains appear as chalky white or gray deposits that build up where water evaporates regularly. These mineral deposits contain calcium and magnesium that bond strongly to tile surfaces over time. Create a targeted solution using equal parts white vinegar and warm water to dissolve these stubborn minerals effectively.
Apply the vinegar solution using a spray bottle, then cover treated areas with plastic wrap to prevent evaporation. This technique allows the acid to work continuously for 30-60 minutes without drying out. The extended contact time ensures complete dissolution of even thick mineral buildup.
For severe mineral deposits, use CLR (Calcium, Lime & Rust remover) following manufacturer instructions carefully. These commercial products contain stronger acids that dissolve heavy mineral buildup quickly. Always ensure adequate ventilation and wear gloves when using these powerful cleaning agents.
Safety First
Addressing Black Grout and Mildew Issues
Black grout typically indicates mold or mildew growth that requires immediate attention to prevent health risks and structural damage. Create a powerful cleaning paste using oxygen bleach powder mixed with water to form a thick consistency. This gentler alternative to chlorine bleach effectively kills mold while being safer for regular use.
Apply the oxygen bleach paste directly to blackened grout lines using an old toothbrush or grout brush. Allow the paste to sit for 10-15 minutes before scrubbing vigorously to remove embedded mold spores. The mechanical action combined with the bleaching agent restores grout to its original color.
For persistent mold issues that resist standard treatments, consider using a grout pen or grout paint after thorough cleaning and disinfection. These products seal the grout surface and provide a fresh, uniform appearance while preventing future mold penetration. Professional assessment may be necessary if mold covers large areas or returns quickly after cleaning.
When to Use Stronger Cleaning Solutions Safely
Stronger cleaning solutions become necessary when standard methods fail to remove heavy buildup or persistent stains. Muriatic acid (diluted hydrochloric acid) effectively removes severe mineral deposits and grout discoloration, but requires extreme caution and proper safety equipment including gloves, eye protection, and respiratory masks.
Always test stronger cleaners on an inconspicuous area first to ensure they won’t damage your specific tile material. Natural stone tiles, for example, can be permanently etched by acidic cleaners that work safely on ceramic surfaces. Never use acid-based cleaners on marble, limestone, or travertine tiles as they will cause irreversible damage.
- Ensure adequate ventilation before using strong chemicals
- Wear protective equipment including gloves and eye protection
- Follow dilution ratios exactly as specified by manufacturers
- Never mix different cleaning products together
- Keep pets and children away from treated areas until fully rinsed
Professional-Grade Methods for Severe Cases
Professional tile restoration services employ specialized equipment and techniques unavailable to homeowners for the most challenging cleaning situations. High-pressure steam cleaning systems generate temperatures exceeding 200°F to dissolve stubborn deposits without chemical additives.
Rotary scrubbing machines with diamond-embedded pads can remove surface stains and restore tile texture without causing damage. These professional tools provide consistent pressure and speed that manual scrubbing cannot match. Additionally, professional-grade sealers applied after deep cleaning provide long-lasting protection against future staining.
Consider professional intervention when DIY methods repeatedly fail or when dealing with valuable natural stone installations that require specialized knowledge. Professional cleaners understand the chemical compatibility of different tile materials and can safely use industrial-strength products that would be dangerous for untrained users.
For comprehensive mold remediation in shower areas, professional services may be necessary to address underlying moisture issues that cause recurring problems. These specialists can identify and treat the root causes of persistent mold growth, ensuring long-term success beyond surface cleaning.
No-Scrub and Gentle Cleaning Alternatives
Gentle cleaning methods protect delicate tile surfaces while achieving excellent results without aggressive scrubbing. These techniques preserve tile integrity and reduce physical effort, making maintenance more sustainable for regular use.
Steam Cleaning Methods for Delicate Tiles
Steam cleaning uses high-temperature vapor to dissolve soap scum and mineral deposits without chemical additives. The heat penetrates porous surfaces, loosening grime that wipes away easily with a microfiber cloth. This method works exceptionally well on natural stone tiles and delicate ceramic surfaces that cannot withstand harsh chemicals.
Handheld steam cleaners generate temperatures between 200-250°F, effectively sanitizing surfaces while removing stubborn stains. Furthermore, steam cleaning eliminates bacteria and mold spores naturally, providing deep sanitation without toxic residues. The process requires only distilled water, making it environmentally friendly and safe for households with children or pets.
Spray-and-Wait Techniques Using Enzyme Cleaners
Enzyme cleaners break down organic matter through biological action rather than chemical abrasion. These specialized products contain proteins that digest soap residue, body oils, and organic stains over time. Simply spray the solution onto tiles and allow 15-30 minutes for enzymes to work before wiping clean.
This approach eliminates scrubbing entirely while achieving superior results on protein-based stains. Enzyme formulations target specific soil types, with some designed for soap scum and others for mineral deposits. Additionally, these cleaners continue working after application, providing ongoing protection against new soil accumulation.
Enzyme Cleaner Application
Gentle Cleaning for Natural Stone and Sensitive Surfaces
Natural stone tiles require pH-neutral cleaners to prevent etching and surface damage. Marble, travertine, and limestone dissolve when exposed to acidic substances like vinegar or lemon juice. Instead, use specialized stone cleaners with neutral pH levels between 6.5-7.5.
Soft-bristled brushes or microfiber cloths provide adequate agitation without scratching polished surfaces. Moreover, immediate drying prevents water spots and mineral buildup that can permanently stain porous stone. For persistent stains on natural stone, professional restoration may be necessary to avoid irreversible damage.
- Use only pH-neutral cleaners on natural stone
- Test cleaning products in inconspicuous areas first
- Avoid abrasive tools on polished surfaces
- Dry surfaces immediately after cleaning
- Seal natural stone annually for protection
Time-Saving Approaches for Regular Maintenance
Daily maintenance prevents heavy soil buildup that requires intensive cleaning later. Squeegee walls after each shower to remove water droplets that create mineral deposits and soap film. This simple habit reduces cleaning frequency from weekly to monthly deep cleans.
Weekly spray treatments with preventive cleaners maintain tile appearance between deep cleaning sessions. These products create protective barriers that repel water and soil, making future cleaning easier. Consequently, regular maintenance reduces the need for harsh chemicals and aggressive scrubbing techniques.
For comprehensive shower maintenance including mold prevention, consider implementing a complete cleaning routine that addresses all moisture-related issues. Professional-grade maintenance schedules can extend tile life significantly while reducing overall cleaning effort.
Daily squeegeeing reduces deep cleaning frequency by up to 75%
Maintenance and Prevention Strategies
Effective maintenance strategies prevent soap scum accumulation and reduce deep cleaning frequency. Daily habits create protective barriers against moisture damage, while weekly routines maintain tile appearance without intensive scrubbing. Furthermore, proper ventilation systems eliminate humidity that promotes mold growth and mineral deposits.
Daily Prevention Habits
Squeegee walls immediately after each shower to remove water droplets that create mineral deposits. This simple action prevents 75% of soap scum formation by eliminating the moisture that allows residue to bond with tile surfaces. Additionally, leave shower doors open for air circulation that accelerates drying.
Wipe down fixtures and faucets with microfiber cloths to prevent water spots and calcium buildup. These quick actions take less than two minutes but dramatically reduce weekly cleaning requirements. Moreover, daily maintenance prevents the formation of stubborn stains that require harsh chemicals to remove.
Weekly and Monthly Cleaning Schedules
| Frequency | Tasks | Time Required |
|---|---|---|
| Weekly | Spray preventive cleaner, wipe surfaces, clean glass | 10-15 minutes |
| Bi-weekly | Scrub grout lines, deep clean corners | 20-30 minutes |
| Monthly | Apply grout sealer, descale fixtures, inspect caulking | 45-60 minutes |
| Quarterly | Professional inspection, replace worn seals | 2-3 hours |
Weekly spray treatments with preventive cleaners create protective barriers that repel water and soap residue. These products contain surfactants that prevent soil adhesion, making future cleaning sessions significantly easier. Consequently, regular application reduces the need for abrasive scrubbing techniques.
Ventilation and Moisture Control
Proper ventilation reduces bathroom humidity by 60-80%, preventing mold growth and mineral deposits. Install exhaust fans rated for your bathroom size, typically requiring 1 CFM per square foot of floor space. Additionally, run ventilation systems during showers and for 30 minutes afterward to remove excess moisture.
Open windows when weather permits to create cross-ventilation that accelerates drying. Natural airflow removes humidity more effectively than mechanical systems alone. Furthermore, adequate ventilation prevents condensation that creates ideal conditions for mold and mildew growth in grout lines and corners.
Humidity Control Tip
Grout Sealing for Long-Term Protection
Seal grout lines annually to create waterproof barriers that prevent staining and moisture penetration. Quality sealers penetrate porous grout surfaces, forming protective films that repel water and soil. This preventive measure reduces cleaning frequency and extends grout lifespan significantly.
Apply penetrating sealers using foam brushes for even coverage across grout lines. Allow complete curing for 24-48 hours before exposing sealed areas to moisture. Properly sealed grout resists staining from soap, shampoo, and hard water minerals that typically discolor untreated surfaces.
Quick Cleaning Routines for Busy Schedules
- Keep all-purpose spray in shower for immediate spot cleaning
- Use daily shower sprays that work without rinsing
- Install soap dispensers to reduce soap scum formation
- Replace bar soap with liquid alternatives that rinse cleanly
- Implement 5-minute weekend touch-ups for problem areas
Daily shower sprays contain enzymes that break down soap residue automatically, eliminating the need for manual scrubbing. These products work continuously between uses, preventing buildup that requires intensive cleaning. Therefore, busy homeowners can maintain clean tiles with minimal time investment.
Preventive maintenance reduces deep cleaning time by up to 80% while extending tile and grout lifespan
Establish maintenance routines that fit your schedule rather than waiting for visible soil buildup. Consistent prevention requires less effort than reactive cleaning and preserves tile appearance longer. Moreover, regular maintenance prevents permanent staining that may require professional restoration services.
What Not to Use on Shower Tiles
Understanding which cleaning products damage shower tiles prevents costly repairs and permanent discoloration. Different tile materials react differently to harsh chemicals, making product selection crucial for maintaining surface integrity. Furthermore, certain household items that seem harmless can cause irreversible damage to both tiles and grout.
Cleaning Products That Damage Different Tile Materials
Acidic cleaners permanently etch natural stone tiles like marble, limestone, and travertine. These products dissolve calcium carbonate in stone surfaces, creating dull spots that require professional restoration. Additionally, bleach-based cleaners discolor colored grout and can weaken grout structure over time.
Ammonia-based products damage metal fixtures and can discolor certain tile glazes. Glass cleaners containing ammonia create streaks on glossy ceramic surfaces and may react with soap residue to form cloudy films. Moreover, oil-based cleaners leave residues that attract dirt and create slippery surfaces in wet shower environments.
Natural Stone Warning
Abrasive bathroom cleaners scratch glazed ceramic surfaces, removing protective coatings that resist staining. Once scratched, tiles become more porous and difficult to clean effectively. Therefore, always check product labels for abrasive warnings before application.
Abrasive Tools That Scratch Surfaces
Steel wool pads create microscopic scratches that trap dirt and bacteria in tile surfaces. These scratches become visible over time as they collect soap scum and mineral deposits. Similarly, scouring powders contain abrasive particles that permanently damage tile glazes and grout surfaces.
Pumice stones remove material from tile surfaces rather than just cleaning them. While effective for removing hard water stains, pumice creates irreversible surface damage on glazed ceramics. Additionally, wire brushes gouge grout lines and scratch metal fixtures beyond repair.
- Avoid these abrasive tools: Steel wool, scouring pads, pumice stones, wire brushes
- Safe alternatives: Soft-bristled brushes, microfiber cloths, plastic scrapers
- For stubborn stains: Baking soda paste with soft cloth application
Chemical Combinations to Avoid for Safety
Mixing bleach with ammonia creates toxic chloramine gas that causes respiratory damage. This dangerous combination occurs when using different cleaning products simultaneously without proper ventilation. Furthermore, combining bleach with vinegar produces chlorine gas, which can cause severe lung irritation.
Hydrogen peroxide mixed with vinegar forms peracetic acid, an unstable compound that can cause chemical burns. Even using these products consecutively without rinsing between applications creates dangerous reactions. Therefore, always use one cleaning product at a time and rinse thoroughly before switching products.
Never mix cleaning chemicals. Use one product completely, rinse thoroughly, then apply a different cleaner if needed.
Professional cleaning services follow strict protocols to prevent chemical interactions. They complete each cleaning step fully before introducing new products to ensure safety and effectiveness. Consequently, homeowners should adopt similar practices for safe shower cleaning.
Common Household Items That Cause Permanent Damage
Lemon juice and vinegar etch natural stone surfaces permanently, despite their reputation as “natural” cleaners. These acids dissolve mineral components in stone tiles, creating dull patches that require professional refinishing. However, these products work safely on ceramic and porcelain tiles when used properly.
Toothpaste contains mild abrasives that scratch tile glazes over repeated use. While effective for removing small stains, toothpaste gradually dulls tile surfaces and creates microscopic scratches. Similarly, baking soda becomes abrasive when scrubbed vigorously, especially on soft stone surfaces.
Cola and other acidic beverages damage grout and natural stone when used as cleaning agents. These products contain phosphoric acid that weakens grout structure and etches stone surfaces. Additionally, dish soap in high concentrations leaves residues that attract dirt and create slippery conditions.
Understanding material compatibility prevents expensive tile replacement and maintains shower safety. Always test cleaning products in inconspicuous areas before full application. Moreover, when dealing with persistent mold issues, consider consulting our guide on how to clean shower mold for safe and effective removal techniques.
Professional tile manufacturers provide specific cleaning recommendations for their products. Following these guidelines preserves warranties and ensures optimal tile performance throughout their lifespan. Therefore, always consult manufacturer instructions before using any cleaning product on shower tiles.
Frequently Asked Questions
What should you not clean tile with?
Avoid using abrasive tools like steel wool, scouring pads, or harsh brushes that can scratch tile surfaces. Never use acidic cleaners like lemon juice or vinegar on natural stone tiles (marble, travertine, slate) as they cause permanent etching. Avoid bleach-based cleaners on colored grout and stay away from ammonia-based products that can damage certain tile finishes. Additionally, avoid using oil-based soaps that leave residue and attract more dirt.
How to clean shower tiles with vinegar?
Create a solution of equal parts white vinegar and water in a spray bottle. Spray the mixture on ceramic or porcelain tiles and let it sit for 10-15 minutes to dissolve soap scum and hard water stains. Use a soft cloth or non-abrasive sponge to wipe clean, then rinse thoroughly with water. For stubborn buildup, heat the vinegar solution slightly before applying. Important: Only use vinegar on ceramic and porcelain tiles, never on natural stone surfaces.
How to clean shower tiles without scrubbing?
Use a paste of baking soda and water applied to tiles and left for 15-20 minutes to break down grime naturally. Alternatively, spray a commercial tile cleaner and allow proper dwell time before wiping with a microfiber cloth. For daily maintenance, use a daily shower spray after each use to prevent buildup. Steam cleaning is another no-scrub option that uses heat and moisture to loosen dirt and soap scum effectively.
What do professionals use to clean showers?
Professional cleaners typically use commercial-grade alkaline cleaners that break down soap scum and mineral deposits more effectively than household products. They often employ steam cleaning equipment for deep sanitization and use specialized grout cleaners with hydrogen peroxide or oxygen bleach. Professionals also use microfiber cloths and squeegees to prevent water spots and may apply protective sealers to grout lines after deep cleaning.
How do I make my shower tile look new again?
Start with a deep cleaning using appropriate cleaners for your tile type, followed by thorough grout cleaning with a grout-specific cleaner. Remove all soap scum, hard water stains, and mildew completely. Consider resealing grout lines if they appear discolored or porous. For natural stone tiles, use a stone polish after cleaning. Finally, establish a regular maintenance routine with daily shower sprays and weekly deep cleaning to maintain the fresh appearance.
How to clean shower tiles naturally?
Natural cleaning methods include using white vinegar and water for ceramic and porcelain tiles, baking soda paste for gentle scrubbing action, and castile soap for regular maintenance. Create a powerful natural cleaner by combining baking soda, vinegar, and a few drops of essential oil like tea tree for antimicrobial properties. Lemon juice works well on ceramic tiles for removing hard water stains, but avoid it on natural stone surfaces.
How to clean grout that has turned black?
Black grout indicates mold or mildew growth that requires immediate attention. Create a paste using baking soda and hydrogen peroxide, apply to affected grout lines, and let sit for 10-15 minutes. Use an old toothbrush to gently scrub the paste into grout lines. For severe cases, use a commercial mold and mildew remover following manufacturer instructions. Always ensure proper ventilation and consider wearing gloves and a mask during cleaning.
How to clean shower tiles with baking soda?
Make a paste using three parts baking soda to one part water. Apply the paste to tile surfaces and grout lines, focusing on stained or discolored areas. Let the paste sit for 15-20 minutes to break down soap scum and stains. Use a soft brush or cloth to gently work the paste into the surface, then rinse thoroughly with warm water. For extra cleaning power, spray vinegar over the baking soda paste to create a fizzing action that helps lift stubborn grime.
How often should I clean my shower tiles?
Perform daily maintenance by using a squeegee or towel to remove water after each shower and applying a daily shower spray. Conduct weekly deep cleaning using appropriate tile cleaners to prevent soap scum buildup. Schedule monthly intensive cleaning for grout lines and hard-to-reach areas. The frequency may increase in hard water areas or households with heavy shower usage. Regular maintenance prevents the need for harsh chemicals and aggressive scrubbing.
Can I use bleach on shower tiles?
Bleach can be used safely on white ceramic and porcelain tiles for disinfection and mold removal. However, avoid bleach on colored grout as it may cause fading or discoloration. Never use bleach on natural stone tiles as it can damage the surface. Always dilute bleach according to manufacturer instructions, ensure proper ventilation, and never mix bleach with other cleaning products. Consider oxygen bleach as a gentler alternative for colored surfaces.
How to prevent soap scum buildup on shower tiles?
Prevention strategies include using liquid soap instead of bar soap, which creates less scum. Install a water softener if you have hard water to reduce mineral deposits. Apply a daily shower spray after each use and squeegee or towel-dry surfaces to prevent water spots. Ensure proper bathroom ventilation with exhaust fans to reduce humidity. Consider applying a protective coating to tiles that repels water and soap residue.
What's the best way to clean glass shower tiles?
Glass tiles require gentle cleaning to avoid scratches. Use a microfiber cloth with warm water for daily cleaning, or a mixture of white vinegar and water for removing water spots and soap residue. Avoid abrasive cleaners or tools that can scratch the glass surface. For stubborn buildup, use a commercial glass cleaner specifically designed for shower environments. Always dry glass tiles with a clean, lint-free cloth to prevent water spots.
How to remove hard water stains from shower tiles?
Hard water stains appear as white, chalky deposits on tile surfaces. For ceramic and porcelain tiles, use white vinegar heated slightly and applied with a spray bottle. Let it sit for 15-20 minutes before wiping clean. For stubborn stains, make a paste with baking soda and vinegar. On natural stone tiles, use a pH-neutral stone cleaner instead of acidic solutions. Commercial lime and calcium removers work effectively but should be used according to manufacturer instructions.
Should I seal my shower tiles after cleaning?
Sealing depends on your tile type. Natural stone tiles should be sealed regularly (every 1-2 years) to prevent staining and water damage. Ceramic and porcelain tiles typically don’t require sealing, but their grout lines should be sealed annually to prevent moisture penetration and staining. Glass tiles don’t require sealing. Always clean tiles thoroughly before applying any sealer and follow manufacturer instructions for proper application and curing time.
You May Also Like
How to Clean Shower Mold: Complete Removal Guide 2026
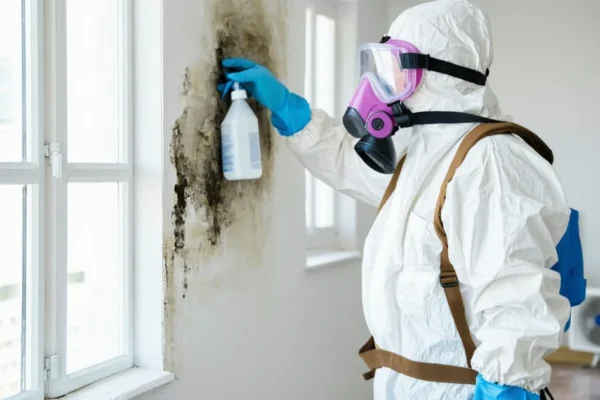
How to Clean Mould Off Walls: Complete Removal Guide 2026