How to Clean a Keyboard: Complete Guide for 2026
How to clean a keyboard properly requires the right supplies, techniques, and safety precautions to remove dust, debris, and germs without damaging your device. Regular keyboard cleaning prevents sticky keys, improves hygiene, and extends your keyboard’s lifespan. Whether you have a mechanical, membrane, or laptop keyboard, the cleaning process involves basic surface cleaning with compressed air and isopropyl alcohol, or deeper cleaning with key removal for stubborn buildup.
Most keyboards benefit from weekly light cleaning and monthly deep cleaning sessions. Additionally, proper preparation and the right cleaning supplies make the difference between effective maintenance and potential damage. Similar to cleaning laptop screens safely, keyboard cleaning requires gentle techniques and appropriate products.
This comprehensive guide covers everything from essential cleaning supplies to advanced techniques for different keyboard types. Furthermore, you’ll learn maintenance schedules, safety precautions, and how to handle spills effectively.
TL;DR
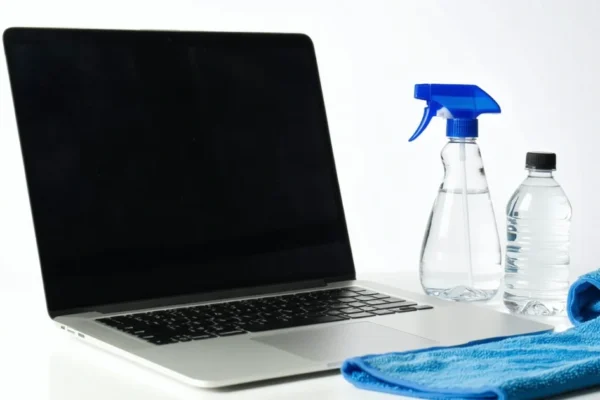
- Essential supplies: compressed air, 70% isopropyl alcohol, microfibre cloths, and cotton swabs
- Basic method: power down keyboard, shake out debris, use compressed air, wipe with alcohol-dampened cloth
- Deep cleaning: remove keys safely, clean keycaps in soapy water, clean base thoroughly, reassemble carefully
- Maintenance schedule: weekly light cleaning, monthly deep cleaning, immediate spill response
Essential Supplies for Keyboard Cleaning
Effective keyboard cleaning requires specific supplies that remove dirt without damaging delicate components. Moreover, using the wrong materials can scratch surfaces, leave residue, or cause electrical damage to your device.
Compressed Air Canister
Compressed air canisters represent the most essential tool for keyboard maintenance. These pressurised containers blast away dust particles, crumbs, and debris from between keys where fingers cannot reach. Furthermore, compressed air removes contaminants without introducing moisture that could damage electrical components.
Quality compressed air products deliver consistent pressure and include extension tubes for precise targeting. Additionally, holding the canister upright prevents liquid propellant from spraying onto your keyboard surface.
Isopropyl Alcohol Solution
Isopropyl alcohol at 70% concentration provides optimal cleaning and disinfection properties for keyboards. This alcohol percentage effectively kills bacteria and viruses while evaporating quickly to prevent moisture damage. Meanwhile, higher concentrations evaporate too rapidly, reducing cleaning effectiveness.
The alcohol dissolves oils, fingerprints, and sticky residues that accumulate on key surfaces. However, never apply alcohol directly to your keyboard – always dampen cleaning materials first.
Microfibre Cloths
Microfibre cloths offer gentle yet effective surface cleaning for keyboard maintenance. These synthetic fibres trap dust particles and absorb oils without scratching delicate key surfaces or leaving lint behind. Similarly, microfibre materials work effectively when slightly dampened with isopropyl alcohol.
Quality microfibre cloths remain reusable after washing, making them environmentally friendly and cost-effective. Therefore, keep dedicated keyboard cleaning cloths separate from other household cleaning materials.
Cotton Swabs for Precision Cleaning
Cotton swabs enable detailed cleaning in tight spaces between keys and around keyboard edges. These precision tools reach areas where cloths cannot access, removing accumulated grime and debris. Additionally, cotton swabs work perfectly when lightly moistened with isopropyl alcohol for spot cleaning.
The cotton tips absorb cleaning solutions effectively while providing gentle scrubbing action. Consequently, cotton swabs excel at cleaning individual key edges and removing stubborn buildup around frequently used keys.
Keycap Puller Tool
Keycap pullers safely remove individual keys from mechanical keyboards without causing damage. These specialised tools distribute pulling force evenly across keycap edges, preventing cracks or breaks during removal. Furthermore, keycap pullers enable thorough cleaning of key switches and underlying surfaces.
Wire-style keycap pullers work best for most mechanical keyboards, while plastic pullers suit delicate or low-profile keycaps. However, membrane and laptop keyboards typically require different removal techniques or professional service.
Small Cleaning Brush
A small brush or clean toothbrush removes stubborn debris that compressed air cannot dislodge. Soft-bristled brushes gently scrub away accumulated dirt while reaching into crevices around keys. Similarly to cleaning laptop screens safely, gentle brushing prevents damage to sensitive components.
Natural bristle brushes work effectively for dry cleaning, while synthetic bristles handle damp cleaning with isopropyl alcohol. Nevertheless, ensure brushes remain clean and dedicated solely to electronics cleaning to prevent contamination.
| Supply | Primary Use | Key Benefit |
|---|---|---|
| Compressed Air | Dust removal | No moisture risk |
| 70% Isopropyl Alcohol | Disinfection | Quick evaporation |
| Microfibre Cloth | Surface wiping | Lint-free cleaning |
| Cotton Swabs | Detail work | Precision access |
| Keycap Puller | Key removal | Safe extraction |
| Small Brush | Stubborn debris | Gentle scrubbing |
Pre-Cleaning Preparation
Proper preparation ensures safe keyboard cleaning while preventing damage to electronic components. Additionally, thorough preparation streamlines the cleaning process and reduces the risk of losing small parts during disassembly.
Power Down and Disconnect
Power down your computer completely before beginning any keyboard cleaning procedure. Subsequently, unplug the keyboard from your computer or switch off wireless keyboards to prevent accidental key presses during cleaning. This safety measure protects both your keyboard and computer from electrical damage.
Wired keyboards require physical disconnection from USB ports, while wireless models need battery removal or power switches turned off. Moreover, allowing powered-down keyboards to rest for several minutes ensures complete electrical discharge before cleaning begins.
Document Key Layout
Taking a clear photograph of your keyboard layout provides essential reference material for reassembly. Furthermore, this documentation proves invaluable when replacing keys in their correct positions after thorough cleaning. Different keyboard layouts and custom keycap arrangements require careful documentation to prevent confusion.
Capture multiple angles showing the entire keyboard surface, including function keys and special characters. Similarly, photograph any unique key arrangements or custom layouts that deviate from standard QWERTY configurations.
Establish Clean Workspace
Select a well-lit, clean work area with adequate space for keyboard disassembly and cleaning supplies. Consequently, proper lighting enables precise identification of debris and ensures thorough cleaning of all surfaces. A clutter-free workspace prevents contamination and reduces the likelihood of losing small components.
Cover your work surface with a clean towel or microfibre cloth to create a soft landing area for removed keys. Additionally, ensure adequate ventilation when using isopropyl alcohol or other cleaning solutions during the process.
Prepare Component Storage
Ready a small container or bowl specifically for storing removed keycaps during cleaning. This organisation system prevents key loss and maintains order throughout the disassembly process. Multiple containers help separate different key types or keyboard sections for easier reassembly.
Label containers clearly if cleaning multiple keyboards or working with complex layouts. Furthermore, shallow containers work better than deep bowls, as they allow easy visibility and access to stored keycaps during reassembly.
Basic Surface Cleaning Method
The fundamental approach to keyboard cleaning involves systematic removal of surface debris and sanitisation of accessible areas. This method effectively addresses 90% of keyboard contamination without requiring complete disassembly. Most users can complete this basic cleaning process within 10-15 minutes using common household supplies.
Begin by disconnecting your keyboard from the computer or switching off wireless models to prevent accidental key presses. Subsequently, turn the keyboard completely upside down over a clean surface or bin. Gently shake the keyboard from side to side, allowing loose crumbs, dust particles, and debris to fall naturally from between the keys.
Continue shaking for 30-60 seconds whilst varying the angle to dislodge stubborn particles. This mechanical removal process eliminates approximately 70% of loose debris without requiring additional tools or cleaning solutions.
Compressed Air Application
Compressed air provides targeted cleaning power for areas that shaking cannot reach effectively. Hold the compressed air canister upright and maintain a 6-inch distance from the keyboard surface to prevent moisture damage from propellant condensation.
Direct short bursts of air between key rows, working systematically from left to right across the keyboard. Focus particularly on heavily used areas around the spacebar, enter key, and frequently pressed letters. The pressurised air stream forces out embedded dust, hair, and microscopic particles that accumulate in key mechanisms.
Tilt the keyboard at various angles during air cleaning to ensure debris falls away from the device rather than settling deeper into crevices. Additionally, this technique proves especially effective for laptop keyboards where key removal remains impractical.
Surface Sanitisation Process
Prepare your cleaning solution by dampening a microfibre cloth with 70% isopropyl alcohol. The cloth should feel slightly moist but never dripping wet, as excess liquid can seep beneath keys and damage internal circuitry. Isopropyl alcohol evaporates quickly and kills 99.9% of bacteria and viruses on contact.
Wipe each keycap surface using gentle circular motions, ensuring complete coverage of the key top and visible sides. Pay special attention to frequently touched keys like the spacebar, shift keys, and enter key, which harbour the highest concentration of germs and oils from fingertips.
Clean the keyboard frame and surrounding areas using the same dampened cloth technique. Moreover, this systematic approach removes fingerprints, oils, and surface stains that accumulate through regular use.
Detailed Edge Cleaning
Cotton swabs provide precision cleaning access to tight spaces around individual keys and keyboard edges. Lightly dampen the cotton swab with isopropyl alcohol, ensuring it remains moist rather than saturated to prevent liquid seepage.
Navigate carefully around each key’s perimeter, removing accumulated grime and debris from gaps that cloth cleaning cannot reach. Focus on areas where keys meet the keyboard frame, as these spaces typically collect the most stubborn contamination.
Use fresh cotton swabs as they become dirty to maintain cleaning effectiveness. Furthermore, this detailed approach ensures thorough sanitisation of all accessible keyboard surfaces without risking component damage.
Drying and Reconnection
Allow the keyboard to air dry completely for a minimum of 15-20 minutes before reconnecting to your computer. Proper drying prevents electrical shorts and ensures all cleaning solution residue evaporates fully. Position the keyboard in a well-ventilated area away from direct heat sources.
Test several keys gently to confirm they move freely and feel completely dry before restoring power connections. Complete drying eliminates the risk of component damage and ensures optimal keyboard performance following the cleaning process.
Deep Cleaning with Key Removal
Deep cleaning requires key removal when standard surface cleaning cannot address persistent contamination. Consider this intensive method when keys stick consistently, heavy debris buildup obstructs key movement, or liquid spills have penetrated beneath the keycaps.
Sticky keys indicate that contaminants have accumulated around the key mechanisms, whilst heavy buildup suggests months of neglected maintenance. Additionally, deep cleaning becomes necessary when visible grime persists despite regular surface cleaning attempts.
Safe Key Removal Techniques
Mechanical keyboards typically feature removable keycaps that detach easily using a keycap puller or flat tool. Insert the removal tool beneath opposite corners of the keycap, applying gentle upward pressure until the cap releases from its switch.
Membrane keyboards require more delicate handling, as keys connect directly to the underlying membrane. Use a thin, flat tool to carefully pry keys upward, working slowly to avoid tearing the membrane connection. However, some membrane keyboards feature non-removable keys that cannot be safely detached.
Laptop keyboards demand extreme caution during key removal, as the attachment mechanisms vary significantly between manufacturers. Research your specific laptop model’s key removal process before attempting disassembly, since improper technique can permanently damage the keyboard.
Keycap Cleaning Process
Prepare a bowl of warm soapy water using mild dish soap, maintaining water temperature around 40°C for optimal cleaning effectiveness. Submerge the removed keycaps completely, allowing them to soak for 15-20 minutes to loosen stubborn grime and oils.
Scrub each keycap gently using a soft-bristled toothbrush, paying particular attention to textured surfaces and recessed areas where debris accumulates. Rinse thoroughly under running water to remove all soap residue, then inspect each keycap for remaining contamination.
Stubborn stains may require additional treatment with isopropyl alcohol applied to a cotton swab. This targeted approach removes persistent marks without compromising the keycap material or printed legends.
Keyboard Base and Switch Cleaning
Clean the exposed keyboard base using compressed air to remove loose debris from switch housings and surrounding areas. Direct the air stream at an angle to prevent pushing debris deeper into the mechanisms.
Dampen a cotton swab with isopropyl alcohol to clean individual switch housings and the keyboard frame. Work systematically across the keyboard, replacing cotton swabs frequently to maintain cleaning effectiveness. This process removes accumulated oils and residue that standard cleaning cannot reach.
Avoid excessive liquid application around electrical components, particularly on membrane keyboards where moisture can damage the underlying circuitry. Similarly, proper cleaning techniques require careful moisture control to prevent component damage.
Keycap Drying and Reassembly
Pat keycaps dry with a clean, lint-free cloth, then arrange them on a towel for complete air drying. Allow 2-3 hours for thorough drying, ensuring no moisture remains in crevices or attachment points before reassembly.
Photograph the keyboard before key removal to reference proper key placement during reassembly. This documentation prevents confusion and ensures correct key positioning, particularly for keyboards with non-standard layouts.
Reattach keys by aligning them carefully over their corresponding switches or membrane contacts, then pressing down firmly until they click into place. Test each key’s movement and response before proceeding to the next, ensuring proper seating and functionality.
Complete the reassembly process systematically, working from one side of the keyboard to the other to maintain organisation. Finally, perform a comprehensive function test of all keys to confirm successful reassembly and optimal keyboard performance.
Laptop Keyboard Cleaning Considerations
Laptop keyboards require specialised cleaning approaches due to their integrated design and proximity to sensitive internal components. Unlike desktop keyboards, laptop keyboards connect directly to the motherboard through delicate ribbon cables, making moisture damage a critical concern during cleaning operations.
The integrated construction of laptop keyboards prevents complete disassembly for thorough cleaning. Therefore, cleaning techniques must focus on surface-level maintenance whilst protecting the underlying electronics from liquid infiltration.
Moisture Control Techniques
Apply minimal moisture techniques when cleaning laptop keyboards to prevent liquid damage to internal circuitry. Use barely damp cotton swabs or microfibre cloths, ensuring excess moisture removal before contact with the keyboard surface.
Isopropyl alcohol solutions should contain 70% concentration maximum for laptop keyboard cleaning, as higher concentrations evaporate too quickly and may damage plastic components. Additionally, apply cleaning solutions to the cloth rather than directly onto the keyboard to maintain precise moisture control.
Compressed air provides the safest cleaning method for laptop keyboards, effectively removing debris without moisture risks. However, maintain 45-degree angles when using compressed air to prevent forcing particles deeper into the keyboard mechanism.
Trackpad and Palm Rest Maintenance
Clean trackpad surfaces using gentle circular motions with slightly damp microfibre cloths, avoiding excessive pressure that might damage the touch-sensitive surface. The trackpad’s capacitive sensors require careful handling to maintain responsiveness and accuracy.
Palm rest areas accumulate oils and debris from regular hand contact, requiring consistent cleaning attention. Use mild cleaning solutions applied to cloths rather than direct application, working systematically across the entire palm rest surface.
Focus particular attention on the junction areas between the trackpad and palm rest, where debris commonly accumulates. These transition zones often harbour bacteria and require thorough cleaning to maintain hygiene standards.
Key Removal Restrictions
Avoid key removal on laptop keyboards unless absolutely necessary, as the delicate attachment mechanisms differ significantly from desktop keyboards. Laptop keys typically use scissor switches or butterfly mechanisms that break easily during removal attempts.
Modern laptop keyboards employ complex key attachment systems with multiple small plastic components that require specific tools and techniques for safe removal. Improper removal attempts frequently result in permanent key damage or complete key loss.
When key removal becomes necessary, consult the manufacturer’s service manual for proper procedures and required tools. Professional repair services offer safer alternatives for deep laptop keyboard cleaning that requires key removal.
Focus cleaning efforts on accessible surfaces using appropriate tools and techniques rather than attempting risky disassembly procedures. This approach maintains keyboard functionality whilst achieving satisfactory cleanliness levels for most users’ needs. For comprehensive laptop maintenance, consider professional laptop screen cleaning alongside keyboard maintenance.
Mechanical vs Membrane Keyboard Differences
Understanding the fundamental differences between mechanical keyboards and membrane keyboards proves essential for effective cleaning approaches. These keyboard types require distinctly different maintenance strategies due to their contrasting construction methods and component materials.
Mechanical Keyboard Cleaning Advantages and Methods
Mechanical keyboards offer superior cleaning accessibility compared to their membrane counterparts. Individual mechanical switches allow complete keycap removal without damaging the underlying mechanism, enabling thorough debris extraction from switch housings.
The modular design of mechanical keyboards permits comprehensive cleaning of each component separately. Furthermore, the elevated keycap position creates natural gaps that facilitate airflow and prevent moisture accumulation beneath keys.
Cleaning mechanical keyboards involves removing all keycaps using a keycap puller tool or improvised wire tool. Subsequently, compressed air effectively dislodges debris from exposed switch mechanisms, whilst individual keycaps undergo separate washing in warm soapy water.
Switch lubrication maintenance becomes possible on mechanical keyboards, extending their operational lifespan significantly. This accessibility advantage makes mechanical keyboards ideal for users requiring frequent deep cleaning cycles.
Membrane Keyboard Limitations and Safe Practices
Membrane keyboards present significant cleaning challenges due to their integrated construction design. The rubber dome switches connect directly to a flexible membrane circuit, creating a sealed system that restricts deep cleaning access.
Key removal on membrane keyboards often damages the underlying rubber domes or membrane connections permanently. Therefore, cleaning must focus exclusively on surface-level maintenance using gentle techniques and minimal moisture application.
Safe membrane keyboard cleaning requires isopropyl alcohol wipes applied sparingly to keycap surfaces only. Additionally, compressed air application must remain brief and low-pressure to prevent membrane displacement or damage.
Avoid liquid penetration beneath membrane keycaps, as moisture can compromise the electrical connections and render keys permanently unresponsive. This limitation makes membrane keyboards unsuitable for environments requiring frequent intensive cleaning.
Switch-Specific Cleaning Considerations
Different mechanical switch types require tailored cleaning approaches based on their internal mechanisms. Linear switches like Cherry MX Red contain fewer internal components, making them easier to clean than complex tactile or clicky variants.
Tactile switches incorporate additional contact leaves that require careful cleaning to maintain their distinctive feedback characteristics. Meanwhile, clicky switches contain delicate click mechanisms that demand gentle handling during maintenance procedures.
Hot-swappable mechanical keyboards offer the ultimate cleaning convenience, allowing complete switch removal without soldering requirements. This design enables thorough switch cleaning and replacement when necessary.
Optical mechanical switches require different cleaning considerations, as their light-based actuation systems must remain free from dust particles that could interfere with optical sensors.
Keycap Material Differences and Appropriate Cleaners
ABS plastic keycaps represent the most common keycap material, offering excellent chemical resistance to standard cleaning solutions. These keycaps tolerate isopropyl alcohol, mild detergents, and even diluted bleach solutions for disinfection purposes.
PBT plastic keycaps provide superior durability and chemical resistance compared to ABS alternatives. However, they require gentler cleaning approaches to preserve their textured surface finish and prevent colour fading.
Double-shot keycaps feature legends moulded from different plastic colours, creating permanent markings that resist wear. These keycaps tolerate aggressive cleaning methods without legend degradation, unlike pad-printed alternatives.
Artisan keycaps made from resin materials or metal require specialised cleaning approaches to prevent surface damage. Similarly, wooden keycaps demand oil-based conditioners rather than alcohol-based cleaners to maintain their natural finish and prevent cracking.
Dealing with Spills and Sticky Keys
Liquid spills demand immediate action to prevent permanent keyboard damage and component failure. First, disconnect the keyboard from power sources or unplug USB connections to eliminate electrical hazard risks. Subsequently, turn the keyboard upside down to drain excess liquid away from internal components.
Blot remaining moisture using absorbent paper towels rather than wiping motions that spread liquid deeper into mechanisms. Additionally, remove affected keycaps immediately to access underlying switch housings and prevent liquid penetration into circuit boards.
Sticky beverages like coffee, tea, or soft drinks create the most challenging spill scenarios due to their sugar content and acidic properties. These substances crystallise as they dry, creating permanent adhesive bonds between moving components that compromise key functionality.
Cleaning Dried Sticky Substances
Dried sticky residues require targeted dissolution using appropriate cleaning agents matched to the contaminating substance. Sugar-based residues respond effectively to warm distilled water applications, while protein-based spills need enzymatic cleaners for complete removal.
Apply cleaning solution using cotton swabs to affected areas, allowing penetration time before gentle agitation. Furthermore, avoid excessive moisture that could damage electronic components or create new contamination pathways.
Stubborn adhesive residues may require multiple treatment cycles with increasing solution concentrations. However, patience prevents component damage that aggressive scraping or harsh chemicals might cause to delicate switch mechanisms.
Removing Food Particles and Crumbs
Food debris accumulates between keys through normal usage patterns, creating hygiene concerns and mechanical interference. Compressed air provides the most effective initial removal method, dislodging particles without liquid contamination risks.
Direct airflow at 45-degree angles to key gaps rather than perpendicular directions that push debris deeper into mechanisms. Moreover, work systematically across the keyboard surface to ensure comprehensive particle removal from all affected areas.
Greasy food residues require degreasing agents for complete elimination, as simple air blowing cannot remove oil-based contamination. Use diluted dish soap solutions applied with minimal moisture to dissolve fatty deposits without component damage.
Restoring Key Functionality After Spills
Post-spill functionality restoration begins with complete moisture elimination through extended drying periods in controlled environments. Position keyboards in warm, dry locations with adequate airflow for 24-48 hours minimum before reconnection attempts.
Test individual key responses systematically after reassembly, identifying any remaining sticky or unresponsive switches that require additional cleaning attention. Mechanical switches often recover functionality after thorough cleaning, while membrane keyboards may suffer permanent damage from liquid infiltration.
Lubricate restored mechanical switches using appropriate switch lubricants to ensure smooth operation and prevent future sticking issues. However, avoid over-lubrication that attracts dust particles and creates new contamination problems over time.
Consider professional ultrasonic cleaning services for valuable keyboards with extensive contamination that exceeds home cleaning capabilities. These services use specialised equipment and solutions to restore functionality without component replacement costs, particularly beneficial for expensive mechanical keyboards with premium switches.
Maintenance Schedule and Prevention
Establishing a consistent keyboard maintenance schedule prevents contamination buildup and extends device lifespan significantly. Regular cleaning routines require less intensive effort than emergency deep cleaning sessions, whilst maintaining optimal performance throughout daily use.
Weekly Light Cleaning Routine
Weekly maintenance involves gentle surface cleaning that removes fresh debris before it becomes embedded in key mechanisms. Turn your keyboard upside down and shake gently to dislodge loose particles that accumulate between keys during regular typing sessions.
Use compressed air in short bursts to clear remaining surface debris from key gaps and crevices. Follow this with a microfibre cloth lightly dampened with isopropyl alcohol to wipe key surfaces and remove fingerprint oils that attract additional contamination.
Monthly Deep Cleaning Schedule
Monthly deep cleaning sessions address accumulated grime that weekly maintenance cannot eliminate completely. Remove keycaps systematically using appropriate tools, then clean each component individually with suitable solutions for thorough decontamination.
Inspect switch mechanisms for wear signs during monthly sessions, identifying potential issues before they cause functionality problems. Clean the keyboard base plate thoroughly, removing all debris from switch housings and stabiliser mechanisms that affect key response quality.
Document your cleaning schedule using a maintenance log to track cleaning dates and identify patterns in contamination accumulation. This systematic approach helps optimise cleaning frequency based on your specific usage environment and habits.
Daily Habits for Cleaner Keyboards
Prevention through daily habits reduces cleaning requirements whilst maintaining keyboard hygiene consistently. Wash hands thoroughly before typing sessions to minimise oil transfer and bacterial contamination that accumulates on key surfaces over time.
Avoid eating directly over keyboards, as food particles inevitably fall between keys regardless of careful eating practices. Instead, maintain designated eating areas away from workstations to prevent crumb infiltration and sticky residue formation.
Cover keyboards with dust covers when not in use, particularly in environments with high airborne particle concentrations. These protective covers prevent passive contamination whilst maintaining easy access for immediate use when needed.
Environmental Factors Affecting Cleanliness
Humidity levels significantly impact keyboard cleanliness, with high moisture encouraging bacterial growth and low humidity increasing static electricity that attracts dust particles. Maintain indoor humidity between 40-60% for optimal keyboard hygiene conditions.
Air quality directly correlates with keyboard contamination rates, as airborne particles settle continuously on exposed surfaces. Position keyboards away from heating vents and air conditioning outlets that circulate dust and debris throughout workspace environments.
Lighting conditions affect cleaning effectiveness, as inadequate illumination prevents proper identification of contamination during maintenance sessions. Ensure sufficient task lighting illuminates keyboard surfaces completely during cleaning procedures for thorough debris removal.
Warning Signs Requiring Immediate Cleaning
Recognise early contamination indicators to prevent permanent damage through timely intervention. Sticky key responses indicate liquid residue or accumulated oils that require immediate cleaning attention before switch mechanisms suffer lasting damage.
Visible debris accumulation between keys signals inadequate maintenance frequency that needs adjustment. Similarly, screen cleaning requirements often coincide with keyboard maintenance needs in portable devices where contamination affects multiple components simultaneously.
Unusual odours emanating from keyboards indicate bacterial growth or organic matter decomposition requiring immediate deep cleaning intervention. These biological contamination signs pose health risks beyond simple aesthetic concerns, necessitating thorough sanitisation procedures.
Reduced tactile feedback from mechanical switches suggests debris interference with spring mechanisms that cleaning can often resolve before expensive component replacement becomes necessary. Address these performance changes promptly to maintain optimal typing experience and device longevity.
Safety Precautions and What to Avoid
Proper keyboard cleaning requires careful selection of cleaning products to prevent permanent damage to sensitive electronic components. Understanding which substances pose risks helps maintain device functionality while ensuring thorough sanitisation.
Cleaning Products That Can Damage Keyboards
Bleach-based cleaners corrode metal contacts and degrade plastic keycaps through chemical reactions that weaken material integrity. Similarly, ammonia-containing products dissolve adhesives used in key assembly, causing keys to detach permanently from their mounting mechanisms.
Acetone and nail polish removers attack plastic surfaces, creating cloudy discolouration and surface roughening that cannot be reversed. Furthermore, abrasive cleaners containing particles scratch protective coatings and printed key legends, rendering keyboards illegible over time.
Acidic cleaners like vinegar-based solutions corrode metal components and circuit board traces, potentially causing complete keyboard failure. Additionally, furniture polish creates slippery residues that attract more dirt while interfering with key switch mechanisms.
Avoiding Excessive Moisture and Liquid Damage
Moisture represents the greatest threat to keyboard electronics, as water conducts electricity and causes short circuits that permanently damage internal components. Never submerge keyboards in water or cleaning solutions, regardless of manufacturer claims about water resistance.
Spray bottles create uncontrolled moisture distribution that seeps beneath keys into sensitive circuitry. Instead, apply cleaning solutions to cloths first, ensuring they remain damp rather than wet during application to keyboard surfaces.
Compressed air cans sometimes release liquid propellant when tilted incorrectly, causing immediate electronic damage. Therefore, maintain cans upright during use and allow any accidentally released liquid to evaporate completely before powering devices.
Protecting Electronic Components During Cleaning
Power disconnection prevents electrical damage during cleaning procedures, as residual charge can cause component failure when moisture contacts live circuits. Unplug USB keyboards completely and remove batteries from wireless models before beginning maintenance.
Static electricity buildup during cleaning can damage sensitive microprocessors and memory chips within keyboards. Consequently, ground yourself by touching metal surfaces before handling electronic components, especially in low-humidity environments.
Cleaning solution penetration beneath keys threatens circuit boards with corrosive damage that manifests hours or days after cleaning sessions. Similar precautions apply when cleaning laptop screens, where moisture can damage underlying electronics through improper application techniques.
When to Seek Professional Cleaning Services
Liquid spill damage requiring disassembly exceeds typical user capabilities, as professional technicians possess specialised tools and ultrasonic cleaning equipment for thorough component restoration. Moreover, sticky residue from sugary drinks often requires professional-grade solvents for complete removal.
High-value mechanical keyboards with custom switches warrant professional attention to preserve expensive components during deep cleaning procedures. Additionally, vintage keyboards require expert knowledge of historical materials and appropriate cleaning methods.
Persistent odours indicating bacterial contamination may require professional sanitisation using UV sterilisation or ozone treatment beyond typical household cleaning capabilities. Furthermore, keyboards showing corrosion signs need professional assessment to determine repair feasibility.
Warranty Considerations for Cleaning Damage
Manufacturer warranties typically exclude damage from improper cleaning procedures, making careful adherence to approved methods essential for maintaining coverage. Read warranty documentation carefully, as some manufacturers void coverage for any liquid exposure.
Disassembly attempts often leave visible evidence that manufacturers use to deny warranty claims, even when reassembly appears successful. Therefore, document keyboard condition before cleaning and avoid removing components unless absolutely necessary.
Some premium keyboard manufacturers provide specific cleaning guidelines that must be followed precisely to maintain warranty protection. Deviation from these procedures, even using seemingly appropriate alternatives, can result in coverage denial for subsequent failures.
Frequently Asked Questions
How often should I clean my keyboard?
For optimal performance and hygiene, perform weekly light cleaning using compressed air and a microfibre cloth. Schedule monthly deep cleaning sessions that involve removing keys and thorough sanitisation. If you eat at your desk or work in a dusty environment, consider cleaning more frequently.
Can I use household cleaners instead of isopropyl alcohol?
Avoid household cleaners as they often contain harsh chemicals that can damage keyboard components or leave residue. 70% isopropyl alcohol is specifically recommended because it effectively disinfects whilst evaporating quickly without damaging electronics. Water-based cleaners can cause electrical damage.
Is it safe to remove keys from my keyboard for cleaning?
Key removal is generally safe for mechanical keyboards with removable keycaps. However, laptop keyboards and some membrane keyboards have fragile key mechanisms that can break easily. Always consult your keyboard manual and use gentle upward pressure with a keycap puller or flat tool.
What should I do if I spill liquid on my keyboard?
Act immediately: power off the keyboard, disconnect it, and turn it upside down to drain liquid. Remove any removable keys and dry all components thoroughly. For sticky spills, clean with isopropyl alcohol once dried. Allow 24-48 hours drying time before reconnecting.
Can I put keycaps in the dishwasher?
Only plastic keycaps from mechanical keyboards can safely go in the dishwasher on a gentle cycle without heated dry. Place them in a mesh bag to prevent loss. However, hand washing in warm soapy water is gentler and recommended for all keycap types, including printed or painted keys.
Why shouldn't I use compressed air upside down?
Holding compressed air canisters upside down releases liquid propellant instead of gas, which can damage electronic components and leave residue. The liquid is extremely cold and can cause thermal shock to sensitive parts. Always keep the canister upright during use.
How do I clean a laptop keyboard differently from a desktop keyboard?
Laptop keyboards require gentler techniques due to their delicate construction. Focus on surface cleaning with compressed air and lightly dampened cloths. Avoid removing keys unless absolutely necessary, as laptop key mechanisms are more fragile than desktop keyboards.
What's the best way to disinfect my keyboard during illness?
Use 70% isopropyl alcohol on a microfibre cloth to wipe all key surfaces and the keyboard base. Pay special attention to frequently used keys like the spacebar and Enter key. Allow the alcohol to air dry completely. This concentration effectively kills bacteria and viruses whilst being safe for electronics.
You May Also Like
How to Clean Laptop Fan: Complete Guide for 2026
How to Clean PS5: Complete Maintenance Guide 2026