How to Clean Bike Chain: Complete Guide for 2026
Learning how to clean bike chain properly is essential for maintaining optimal bike performance and extending component lifespan. Regular chain cleaning removes dirt, grime, and old lubricant that cause poor shifting, increased wear, and costly replacements. Whether you’re dealing with light surface dirt or heavy rust buildup, the right cleaning techniques and tools can restore your chain’s smooth operation and prevent premature failure.
Most cyclists can clean their bike chain effectively using either commercial degreasers or simple household alternatives like dish soap and warm water. The key is understanding when to clean without removing the chain versus when deep cleaning requires full removal. Additionally, proper post-cleaning lubrication ensures your freshly cleaned chain continues performing at its best.
This comprehensive guide covers everything from basic cleaning techniques to rust removal methods, helping you choose the right approach for your specific situation. Furthermore, we’ll explore budget-friendly solutions and maintenance schedules that keep your bike running smoothly without breaking the bank.
TL;DR
- Regular cleaning prevents expensive chain replacements and improves shifting performance
- Use commercial degreasers or household alternatives like dish soap for effective cleaning
- Clean without removal for routine maintenance, remove chain for deep cleaning or rust issues
- Always lubricate immediately after cleaning to prevent rust and ensure smooth operation
- Clean every 100-200 miles in normal conditions, more frequently in wet or dusty environments
Why Regular Bike Chain Cleaning Matters
A dirty bike chain creates a cascade of problems that affect your entire cycling experience. Dirt and grime accumulation acts like sandpaper between chain links, causing accelerated wear that reduces chain lifespan by up to 50%. Moreover, contaminated chains struggle to engage properly with gears, resulting in poor shifting performance and increased pedaling effort.
The financial impact of neglecting chain maintenance becomes clear when comparing costs. Regular cleaning and lubrication costs approximately £15-20 annually, while premature chain replacement can cost £30-80 depending on your bike type. Furthermore, a worn chain damages cassettes and chainrings, potentially requiring £100+ in additional repairs.
Chain Wear Warning Signs
Performance benefits from regular chain cleaning extend beyond cost savings. Clean chains deliver crisp, precise shifting across all gears, eliminating the frustrating delays and missed shifts that plague dirty drivetrains. Additionally, well-maintained chains operate quietly, reducing the annoying grinding and clicking sounds that distract from peaceful rides.
Rust prevention represents another critical advantage of consistent chain cleaning. Moisture and contaminants create ideal conditions for corrosion, which weakens chain links and causes permanent damage. However, proper cleaning removes these corrosive elements before they can cause lasting harm, especially important for bikes stored outdoors or ridden in wet conditions.
The cleaning process itself becomes easier with regular maintenance. Lightly soiled chains require minimal effort and basic household products, while heavily contaminated chains demand aggressive degreasers and extended cleaning time. Consequently, establishing a routine cleaning schedule prevents the buildup that makes deep cleaning necessary.
Environmental factors significantly influence cleaning frequency requirements. Riders in dusty conditions may need weekly cleaning, while those in clean, dry environments can extend intervals to monthly sessions. Understanding your specific riding conditions helps optimize maintenance schedules for maximum chain longevity and performance.
Essential Tools and Supplies for Chain Cleaning
Effective bike chain cleaning requires the right combination of tools and supplies to remove grime, grease, and contaminants safely. Furthermore, selecting appropriate equipment ensures thorough cleaning while protecting your chain’s integrity and extending its operational lifespan.
Commercial Chain Cleaners vs Household Alternatives
Commercial chain cleaners offer specialized formulations designed specifically for bicycle drivetrains. These products contain biodegradable solvents that break down chain lubricants and road grime without damaging seals or O-rings. Additionally, most commercial cleaners include corrosion inhibitors that protect metal surfaces during the cleaning process.
Popular commercial options include Park Tool CB-4 Bio ChainBrite and Finish Line Speed Clean, which provide consistent results and environmentally friendly formulations. However, these specialized products typically cost £8-15 per bottle, making them more expensive than household alternatives.
Household alternatives present budget-friendly options for chain cleaning maintenance. Fairy liquid mixed with warm water creates an effective degreasing solution for light to moderate contamination. Similarly, white vinegar removes rust and mineral deposits, while baking soda paste tackles stubborn grime buildup.
Nevertheless, household cleaners require careful application to avoid damaging chain components. Avoid bleach-based products that can weaken metal links, and never use harsh abrasives that scratch protective coatings.
Chain Cleaning Brushes and Their Specific Uses
Chain cleaning brushes come in various designs, each serving specific cleaning functions. Stiff-bristled brushes excel at removing caked-on dirt and dried lubricants from chain links, while soft-bristled brushes provide gentle cleaning for delicate components and final detailing work.
- Chain scrubbing brushes: Long, narrow brushes designed to reach between chain links and remove embedded grime
- Detail brushes: Small, precision brushes for cleaning tight spaces around derailleurs and cassettes
- Toothbrushes: Repurposed household items perfect for gentle cleaning and applying cleaning solutions
- Wire brushes: Heavy-duty options for removing rust and severe contamination (use sparingly)
Three-sided chain brushes represent the most efficient cleaning tool design. These specialized brushes surround the chain during cleaning, simultaneously scrubbing the top, bottom, and sides of each link. Consequently, this design reduces cleaning time while ensuring thorough coverage of all chain surfaces.
Degreasing Solvents: Pros and Cons of Different Options
Degreasing solvents remove heavy grease buildup and penetrating lubricants from chain components. However, different solvents offer varying levels of effectiveness, safety, and environmental impact considerations.
Pros
- Powerful degreasing action
- Fast-acting formula
- Readily available
- Affordable option
Cons
- Harsh chemical odors
- Potential skin irritation
- Environmental concerns
- May damage rubber seals
White spirit provides excellent degreasing power for heavily contaminated chains. This petroleum-based solvent dissolves stubborn grease and dried lubricants effectively. However, white spirit requires adequate ventilation and protective equipment due to its strong fumes and potential health risks.
Isopropyl alcohol offers a safer alternative with good cleaning properties and rapid evaporation rates. This solvent works particularly well for final cleaning stages and removing water spots. Moreover, isopropyl alcohol leaves no residue that could interfere with fresh lubricant application.
Citrus-based degreasers combine effective cleaning power with environmental friendliness. These natural solvents break down organic contaminants while producing pleasant aromas instead of harsh chemical odors. Additionally, citrus degreasers typically cause less skin irritation than petroleum-based alternatives.
Protective Equipment and Workspace Preparation
Proper protective equipment ensures safe chain cleaning while preventing chemical exposure and skin irritation. Nitrile gloves provide superior chemical resistance compared to latex alternatives, protecting hands from solvents and degreasers. Additionally, safety glasses prevent splashing cleaners from reaching your eyes during vigorous scrubbing.
Workspace preparation involves creating a controlled environment for effective chain cleaning. Lay down old newspapers or cardboard to protect surfaces from dripping solvents and falling debris. Furthermore, ensure adequate ventilation by opening windows or working outdoors when using strong degreasers.
Container selection plays a crucial role in cleaning efficiency. Shallow pans allow easy chain submersion for soaking treatments, while spray bottles provide controlled application of cleaning solutions. Similarly, old rags or paper towels absorb excess moisture and remove loosened contaminants during the cleaning process.
Chain Cleaning Devices and Tools for Efficiency
Chain cleaning devices streamline the maintenance process while delivering consistent results. Chain cleaning machines like the Park Tool CM-5.3 contain brushes and solvent reservoirs that clean chains without removal from the bike. These devices reduce cleaning time from 30 minutes to under 10 minutes per session.
Chain keepers or dummy hubs hold the chain in position when removed from the bike, preventing tangling and facilitating thorough cleaning access. These simple tools cost under £15 but significantly improve cleaning convenience and effectiveness.
Ultrasonic cleaners represent the premium option for professional-level chain maintenance. These devices use high-frequency sound waves to remove microscopic contaminants from chain links and rollers. While ultrasonic cleaners cost £50-200, they deliver unmatched cleaning thoroughness for serious cyclists and mechanics.
Essential measuring tools include chain wear indicators and rulers for assessing chain condition during cleaning. Similar to maintaining paint brushes, regular measurement helps determine when chains require replacement rather than continued cleaning efforts.
Magnetic parts trays organize small components like master links and pins during disassembly. These inexpensive accessories prevent lost parts and streamline reassembly after thorough cleaning sessions.
Step-by-Step Chain Cleaning Process (Without Removal)
Cleaning your bike chain without removal requires systematic preparation and proper technique. This method maintains chain position while achieving thorough decontamination through careful workspace setup and strategic cleaning approaches.
Positioning the Bike and Preparing the Workspace
Position your bike in a stable upright position using a bike stand or by flipping it upside down on handlebars and seat. However, bike stands provide superior access to the drivetrain while preventing handlebar damage and brake fluid displacement. Place the bike on level ground away from wind and direct sunlight.
Shift the chain to the smallest chainring and smallest rear cog before beginning the cleaning process. This positioning creates maximum chain slack and exposes the greatest chain length for cleaning access. Additionally, this configuration reduces tension on derailleurs during the cleaning procedure.
Lay protective materials beneath the bike to catch dripping degreaser and debris. Old newspapers, cardboard, or dedicated bike mats prevent floor staining and facilitate easy cleanup. Furthermore, ensure adequate ventilation when using chemical degreasers to avoid inhaling fumes.
Initial Dirt and Debris Removal Techniques
Begin by removing loose dirt and debris using a dry brush or compressed air. Brush from the inside of the chain outward to prevent forcing contaminants deeper into the links. This preliminary step removes approximately 40-60% of surface contamination before applying cleaning solutions.
Inspect the chain for embedded debris like thorns, wire fragments, or hardened mud that require manual removal. Use needle-nose pliers or dental picks to extract stubborn particles without damaging chain components. Subsequently, wipe the chain with a dry rag to remove loosened material.
Check for chain stiff links by slowly rotating the pedals and observing chain movement through the derailleur. Stiff links indicate internal contamination requiring focused cleaning attention during subsequent steps.
Applying Degreaser and Working it into the Chain
Apply biodegradable degreaser liberally to the entire chain length while slowly backpedaling to distribute the solution evenly. Quality degreasers like Finish Line Citrus or Park Tool CB-4 penetrate chain links within 30-60 seconds of application. Avoid petroleum-based solvents that can damage rubber seals in modern chains.
Allow the degreaser to penetrate for 3-5 minutes before agitation, particularly for heavily contaminated chains. During this dwell time, the chemical solution breaks down grease bonds and loosens embedded contaminants. Meanwhile, prepare cleaning brushes and rags for the scrubbing phase.
Reapply degreaser to sections showing persistent contamination or rust staining. Concentrated application on problem areas improves cleaning effectiveness without wasting product on already-clean sections.
Scrubbing Techniques for Thorough Cleaning
Use a chain cleaning brush or old toothbrush to scrub each chain link systematically. Hold the brush at a 45-degree angle to access link articulation points where contaminants accumulate most heavily. Brush in short, firm strokes while slowly rotating the pedals to clean the entire chain circumference.
Focus particular attention on the chain rollers and side plates where road grime creates the thickest buildup. These areas require 15-20 brush strokes per section to achieve complete decontamination. Additionally, clean the chain’s inner surfaces that contact the cassette and chainrings.
For stubborn contamination, use a chain cleaning tool that encases the chain with rotating brushes. These devices apply consistent pressure while containing degreaser spray, reducing mess and improving cleaning uniformity. Run the tool through 3-4 complete chain rotations for optimal results.
Wipe the chain frequently during scrubbing to remove dissolved contaminants and assess cleaning progress. Fresh rags prevent redistributing dirt onto already-cleaned sections and provide visual feedback on remaining contamination levels.
Rinsing and Drying the Chain Properly
Rinse the chain thoroughly with clean water to remove degreaser residue and loosened contaminants. Use a gentle spray rather than high-pressure water that can force contaminants into bearing surfaces. Direct the water flow away from the bike’s frame and components to prevent spreading contamination.
Immediately dry the chain with clean, lint-free rags to prevent rust formation on steel components. Work systematically around the entire chain circumference while rotating the pedals slowly. Pay special attention to link articulation points where water tends to collect.
Allow the chain to air dry for 10-15 minutes before applying fresh lubricant, ensuring complete moisture evaporation from internal surfaces. Alternatively, use compressed air to accelerate drying in hard-to-reach areas between chain links.
Inspect the cleaned chain for remaining contamination or damage before proceeding to lubrication. A properly cleaned chain appears uniformly metallic without dark residue or rust staining on any surfaces.
Deep Cleaning Method (Chain Removal)
Removing the chain provides the most thorough cleaning possible, allowing access to every link surface and internal component. This deep cleaning method proves essential for heavily contaminated chains, seasonal maintenance, or when standard cleaning fails to restore smooth operation.
When to Remove the Chain for Cleaning
Consider chain removal when visible contamination persists after standard cleaning attempts. Heavily rusted chains require complete removal to access all corroded surfaces effectively. Additionally, chains that skip gears or produce grinding noises despite cleaning benefit from this intensive approach.
Seasonal cyclists should remove chains every 3-4 months during active riding periods. Mountain bikers operating in muddy conditions may need monthly removal, while road cyclists can extend intervals to 6 months with proper maintenance.
Safe Chain Removal Using Proper Tools
Use a chain tool or master link pliers for safe chain removal without damage. Chain tools work by pushing the connecting pin partially through the link, while master link pliers specifically grip removable connecting links found on modern chains.
- Position the chain tool pin directly over the chain pin
- Turn the handle slowly until the pin emerges from the opposite side
- Stop when approximately 1mm of pin remains in the link
- Flex the chain gently to separate the connection
For master link chains, squeeze the link ends together using pliers while pulling the chain apart. These removable connections eliminate the risk of pin damage during disassembly.
Soaking and Agitation Techniques
Submerge the removed chain in a container filled with degreasing solution for 15-30 minutes. Commercial bike degreasers work most effectively, though dish soap mixed with warm water provides a gentler alternative for lightly soiled chains.
Agitate the chain every 5 minutes by lifting and moving it through the solution. This mechanical action helps dissolve stubborn contaminants lodged between link plates and roller surfaces. Use an old toothbrush to scrub individual links during soaking periods.
Create a cleaning bath using a plastic container large enough to accommodate the full chain length. Multiple shorter soaking cycles prove more effective than single extended periods, as fresh solution contacts contaminated surfaces repeatedly.
Thorough Cleaning of Hard-to-Reach Areas
Focus intensive cleaning efforts on roller bearings and link articulation points where contamination accumulates most heavily. Use cotton swabs dipped in degreaser to clean narrow gaps between chain plates that standard brushes cannot reach.
Inspect each link individually for wear indicators, stretched pins, or damaged rollers during the cleaning process. This detailed examination reveals chain condition issues that require replacement rather than continued use.
Rinse the chain thoroughly under running water after degreasing, ensuring complete removal of cleaning solution residue. Shake the chain vigorously to expel water from internal bearing surfaces before proceeding to drying.
Chain Reinstallation and Connection
Thread the clean, dry chain through the rear derailleur and around the cassette before connecting the ends. Ensure proper routing through both derailleur jockey wheels to maintain correct tension and shifting performance.
Reconnect the chain using the same method employed during removal. For pin connections, carefully push the pin back through the link until it sits flush on both sides. Master links simply snap together when pressed firmly into position.
Test chain connection security by applying gentle pulling force before installing on the bike. A properly connected chain shows no separation or movement at the joining point under normal handling pressure.
Apply fresh chain lubricant immediately after installation to prevent corrosion and ensure smooth operation. This deep cleaning method, while time-intensive, extends chain life significantly compared to surface cleaning alone.
Household Alternatives and Budget Solutions
Many cyclists successfully clean their bike chains using common household items rather than expensive commercial degreasers. These budget-friendly alternatives often deliver excellent results while saving money on specialized cycling products.
Using Dish Soap and Warm Water Effectively
Dish soap creates an effective degreasing solution when mixed with warm water in a 1:10 ratio. The surfactants in quality washing-up liquid break down grease molecules similarly to commercial bike cleaners. Fairy liquid and similar concentrated formulas work particularly well for this application.
Soak the chain in the soapy solution for 15-20 minutes to allow the detergent to penetrate built-up grime. Subsequently, scrub with an old toothbrush to remove stubborn deposits from chain links and rollers. This method proves especially effective for light to moderate contamination levels.
Rinse thoroughly with clean water after scrubbing to remove all soap residue. Soap remnants attract dirt and accelerate chain wear if left on the drivetrain components.
Petrol and Other Solvent Alternatives
Petrol dissolves heavy grease and oil deposits more aggressively than water-based solutions. However, this flammable solvent requires extreme caution during use and storage. Work outdoors in well-ventilated areas away from ignition sources when using petrol for chain cleaning.
Safety Warning
White spirit offers similar degreasing power with reduced fire risk compared to petrol. This paint thinner dissolves oil-based contaminants effectively while producing fewer toxic vapors during application.
Isopropyl alcohol provides another safer alternative for dissolving grease and grime. The 70% concentration available from pharmacies works well for chain cleaning while evaporating quickly to prevent corrosion.
DIY Degreasing Solutions and Their Effectiveness
Several homemade degreasing mixtures rival commercial products in cleaning performance. A solution combining baking soda, dish soap, and warm water creates an alkaline cleaner that breaks down acidic grease deposits effectively.
| DIY Solution | Ingredients | Effectiveness | Cost per Use |
|---|---|---|---|
| Soapy Water | 1 part dish soap, 10 parts water | Good for light grime | £0.05 |
| Baking Soda Paste | 3 parts baking soda, 1 part water | Excellent for heavy buildup | £0.10 |
| Vinegar Solution | 1 part vinegar, 2 parts water | Moderate degreasing power | £0.08 |
Citrus-based cleaners can be created by soaking orange or lemon peels in white vinegar for several weeks. The natural oils in citrus rinds enhance the degreasing properties of the acidic solution.
Mix equal parts ammonia and water for an aggressive degreasing solution that cuts through heavy oil contamination. Use this mixture sparingly and ensure adequate ventilation due to ammonia’s strong fumes.
When Household Methods Are Sufficient vs Professional Products
Household cleaning methods work well for regular maintenance on chains with light to moderate contamination. Cyclists who clean their chains weekly can maintain excellent drivetrain performance using only dish soap and warm water.
Professional degreasers become necessary when chains accumulate heavy grease buildup from neglect or extreme riding conditions. Thick, hardened lubricant deposits resist household cleaners and require stronger solvents for complete removal.
Mountain bikes ridden in muddy conditions often need commercial degreasers due to the combination of dirt, water, and chain lubricant creating stubborn deposits. Road bikes maintained regularly respond well to gentler household alternatives.
Consider the techniques used for removing grease from kitchen surfaces when evaluating household degreasing methods. Similar principles apply to both applications, though bike chains require more thorough rinsing to prevent component damage.
Time investment also influences the choice between household and professional products. Household methods typically require longer soaking times and more scrubbing effort compared to purpose-made bike cleaners that work faster with less manual labor.
Rust Removal and Restoration Techniques
Rust formation on bike chains occurs when iron components oxidize through exposure to moisture and oxygen. Understanding different rust severity levels helps determine whether restoration or replacement provides the most cost-effective solution.
Identifying Different Levels of Rust Damage
Surface rust appears as light orange or brown discoloration on chain links without affecting structural integrity. This superficial oxidation responds well to cleaning treatments and represents the easiest restoration scenario.
Moderate rust penetrates deeper into metal surfaces, creating rough textures and visible pitting. Chain flexibility remains intact, but performance degrades due to increased friction between components.
Severe rust compromises chain structural integrity through deep corrosion that weakens link connections. Advanced oxidation creates brittle spots where chains break under normal pedaling forces.
Additionally, rust patterns indicate exposure sources – uniform corrosion suggests general moisture exposure, while localized rust spots point to specific contamination areas requiring targeted treatment.
Specific Rust Removal Products and Methods
Naval Jelly contains phosphoric acid that converts rust into removable compounds through chemical reaction. Apply this gel-based product to affected areas, allowing 15-30 minutes contact time before scrubbing and rinsing thoroughly.
White vinegar provides an environmentally friendly alternative using acetic acid to dissolve rust deposits. Soak chain sections in undiluted vinegar for 2-4 hours, then scrub with a brush to remove loosened oxidation.
Commercial rust converters transform existing rust into protective coatings rather than removing oxidation completely. These products work best on chains with moderate rust damage that will continue outdoor exposure.
Lemon juice combined with salt creates a natural rust-fighting paste through citric acid action. This method works effectively on light surface rust while avoiding harsh chemical exposure during the cleaning process.
Wire Brush and Abrasive Techniques
Brass wire brushes remove rust without damaging underlying steel chain components. The softer brass bristles scrub away oxidation while preserving original metal surfaces and chain tolerances.
Steel wool grades from 0000 (finest) to 3 (coarsest) provide progressive abrasion levels for different rust severity. Start with finer grades and progress to coarser options only when necessary to avoid excessive material removal.
Sandpaper grits between 220-400 effectively remove stubborn rust deposits through controlled abrasion. Wrap sandpaper around wooden blocks to maintain consistent pressure across chain link surfaces during restoration work.
Furthermore, rotary tools with wire brush attachments accelerate rust removal on heavily corroded chains. However, exercise caution to prevent overheating that could affect chain temper and strength characteristics.
Similar techniques apply when addressing rust on other metal items, such as cleaning rusty grill grates, where proper abrasive selection prevents surface damage while removing oxidation effectively.
When a Rusty Chain Can Be Saved vs Needs Replacement
Chains with surface rust affecting less than 25% of total surface area typically respond well to restoration efforts. The cleaning investment proves worthwhile when rust remains superficial without penetrating into link pin areas.
Replacement becomes necessary when rust compromises chain flexibility or creates stiff links that resist normal articulation. Inflexible sections cause poor shifting performance and accelerated drivetrain component wear.
Measure chain stretch using a ruler – if 12 links measure more than 12.125 inches, the chain has exceeded wear limits regardless of rust condition. Stretched chains require replacement to prevent damage to expensive cassette and chainring components.
Consider replacement costs versus restoration time when making decisions about severely rusted chains. New chains cost £15-50 depending on quality, while restoration may require multiple hours of labor for questionable results.
Pros
- Surface rust responds well to chemical treatments
- Brass brushes preserve chain integrity
- Vinegar provides safe rust removal
- Restoration costs less than replacement
Cons
- Deep rust compromises structural strength
- Abrasive methods can damage chain surfaces
- Time-intensive restoration process
- Severe corrosion requires replacement
Post-Cleaning Lubrication and Protection
Immediate lubrication after cleaning prevents flash rusting and ensures optimal chain performance. Clean chains require lubrication within 30 minutes of cleaning to prevent moisture from initiating corrosion processes. Therefore, the lubrication step completes the chain maintenance cycle rather than serving as an optional addition.
Wet lubricants work best for rainy or muddy conditions because they resist water washout effectively. Conversely, dry lubricants excel in dusty or dry environments where dirt attraction becomes the primary concern. Additionally, ceramic lubricants provide longer-lasting protection but cost significantly more than traditional options.
Selecting the Right Chain Lubricant
Different riding conditions demand specific lubricant formulations for optimal protection and performance. Wet lubricants contain heavier base oils that penetrate chain pin bushings while resisting water displacement during wet rides.
- Wet conditions: Use heavy-duty wet lubricants with water-resistant properties
- Dry conditions: Apply light dry lubricants that attract minimal dirt
- Mixed conditions: Choose all-weather lubricants for versatile protection
- Racing applications: Use ceramic lubricants for maximum efficiency
Furthermore, avoid using WD-40 as a chain lubricant because it displaces existing lubrication without providing adequate long-term protection. While WD-40 works excellently for cleaning, proper chain lubricants contain additives specifically formulated for high-stress cycling applications.
Proper Lubrication Application Technique
Apply lubricant to the inside edge of the chain while slowly rotating the pedals backward. This technique ensures lubricant reaches chain pin bushings where friction occurs most intensively. Moreover, applying lubricant to the inside prevents excess oil from flinging onto brake rotors or rim surfaces.
Position the lubricant bottle tip close to the chain while maintaining steady drip application. One drop per chain link provides adequate coverage without creating excess that attracts dirt particles. Subsequently, continue pedaling backward for 30-60 seconds to distribute lubricant throughout all chain articulation points.
Pro Tip
Removing Excess Lubricant
Excess lubricant creates a dirt magnet effect that accelerates chain contamination and reduces cleaning intervals significantly. Therefore, wiping excess lubricant prevents premature drivetrain wear while maintaining optimal shifting performance.
Use a clean microfiber cloth to wipe the outer chain surfaces while avoiding the inner pin areas where lubrication remains essential. Additionally, clean any lubricant that contacts the cassette teeth or chainring surfaces to prevent contamination buildup.
Allow the chain to sit for 5-10 minutes after application before wiping excess lubricant. This settling time permits the lubricant to penetrate chain pin bushings while excess oil rises to surface areas for easy removal.
Properly lubricated chains require reapplication every 100-200 miles depending on riding conditions and lubricant type. However, chains exposed to wet conditions may need lubrication every 50-75 miles to maintain adequate protection levels.
Cleaning Frequency and Maintenance Schedule
Establishing a proper cleaning schedule prevents costly drivetrain replacements while ensuring optimal bike performance. However, cleaning frequency depends on riding conditions, chain type, and environmental factors that affect contamination rates.
Signs That Indicate Chain Needs Cleaning
Visual inspection reveals several indicators that signal immediate chain cleaning requirements. Black residue buildup on chain links indicates excessive dirt accumulation that requires degreasing action. Additionally, grinding noises during pedaling suggest contaminated lubricant that no longer provides adequate protection.
Chain stiffness represents another critical warning sign that cleaning becomes necessary. Furthermore, skipping gears or rough shifting performance often results from contaminated chains affecting derailleur precision. Chains that appear dry or produce squeaking sounds also require immediate attention to prevent accelerated wear.
- Visible dirt accumulation on chain links and rollers
- Black lubricant residue coating chain surfaces
- Grinding or squeaking noises during pedaling
- Stiff chain movement when backpedaling by hand
- Poor shifting performance or gear skipping
- Gritty texture when touching chain links
Recommended Cleaning Intervals Based on Riding Conditions
Riding conditions significantly influence chain cleaning frequency requirements. Road cycling in dry conditions typically requires chain cleaning every 200-300 miles, while wet weather riding necessitates cleaning every 100-150 miles due to increased contamination exposure.
| Riding Conditions | Cleaning Frequency | Key Factors |
|---|---|---|
| Dry Road Cycling | 200-300 miles | Minimal moisture, dust accumulation |
| Wet Weather Riding | 100-150 miles | Water contamination, increased dirt |
| Mountain Biking | 50-100 miles | Mud, debris, trail conditions |
| Commuter Cycling | 150-250 miles | Urban pollution, variable weather |
| Beach/Coastal Riding | 50-75 miles | Salt exposure, sand contamination |
Mountain biking demands more frequent cleaning due to mud and debris exposure that accelerates chain contamination. Similarly, coastal riding requires increased cleaning frequency because salt exposure causes rapid corrosion if left untreated.
Quick Maintenance Between Deep Cleans
Regular quick maintenance extends intervals between comprehensive chain cleaning sessions. Wiping chain surfaces with a dry cloth after each ride removes surface contaminants before they penetrate lubricant layers.
Applying chain lube drops to squeaky sections provides temporary protection until proper cleaning occurs. However, avoid over-lubrication during quick maintenance because excess oil attracts additional dirt particles that worsen contamination problems.
- Post-ride chain wiping with clean microfiber cloth
- Quick visual inspection for damage or excessive wear
- Light lubrication of squeaky chain sections
- Gear shifting test to identify performance issues
- Chain tension check for proper adjustment
Additionally, proper cleaning techniques apply to various maintenance tasks that require similar attention to detail and systematic approaches.
Seasonal Maintenance Considerations
Winter maintenance requires increased cleaning frequency due to road salt and moisture exposure that accelerates corrosion processes. Therefore, post-ride chain cleaning becomes essential during winter months to prevent permanent damage from salt contamination.
Spring cleaning involves comprehensive chain inspection after winter storage or heavy use periods. Meanwhile, summer maintenance focuses on dust and heat management that affects lubricant viscosity and performance characteristics.
Seasonal Storage Tip
Autumn preparation includes thorough drivetrain cleaning before wet season conditions begin affecting chain performance. Furthermore, switching to wet-weather lubricants provides better protection against moisture penetration during rainy periods.
Chains cleaned every 150 miles last 40% longer than chains cleaned every 300 miles
Regular maintenance scheduling prevents emergency repairs while ensuring consistent bike performance throughout varying seasonal conditions. Consequently, establishing cleaning routines based on mileage and environmental exposure optimizes chain longevity and riding experience quality.
Common Mistakes and Troubleshooting
Even experienced cyclists make critical errors when cleaning bike chains that can damage components or reduce performance. Understanding these common pitfalls helps prevent costly mistakes while ensuring proper chain maintenance throughout your bike’s lifespan.
Over-Cleaning and Its Negative Effects
Excessive cleaning frequency strips essential lubricants from internal chain components faster than they can be replaced. Moreover, aggressive degreasing removes factory-applied lubricants from sealed bearing surfaces that cannot be easily re-lubricated during home maintenance.
Daily chain cleaning accelerates wear rates by 25% compared to appropriate cleaning intervals based on riding conditions. Furthermore, over-zealous scrubbing with stiff brushes creates microscopic scratches on chain plates that trap dirt particles and accelerate future contamination.
Over-Cleaning Warning
Using Inappropriate Cleaning Products
Household detergents like washing-up liquid contain surfactants that penetrate rubber seals and remove essential greases from internal mechanisms. Additionally, these products leave residues that attract dirt particles and create abrasive compounds when mixed with road grime.
WD-40 and penetrating oils dissolve existing lubricants without providing adequate long-term protection for chain components. Consequently, using these products as primary cleaners leaves chains vulnerable to accelerated wear and corrosion damage.
- Avoid: Petrol, brake cleaner, or harsh solvents that damage rubber seals
- Never use: Pressure washers that force water into sealed bearings
- Skip: Acidic cleaners that corrode metal surfaces
- Prevent: Bleach-based products that weaken chain materials
Inadequate Drying Leading to Rust
Insufficient drying time allows moisture to remain in chain links where it initiates corrosion processes within hours of cleaning completion. Therefore, proper air circulation and complete moisture removal become critical steps that many cyclists rush or skip entirely.
Surface rust formation begins within 4-6 hours when chains remain damp after cleaning sessions. Meanwhile, trapped moisture in roller bearings creates internal corrosion that reduces smooth operation and accelerates component replacement needs.
Compressed air application removes moisture from hard-to-reach areas between chain plates and inside roller mechanisms. Similarly, proper rust prevention techniques apply to bike chains just as they do to other metal components requiring moisture protection.
Signs of Chain Wear That Cleaning Cannot Fix
Chain stretch measurement indicates permanent elongation that cleaning and lubrication cannot reverse or improve. Furthermore, worn chains damage expensive cassette and chainring components even when kept meticulously clean and properly lubricated.
| Wear Indicator | Measurement | Action Required |
|---|---|---|
| Chain stretch | 0.5% elongation | Monitor closely |
| Excessive stretch | 0.75% elongation | Replace immediately |
| Stiff links | Visual inspection | Replace if persistent |
| Worn teeth | Shark-fin shape | Replace drivetrain |
Persistent noise after thorough cleaning indicates mechanical wear rather than contamination issues that require component replacement. Additionally, skipping gears under load suggests chain-cassette wear patterns that cleaning cannot address effectively.
Visual inspection reveals worn chain plates, stretched pins, and damaged rollers that compromise shifting performance regardless of cleanliness levels. Consequently, recognizing these wear indicators prevents further drivetrain damage and ensures optimal bike performance through timely component replacement.
A worn chain that’s 0.75% stretched will damage your cassette and chainrings within 500 miles, regardless of how clean you keep it
Frequently Asked Questions
What is the best thing to clean a bike chain with?
The best bike chain cleaners include commercial degreasers like Muc-Off Bio Drivetrain Cleaner or Park Tool CB-4. For budget-friendly alternatives, dish soap mixed with warm water works effectively for routine cleaning. Avoid harsh chemicals like bleach or ammonia that can damage chain components.
Can I use WD-40 to clean a bike chain?
WD-40 can be used for cleaning but should not be your primary chain cleaner. It’s effective for removing rust and displacing moisture, but it’s not a proper degreaser. Always follow WD-40 cleaning with proper chain lubricant, as WD-40 is not a long-term lubricant solution.
Can I use fairy liquid to clean my bike chain?
Yes, Fairy liquid (dish soap) is excellent for cleaning bike chains. Mix it with warm water to create an effective degreasing solution that removes dirt and grime safely. This household alternative costs much less than commercial cleaners and works particularly well for routine maintenance cleaning.
How often should I clean my bike chain?
Clean your bike chain every 100-200 miles under normal conditions. Increase frequency to weekly cleaning in dusty environments or after riding in wet conditions. Signs your chain needs cleaning include visible dirt buildup, poor shifting performance, or increased noise during pedaling.
How do I clean a bike chain without removing it?
To clean without removal, use a chain cleaning tool or old toothbrush with degreaser. Rotate the pedals backward while applying cleaner, then rinse with water and dry thoroughly. This method works well for routine maintenance but won’t achieve the deep cleaning possible with chain removal.
How do I remove rust from my bike chain?
For rust removal, use WD-40 or specialized rust removers like Evapo-Rust. Apply the product, let it penetrate for 10-15 minutes, then scrub with a wire brush or steel wool. Severe rust may require chain removal and overnight soaking. Always lubricate immediately after rust removal to prevent recurrence.
Can I clean my bike chain with petrol?
Petrol is not recommended for chain cleaning due to safety hazards and environmental concerns. It’s highly flammable and toxic. Stick to safer alternatives like commercial degreasers, dish soap, or specialized bike cleaning products that are designed for this purpose.
How do I clean a bike chain without degreaser?
Without commercial degreaser, use warm soapy water with dish soap, or create a mixture of baking soda and water. White vinegar also works for cutting through grease. These household alternatives require more scrubbing but effectively remove dirt and grime from your chain.
What tools do I need for chain cleaning?
Essential tools include:
- Chain cleaning tool or old toothbrush
- Degreaser or dish soap
- Clean rags or paper towels
- Chain lubricant for post-cleaning
- Bucket for cleaning solution
- Wire brush for stubborn grime
Should I lubricate my chain immediately after cleaning?
Yes, always lubricate immediately after cleaning and drying your chain. A clean, dry chain will rust quickly without protection. Apply chain-specific lubricant to each link, then wipe excess to prevent dirt attraction. This step is crucial for maintaining smooth operation and preventing corrosion.
What's the difference between cleaning road bike and MTB chains?
MTB chains typically require more frequent cleaning due to exposure to mud, dirt, and debris from off-road riding. Road bike chains can often go longer between cleanings but may need more attention to removing road grime and salt. The cleaning process remains the same, but frequency varies based on riding conditions.
How much does chain maintenance cost compared to replacement?
Regular maintenance costs approximately £15-20 annually for cleaning supplies and lubricants. In contrast, premature chain replacement costs £30-80, plus potential damage to cassettes and chainrings requiring £100+ in additional repairs. Consistent cleaning extends chain life by up to 50%, making maintenance highly cost-effective.
Can a dirty chain damage other bike components?
Yes, dirty chains cause accelerated wear to cassettes, chainrings, and derailleurs. Grit and grime act like sandpaper, wearing down gear teeth and causing poor shifting. A worn chain can stretch and damage expensive drivetrain components, making regular cleaning essential for protecting your entire bike’s performance.
You May Also Like
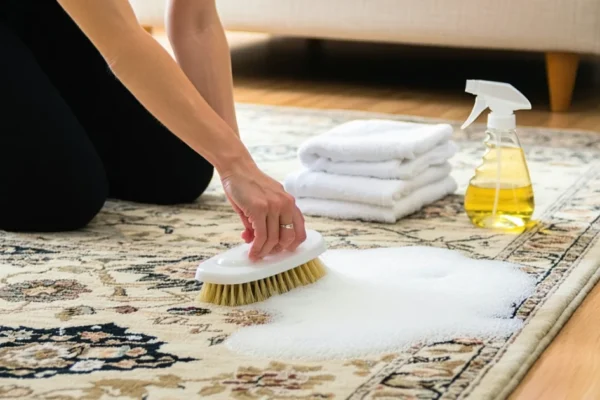
How to Clean a Rug: Complete DIY Guide for All Rug Types
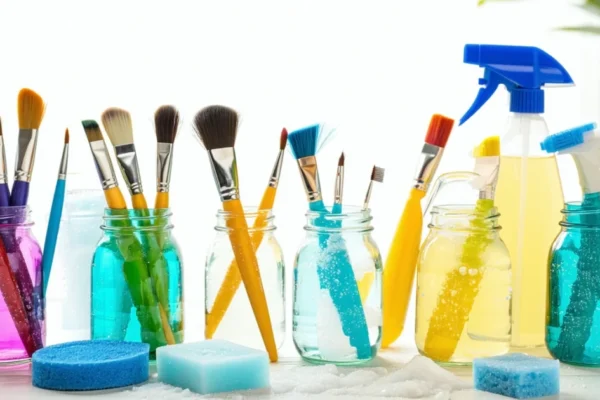
How to Clean Paint Brushes: Complete Guide for All Paint Types
