How to Clean Oven Glass Without Scratching: Expert Guide 2026
How to clean oven glass without scratching it requires using gentle cleaning agents like baking soda paste and microfibre cloths whilst avoiding abrasive materials such as steel wool or harsh chemicals. The key to maintaining crystal-clear oven glass lies in understanding proper cleaning techniques and selecting appropriate tools that effectively remove grease and burnt-on residue without causing permanent damage.
Most oven glass scratches occur from using inappropriate cleaning materials or applying excessive pressure during the cleaning process. Furthermore, tempered glass used in modern ovens is designed to withstand high temperatures but remains vulnerable to abrasive cleaning methods that can compromise both appearance and safety.
This comprehensive guide covers proven methods using common household items like white vinegar, baking soda, and dish soap to achieve professional results. Additionally, we’ll explore advanced techniques for tackling stubborn stains whilst maintaining your oven’s warranty and ensuring long-term performance. Proper maintenance techniques, including the strategic use of oven liners, can prevent future buildup and reduce cleaning frequency.
TL;DR
- Use baking soda paste, white vinegar, or gentle dish soap with microfibre cloths to clean oven glass safely
- Avoid steel wool, abrasive pads, harsh chemicals, and excessive pressure that cause permanent scratches
- Allow oven to cool completely before cleaning and use plastic scrapers for stubborn residue removal
- Implement regular cleaning schedules and protective measures like oven liners to prevent heavy buildup
Understanding Oven Glass and Why It Gets Dirty
Modern ovens feature tempered glass doors specifically engineered to withstand extreme temperatures whilst providing clear visibility of cooking food. This heat-resistant glass undergoes a special manufacturing process that strengthens the material through controlled thermal treatment, making it four to five times stronger than regular glass. However, despite its durability, oven glass remains susceptible to staining and scratching when cleaned improperly.
The composition of oven glass includes borosilicate or specially treated soda-lime glass that maintains structural integrity at temperatures exceeding 250°C. Consequently, this glass type resists thermal shock but requires gentle cleaning approaches to preserve its clarity and prevent surface damage.
Common Causes of Oven Glass Staining
Grease splatters represent the primary culprit behind cloudy oven glass, particularly when roasting meats or cooking fatty foods at high temperatures. These oil-based residues adhere firmly to the glass surface, creating stubborn films that obscure visibility and attract additional debris. Moreover, grease undergoes polymerisation when exposed to repeated heating cycles, forming tough, amber-coloured deposits that become increasingly difficult to remove.
Food residue from spills and splashes creates another significant source of glass contamination. Sugar-based substances caramelise on hot glass surfaces, whilst protein deposits from meat juices create brown, burnt-on stains. Additionally, high-temperature cooking accelerates the bonding process between food particles and glass, making immediate cleaning essential for preventing permanent staining.
- Grease and oil splatters from roasting and frying
- Caramelised sugar deposits from baking and roasting
- Protein residues from meat drippings and marinades
- Condensation mixing with food particles during cooking
- Smoke residue from overheated or burnt food items
Why Scratches Occur on Oven Glass
Scratches develop when abrasive cleaners or inappropriate tools make contact with the glass surface during cleaning attempts. Steel wool, scouring pads, and razor blades create microscopic grooves that permanently damage the glass structure, reducing transparency and creating weak points susceptible to thermal stress. Furthermore, these scratches trap grease and food particles, making future cleaning more challenging.
Using improper cleaning tools such as metal scrapers, abrasive sponges, or harsh chemical cleaners compounds the scratching problem. Even seemingly gentle materials like paper towels can cause micro-scratches when used with excessive pressure or on dried-on residues. Additionally, cleaning hot glass surfaces increases the risk of thermal shock and surface damage.
Commercial oven cleaners containing caustic chemicals can etch the glass surface, creating permanent cloudiness that resembles scratching. These products often contain sodium hydroxide or potassium hydroxide, which react with silica in glass to create irreversible surface damage. Therefore, understanding proper tool selection prevents costly glass replacement and maintains oven performance.
Impact of Scratches on Oven Performance and Safety
Scratched oven glass compromises heat retention and energy efficiency by creating weak points that allow heat to escape more readily. These surface imperfections also reduce visibility, making it difficult to monitor cooking progress without opening the door and releasing valuable heat. Consequently, scratched glass forces longer cooking times and increased energy consumption.
From a safety perspective, scratched glass becomes more vulnerable to thermal stress and potential failure during high-temperature cooking cycles. Deep scratches concentrate stress at specific points, increasing the risk of sudden glass breakage when exposed to rapid temperature changes. Moreover, compromised glass integrity poses safety hazards to users and may void manufacturer warranties.
Prevention through proper cleaning techniques and protective measures like oven liners maintains glass clarity whilst preserving oven functionality. Regular maintenance using appropriate methods ensures optimal performance, safety, and longevity of your oven investment.
Essential Tools and Materials for Scratch-Free Cleaning
Selecting appropriate cleaning tools prevents oven glass damage whilst ensuring effective grease and grime removal. The right equipment combination delivers superior cleaning results without compromising glass integrity or creating costly scratches.
Safe Cleaning Tools for Oven Glass
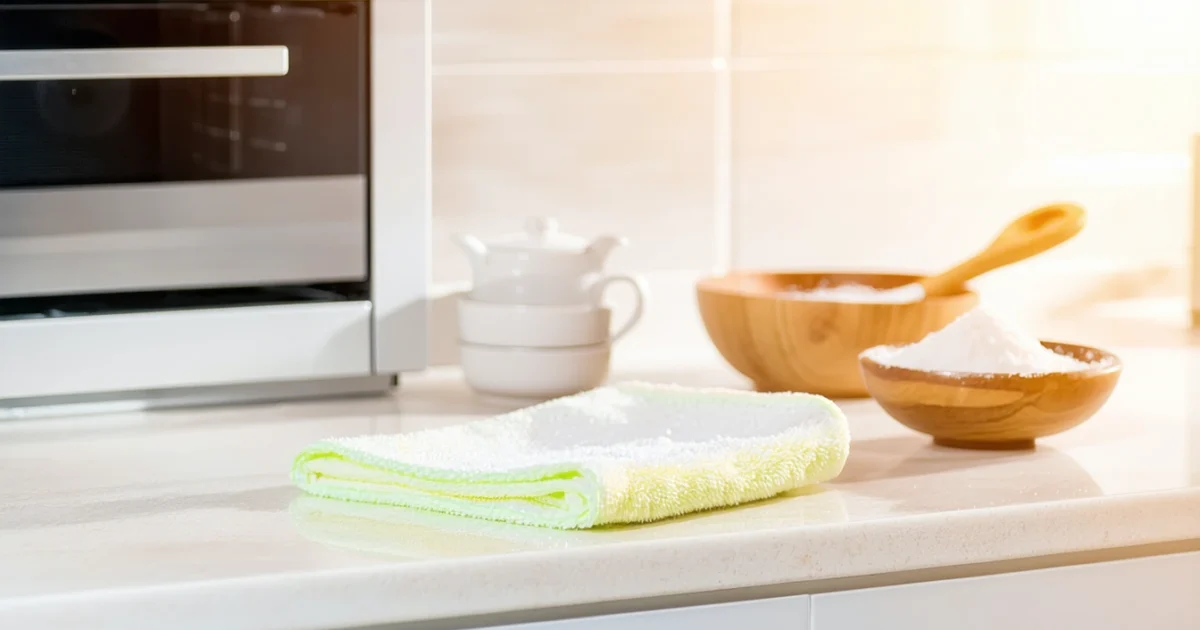
Microfibre cloths represent the safest option for oven glass cleaning due to their ultra-fine synthetic fibres that trap dirt without scratching. These cloths effectively remove grease whilst their non-abrasive texture protects delicate glass surfaces from damage. Additionally, microfibre materials absorb cleaning solutions efficiently, reducing streaking and improving overall results.
Plastic scrapers safely remove stubborn burnt-on deposits without creating surface scratches. Unlike metal alternatives, plastic scrapers flex slightly when pressure increases, preventing gouging whilst maintaining effective scraping action. Furthermore, these tools work particularly well when combined with appropriate cleaning agents to soften hardened residues.
Soft-bristled brushes provide gentle agitation for textured grime without damaging glass surfaces. Natural bristle brushes or synthetic alternatives with flexible bristles effectively dislodge particles from corners and edges where cloths cannot reach. Moreover, these brushes excel at working cleaning solutions into stubborn stains whilst maintaining surface protection.
Recommended Cleaning Agents
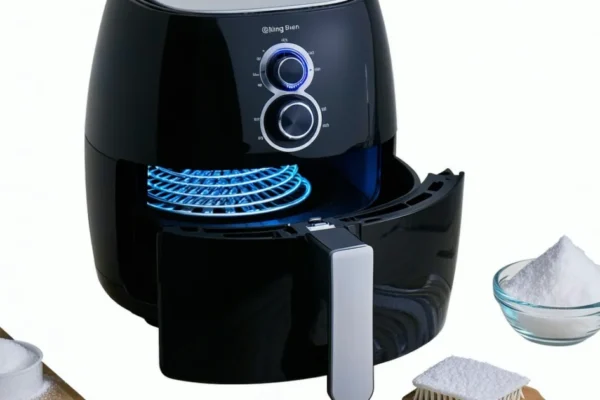
Baking soda creates a mildly abrasive paste when mixed with water that effectively removes grease without scratching glass. This alkaline compound neutralises acidic food residues whilst its fine crystalline structure provides gentle scrubbing action. Similarly, baking soda’s natural deodorising properties eliminate lingering cooking odours from oven interiors.
White vinegar dissolves mineral deposits and cuts through grease using its natural acidity. This versatile cleaning agent breaks down alkaline residues whilst remaining completely safe for glass surfaces. Natural cleaning methods using citrus acids offer similar benefits with pleasant fragrances and effective grease-cutting properties.
Dish soap provides excellent degreasing action when diluted with warm water for safe glass cleaning. Quality dish soaps contain surfactants that break surface tension, allowing grease to lift away from glass without aggressive scrubbing. Therefore, gentle dish soap solutions effectively clean oven glass whilst maintaining surface integrity.
Commercial glass cleaners specifically formulated for appliances offer streak-free results with ammonia-based formulations. These products dissolve grease efficiently whilst evaporating cleanly to prevent residue buildup. However, always verify compatibility with oven glass before applying commercial cleaners to heated surfaces.
Tools and Materials to Avoid
- Steel wool creates microscopic scratches that accumulate into visible damage over time
- Abrasive pads including scouring pads and rough sponges damage glass surfaces permanently
- Harsh chemicals such as oven cleaners containing caustic soda etch glass surfaces
- Metal scrapers including razor blades and putty knives gouge glass when pressure increases
- Bleach-based cleaners react with heat-resistant glass coatings, causing cloudiness
These abrasive tools and aggressive chemicals compromise glass clarity whilst creating safety hazards through weakened surface integrity. Consequently, avoiding these materials prevents expensive glass replacement and maintains optimal oven performance.
Essential Protective Equipment
Rubber gloves protect hands from cleaning chemicals whilst providing better grip on tools and surfaces. Quality gloves prevent skin irritation from alkaline solutions like baking soda paste or acidic cleaners such as vinegar. Additionally, gloves maintain hygiene standards whilst handling potentially contaminated oven surfaces.
Safety glasses shield eyes from splashing cleaning solutions, particularly when working with spray bottles or applying solutions overhead. Eye protection becomes especially important when cleaning vertical oven door glass where gravity increases splash risks. Moreover, protective eyewear prevents chemical exposure during vigorous cleaning motions.
Proper protective equipment ensures safe cleaning practices whilst maintaining comfort during extended cleaning sessions. This safety-first approach prevents injuries and allows focus on achieving optimal cleaning results without health concerns.
Step-by-Step Cleaning Methods
Essential Preparation Steps
Allow your oven to cool completely before beginning any cleaning process. Hot glass surfaces expand and become more vulnerable to thermal shock from cold cleaning solutions. Furthermore, working on cooled surfaces prevents burns and ensures cleaning products work effectively.
Remove all oven racks and accessories to access the glass door fully. This step prevents obstruction whilst allowing thorough cleaning of all glass surfaces. Additionally, removing racks prevents cleaning solutions from dripping onto metal components unnecessarily.
Conduct an initial assessment of staining severity and grease buildup patterns. Light soiling requires gentler methods, whilst heavy carbonised deposits need stronger approaches. Consequently, this assessment determines which cleaning method delivers optimal results without over-treating the glass surface.
Baking Soda Paste Method
Mix three parts baking soda with one part water to create a thick, spreadable paste. This alkaline solution effectively breaks down grease and burnt-on food particles without scratching glass surfaces. Moreover, baking soda’s mild abrasive properties lift stubborn stains whilst remaining gentle on heat-resistant glass.
Apply the paste using circular motions with a soft cloth or non-abrasive sponge. Cover all stained areas evenly, ensuring complete contact between the paste and soiled surfaces. Subsequently, the paste adheres better when applied in thin, consistent layers rather than thick clumps.
Allow the baking soda paste to dwell for 15-20 minutes on the glass surface. This contact time enables the alkaline solution to penetrate and soften hardened deposits effectively. However, avoid letting the paste dry completely, as dried residue becomes difficult to remove and may streak the glass.
Vinegar and Water Solution Approach
Combine equal parts white vinegar and water in a spray bottle for effective grease cutting action. This acidic solution dissolves mineral deposits and soap scum whilst neutralising alkaline residues from previous cleaning attempts. Additionally, vinegar’s natural antimicrobial properties sanitise the glass surface during cleaning.
Spray the solution evenly across the glass surface, ensuring complete coverage of all stained areas. Hold the bottle 6-8 inches from the glass to achieve optimal distribution without oversaturating. Furthermore, systematic spraying from top to bottom prevents solution from dripping onto already-cleaned areas.
Wipe the treated surface using microfibre cloths in straight, overlapping strokes. Start from one side and work methodically across the entire glass panel to avoid missing spots. Subsequently, use a clean, dry microfibre cloth to buff the surface and eliminate any remaining streaks or moisture.
Dish Soap and Warm Water Method
Mix two teaspoons of liquid dish soap with one litre of warm water for light cleaning tasks. This gentle solution effectively removes everyday grease and fingerprints without harsh chemicals. Moreover, dish soap’s surfactant properties break down oil-based residues whilst remaining safe for regular use on glass surfaces.
Apply the soapy solution using a soft sponge or cloth, working in gentle circular motions across the glass. Avoid applying excessive pressure, as even mild abrasion can create microscopic scratches over time. Instead, let the cleaning solution do the work whilst you provide gentle agitation to lift surface deposits.
Rinse thoroughly with clean water to remove all soap residue, then dry immediately with a lint-free cloth. Soap residue creates streaks and attracts dirt when left on glass surfaces. Therefore, complete rinsing ensures a crystal-clear finish without compromising future cleaning effectiveness.
Steam Cleaning Technique
Heat water to boiling point and carefully pour into a heat-resistant bowl placed inside the oven. The steam generated softens baked-on deposits and makes them easier to remove without scrubbing. Additionally, this natural method avoids chemical exposure whilst providing effective cleaning power through heat and moisture.
Place clean towels over the bowl to trap steam and direct it towards the glass door. Close the oven door and allow steam to circulate for 20-30 minutes, creating a humid environment that penetrates stubborn stains. Furthermore, the trapped steam maintains consistent moisture levels throughout the cleaning process.
Remove the bowl carefully using oven mitts and immediately wipe the softened deposits with a damp microfibre cloth. The steam treatment loosens even carbonised residues, allowing gentle removal without aggressive scrubbing. Consequently, this method proves particularly effective for natural oven cleaning approaches that prioritise surface protection over harsh chemical action.
Tackling Stubborn Stains and Burnt-On Residue
Different types of stains require specific approaches to ensure effective removal without damaging glass surfaces. Grease stains appear as yellowish or brown films that spread across the glass, whilst food particles create localised spots with varying textures and colours. Meanwhile, carbon deposits form black, hardened layers from high-temperature cooking that resist standard cleaning methods.
Grease deposits typically respond well to alkaline cleaners because fats break down in basic solutions. Conversely, protein-based food residues dissolve more effectively in acidic environments, making vinegar solutions particularly useful. Carbon buildup, however, requires extended treatment time and gentle mechanical action to avoid scratching the glass surface during removal.
Extended Soaking Methods for Tough Stains
Create a paste using three parts baking soda to one part water for stubborn deposits that resist initial cleaning attempts. Apply this mixture generously to affected areas, ensuring complete coverage of burnt-on residue. Subsequently, cover the paste with cling film to prevent drying and maintain moisture contact with the stains.
Allow the paste to work for 2-4 hours or overnight for severely burnt deposits, as extended contact time breaks down carbonised materials naturally. The alkaline properties of baking soda neutralise acidic compounds whilst the moisture softens hardened residues. Therefore, patience during the soaking process significantly reduces the physical effort required for removal.
For particularly stubborn grease stains, combine the baking soda paste with a few drops of washing-up liquid to enhance degreasing action. The surfactants in washing-up liquid penetrate oily residues whilst the baking soda provides gentle abrasive action. Additionally, this combination works effectively on both organic and inorganic deposits without requiring harsh chemicals.
Safe Scraping Techniques Using Plastic Tools
Plastic scrapers remove hardened deposits without creating microscopic scratches that metal tools would cause. Hold the scraper at a 45-degree angle to the glass surface and apply gentle, consistent pressure whilst moving in one direction. Furthermore, avoid circular motions that can create swirl marks visible under certain lighting conditions.
Work systematically across the glass surface, overlapping strokes to ensure complete coverage of affected areas. Clean the scraper blade frequently with a damp cloth to remove accumulated debris that could scratch the glass. Moreover, replace worn plastic scrapers immediately because damaged edges can mark the surface despite being softer than metal alternatives.
Credit cards or plastic putty knives serve as effective alternatives when purpose-made scrapers aren’t available. These household items provide sufficient rigidity for deposit removal whilst maintaining the flexibility needed to follow glass contours. However, ensure these tools are clean and undamaged before use to prevent introducing scratches from embedded particles.
Combining Cleaning Agents for Enhanced Effectiveness
Mix equal parts white vinegar and water with a tablespoon of baking soda per cup of solution to create a powerful cleaning combination. The initial fizzing reaction helps lift deposits whilst the resulting solution provides both acidic and alkaline cleaning properties. Nevertheless, prepare this mixture fresh for each use because the reaction neutralises over time.
Apply the mixture immediately after preparation whilst the chemical reaction remains active, as this maximises cleaning effectiveness. The bubbling action helps penetrate crevices and lift particles that static solutions might miss. Consequently, this dynamic cleaning approach proves particularly effective for textured or patterned glass surfaces where deposits accumulate in grooves.
For extreme cases, create a two-step process using lemon juice followed by baking soda application. The citric acid in lemon juice dissolves mineral deposits and organic residues, whilst the subsequent baking soda treatment neutralises acids and provides gentle abrasion. This natural cleaning approach offers an eco-friendly alternative to commercial products whilst maintaining cleaning effectiveness.
When to Use Commercial Oven Cleaners Safely
Reserve commercial oven cleaners for deposits that resist natural cleaning methods after multiple attempts. These products contain powerful alkaline chemicals that dissolve carbonised materials quickly but require careful handling to prevent glass etching. Additionally, ensure adequate ventilation because commercial cleaners release strong fumes during application and activation.
Read manufacturer instructions thoroughly before application, paying particular attention to contact time and dilution requirements. Some commercial cleaners require specific temperature conditions for optimal effectiveness, whilst others work better on cool surfaces. Therefore, following product guidelines ensures safe use whilst maximising cleaning performance.
Test commercial cleaners on an inconspicuous area first to verify compatibility with your oven glass type. Some older ovens feature coated glass that can react adversely to strong alkaline solutions, resulting in permanent damage. Furthermore, neutralise commercial cleaners completely with thorough rinsing to prevent ongoing chemical action that could weaken the glass over time.
Wear protective gloves and eye protection when using commercial products, as these chemicals can cause skin and respiratory irritation. Work in well-ventilated areas and avoid mixing commercial cleaners with other substances, which can create dangerous chemical reactions. Moreover, store these products safely away from children and pets to prevent accidental exposure.
Advanced Cleaning Techniques for Heavily Soiled Glass
When standard cleaning methods fail to remove stubborn deposits, advanced techniques provide effective solutions for heavily soiled oven glass. However, these methods require careful execution to prevent scratching or damaging the glass surface. Each technique addresses specific types of buildup whilst maintaining the integrity of your oven’s viewing window.
Ammonia Cleaning Method
Ammonia-based cleaning dissolves grease and carbonised deposits effectively through its alkaline properties. Nevertheless, proper ventilation remains absolutely critical because ammonia fumes can cause respiratory irritation and headaches. Open all windows and doors before beginning, then run an extractor fan throughout the cleaning process.
Mix one part household ammonia with three parts warm water in a spray bottle for optimal cleaning strength. Apply this solution generously to the glass surface, allowing it to penetrate deposits for 15-20 minutes before wiping. Subsequently, use a microfibre cloth to remove loosened debris whilst working in circular motions to prevent streaking.
Rinse the glass thoroughly with clean water after ammonia treatment to neutralise any residual chemicals. Moreover, dry the surface immediately with a lint-free cloth to prevent water spots from forming. This method works particularly well on grease-heavy deposits that resist other cleaning approaches.
Razor Blade Technique
Razor blade scraping removes stubborn, baked-on deposits when applied correctly with proper safety precautions. Hold the blade at a 45-degree angle to the glass surface, ensuring consistent pressure whilst moving in one direction only. Never use back-and-forth motions, as this increases the risk of creating scratches.
Use this technique only on completely cool glass to prevent thermal shock that could cause cracking. Additionally, ensure the blade remains sharp throughout the process because dull blades require more pressure and increase scratching potential. Replace blades immediately when they show signs of nicking or dulling.
Apply a lubricant such as soapy water or glass cleaner before scraping to reduce friction between the blade and glass surface. Furthermore, work in small sections to maintain control and prevent accidental slipping. This method proves most effective for removing carbonised food particles and burnt-on spills that form hard, crusty deposits.
Heat-Assisted Cleaning
Residual heat cleaning utilises your oven’s natural warmth to soften deposits for easier removal. After cooking, allow the oven to cool to approximately 50-60°C before applying cleaning solutions, as this temperature softens grease without creating dangerous steam. Never attempt cleaning on hot surfaces above 80°C, which can cause severe burns.
Apply your chosen cleaning solution to the warm glass, then cover with a damp cloth to maintain moisture and prevent rapid evaporation. The gentle heat accelerates chemical reactions whilst keeping the cleaning solution active longer. Consequently, this method reduces the physical scrubbing required to remove stubborn deposits.
Monitor the glass temperature carefully using an infrared thermometer or by testing with your hand from a safe distance. If the surface feels too hot to touch comfortably, wait longer before proceeding. This technique works exceptionally well when combined with natural cleaning solutions that benefit from gentle heat activation.
Professional-Grade Cleaning Products
Professional oven degreasers contain concentrated alkaline formulations designed for commercial kitchen environments. These products dissolve heavy grease accumulation and carbonised deposits more effectively than household cleaners. However, they require precise application and thorough safety precautions due to their increased chemical strength.
Dilute professional cleaners according to manufacturer specifications, as full-strength application can etch or cloud glass surfaces permanently. Apply the solution using a foam applicator or spray bottle, ensuring even coverage whilst avoiding oversaturation. Allow the recommended contact time before agitation, typically 10-15 minutes for optimal effectiveness.
Neutralise professional cleaners completely with multiple rinses using clean water to prevent ongoing chemical action. Incomplete neutralisation can result in continued etching even after cleaning completion. Additionally, wear chemical-resistant gloves and eye protection when handling these products, as they can cause severe skin and eye irritation upon contact.
Common Mistakes That Cause Scratches
Understanding the primary causes of oven glass scratches helps prevent permanent damage during cleaning. Most scratches occur when homeowners unknowingly use inappropriate materials or techniques that compromise the glass surface integrity.
Using Abrasive Materials
Steel wool ranks as the most damaging material for oven glass surfaces. Furthermore, scouring pads create microscopic scratches that accumulate over time, eventually clouding the glass appearance. Harsh brushes with stiff bristles similarly abrade the surface, particularly when combined with cleaning chemicals that soften the glass temporarily.
Wire brushes cause immediate visible damage through deep scoring that cannot be reversed. Additionally, pumice stones and abrasive cleaners containing silica particles create permanent etching patterns. These materials remove glass material rather than simply cleaning the surface, making damage irreversible.
Applying Excessive Pressure
Excessive scrubbing pressure concentrates force into small contact areas, creating stress fractures and surface scratches. Moreover, pressing hard whilst cleaning forces debris particles deeper into the glass surface, acting like sandpaper against the material. This technique proves counterproductive as it embeds contaminants rather than removing them.
Gentle circular motions distribute cleaning force evenly across larger surface areas. Consequently, this approach prevents concentrated stress points that lead to scratching. Professional cleaners recommend using light, consistent pressure combined with appropriate cleaning solutions for optimal results.
Using Inappropriate Cleaning Chemicals
Acidic cleaners containing hydrochloric or phosphoric acid etch glass surfaces permanently. Similarly, alkaline cleaners with pH levels exceeding 12 cause chemical etching that appears as cloudy patches or surface roughness. These chemical reactions alter the glass structure at a molecular level, creating irreversible damage.
Ammonia-based products react with certain glass coatings, causing discolouration and surface degradation. Therefore, stick to pH-neutral cleaners specifically formulated for glass surfaces. Natural alternatives like lemon-based solutions provide effective cleaning without chemical etching risks.
Cleaning Hot Glass Surfaces
Thermal shock occurs when cold cleaning solutions contact hot glass surfaces, causing rapid temperature changes that create stress fractures. Additionally, hot glass becomes more susceptible to chemical etching as elevated temperatures accelerate chemical reactions between cleaners and glass materials.
Steam cleaning on hot surfaces intensifies chemical activity, potentially causing permanent clouding or etching. Subsequently, always allow oven glass to cool completely before applying any cleaning solutions. This cooling period prevents thermal stress and reduces chemical reactivity significantly.
Dragging Debris Across the Surface
Food particles and carbonised deposits act as abrasive materials when dragged across glass surfaces during cleaning. Furthermore, sugar residues crystallise into hard particles that scratch glass when subjected to scrubbing motions. These debris particles create linear scratches that follow the cleaning motion direction.
Pre-soaking loosens debris particles, allowing them to lift away without surface contact during removal. Therefore, always remove loose debris with a plastic scraper before applying cleaning solutions. This preliminary step eliminates the primary cause of scratching during the actual cleaning process.
Finishing and Polishing for Crystal-Clear Results
Proper finishing techniques determine whether your oven glass achieves crystal-clear transparency or develops streaks and water spots. Moreover, the final rinse and polishing stages remove cleaning residue that can cause clouding or attract future dirt buildup.
Final Rinse Techniques to Remove Cleaning Residue
Cleaning residue creates a thin film that reduces glass clarity and attracts dirt particles. Therefore, thorough rinsing eliminates soap films, chemical deposits, and loosened grime completely. Use distilled water for the final rinse to prevent mineral deposits from tap water.
Spray distilled water evenly across the entire glass surface, ensuring complete coverage of all cleaned areas. Subsequently, work from top to bottom using gentle wiping motions to prevent residue redistribution. This systematic approach ensures no cleaning solution remains on the glass surface.
Proper Drying Methods to Prevent Water Spots
Water spots form when mineral-rich water evaporates, leaving behind calcium and magnesium deposits on glass surfaces. Furthermore, these spots become increasingly difficult to remove as they bond with the glass through repeated heating cycles.
Immediate drying prevents water spot formation by removing moisture before evaporation occurs. Additionally, use a clean microfibre cloth to absorb water droplets without leaving lint or scratches. Work quickly but gently to maintain the glass surface integrity throughout the drying process.
Polishing with Microfibre Cloths for Streak-Free Finish
Microfibre cloths contain thousands of tiny fibres that trap dirt particles and absorb moisture without scratching glass surfaces. However, ensure the cloth remains completely clean and dry before polishing to prevent redistributing contaminants across the glass.
Use circular motions followed by straight vertical strokes to achieve optimal clarity and eliminate streaking patterns. Consequently, this two-stage polishing technique removes any remaining moisture while creating a uniform surface finish. Replace or wash microfibre cloths regularly to maintain their effectiveness.
Professional cleaning services recommend using separate cloths for cleaning and polishing to prevent cross-contamination. Therefore, designate one cloth for initial cleaning and another exclusively for final polishing to achieve restaurant-quality results.
Checking for Missed Spots and Touch-Up Cleaning
Inspection lighting reveals missed spots, streaks, and residue that appear invisible under normal kitchen lighting conditions. Moreover, different angles expose various surface imperfections that require additional attention for complete cleaning success.
Examine the glass from multiple angles using natural daylight or bright LED lighting to identify any remaining blemishes. Additionally, look for grease spots, water marks, and cleaning streaks that compromise the glass transparency. Touch-up cleaning addresses these specific areas without repeating the entire cleaning process.
Apply minimal cleaning solution to problem areas using a cotton swab or small cloth section for precise treatment. Subsequently, rinse and dry these spots immediately to prevent new residue formation. This targeted approach maintains the overall cleanliness while perfecting specific imperfections.
Preventive Maintenance and Care Tips
Preventive maintenance significantly reduces the frequency of intensive oven glass cleaning while preserving the surface integrity. Furthermore, regular care prevents grease buildup, stubborn stains, and potential scratching from accumulated debris that requires aggressive removal methods.
Regular Cleaning Schedule to Prevent Buildup
Weekly light cleaning prevents grease and food particles from forming hardened deposits on oven glass surfaces. Moreover, this consistent maintenance approach eliminates the need for harsh chemicals or abrasive techniques that risk scratching the glass.
Wipe down oven glass after every three cooking sessions using a damp microfibre cloth and mild dish soap solution. Additionally, monthly deep cleaning removes any accumulated residue while maintaining optimal transparency and preventing permanent staining.
Using Oven Liners and Drip Trays
Oven liners create a protective barrier that catches spills, grease splatters, and food debris before they reach the oven glass. Consequently, these disposable or reusable sheets reduce cleaning frequency while protecting glass surfaces from direct contamination.
Position drip trays beneath roasting dishes and baking sheets to capture overflow liquids and grease. Therefore, this preventive measure minimises splattering onto oven walls and glass doors during cooking processes.
- Silicone oven liners withstand temperatures up to 260°C
- Disposable foil liners provide single-use protection
- Custom-fit drip trays match specific oven dimensions
- Non-stick surfaces facilitate easy cleaning
Proper Cooking Techniques to Minimise Splattering
Covering dishes with foil or oven-safe lids reduces grease splattering by up to 80% during roasting and baking processes. Similarly, using appropriate cooking temperatures prevents excessive bubbling and splattering that coats oven glass with stubborn residue.
Lower cooking temperatures by 25°F (15°C) and extend cooking time to achieve similar results with reduced splattering. Meanwhile, placing baking sheets on lower oven racks creates distance between food and glass surfaces, minimising direct splatter contact.
Immediate Cleanup of Spills While Cooking
Fresh spills remove easily with minimal effort, whereas dried residue requires intensive scrubbing that risks glass scratching. Therefore, address spills immediately after they occur while the oven remains warm but safe to access.
Turn off the oven and allow 5-10 minutes cooling time before carefully wiping spills with a damp cloth. Subsequently, this immediate response prevents spills from baking onto glass surfaces and forming permanent stains.
Immediate spill cleanup reduces deep cleaning requirements by 70%
Protective Measures During Heavy Cooking Periods
Holiday cooking and meal preparation sessions generate increased oven activity that accelerates glass contamination. Moreover, implementing additional protective measures during these intensive periods maintains glass clarity and prevents damage accumulation.
Install temporary splatter screens inside the oven during multi-dish cooking sessions to create extra protection layers. Additionally, increase ventilation by using exhaust fans and opening windows to reduce moisture and grease circulation that settles on glass surfaces.
Clean oven glass between cooking batches during extended cooking sessions to prevent layered buildup that becomes increasingly difficult to remove. Consequently, this proactive approach maintains optimal visibility and prevents the need for aggressive cleaning methods that risk scratching.
Troubleshooting and Repair Options
Despite careful cleaning techniques, oven glass scratches occasionally occur from abrasive materials or improper cleaning methods. Consequently, understanding scratch assessment and repair options helps restore glass clarity whilst maintaining appliance functionality and value.
Assessing Scratch Severity and Visibility
Surface scratches appear as fine lines visible only under direct lighting, whereas deep scratches catch fingernails when running across the surface. Additionally, determining scratch depth guides appropriate repair methods and realistic outcome expectations.
Test scratch depth by gently running a fingernail perpendicular to the scratch line. Furthermore, surface scratches feel smooth whilst deep scratches create noticeable resistance and catching sensations that indicate glass penetration beyond the outer layer.
Visibility assessment requires examining glass under various lighting conditions including natural daylight, artificial kitchen lighting, and oven interior illumination. Moreover, scratches appearing prominent under one lighting condition may prove barely noticeable under others, influencing repair necessity decisions.
DIY Scratch Repair Methods
Glass polishing compounds effectively remove surface scratches through gentle abrasive action that smooths microscopic irregularities. Subsequently, apply small amounts using circular motions with soft microfibre cloths, working gradually across affected areas.
Cerium oxide powder provides professional-grade scratch removal capabilities for home use when mixed with water to create polishing paste. However, this method requires patience and multiple applications for noticeable improvement on deeper scratches.
- Clean glass thoroughly before applying polishing compounds
- Work in small sections using consistent pressure
- Rinse completely between applications to assess progress
- Allow glass to cool completely before beginning repairs
Toothpaste containing mild abrasives serves as an emergency scratch repair solution for minor surface marks. Nevertheless, this household remedy works only on superficial scratches and requires thorough rinsing to prevent residue buildup that attracts future dirt accumulation.
Professional Repair and Replacement Considerations
Professional glass restoration services employ specialised equipment and compounds unavailable to consumers, achieving superior results on moderate to severe scratching. Additionally, technicians assess whether repairs provide cost-effective solutions compared to complete glass replacement options.
Consider professional intervention when DIY methods fail to improve visibility or when scratches cover extensive glass areas affecting cooking visibility. Furthermore, deep scratches extending through multiple glass layers typically require professional assessment to determine structural integrity implications.
Complete glass replacement becomes necessary when scratches compromise safety, create stress concentration points, or cover more than 30% of viewing area. Moreover, replacement ensures optimal clarity and eliminates ongoing frustration with impaired cooking visibility.
Cost Analysis: Repair Versus Replacement
| Repair Option | Cost Range (UK) | Effectiveness | Time Required |
|---|---|---|---|
| DIY Polish Kit | £15-30 | Surface scratches only | 2-4 hours |
| Professional Restoration | £80-150 | Moderate to deep scratches | 1-2 days |
| Glass Replacement | £120-300 | Complete restoration | 3-5 days |
Repair costs prove economical for minor scratching affecting limited glass areas, whilst replacement becomes cost-effective when extensive damage requires multiple repair attempts. Subsequently, factor in appliance age, warranty status, and overall condition when making repair versus replacement decisions.
Additionally, consider opportunity costs including time invested in DIY repairs, temporary cooking limitations, and potential for unsuccessful repair attempts requiring eventual replacement anyway. Therefore, realistic assessment of scratch severity guides appropriate investment levels.
Maintaining Warranty Coverage
Manufacturer warranties typically exclude damage from improper cleaning methods, abrasive materials, or user negligence. However, documenting proper cleaning practices and using approved methods helps maintain warranty validity for manufacturing defects or premature glass failure.
Contact manufacturers before attempting repairs to understand warranty implications and approved service providers. Furthermore, unauthorised repairs or modifications may void remaining warranty coverage, making professional consultation essential for newer appliances.
Maintain cleaning product receipts and documentation showing adherence to manufacturer guidelines as evidence of proper care. Consequently, this preparation supports warranty claims for legitimate glass defects whilst protecting against coverage denial due to suspected misuse.
Frequently Asked Questions
Can I use glass cleaner on my oven door?
Avoid using standard glass cleaners on oven doors as they often contain ammonia and other harsh chemicals that can damage the tempered glass surface. Instead, use baking soda paste, white vinegar, or gentle dish soap with warm water for safe and effective cleaning.
How often should I clean my oven glass to prevent stubborn stains?
Clean your oven glass after every 3-4 uses or whenever you notice grease splatters. Regular maintenance prevents grease from polymerising and forming tough, amber-coloured deposits that become increasingly difficult to remove. Immediate cleaning after spills is ideal.
What should I do if my oven glass already has scratches?
Unfortunately, scratches on tempered oven glass cannot be repaired and may compromise the door’s safety. Minor scratches might not affect functionality, but deep scratches create weak points that could lead to thermal stress fractures. Consider professional assessment or replacement if scratches are extensive.
Is it safe to clean oven glass whilst it's still warm?
Never clean oven glass whilst it’s warm or hot. Always allow the oven to cool completely before cleaning to prevent thermal shock, which can cause the tempered glass to shatter. Wait at least 30-60 minutes after cooking before attempting any cleaning.
Can I remove the oven door for easier cleaning?
Most modern oven doors can be safely removed for thorough cleaning. Check your oven manual for specific instructions, as the process varies by manufacturer. Removing the door allows better access to clean both sides of the glass and prevents cleaning solution from dripping into the oven cavity.
What's the best homemade cleaning solution for oven glass?
Create a paste using 3 parts baking soda to 1 part water for the most effective homemade cleaner. For extra cleaning power, spray white vinegar over the baking soda paste to create a gentle fizzing action that helps break down grease and burnt-on residue without scratching the glass surface.
Will using oven liners prevent glass from getting dirty?
Oven liners significantly reduce grease splatters and food spills that dirty oven glass. Place silicone or PTFE-coated liners on the bottom rack or oven floor to catch drips. However, ensure liners don’t block air circulation and follow manufacturer guidelines for safe placement.
Can I use a plastic scraper on stubborn burnt-on residue?
Yes, plastic scrapers are safe for removing stubborn residue from oven glass. Use a plastic putty knife or dedicated glass scraper at a 45-degree angle with gentle pressure. Always ensure the glass is completely cool and apply cleaning solution first to soften the residue before scraping.
You May Also Like
How to Clean Washing Machine Filter: Complete Guide 2026

How to Clean Artificial Grass: Complete Maintenance Guide