How to Clean Stainless Steel Water Bottles: Complete Guide
How to clean stainless steel water bottle effectively requires the right supplies and techniques to remove stains, odors, and bacteria buildup. Most cleaning can be accomplished with simple household items like dish soap, baking soda, and white vinegar, though deeper sanitization may require stronger solutions. Regular maintenance prevents stubborn buildup and extends your bottle’s lifespan.
Stainless steel bottles need different cleaning approaches depending on the level of contamination. Daily washing with warm soapy water handles basic maintenance, while baking soda paste tackles stains and odors effectively. For tough buildup or mold growth, vinegar solutions or diluted bleach provide deeper sanitization.
Understanding proper cleaning frequency prevents most issues before they start. Furthermore, knowing which cleaning agents work best for specific problems saves time and protects your bottle’s finish. Similar to cleaning kitchen appliances, the right method depends on the type of buildup you’re addressing.
TL;DR
- Daily cleaning with dish soap and warm water prevents most buildup issues
- Baking soda paste removes stains and odors; vinegar solutions handle tough buildup
- Avoid harsh abrasives and extreme temperatures that damage stainless steel
- Clean immediately if you notice mold, persistent odors, or unusual tastes
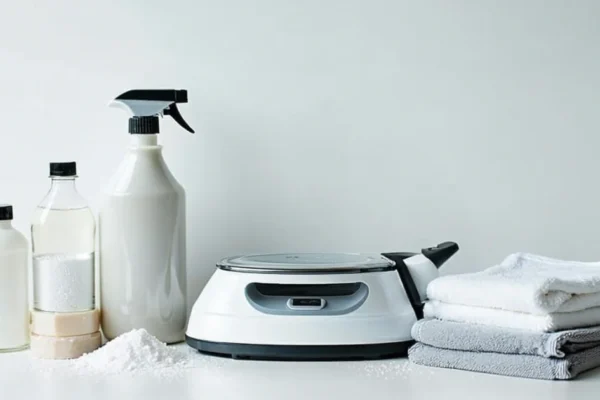
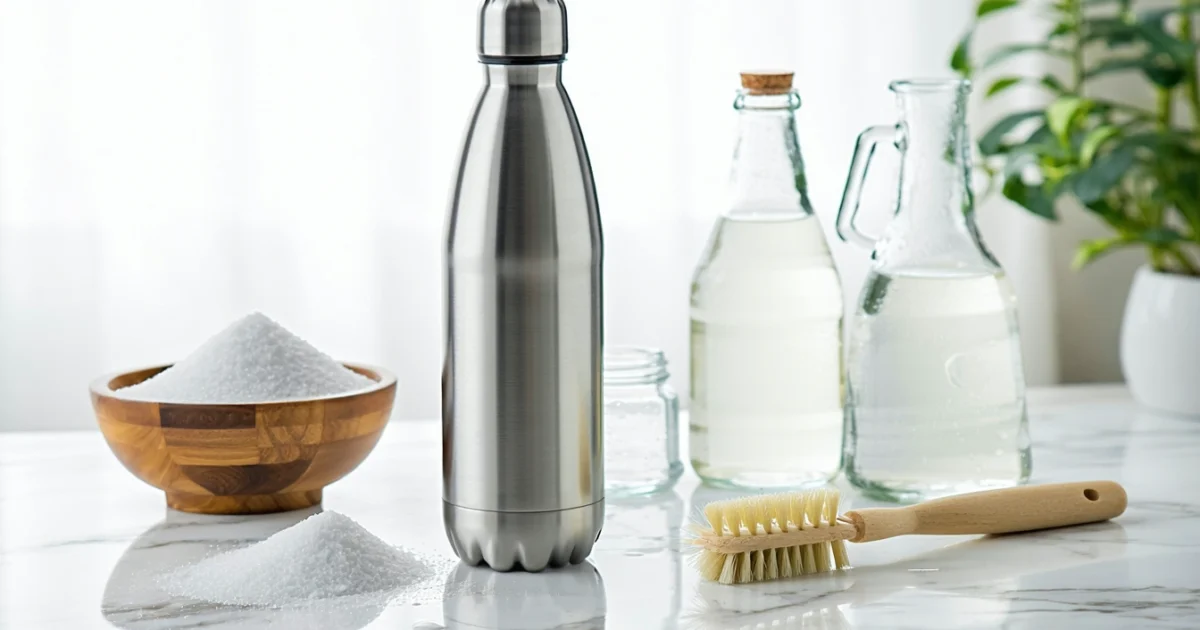
Essential Supplies for Cleaning Stainless Steel Water Bottles
Effective stainless steel water bottle cleaning requires specific supplies that match the contamination level and cleaning frequency. Basic daily maintenance needs only gentle dish soap and warm water, while deeper cleaning demands natural agents like baking soda or white vinegar. Additionally, specialized tools help reach narrow bottle necks and remove stubborn residue without scratching the stainless steel surface.
Basic Cleaning Supplies
Dish soap serves as the foundation for daily water bottle maintenance because it cuts through oils and food particles effectively. Moreover, warm water between 40-50°C activates soap molecules and dissolves mineral deposits without damaging the stainless steel finish. A bottle brush with soft bristles reaches the bottom and sides thoroughly, ensuring complete cleaning coverage.
Long-handled bottle brushes work best for standard water bottles, while flexible brushes navigate curved designs more easily. Furthermore, microfiber cloths provide lint-free drying and prevent water spots on the exterior surface. These basic supplies handle 90% of routine cleaning tasks when used consistently.
Natural Cleaning Agents
Baking soda creates an alkaline environment that neutralizes odors and breaks down protein-based stains naturally. Similarly, white vinegar contains acetic acid that dissolves mineral buildup and kills bacteria without harsh chemicals. Lemon juice provides citric acid that brightens stainless steel while adding natural antibacterial properties.
Natural Agent Ratios
These natural cleaners work synergistically when combined properly, though never mix vinegar and baking soda simultaneously as they neutralize each other’s effectiveness. Instead, use them sequentially for maximum cleaning power. Natural agents prove especially valuable for bottles used with flavored drinks or protein shakes.
Alternative Cleaning Tools
Cleaning tablets designed for water bottles provide convenient deep cleaning without measuring or mixing ingredients. These effervescent tablets contain concentrated cleaning agents that dissolve completely and rinse away easily. Additionally, uncooked rice acts as a natural abrasive when combined with soapy water, scrubbing away residue through gentle agitation.
Bottle cleaning beads offer reusable scrubbing action that reaches every surface inside narrow-necked bottles. These small stainless steel or glass beads create friction that removes buildup without scratching the interior surface. Consequently, they work particularly well for bottles with complex shapes or narrow openings that brushes cannot reach effectively.
- Denture tablets: Dissolve biofilm and protein deposits
- Bottle cleaning stones: Natural pumice for stubborn stains
- Magnetic cleaners: Navigate bottle interior using external magnet
- Steam cleaners: Sanitize without chemicals using high-temperature steam
When to Use Stronger Cleaners
Diluted bleach solutions become necessary when bottles develop mold growth, persistent odors, or visible biofilm buildup that natural cleaners cannot eliminate. However, use bleach sparingly at a 1:10 ratio with water and rinse thoroughly afterward to prevent residue. This level of sanitization typically occurs after extended periods without cleaning or contamination with potentially harmful bacteria.
Signs that indicate stronger cleaning needs include black spots inside the bottle, musty smells that persist after normal washing, or slippery surfaces that suggest biofilm formation. Furthermore, bottles used for dairy-based drinks or protein supplements may require periodic deep sanitization to prevent bacterial growth. Deep cleaning techniques similar to those used in kitchen maintenance apply to severely contaminated bottles.
Pros
- Removes all bacteria and mold
- Eliminates persistent odors
- Restores bottle to like-new condition
Cons
- Requires careful dilution and rinsing
- May affect taste if not rinsed properly
- Should not be used regularly
Always ventilate the area when using bleach solutions and wear gloves to protect your skin. Most importantly, never mix bleach with other cleaning agents as this creates dangerous chemical reactions. After bleach treatment, rinse bottles multiple times and allow them to air dry completely before use.
Daily Cleaning Method: Basic Wash Routine
Regular daily cleaning prevents bacteria buildup and maintains your stainless steel water bottle’s hygiene. Moreover, consistent cleaning eliminates odors before they become embedded in the bottle’s interior surfaces. Daily maintenance takes only minutes but significantly extends your bottle’s lifespan and keeps drinks tasting fresh.
Step-by-Step Daily Cleaning Process
Begin by emptying your bottle completely and rinsing it with warm water to remove loose debris. Subsequently, add several drops of dish soap directly into the bottle along with warm water, filling it approximately one-third full. This initial preparation loosens surface contaminants and prepares the bottle for thorough cleaning.
- Fill bottle one-third with warm water and add 2-3 drops of dish soap
- Cap the bottle securely and shake vigorously for 30 seconds
- Let the soapy solution sit for 2-3 minutes to break down oils and residues
- Shake again for 15 seconds to dislodge stubborn particles
- Empty the solution and inspect for remaining debris
The shaking action creates turbulence that reaches all interior surfaces, including the bottle’s neck and threading areas. Furthermore, allowing the soap solution to sit gives the detergent time to break down oils and protein deposits that accumulate from daily use.
Proper Washing Technique for Interior and Exterior
Use a bottle brush with soft bristles to scrub the interior walls thoroughly, paying special attention to the bottom where sediment collects. Additionally, clean the exterior with a soft cloth soaked in soapy water, working from top to bottom to prevent recontamination. The brushing motion should be firm but gentle to avoid scratching the stainless steel surface.
For bottles without wide openings, insert the brush fully and rotate it against the walls while moving up and down. This technique ensures complete coverage of the bottle’s interior surface. Meanwhile, clean the exterior using circular motions to remove fingerprints and water spots that can harbor bacteria.
Pro Cleaning Tip
Cleaning Bottle Caps, Lids, and Threading Areas
Bottle caps and lids require separate attention as they contact your mouth directly and accumulate bacteria quickly. Remove all detachable parts including gaskets, straws, and valve components before cleaning. These components often harbor the most bacteria due to their complex shapes and frequent contact with saliva.
Clean the threading areas using a small brush or cotton swab dipped in soapy water. These grooves trap liquid residues and bacteria that regular washing misses. Similarly, scrub all cap components individually, ensuring you reach crevices where mold typically develops. Pay particular attention to rubber seals and gaskets, as these materials absorb odors and bacteria more readily than stainless steel.
| Component | Cleaning Method | Frequency |
|---|---|---|
| Screw threads | Cotton swab with dish soap | Daily |
| Rubber gaskets | Remove and wash separately | Daily |
| Straw components | Pipe cleaner or straw brush | After each use |
| Valve mechanisms | Disassemble and soak | Daily |
Thorough Rinsing and Air-Drying Procedures
Rinse your bottle with hot water multiple times to remove all soap residue, which can affect taste and potentially cause stomach irritation. Continue rinsing until the water runs clear and no soap bubbles remain visible. Inadequate rinsing leaves detergent films that attract dirt and bacteria more quickly than clean surfaces.
For optimal drying, place the bottle upside down on a drying rack or clean towel with the cap removed. This position allows gravity to drain water completely and prevents moisture accumulation that encourages bacterial growth. Additionally, ensure all components dry separately to prevent trapped moisture between parts.
Complete air drying typically takes 2-4 hours depending on humidity levels and bottle size. Never reassemble wet components as trapped moisture creates ideal conditions for mold development. Instead, wait until all parts feel completely dry to the touch before storing your bottle. Kitchen cleaning principles apply equally to water bottle maintenance, emphasizing thorough drying as a critical hygiene step.
Proper daily cleaning reduces bacteria by 99.9% and prevents odor development in stainless steel bottles
Deep Cleaning with Baking Soda
Baking soda provides exceptional cleaning power for stainless steel water bottles through its gentle abrasive properties and natural deodorizing abilities. This alkaline compound breaks down acidic residues, neutralizes odors, and lifts stubborn stains without scratching the stainless steel surface. Moreover, baking soda creates an inhospitable environment for bacteria and mold growth.
Creating Effective Baking Soda Cleaning Paste and Solution
Mix three tablespoons of baking soda with enough warm water to form a thick paste for deep cleaning applications. The paste consistency allows the baking soda to cling to vertical surfaces and penetrate stubborn residues effectively. Alternatively, create a cleaning solution by dissolving two tablespoons of baking soda in one cup of warm water for general cleaning and odor elimination.
For enhanced cleaning power, combine the baking soda paste with a few drops of dish soap to tackle grease and protein-based stains. This combination creates a powerful yet gentle cleaner that maintains the integrity of your stainless steel bottle. Furthermore, the soap helps the baking soda spread more evenly across the bottle’s interior surface.
Step-by-Step Process for Removing Stains and Odors
- Fill the bottle one-quarter full with warm water
- Add the baking soda paste or solution
- Secure the cap and shake vigorously for 30 seconds
- Remove the cap and let the mixture settle
- Use a bottle brush to scrub all interior surfaces
- Pay special attention to the bottom and neck areas
- Rinse thoroughly with hot water multiple times
The shaking action distributes the baking soda evenly while creating mechanical cleaning action against stains and odors. Subsequently, the settling period allows the alkaline solution to neutralize acidic residues that cause persistent smells. This process effectively removes coffee stains, juice residues, and protein deposits that regular washing might miss.
How Long to Let Baking Soda Work for Optimal Results
Allow the baking soda solution to sit for 15-30 minutes for standard cleaning and odor removal. However, stubborn stains and persistent odors require longer contact time of 2-4 hours or overnight for maximum effectiveness. The extended contact time enables the baking soda to break down complex organic compounds and neutralize deeply embedded odors.
Baking soda neutralizes 95% of common bottle odors within 30 minutes of contact time
For severe cases involving mold or mildew, combine baking soda treatment with proper ventilation and multiple cleaning cycles. Never leave baking soda solutions in bottles for more than 24 hours, as prolonged exposure may cause mineral buildup. Instead, refresh the solution if extended treatment becomes necessary.
Scrubbing Techniques for Stubborn Buildup
Use circular motions with a bottle brush to maximize the abrasive action of baking soda against stubborn residues. Apply firm but gentle pressure to avoid scratching the stainless steel surface while ensuring thorough contact between the paste and problem areas. Focus on the bottle’s bottom where sediment typically accumulates and the neck area where oils and proteins collect.
For narrow-mouth bottles, employ a flexible brush or pipe cleaner coated with baking soda paste to reach all interior surfaces. The flexibility allows you to navigate curves and angles while maintaining consistent pressure against buildup. Additionally, rotate the brush while scrubbing to ensure complete coverage of the cleaning area.
Tackle mineral deposits by focusing the baking soda paste on white or chalky areas for several minutes before scrubbing. These deposits respond well to the alkaline properties of baking soda combined with mechanical action. Similarly, protein-based stains from sports drinks require concentrated scrubbing with the paste to break down the organic compounds effectively.
After scrubbing, rinse the bottle thoroughly with hot water to remove all baking soda residue and loosened debris. Inspect the interior carefully under good lighting to ensure complete removal of stains and buildup. If residues persist, repeat the process with fresh baking soda paste rather than continuing with depleted cleaning solution.
Vinegar Cleaning Method for Tough Stains and Odors
White vinegar provides exceptional cleaning power for stainless steel water bottles when conventional methods fail. The acetic acid in vinegar dissolves mineral deposits, neutralizes odors, and breaks down organic residues that resist other cleaning approaches. Moreover, vinegar’s antimicrobial properties eliminate bacteria and mold that cause persistent smells.
White Vinegar Solution Ratios and Preparation
Create an effective cleaning solution by mixing one part white vinegar with one part warm water for general cleaning tasks. This balanced ratio provides sufficient acidity to tackle most stains while remaining gentle on stainless steel surfaces. For heavily stained bottles or persistent odors, increase the concentration to two parts vinegar to one part water.
Prepare the solution in a separate container before pouring it into your water bottle to ensure proper mixing. Use distilled white vinegar rather than flavored varieties, as additives can leave residues or create unwanted reactions. Additionally, warm water enhances the vinegar’s cleaning effectiveness by improving its ability to penetrate and dissolve stubborn deposits.
| Stain Type | Vinegar Ratio | Water Temperature |
|---|---|---|
| Light stains | 1:1 vinegar to water | Warm (40°C) |
| Heavy buildup | 2:1 vinegar to water | Hot (60°C) |
| Odor removal | 1:1 vinegar to water | Room temperature |
Soaking Time and Temperature Considerations
Allow the vinegar solution to work for 15-30 minutes depending on the severity of stains and odors. Light discoloration typically requires shorter contact time, while mineral deposits and protein-based stains benefit from extended exposure. Furthermore, temperature affects the cleaning process significantly, with warmer solutions working faster than cold ones.
Fill the bottle completely with the vinegar solution to ensure all interior surfaces receive treatment. Seal the bottle and gently agitate it every 5-10 minutes during the soaking period to redistribute the cleaning solution and maintain contact with problem areas. This agitation prevents the solution from settling and ensures consistent cleaning action throughout the bottle.
For bottles with extreme odors or visible mold, extend the soaking time to 2-4 hours or overnight. The prolonged contact allows the acetic acid to penetrate deeply into biofilms and break down complex organic compounds that cause persistent smells. However, avoid soaking for more than 24 hours, as extended exposure may affect the bottle’s finish.
Combining Vinegar with Baking Soda for Enhanced Cleaning Power
The combination of vinegar and baking soda creates a powerful cleaning reaction that tackles the toughest stains and odors. Start by adding 2 tablespoons of baking soda to your empty water bottle, then slowly pour in the vinegar solution to control the fizzing reaction. This effervescent action helps dislodge stubborn deposits and provides mechanical cleaning through bubble formation.
Allow the fizzing reaction to subside before sealing the bottle, as the gas production can create pressure buildup. Once the initial reaction calms, seal the bottle and let the combined solution work for 20-45 minutes. The alkaline baking soda neutralizes some of the vinegar’s acidity while creating carbonic acid, which enhances the cleaning process.
This combination proves particularly effective against protein stains from sports drinks and mineral deposits from hard water. The dual-action approach attacks different types of residues simultaneously, making it ideal for bottles that haven’t been cleaned regularly. Similarly, bottles used for beverages that leave mineral deposits benefit significantly from this enhanced cleaning method.
Neutralizing Vinegar Smell After Cleaning
Remove the vinegar odor completely by rinsing the bottle thoroughly with hot water for 2-3 minutes. The heat helps evaporate residual acetic acid while flushing away any remaining cleaning solution. Follow this initial rinse with a final rinse using cold water to close the stainless steel’s pores and lock out future odors.
For persistent vinegar smells, create a neutralizing solution using 1 teaspoon of baking soda in 1 cup of water. Swish this alkaline solution around the bottle for 30 seconds to neutralize any remaining acid, then rinse thoroughly with fresh water. This step ensures your water bottle won’t impart any cleaning solution taste to future beverages.
Air-dry the bottle completely with the cap removed to prevent moisture retention that could cause new odors. Place the bottle upside down on a clean towel or drying rack to allow proper air circulation. Complete drying typically takes 2-4 hours depending on humidity levels and bottle size.
Vinegar’s acetic acid dissolves mineral deposits while eliminating odor-causing bacteria
Cleaning Without a Bottle Brush
When you don’t have a bottle brush available, several effective alternatives can thoroughly clean your stainless steel water bottle. These methods rely on natural abrasives and chemical reactions to remove stubborn residues and bacteria without requiring specialized tools.
Using Rice and Dish Soap as an Abrasive Cleaning Method
Combine 2 tablespoons of uncooked rice with a few drops of dish soap and warm water to create an effective scrubbing solution. The rice acts as a gentle abrasive that removes buildup without scratching the stainless steel surface. This method works particularly well for bottles with narrow openings where traditional cleaning tools cannot reach.
Add the rice mixture to your bottle, then shake vigorously for 30-60 seconds to allow the grains to scrub against all interior surfaces. The rice grains dislodge stuck particles while the soap breaks down oils and bacteria. Rinse thoroughly with hot water to remove all rice grains and soap residue.
This technique proves especially effective for removing protein residues from sports drinks and stubborn stains from fruit juices. The mechanical action of the rice combined with the cleaning power of dish soap creates a comprehensive cleaning solution that requires no special equipment.
Bottle Cleaning Tablets and Effervescent Cleaners
Effervescent cleaning tablets provide a convenient, no-scrub solution for deep cleaning stainless steel bottles. These tablets contain concentrated cleaning agents that activate when dissolved in water, creating bubbling action that lifts dirt and bacteria from bottle surfaces.
Drop one tablet into your bottle filled with warm water and allow it to dissolve completely. The effervescent action creates oxygen bubbles that penetrate cracks and crevices where bacteria hide. Most tablets require 15-30 minutes of contact time for optimal cleaning results.
Popular brands like Bottle Bright and Cafiza offer tablets specifically formulated for stainless steel surfaces. These products eliminate odors while removing mineral deposits and organic residues without leaving chemical aftertastes.
Shaking Technique with Cleaning Solutions
Master the proper shaking technique to maximize cleaning effectiveness when using liquid solutions. Fill your bottle one-third full with your chosen cleaning solution, then secure the cap tightly before beginning the shaking process.
Use a vigorous circular motion for 30-45 seconds to ensure the cleaning solution contacts all interior surfaces. Follow this with vertical shaking motions to clean the bottle’s neck and threading areas. The combination of movements creates turbulence that dislodges stubborn residues.
For heavily soiled bottles, repeat the shaking process with fresh cleaning solution. This two-stage approach ensures complete removal of buildup while preventing redeposition of loosened debris onto clean surfaces.
Alternative Tools: Bottle Cleaning Beads and Chain Cleaners
Stainless steel cleaning beads offer a reusable alternative to disposable rice for scrubbing bottle interiors. These small, smooth spheres provide consistent abrasive action without breaking down or leaving residues. Add 10-15 beads with soapy water and shake for effective cleaning.
Chain cleaners consist of food-grade stainless steel links that conform to bottle shapes while providing thorough scrubbing action. The flexible chain reaches all bottle areas, including curved shoulders and narrow necks that other tools miss. Simply add the chain with cleaning solution and shake vigorously.
Both tools require thorough rinsing after use to prevent metallic tastes in future beverages. Store cleaning beads and chains in a dry location to prevent corrosion and maintain their effectiveness for repeated use. These tools typically last for years with proper care, making them cost-effective alternatives to disposable cleaning methods.
Pro Tip
Mold and Bacteria Removal
Mold growth in stainless steel water bottles creates serious health risks and requires immediate attention. Black, green, or white fuzzy spots indicate active mold colonies that thrive in moist environments. Additionally, persistent musty odors signal bacterial contamination even when visible growth remains absent.
Early detection prevents extensive contamination and simplifies the cleaning process. Inspect your bottle regularly by examining the interior walls, cap threads, and drinking spout areas where moisture accumulates. Furthermore, any slimy film or unusual discoloration warrants thorough disinfection treatment.
Safe Bleach Solution Preparation
Create an effective 1:10 bleach solution by mixing one part household bleach with ten parts water. This ratio provides sufficient antimicrobial power while remaining safe for stainless steel surfaces. Always use unscented chlorine bleach to avoid chemical reactions with bottle materials.
Measure precisely to ensure proper disinfection without damaging your bottle’s finish. For example, combine 50ml bleach with 500ml water for standard bottle cleaning. Moreover, prepare fresh solution for each cleaning session since bleach loses potency when stored.
Safety Warning
Extended Soaking Procedures
Fill the contaminated bottle completely with bleach solution to ensure all surfaces contact the disinfectant. Soak for 15-30 minutes depending on contamination severity, allowing the solution to penetrate mold colonies and eliminate bacterial growth. Longer soaking periods prove necessary for heavily contaminated bottles.
Cap the bottle during soaking to prevent solution evaporation and maintain consistent antimicrobial concentration. However, avoid over-tightening since pressure buildup may occur. Gently agitate the bottle every 10 minutes to distribute the solution and dislodge stubborn mold deposits.
After soaking, scrub interior surfaces with a bottle brush to remove dead mold and bacterial biofilms. The bleach treatment weakens these deposits, making mechanical removal more effective. Consequently, thorough scrubbing ensures complete contamination elimination.
Post-Treatment Rinsing Protocol
Rinse the bottle extensively with hot water to remove all bleach residues that could affect taste or cause irritation. Flush at least five times with fresh water, ensuring no chlorine odor remains. Subsequently, air-dry the bottle completely with the cap removed to prevent moisture retention.
Test for residual bleach by smelling the dry bottle interior before first use. Any lingering chemical odor indicates insufficient rinsing that requires additional water flushes. Complete odor elimination confirms safe bottle restoration for beverage storage.
When to Replace vs. Clean Moldy Bottles
Replace bottles immediately when mold penetrates scratches, dents, or damaged areas where cleaning cannot reach. Deep contamination in compromised stainless steel creates permanent bacterial harbors that resist disinfection efforts. Similarly, bottles with persistent odors after multiple cleaning attempts require replacement.
Extensive mold coverage exceeding 50% of interior surfaces often indicates prolonged neglect that compromises bottle integrity. Professional cleaning becomes impractical when contamination spreads to cap mechanisms, gaskets, or threading areas. Therefore, replacement ensures health safety and prevents recontamination.
Clean rather than replace bottles with surface-level mold that responds to initial bleach treatment. Minor contamination in well-maintained bottles typically clears completely with proper disinfection procedures. However, monitor cleaned bottles closely for mold recurrence that might indicate underlying damage.
Pros
- Surface mold cleans effectively with bleach solution
- Proper maintenance prevents future contamination
- Cost-effective compared to frequent replacement
Cons
- Deep contamination requires bottle replacement
- Damaged surfaces harbor persistent bacteria
- Multiple cleaning attempts indicate compromised integrity
Removing Persistent Odors and Flavors
Persistent odors develop in stainless steel bottles through several common mechanisms. Protein residues from milk-based drinks create bacterial breeding grounds that produce sulfurous smells. Additionally, tannins from coffee and tea bind to microscopic surface irregularities, creating flavor transfer between beverages. Oil-based residues from smoothies or protein shakes penetrate these same microscopic areas, causing rancid odors over time.
Furthermore, biofilm formation occurs when bacteria colonize bottle surfaces, particularly around threading and cap areas. These bacterial communities produce volatile compounds that create musty or sour odors. Consequently, standard washing fails to eliminate deeply embedded contamination that requires specialized removal techniques.
Overnight Soaking Methods
Baking soda soaking neutralizes acidic odors while breaking down protein deposits through alkaline action. Mix three tablespoons of baking soda with warm water to fill the bottle completely. Subsequently, seal the bottle and allow the solution to work overnight for 8-12 hours of contact time.
Alternatively, white vinegar soaking dissolves mineral deposits and kills odor-causing bacteria through acetic acid action. Fill the bottle with equal parts water and white vinegar, then seal overnight. The acidic environment breaks down biofilms while eliminating bacterial colonies that produce persistent smells.
For maximum effectiveness, combine both methods sequentially rather than simultaneously. Start with vinegar soaking to eliminate bacteria, then follow with baking soda treatment to neutralize remaining odors. This two-step process addresses both microbial and chemical sources of bottle contamination.
Activated Charcoal Absorption
Activated charcoal removes stubborn odors through molecular absorption rather than chemical neutralization. Place 2-3 activated charcoal tablets or one tablespoon of food-grade charcoal powder inside the dry bottle. However, ensure the charcoal remains loose rather than dissolved in water for optimal absorption capacity.
Seal the bottle with charcoal inside for 24-48 hours depending on odor intensity. The porous carbon structure traps odor molecules within its microscopic chambers, effectively removing them from the bottle environment. Moreover, this method works particularly well for eliminating petroleum-based odors from sports drinks or supplement residues.
Remove charcoal completely before use, then rinse thoroughly with warm water. Inspect the bottle interior to ensure no charcoal particles remain, as these could affect beverage taste. Therefore, multiple rinses guarantee complete charcoal removal while preserving the deodorizing benefits.
Prevention Strategies
Daily rinsing prevents odor buildup more effectively than intensive cleaning sessions. Rinse bottles immediately after each use, particularly following protein drinks or dairy-based beverages. This simple practice removes residues before they bond to stainless steel surfaces or support bacterial growth.
Additionally, complete air drying eliminates moisture that enables bacterial proliferation. Store bottles with caps removed in well-ventilated areas rather than sealed containers. Moisture retention creates anaerobic conditions that promote odor-producing bacterial colonies, especially in cap threading areas.
Rotate between multiple bottles to allow thorough drying between uses. This strategy prevents continuous moisture exposure while extending bottle lifespan through reduced bacterial stress. Similarly, avoid storing acidic beverages like citrus juices for extended periods, as these can etch stainless steel surfaces and create odor-trapping irregularities.
Pro Tip
Regular deep cleaning prevents the accumulation of residues that cause persistent odors. Weekly treatments with baking soda or vinegar maintain bottle freshness while eliminating early-stage bacterial colonization. Consequently, proactive maintenance reduces the need for intensive odor removal procedures while ensuring consistently fresh-tasting beverages.
Cleaning Frequency and Maintenance Schedule
Establishing a proper cleaning schedule prevents bacterial buildup while maintaining your stainless steel water bottle’s hygiene and performance. Regular maintenance eliminates residues before they become stubborn stains or odor sources. Moreover, consistent cleaning practices extend bottle lifespan while ensuring safe drinking conditions.
Daily Cleaning Requirements for Regular Use
Daily rinsing forms the foundation of effective bottle maintenance, particularly after each use session. Rinse bottles immediately with warm water to remove beverage residues before they adhere to stainless steel surfaces. This simple practice prevents sugar deposits, protein buildup, and bacterial colonization that occur within hours of use.
Furthermore, complete air drying eliminates moisture that supports bacterial growth between uses. Remove caps and allow bottles to dry inverted on clean surfaces rather than storing them sealed. Trapped moisture creates anaerobic environments where odor-producing bacteria thrive, especially in cap threading areas and narrow bottle necks.
Additionally, wash bottles with mild dish soap daily when used for anything other than plain water. Protein drinks, fruit juices, and flavored beverages leave residues that require soap removal rather than simple rinsing. Use warm soapy water with bottle brushes to reach all interior surfaces effectively.
Weekly Deep Cleaning Recommendations
Weekly deep cleaning prevents the accumulation of mineral deposits and bacterial biofilms that daily rinsing cannot eliminate. Perform thorough cleaning sessions using baking soda solutions or white vinegar to dissolve stubborn residues and neutralize odors. These treatments target microscopic buildup that affects taste and hygiene.
Create a baking soda paste using three tablespoons of baking soda mixed with warm water for weekly scrubbing sessions. This alkaline solution breaks down protein deposits and neutralizes acidic residues while providing gentle abrasive action. Scrub all surfaces thoroughly, including cap threads and gasket areas where bacteria commonly accumulate.
Alternatively, use white vinegar soaks for weekly mineral deposit removal and bacterial elimination. Fill bottles with equal parts water and white vinegar, then let the solution sit for 30 minutes before scrubbing and rinsing. Vinegar’s acidity dissolves calcium buildup while its antimicrobial properties eliminate harmful bacteria.
Monthly Sanitization Procedures
Monthly sanitization ensures complete bacterial elimination and prevents the development of resistant bacterial strains. Use hydrogen peroxide solutions or diluted bleach treatments to achieve hospital-grade sanitization levels. These procedures are essential for bottles used frequently or shared among multiple users.
Prepare a 3% hydrogen peroxide solution by mixing one part hydrogen peroxide with two parts water for monthly sanitization. Fill bottles completely with this solution and allow it to sit for 15 minutes before thorough rinsing. Hydrogen peroxide breaks down into water and oxygen, leaving no harmful residues while eliminating all bacterial contaminants.
Alternatively, create a bleach sanitization solution using one teaspoon of unscented bleach per gallon of water for monthly treatments. Soak bottles for five minutes maximum, then rinse extensively with clean water until no chlorine odor remains. This method provides the strongest antimicrobial action but requires careful rinsing to prevent taste contamination.
Signs That Indicate Immediate Cleaning Is Needed
Unusual odors signal bacterial overgrowth that requires immediate attention regardless of your regular cleaning schedule. Musty, sour, or metallic smells indicate biofilm formation or chemical reactions that compromise bottle safety. Address these odors immediately with intensive cleaning procedures rather than masking them with flavored beverages.
Additionally, visible residue buildup on bottle walls or caps demands prompt cleaning action. White mineral deposits, colored stains, or slimy films indicate inadequate cleaning practices that allow contaminant accumulation. These visible signs often accompany invisible bacterial colonies that pose health risks.
Taste changes in plain water indicate contamination that requires immediate bottle sanitization. Metallic, bitter, or off-flavors suggest chemical reactions or bacterial metabolites affecting water quality. Clean bottles immediately when taste changes occur, as these symptoms indicate potential health hazards.
Finally, mold growth anywhere on the bottle necessitates immediate deep cleaning with antifungal solutions. Black spots, fuzzy growths, or discoloration indicate serious contamination that standard cleaning cannot address. Use specialized cleaning techniques similar to those used for kitchen appliances when mold appears, including extended vinegar soaks and thorough sanitization procedures.
Important Safety Note
What to Avoid When Cleaning Stainless Steel Water Bottles
Proper cleaning techniques preserve your stainless steel water bottle’s integrity, while improper methods cause permanent damage that reduces lifespan and affects performance. Understanding what to avoid prevents costly mistakes that compromise both bottle functionality and your health. Avoiding these common errors ensures your investment lasts years rather than months.
Harsh Chemicals and Abrasives That Damage Stainless Steel
Bleach solutions corrode stainless steel surfaces through oxidation reactions that create permanent pitting and discoloration. Commercial bleach contains sodium hypochlorite that attacks the protective chromium oxide layer essential for corrosion resistance. This damage appears as dark spots, rough patches, or metallic taste contamination that cannot be reversed.
Similarly, ammonia-based cleaners cause chemical etching that destroys the smooth surface finish critical for easy cleaning. These alkaline solutions react with stainless steel alloys to create microscopic scratches that harbor bacteria and odors. Once etching occurs, bottles become progressively harder to clean and maintain.
Steel wool and abrasive scrubbers physically scratch stainless steel surfaces beyond repair. These tools remove the protective oxide layer while creating grooves that trap contaminants and promote bacterial growth. Use soft brushes, microfiber cloths, or bottle brushes specifically designed for stainless steel cleaning instead.
Furthermore, chlorine tablets or powders intended for pool cleaning cause severe corrosion when used on water bottles. These concentrated chemicals create chloride stress corrosion that manifests as cracks, pitting, or complete structural failure. Never substitute pool chemicals for food-safe cleaning products.
Chemical Safety Warning
Temperature Extremes That Affect Bottle Integrity
Boiling water cleaning warps bottle shapes and damages sealing mechanisms through thermal expansion stress. Temperatures above 80°C (176°F) cause metal expansion that affects thread alignment, cap sealing, and overall structural integrity. This thermal stress creates permanent deformation that prevents proper closure and allows contamination.
Conversely, freezing bottles during cleaning causes contraction stress that cracks welds and joints. Ice formation inside bottles creates internal pressure that exceeds design limits, particularly around narrow neck areas. These stress fractures compromise bottle safety and create leak points that cannot be repaired.
Rapid temperature changes during cleaning create thermal shock that damages bottle coatings and finishes. Moving bottles directly from hot cleaning solutions to cold rinses causes differential expansion rates that stress material bonds. Allow gradual temperature transitions during cleaning processes to prevent thermal damage.
Additionally, microwave heating for cleaning purposes creates uneven heating patterns that warp bottle shapes and damage internal coatings. Microwaves generate hot spots that exceed safe temperature limits while leaving other areas cool. This uneven heating causes permanent deformation and coating failure.
Dishwasher Considerations and Manufacturer Guidelines
High-temperature dishwasher cycles exceed safe cleaning temperatures for many stainless steel bottles, causing warping and seal damage. Most bottles withstand temperatures up to 70°C (158°F), but commercial dishwashers often reach 85°C (185°F) during sanitizing cycles. Check manufacturer specifications before dishwasher cleaning to prevent thermal damage.
Dishwasher detergent chemicals contain phosphates and enzymes that etch stainless steel surfaces over time. These industrial-strength formulations create microscopic surface damage that accumulates with repeated exposure. Hand washing with gentle detergents preserves surface integrity better than automated cleaning systems.
Moreover, dishwasher spray pressure forces water into cap mechanisms and threading areas where it cannot properly drain. This trapped moisture promotes bacterial growth and corrosion in hard-to-reach areas. Manual cleaning allows controlled water application that prevents moisture accumulation in critical areas.
Manufacturer warranty terms often exclude damage from dishwasher cleaning, making manual cleaning the safer choice for warranty protection. Many premium bottle brands specifically prohibit dishwasher use to maintain product guarantees. Deep cleaning kitchen items requires understanding manufacturer limitations to avoid voiding warranties.
Common Cleaning Mistakes That Reduce Bottle Lifespan
Inadequate rinsing after cleaning leaves chemical residues that continue reacting with stainless steel long after cleaning ends. Soap films, vinegar traces, or baking soda deposits create ongoing chemical reactions that gradually damage bottle surfaces. Thorough rinsing with clean water removes all cleaning product residues that could cause delayed damage.
Over-cleaning with acidic solutions weakens the protective oxide layer through repeated acid exposure. While vinegar effectively removes mineral deposits, daily acid cleaning gradually erodes surface protection. Limit acidic cleaning to weekly deep cleaning sessions rather than daily maintenance routines.
Ignoring cap and threading maintenance allows contamination buildup in critical sealing areas that affects bottle performance. Food particles, soap residue, or mineral deposits in threading create sealing failures and bacterial growth sites. Clean caps and threads separately during each cleaning session to maintain proper function.
Finally, storing bottles while damp promotes bacterial growth and corrosion in enclosed environments. Moisture trapped inside bottles creates ideal conditions for mold development and metal oxidation. Complete air drying before storage prevents these moisture-related problems that reduce bottle lifespan and safety.
Pros
- Gentle cleaning preserves bottle integrity
- Proper techniques extend lifespan significantly
- Following guidelines maintains warranty coverage
- Safe methods protect health and investment
Cons
- Harsh chemicals cause permanent damage
- Temperature extremes warp bottle structure
- Dishwasher cleaning voids many warranties
- Common mistakes reduce bottle performance
Frequently Asked Questions
How often should I clean my stainless steel water bottle?
Clean your stainless steel water bottle daily with warm soapy water if you use it regularly. For bottles used only with plain water, cleaning every 2-3 days is sufficient. However, if you use flavored drinks, protein shakes, or notice any odors, clean immediately after each use to prevent bacteria buildup and staining.
How do I clean a stainless steel water bottle with baking soda?
Create a paste using 2 tablespoons of baking soda mixed with a small amount of water. Apply the paste to stained areas and let it sit for 15-20 minutes. Scrub gently with a bottle brush, then rinse thoroughly with warm water. For deeper cleaning, fill the bottle with warm water and 2 tablespoons of baking soda, shake well, and let sit overnight before rinsing.
Can I clean my stainless steel water bottle with vinegar?
Yes, white vinegar is excellent for cleaning stainless steel water bottles. Fill the bottle with equal parts white vinegar and warm water, let it sit for 30 minutes to 2 hours depending on buildup severity, then scrub with a bottle brush and rinse thoroughly. Vinegar effectively dissolves mineral deposits and kills bacteria naturally.
How do I clean a stainless steel water bottle without a brush?
Use uncooked rice as a natural abrasive. Add 2-3 tablespoons of rice, warm soapy water, and shake vigorously for 2-3 minutes. The rice will scrub away residue from all surfaces. Alternatively, use cleaning tablets designed for water bottles, or try bottle cleaning beads that provide scrubbing action without requiring a brush.
How do I clean the cap of my stainless steel water bottle?
Disassemble the cap completely if possible, removing rubber seals and straws. Soak all parts in warm soapy water for 10-15 minutes, then scrub with a small brush or old toothbrush. For stubborn buildup, use a baking soda paste or vinegar solution. Rinse thoroughly and air dry completely before reassembling to prevent mold growth.
Will baking soda and vinegar clean stainless steel effectively?
Use them separately, not together. When mixed, baking soda and vinegar neutralize each other’s cleaning properties. Use baking soda first for scrubbing and odor removal, rinse completely, then follow with vinegar for disinfection and mineral deposit removal. This sequential approach maximizes their individual cleaning effectiveness.
How do I remove mold from my stainless steel water bottle?
For mold removal, use a diluted bleach solution (1 teaspoon bleach per cup of water) or white vinegar. Fill the bottle with the solution, let it sit for 30 minutes, then scrub thoroughly with a bottle brush. Rinse multiple times with clean water and air dry completely. Never use bleach and vinegar together as this creates dangerous chlorine gas.
What should I not put in a stainless steel water bottle?
Avoid putting carbonated drinks, acidic juices, or dairy products in stainless steel bottles for extended periods as they can cause staining and bacterial growth. Never use harsh chemicals like bleach regularly, avoid abrasive cleaners that scratch the surface, and don’t put the bottle in the dishwasher unless specifically marked as dishwasher-safe.
How do I remove tough stains and old juice stains from stainless steel?
For stubborn stains, create a paste with baking soda and lemon juice. Apply to stained areas and let sit for 30 minutes before scrubbing. For old juice stains, try soaking overnight in white vinegar, then scrub with baking soda paste. Cleaning tablets designed for water bottles also work well for tough, set-in stains.
How do I clean a stainless steel water bottle that smells?
Fill the bottle with warm water and 2 tablespoons of baking soda, shake well, and let sit overnight. For persistent odors, use white vinegar instead of baking soda. After soaking, scrub thoroughly and rinse multiple times. Air dry completely with the cap off to prevent moisture buildup that causes odors.
Can I use bleach to clean my stainless steel water bottle?
Use bleach only for occasional deep sanitization, not regular cleaning. Mix 1 teaspoon of bleach per cup of water, fill the bottle, let sit for 5-10 minutes, then rinse thoroughly multiple times. Never use bleach with other cleaning agents, and ensure complete rinsing as bleach residue can be harmful if ingested.
What temperature water should I use for cleaning?
Use warm water between 40-50°C (104-122°F) for optimal cleaning effectiveness. This temperature activates soap molecules and dissolves buildup without damaging the stainless steel. Avoid extremely hot water which can warp rubber seals or damage the bottle’s finish, and cold water which is less effective at removing oils and residue.
How long should I let cleaning solutions sit in my bottle?
For routine cleaning, 15-30 minutes is sufficient for most solutions. Baking soda paste works well after 15-20 minutes, while vinegar solutions need 30 minutes to 2 hours for tough buildup. For overnight soaking, use only mild solutions like diluted baking soda or vinegar to avoid potential damage to seals or finishes.
You May Also Like
How to Clean Stainless Steel Pans: Complete 2026 Guide
How to Clean a Kettle: Complete Guide for 2026