How to Clean Hardwood Floors: Complete UK Guide 2026
How to clean hardwood floors properly requires the right tools, techniques, and understanding of your specific floor type to maintain their beauty and longevity. Most homeowners can achieve professional-quality results using pH-neutral cleaners, microfibre mops, and systematic cleaning routines that protect the wood’s finish whilst removing dirt and grime effectively.
Proper hardwood floor maintenance involves daily sweeping, weekly damp mopping, and immediate spill cleanup to prevent permanent damage. Additionally, understanding the differences between solid hardwood, engineered hardwood, and various finishes ensures you choose the correct cleaning approach for your specific flooring investment.
This comprehensive guide covers everything from essential cleaning tools to professional stain removal techniques. Furthermore, we’ll explore common mistakes that can void warranties and damage your floors, plus long-term care strategies to protect your investment for decades to come.
TL;DR
- Use pH-neutral cleaners and microfibre mops for safe, effective cleaning without damaging the finish
- Sweep daily and damp mop weekly using minimal moisture to prevent water damage and warping
- Avoid harsh chemicals, excessive water, steam cleaning, and abrasive tools that can permanently damage hardwood floors
- Clean spills immediately and maintain 40-60% humidity levels to preserve wood integrity and appearance
Essential Tools and Materials for Hardwood Floor Cleaning
Selecting the right cleaning tools significantly impacts both the effectiveness of your cleaning routine and the longevity of your hardwood floors. Moreover, using inappropriate equipment can cause permanent damage, void warranties, and lead to costly repairs that proper tool selection easily prevents.
Microfibre Mops vs Traditional String Mops
Microfibre mops represent the gold standard for hardwood floor cleaning due to their superior dirt-trapping capabilities and moisture control. These mops feature thousands of microscopic fibres that capture dust, pet hair, and debris more effectively than traditional alternatives. Additionally, microfibre materials require less water and cleaning solution, reducing the risk of moisture damage to your floors.
Traditional string mops pose several disadvantages for hardwood surfaces, including excessive water retention and potential scratching from worn fibres. Furthermore, cotton string mops tend to spread dirt around rather than capturing it, leaving streaks and residue that dull your floor’s natural shine.
| Feature | Microfibre Mops | Traditional String Mops |
|---|---|---|
| Water Retention | Low (controlled moisture) | High (excess water risk) |
| Dirt Capture | Excellent (traps particles) | Poor (spreads debris) |
| Durability | 300+ washes | 50-100 uses |
| Streak Prevention | Superior | Frequent streaking |
pH-Neutral Hardwood Floor Cleaners
pH-neutral cleaners maintain a balanced acidity level between 6.5 and 7.5, ensuring they won’t damage your floor’s protective finish or the underlying wood. Consequently, these specialised cleaners preserve the natural oils and polymers in hardwood finishes whilst effectively removing dirt and grime.
Alkaline cleaners (pH above 8) can strip protective coatings and cause permanent cloudiness, whilst acidic products (pH below 6) may etch the surface and create dull spots. Therefore, investing in quality pH-neutral formulations protects your flooring investment and maintains manufacturer warranties.
Vacuum Cleaners with Hardwood Settings
Modern vacuum cleaners designed for hardwood floors feature brush roll control that allows you to disable rotating brushes that might scratch delicate surfaces. Additionally, these vacuums typically include adjustable suction settings and specialised attachments for crevices and edges where debris commonly accumulates.
Canister vacuums with hardwood floor attachments often outperform upright models because they provide better manoeuvrability around furniture and generate less static electricity. Similarly, models with HEPA filtration capture fine dust particles that would otherwise resettle on your freshly cleaned floors.
Soft-Bristled Brooms for Daily Maintenance
Daily sweeping with soft-bristled brooms prevents abrasive particles from scratching your hardwood surface during regular foot traffic. Natural bristles or fine synthetic fibres effectively capture dust and debris without creating the static charge that attracts more dirt.
Avoid stiff-bristled brooms or those with worn, frayed ends that can gouge softer wood species like pine or cherry. Instead, choose brooms with flagged bristle tips that split into multiple fine ends for superior dust collection and gentle surface contact.
Spray Bottles and Measuring Tools
Precise dilution ratios ensure optimal cleaning performance whilst preventing damage from over-concentrated solutions. Quality spray bottles with adjustable nozzles allow you to control moisture application, applying just enough cleaning solution without oversaturating the wood.
Measuring cups or graduated bottles help you achieve manufacturer-recommended dilution ratios, typically ranging from 1:10 to 1:128 depending on the product concentration. Furthermore, consistent measurements ensure predictable results and prevent waste of expensive cleaning products.
Protective Equipment and Furniture Pads
Furniture pads protect your floors during the cleaning process and prevent scratches from chair legs, table bases, and other furniture items. Felt pads work excellently for lighter furniture, whilst rubber or plastic pads suit heavier pieces that require more substantial protection.
Knee pads become essential when cleaning baseboards or addressing stubborn stains that require close attention. Additionally, protective gloves prevent skin irritation from cleaning products and improve your grip on tools and equipment during extended cleaning sessions.
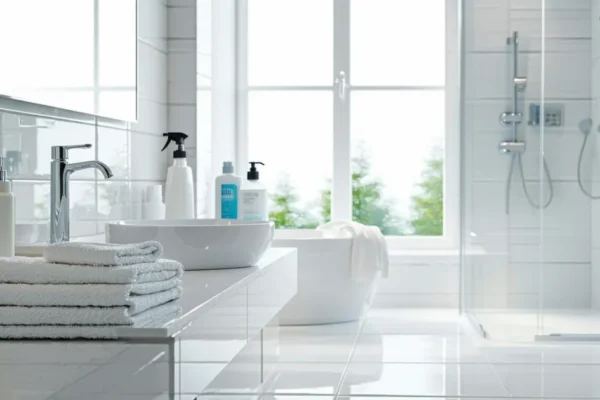
Just as thorough preparation matters for deep cleaning your bathroom, having the right hardwood floor cleaning tools ensures professional results whilst protecting your valuable flooring investment for years to come.
Daily and Weekly Hardwood Floor Maintenance
Consistent maintenance routines preserve hardwood floors whilst preventing costly damage from accumulated dirt and moisture. Daily care requires minimal time investment but delivers maximum protection for your flooring investment.
Daily Sweeping and Vacuuming Techniques
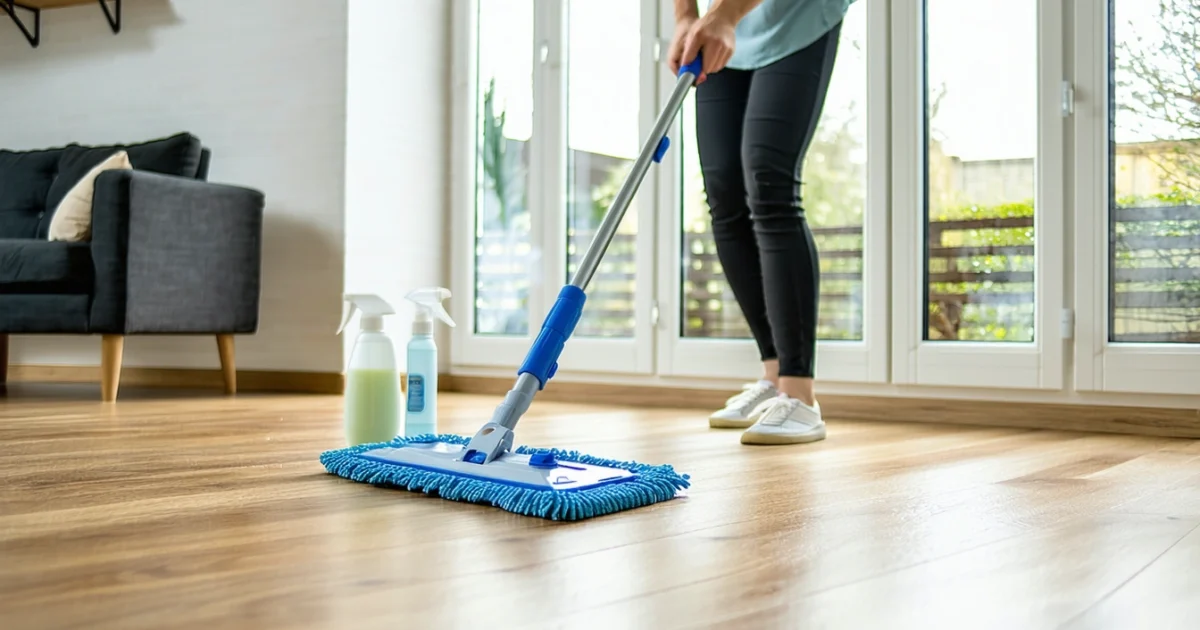
Microfibre dust mops capture fine particles without scratching delicate wood surfaces. Always sweep in the direction of the wood grain, using long, smooth strokes that prevent debris from settling into gaps between planks. Additionally, this technique reduces the friction that creates micro-scratches over time.
When vacuuming hardwood floors, use the hard floor setting with brush roll disengaged to prevent spinning bristles from creating surface damage. Furthermore, vacuum attachments with soft bristles work effectively for reaching corners and edges where dust commonly accumulates.
High-traffic areas require twice-daily attention during peak seasons when outdoor debris increases. Consequently, entrance halls, kitchen walkways, and corridors benefit from morning and evening maintenance to prevent grit from embedding into the wood finish.
Weekly Damp Mopping Routine
Weekly damp mopping removes residual dirt whilst maintaining proper moisture levels that prevent wood damage. Moisture control remains critical since excess water causes warping, cupping, and finish deterioration in hardwood flooring systems.
Wring your mop until it feels barely damp to the touch before applying it to floor surfaces. Moreover, work in small sections to ensure the floor dries quickly, preventing moisture from penetrating wood fibres or seeping between planks.
Use pH-neutral cleaning solutions specifically formulated for hardwood floors, avoiding harsh chemicals that strip protective finishes. Therefore, always follow manufacturer dilution ratios to maintain cleaning effectiveness whilst protecting your floor’s warranty coverage.
Immediate Spill Response Procedures
Immediate action prevents liquid spills from penetrating wood pores and causing permanent staining or warping. Blot spills with absorbent cloths rather than wiping, which spreads liquid across larger surface areas.
Different spill types require specific treatment approaches for optimal results. Water-based spills need quick absorption followed by thorough drying, whilst oil-based substances require gentle cleaning solutions to break down residues without damaging wood finishes.
- Water spills: Blot immediately, then dry completely with clean towels
- Food spills: Remove solids first, then clean with appropriate pH-neutral solution
- Pet accidents: Clean thoroughly with enzymatic cleaners designed for hardwood
- Oil-based spills: Absorb excess, then treat with manufacturer-approved degreasers
High-Traffic Area Management
High-traffic zones experience accelerated wear patterns that require focused attention and strategic protection measures. Entrance areas, hallways, and kitchen pathways typically show signs of dulling and surface scratching before other floor areas.
Rotation patterns distribute foot traffic more evenly across floor surfaces by strategically placing furniture and area rugs. Consequently, this approach prevents concentrated wear in specific locations whilst extending overall floor lifespan.
Consider installing protective mats at exterior entrances to capture dirt and moisture before it reaches your hardwood floors. Similarly, runners in hallways reduce direct foot contact whilst adding decorative elements to your interior design scheme.
Seasonal Maintenance Adjustments
Seasonal changes affect hardwood floor maintenance requirements due to varying humidity levels, temperature fluctuations, and debris patterns. Winter months bring salt, sand, and increased moisture from wet footwear, requiring more frequent cleaning cycles.
During spring and autumn, increased outdoor activity introduces more dirt and organic debris into homes. Therefore, adjust your maintenance schedule to include additional sweeping sessions and more thorough weekly cleanings during these transitional seasons.
Summer humidity requires careful moisture monitoring to prevent wood expansion and finish damage. Additionally, increased air conditioning usage can create rapid humidity changes that affect wood stability, making consistent maintenance even more crucial for floor preservation.
Just as deep cleaning your bathroom requires seasonal adjustments, hardwood floor maintenance adapts to environmental conditions whilst maintaining consistent care standards throughout the year.
Step-by-Step Deep Cleaning Process
Deep cleaning hardwood floors requires systematic preparation and methodical execution to achieve professional results. Furthermore, this comprehensive process ensures thorough dirt removal whilst protecting your floor’s finish and structural integrity.
Pre-cleaning Preparation and Area Setup
Begin by removing all furniture, rugs, and decorative items from the cleaning area. Additionally, clear the space completely to prevent obstacles and ensure unrestricted access to every floor section.
Open windows and doors to establish proper ventilation before starting the cleaning process. Similarly, this airflow accelerates drying whilst preventing moisture accumulation that could damage wood fibres.
Inspect the floor surface for loose boards, protruding nails, or damaged areas that require attention before cleaning begins. Consequently, addressing these issues prevents further damage during the cleaning process.
Dust and Debris Removal Techniques
Vacuum cleaners with hardwood floor attachments effectively remove embedded dirt and fine particles from wood grain crevices. However, ensure the vacuum head contains soft bristles to prevent scratching the floor finish.
Alternatively, use a microfibre dust mop or soft-bristled broom to sweep debris systematically across the entire floor surface. Moreover, work from the furthest corner towards the exit to avoid walking over cleaned areas.
Pay special attention to corners, baseboards, and areas beneath furniture where dust accumulates most heavily. Therefore, thorough debris removal creates the foundation for effective wet cleaning procedures.
Cleaning Solution Preparation and Mixing Ratios
Mix pH-neutral hardwood floor cleaner with warm water according to manufacturer specifications, typically 1:10 ratio for concentrated solutions. Additionally, test the mixture in an inconspicuous area before applying to the entire floor surface.
| Solution Type | Water Ratio | Coverage Area |
|---|---|---|
| Commercial cleaner | 1:10 | 200 sq ft per litre |
| White vinegar | 1:2 | 150 sq ft per litre |
| Dish soap | 1 tsp per gallon | 300 sq ft per gallon |
Avoid using ammonia-based cleaners, bleach, or acidic solutions that can strip protective finishes and discolour wood surfaces. Instead, stick to gentle, wood-safe formulations designed specifically for hardwood floor maintenance.
Systematic Mopping Technique and Grain Direction
Wring the mop thoroughly to achieve damp-dry consistency rather than soaking wet conditions that could penetrate wood joints. Furthermore, excess moisture causes warping, cupping, and finish deterioration over time.
Mop with the wood grain direction using smooth, overlapping strokes that follow the natural wood pattern. Similarly, this technique prevents streaking whilst ensuring even cleaning solution distribution across plank surfaces.
Work in 4-foot sections to maintain control over moisture levels and prevent cleaning solution from drying before removal. Additionally, rinse the mop frequently in clean water to avoid redistributing dirt across cleaned areas.
Just as deep cleaning your bathroom requires sectional approaches, hardwood floor cleaning benefits from systematic area-by-area progression that ensures thorough coverage.
Proper Drying Process and Ventilation Requirements
Maintain adequate air circulation throughout the drying period by operating ceiling fans, opening windows, and positioning portable fans strategically. Consequently, proper airflow prevents moisture retention that leads to wood damage and mould growth.
Allow 30-60 minutes for complete surface drying before replacing furniture or walking on cleaned areas with regular footwear. Moreover, this drying time varies based on humidity levels, temperature, and ventilation effectiveness.
Monitor floor surfaces for standing water or excessive moisture that requires immediate removal with dry towels. Therefore, prompt moisture elimination prevents water penetration into wood fibres and subfloor materials.
Post-cleaning Inspection and Touch-up Procedures
Examine the entire floor surface under adequate lighting to identify missed spots, streaking, or areas requiring additional attention. Additionally, natural daylight reveals cleaning imperfections better than artificial lighting sources.
Address any remaining stains or discoloured areas with targeted spot-cleaning techniques using appropriate wood-safe products. However, persistent stains may require professional refinishing services to restore uniform appearance.
Replace furniture carefully using protective pads beneath legs to prevent scratching newly cleaned surfaces. Furthermore, wait until floors achieve complete dryness before resuming normal foot traffic patterns and daily activities.
Cleaning Different Types of Hardwood Floors
Different hardwood floor types require specific cleaning approaches to maintain their unique characteristics and protective finishes. Understanding these variations ensures proper care while preventing damage to your investment.
Solid Hardwood vs Engineered Hardwood Cleaning Differences
Solid hardwood floors tolerate slightly more moisture during cleaning due to their thick construction and multiple refinishing capabilities. However, engineered hardwood requires more cautious moisture management because excessive water penetrates the thin veneer layer and damages the plywood core beneath.
Use damp mopping techniques for solid hardwood, ensuring the mop remains only slightly moist rather than wet. Conversely, engineered floors benefit from spray-and-wipe methods that minimise moisture contact time with the surface.
Engineered hardwood cleaning demands quicker drying times and reduced water exposure compared to solid wood alternatives. Therefore, increase ventilation and use microfibre cloths that absorb moisture efficiently during the cleaning process.
Prefinished vs Site-Finished Floor Care Variations
Prefinished hardwood floors feature factory-applied protective coatings that create more durable surfaces resistant to moisture and staining. Additionally, these floors typically require less frequent deep cleaning due to their superior protective qualities.
Site-finished floors receive their protective coating after installation, creating seamless surfaces but requiring more gentle cleaning approaches. Moreover, these finishes often need longer curing periods and careful maintenance during the initial months.
Clean prefinished floors with standard hardwood cleaners, while site-finished surfaces benefit from pH-neutral products that won’t compromise the curing finish. Furthermore, avoid abrasive tools on newly finished floors until the coating fully hardens.
Oil-Based vs Water-Based Finish Cleaning Requirements
Oil-based finishes penetrate wood fibres deeply, creating rich amber tones that require specific cleaning products designed for penetrating sealers. Subsequently, these floors respond well to oil-based maintenance products that nourish the wood while cleaning.
Water-based finishes form surface barriers that maintain the wood’s natural colour while providing excellent durability and faster drying times. Consequently, these floors accept water-based cleaning solutions without compatibility issues or finish degradation.
| Finish Type | Recommended Cleaners | Avoid |
|---|---|---|
| Oil-based | Oil-based hardwood cleaners, mineral spirits | Water-based products, excessive moisture |
| Water-based | Water-based cleaners, pH-neutral solutions | Oil-based products, wax-based cleaners |
Antique and Reclaimed Wood Special Considerations
Antique hardwood floors often feature original finishes, worn surfaces, and historical character that demands extremely gentle cleaning approaches. Indeed, these floors may lack modern protective coatings, making them vulnerable to moisture damage and chemical reactions.
Test cleaning products in inconspicuous areas before applying them to entire antique floor surfaces. Additionally, use minimal moisture and soft cleaning tools to preserve the aged patina and prevent further wear to already-stressed wood fibres.
Reclaimed wood floors combine old wood character with modern installation techniques, requiring cleaning methods that respect both aspects. Therefore, clean these floors using gentle, natural products that won’t strip away the weathered appearance that makes reclaimed wood desirable.
Bamboo and Cork Flooring Cleaning Adaptations
Bamboo flooring shares similarities with hardwood but requires specific care due to its grass-based composition and different expansion characteristics. Moreover, bamboo responds differently to moisture and cleaning chemicals compared to traditional wood species.
Clean bamboo floors using pH-neutral cleaners specifically formulated for bamboo surfaces, avoiding ammonia-based products that can cause discolouration. Furthermore, maintain consistent humidity levels to prevent bamboo’s natural expansion and contraction cycles from creating gaps.
Cork flooring features natural antimicrobial properties but requires gentle cleaning to preserve its cellular structure and protective wax coating. Subsequently, use minimal moisture and avoid harsh chemicals that can break down cork’s natural oils and protective barriers.
Both bamboo and cork floors benefit from regular dust mopping and occasional damp cleaning with microfibre tools. However, these materials dry faster than traditional hardwood, reducing the risk of moisture-related damage during routine maintenance, similar to other cleaning tasks around your home like grout cleaning that require specific approaches for different materials.
Common Stains and Spot Treatment Methods
Hardwood floors encounter various stains throughout their lifespan, requiring specific treatment approaches based on the stain type and severity. Furthermore, understanding proper spot treatment techniques prevents permanent damage and maintains your floor’s natural beauty.
Water Marks and Ring Removal Techniques
Water rings appear as white or dark circles on hardwood surfaces, typically caused by moisture penetrating the finish rather than the wood itself. Additionally, these marks develop when glasses, vases, or wet items sit directly on unprotected wood surfaces.
Remove white water rings by gently rubbing the area with a cloth dampened in mayonnaise or petroleum jelly, allowing the oils to penetrate and restore the finish. Alternatively, mix equal parts baking soda and toothpaste to create a mild abrasive paste that lifts surface-level water damage.
Dark water stains indicate deeper penetration into the wood fibres, requiring more intensive treatment methods. Therefore, apply oxalic acid wood bleach following manufacturer instructions, ensuring proper ventilation and protective equipment usage.
Pet Stain and Odour Elimination Methods
Pet accidents create both visible stains and persistent odours that penetrate deep into hardwood fibres and subflooring materials. Moreover, untreated pet stains attract animals back to the same location, perpetuating the problem.
Immediately blot fresh pet accidents using absorbent paper towels, working from the outside edges toward the centre to prevent spreading. Subsequently, clean the area with a white vinegar solution (one part vinegar to three parts water) to neutralise odours and break down organic compounds.
Apply enzymatic cleaners specifically designed for pet stains, as these products contain bacteria that consume odour-causing organic matter. However, test enzymatic cleaners on inconspicuous areas first, as some formulations may affect certain wood finishes.
Persistent odours may require professional intervention, including subfloor treatment or board replacement in severely affected areas. Therefore, address pet accidents promptly to minimise long-term damage and costly repairs.
Scuff Mark Removal Using Appropriate Tools
Scuff marks result from rubber soles, furniture legs, and other objects dragging across hardwood surfaces, leaving dark streaks that mar the floor’s appearance. Additionally, different scuff types require specific removal techniques based on their composition and depth.
Remove light scuff marks using a clean tennis ball, gently rubbing the affected area in circular motions to lift surface-level marks. Similarly, pencil erasers effectively remove small scuffs without damaging the surrounding finish.
Stubborn scuffs respond to baking soda paste mixed with water, applied with a soft cloth and buffed gently until the mark disappears. Furthermore, mineral spirits on a clean rag can dissolve rubber-based scuff marks that resist other removal methods.
Food and Beverage Spill Treatment Procedures
Food spills vary significantly in their staining potential and required treatment approaches, from simple water-based liquids to complex protein and oil-based substances. Therefore, quick response prevents permanent staining and reduces cleaning difficulty.
- Coffee and tea stains: Blot immediately, then clean with diluted white vinegar solution
- Wine spills: Cover with salt to absorb liquid, then treat with club soda and mild detergent
- Grease stains: Apply cornstarch to absorb oil, then clean with degreasing dish soap
- Fruit juice: Neutralise acidity with baking soda paste before cleaning with water
Acidic beverages like orange juice and wine can etch hardwood finishes if left untreated, creating permanent damage that requires professional refinishing. Consequently, neutralise acidic spills quickly using baking soda before proceeding with standard cleaning methods.
Ink, Crayon, and Marker Stain Removal
Ink stains penetrate quickly into porous wood surfaces, requiring immediate attention and specific solvents to prevent permanent marking. Additionally, different ink types respond to different removal techniques and chemical solutions.
Remove ballpoint pen ink using isopropyl alcohol applied with a cotton swab, working from the outside edges inward to prevent spreading. Similarly, permanent marker stains respond to rubbing alcohol or acetone-based nail polish remover, applied sparingly to avoid finish damage.
Crayon marks require heat application to soften the wax before removal, using a hair dryer on low heat followed by gentle scraping with a plastic card. Subsequently, clean residual wax using mineral spirits and a soft cloth, similar to techniques used for cleaning grout that requires specific approaches for different stain types.
When to Call Professionals for Severe Damage
Professional intervention becomes necessary when stains penetrate through the finish into the wood substrate or when DIY methods prove ineffective. Moreover, certain damage types require specialised equipment and expertise to restore properly.
Contact professionals for deep water damage that causes board warping, cupping, or separation, as these issues often indicate subfloor problems requiring structural assessment. Additionally, extensive pet damage with persistent odours may require board replacement and subfloor treatment beyond DIY capabilities.
Chemical stains from harsh cleaners or unknown substances warrant professional evaluation, as improper treatment can worsen damage or create safety hazards. Furthermore, multiple overlapping stains or finish failure across large areas typically require complete refinishing rather than spot treatment.
Professional floor restoration services possess industrial-grade equipment and specialised products unavailable to consumers, enabling them to address severe damage effectively while maintaining floor integrity and value.
What to Avoid When Cleaning Hardwood Floors
Proper hardwood floor maintenance requires understanding what not to use as much as knowing effective cleaning methods. Unfortunately, many common cleaning products and techniques can cause irreversible damage to your floor’s finish and underlying wood structure.
Harsh Chemicals and Acidic Cleaners That Damage Finish
Acidic cleaners pose the greatest threat to hardwood floor finishes, as they break down protective coatings and etch the wood surface. Vinegar, despite its popularity in natural cleaning circles, contains acetic acid that gradually dissolves polyurethane finishes and creates permanent clouding.
Similarly, ammonia-based cleaners create alkaline conditions that cause finish discoloration and wood grain raising. Bleach products not only damage finishes but can also lighten wood staining permanently, creating unsightly patches that require professional refinishing to correct.
Citrus-based cleaners, whilst effective for other surfaces, contain natural acids that gradually weaken floor finishes over repeated use. Additionally, abrasive chemical cleaners designed for tiles or stone surfaces will strip hardwood finishes and leave floors vulnerable to moisture damage.
Excessive Water Use and Steam Cleaning Risks
Water damage represents one of the most common causes of hardwood floor deterioration, particularly when excessive moisture penetrates finish gaps or seeps between boards. Steam cleaning, despite manufacturer claims of safety, introduces superheated moisture that can cause board expansion, cupping, and finish separation.
Wet mopping with soaking mops leaves standing water on floor surfaces, allowing moisture to penetrate vulnerable areas and cause wood swelling. Furthermore, steam mops generate temperatures exceeding 200°F, which can soften adhesives in engineered flooring and cause delamination.
Even seemingly minor water exposure from overly damp cleaning cloths can accumulate over time, causing gradual finish degradation and wood movement. Therefore, moisture control during cleaning proves essential for long-term floor preservation, similar to how bathroom cleaning requires careful moisture management to prevent damage.
Abrasive Tools and Cleaning Pads That Cause Scratches
Steel wool and scouring pads create microscopic scratches that accumulate into visible wear patterns, dulling floor finishes and creating areas where dirt accumulates more readily. These abrasive materials remove finish layers rather than cleaning them, necessitating premature refinishing.
Vacuum cleaners with worn beater bars or damaged wheels can gouge floor surfaces, whilst stiff-bristled brushes designed for outdoor cleaning leave permanent scratch marks on delicate hardwood finishes. Additionally, dragging furniture or appliances across floors without protective pads creates deep scratches requiring professional repair.
Even seemingly harmless cleaning tools like rough microfiber cloths can cause finish damage when used with excessive pressure or when contaminated with grit particles. Consequently, selecting appropriate cleaning tools proves as important as choosing proper cleaning solutions.
Oil-Based Soaps and Wax Buildup Problems
Oil-based soaps create residue layers that attract dirt and dust, causing floors to appear increasingly dull despite regular cleaning efforts. These products leave behind petroleum-based films that interfere with future finish applications and create slippery surfaces.
Wax products, whilst traditional for floor care, build up over time and create uneven surface textures that trap debris and require aggressive removal methods. Moreover, wax buildup prevents proper adhesion of modern polyurethane finishes, necessitating complete stripping before refinishing.
Pine oil cleaners and furniture polishes contain oils that penetrate into wood pores and create permanent staining, particularly problematic in lighter wood species. Therefore, avoiding oil-based products prevents long-term maintenance complications and preserves floor appearance.
Common Household Cleaners That Void Warranties
Multi-surface cleaners designed for various materials often contain ingredients specifically harmful to hardwood finishes, yet their marketing suggests universal applicability. Using these products can void manufacturer warranties and eliminate coverage for finish defects or premature wear.
Dish soaps, despite their gentleness on hands, contain surfactants that leave residue films and can cause finish clouding over repeated use. Similarly, laundry detergents used as floor cleaners introduce optical brighteners and enzymes that can discolor wood stains permanently.
Always check manufacturer specifications before using any cleaning product, as warranty terms typically require approved cleaning methods and products. Furthermore, documenting proper maintenance practices helps preserve warranty coverage and ensures professional support when issues arise.
Using non-approved cleaning products can void hardwood floor warranties worth thousands of pounds
Protecting Your Investment: Long-term Care Tips
Proper long-term hardwood floor care extends beyond regular cleaning routines and requires strategic environmental management to preserve your investment. Consequently, understanding humidity control, UV protection, and maintenance scheduling helps prevent costly repairs and maintains floor beauty for decades.
Humidity Control and Seasonal Adjustments
Maintaining 40-60% relative humidity prevents wood expansion and contraction that causes gaps, cupping, and finish cracking. During UK winters, central heating systems dramatically reduce indoor humidity, whilst summer months can increase moisture levels beyond safe ranges.
Install a whole-house humidifier or use portable units during heating season to maintain optimal moisture levels. Additionally, dehumidifiers become essential during humid summer months, particularly in coastal areas where moisture levels frequently exceed safe parameters.
Monitor humidity levels using digital hygrometers placed throughout your home, as readings can vary significantly between rooms. Furthermore, gradual seasonal adjustments prevent sudden environmental changes that shock wood fibres and cause immediate damage.
UV Protection Using Curtains and Window Treatments
Ultraviolet radiation causes irreversible colour changes in hardwood floors, creating uneven fading patterns that require complete refinishing to correct. Therefore, installing UV-filtering window treatments protects floors from sun damage whilst maintaining natural light.
Use curtains, blinds, or UV-protective films on south-facing windows where sun exposure remains most intense throughout the day. Similarly, rotating area rugs periodically prevents distinct colour variations between covered and exposed floor areas.
Consider low-E window coatings that block harmful UV rays whilst allowing visible light transmission. Moreover, strategic furniture placement can shield vulnerable floor areas from direct sunlight during peak intensity hours.
Furniture Pad Placement and Regular Repositioning
Furniture pads distribute weight evenly and prevent scratches, dents, and finish wear patterns that develop under heavy items. However, using inappropriate pad materials can trap moisture and create permanent staining or finish damage.
Choose felt pads for most furniture, avoiding rubber or vinyl options that can discolour finishes through chemical reactions. Additionally, replace pads annually as accumulated dirt and debris reduces their protective effectiveness.
Reposition furniture quarterly to prevent permanent indentations and allow compressed wood fibres to recover naturally. Furthermore, this practice reveals hidden damage early and prevents localised wear patterns that compromise floor appearance.
Professional Refinishing Timeline and Indicators
Most hardwood floors require professional refinishing every 7-10 years depending on traffic levels, maintenance quality, and environmental conditions. Recognising early warning signs helps schedule refinishing before damage becomes irreversible.
- Widespread scratches that catch fingernails indicate finish wear
- Dull areas that don’t respond to cleaning suggest finish deterioration
- Water stains or white marks signal finish penetration
- Exposed wood grain visible through worn finish areas
Schedule professional assessment when multiple indicators appear simultaneously, as delaying refinishing can necessitate complete floor replacement. Moreover, addressing issues early typically costs £15-25 per square metre compared to £40-60 for full restoration.
Insurance Considerations and Documentation for Damage Claims
Comprehensive documentation of hardwood floor condition and maintenance history supports insurance claims for water damage, accidents, or natural disasters. Therefore, maintaining detailed records proves proper care and helps establish replacement values.
Photograph floors annually from multiple angles, documenting existing wear patterns and overall condition before issues develop. Additionally, retain receipts for professional cleaning, refinishing, and repair services as evidence of proper maintenance.
Review home insurance policies to understand hardwood floor coverage limitations and exclusions, as many policies don’t cover gradual wear or maintenance-related damage. Furthermore, consider additional coverage for high-value exotic wood species that exceed standard replacement allowances.
Proper documentation and maintenance records can increase insurance claim settlements by 20-30% for hardwood floor damage
Frequently Asked Questions
How often should I clean my hardwood floors?
You should sweep daily to remove dirt and debris that can scratch the surface, and damp mop weekly using a pH-neutral cleaner. High-traffic areas may require more frequent attention, whilst rooms used less often can be cleaned fortnightly. Always clean spills immediately to prevent permanent staining or water damage.
Can I use a steam mop on hardwood floors?
No, steam mops should never be used on hardwood floors. The high heat and moisture can penetrate the wood grain, causing warping, cupping, and permanent damage to the finish. Steam can also void your flooring warranty. Stick to damp mopping with minimal moisture instead.
What's the difference between cleaning solid hardwood and engineered hardwood?
Both solid and engineered hardwood require similar cleaning methods using pH-neutral cleaners and microfibre mops. However, engineered hardwood is typically more sensitive to moisture due to its layered construction, so use even less water when cleaning. Both types benefit from daily sweeping and weekly damp mopping.
Why are my hardwood floors streaky after cleaning?
Streaky floors usually result from using too much cleaning solution, not rinsing the mop properly, or using the wrong type of mop. Switch to a microfibre mop, use less cleaning product, and ensure your mop is only slightly damp. Also, clean in the direction of the wood grain for best results.
What household products should I avoid on hardwood floors?
- Vinegar or acidic cleaners – can etch and dull the finish
- Bleach or ammonia – too harsh and can discolour wood
- Oil-based soaps – leave residue and attract dirt
- Wax-based products – can interfere with future refinishing
- Abrasive cleaners – scratch the surface permanently
How do I maintain proper humidity levels for my hardwood floors?
Maintain 40-60% relative humidity year-round to prevent wood expansion and contraction. Use a humidifier during dry winter months and a dehumidifier during humid summer periods. Monitor levels with a hygrometer and adjust as needed to prevent gaps, cupping, or warping.
Can I use a regular vacuum cleaner on hardwood floors?
Yes, but ensure your vacuum has a hardwood floor setting that disables the rotating brush roll to prevent scratches. Use the bare floor attachment and adjust suction to a lower setting. Canister vacuums with hardwood attachments often work better than upright models for delicate surfaces.
How do I remove scuff marks from hardwood floors?
For light scuff marks, try rubbing gently with a clean tennis ball or microfibre cloth. For stubborn marks, use a small amount of pH-neutral cleaner on a damp cloth. Avoid abrasive materials that could scratch the finish. If scuffs persist, consult a professional as they may require refinishing.
You May Also Like
How to Clean Shower Head: Remove Limescale & Restore Flow
How to Clean a Shower Curtain: Complete UK Guide 2026