How to Deep Clean Your Bathroom: Complete UK Guide 2026
How to deep clean bathroom effectively requires the right supplies, systematic approach, and proper techniques to tackle soap scum, limescale, mould, and stubborn stains. Deep cleaning your bathroom involves working from top to bottom, using appropriate cleaning products for each surface, and paying special attention to high-bacteria areas like toilets, drains, and grout lines.
This comprehensive process goes beyond regular maintenance cleaning. Instead, it targets built-up grime, mould growth, and mineral deposits that accumulate over time. Moreover, proper preparation with the right tools and safety equipment ensures both effective results and personal protection.
From gathering essential supplies like descaler and antibacterial spray to mastering techniques for cleaning shower drains and grout, this guide covers every aspect of bathroom deep cleaning. Furthermore, you’ll learn maintenance strategies to keep your bathroom hygienic between deep cleaning sessions.
TL;DR
- Essential supplies: bleach, descaler, microfibre cloths, scrubbing brushes, and protective equipment
- Top-to-bottom approach: start with ceiling and lights, then work down to walls, fixtures, and floors
- Focus areas: toilet deep clean, shower/bath descaling, sink limescale removal, and thorough floor sanitisation
- Mould prevention: improve ventilation and establish regular maintenance schedule
Essential Supplies and Equipment for Deep Cleaning Your Bathroom
Successful bathroom deep cleaning requires specific cleaning products designed to tackle different types of grime and bacteria. Additionally, proper tools and protective equipment ensure both effective cleaning and personal safety throughout the process.
Core Cleaning Products
Bleach serves as your primary disinfectant for killing bacteria, viruses, and mould spores on hard surfaces. Furthermore, descaler specifically targets limescale buildup on taps, showerheads, and around bath edges. Antibacterial spray provides broad-spectrum cleaning for surfaces like countertops and door handles.
Toilet cleaner contains specialised acids that break down uric acid deposits and staining inside the bowl. Meanwhile, glass cleaner creates streak-free results on mirrors, shower screens, and windows. These products work synergistically to address different cleaning challenges throughout your bathroom.
Essential Cleaning Tools
Rubber gloves protect your hands from harsh chemicals whilst providing better grip on wet surfaces. Similarly, microfibre cloths trap dirt and bacteria more effectively than traditional cloths, reducing cross-contamination between surfaces.
Scrubbing brushes with different bristle strengths tackle various surfaces without causing damage. Consequently, a dedicated toilet brush ensures hygienic cleaning of the bowl and under-rim areas. Squeegees remove water efficiently from shower screens and tiles, preventing water spots and mould growth.
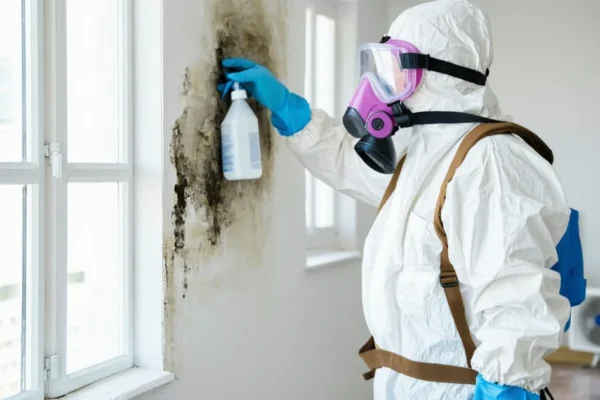
Safety and Protective Equipment
Ventilation masks protect against inhaling chemical fumes, particularly when using bleach or ammonia-based products. Moreover, eye protection prevents splashing chemicals from causing irritation or injury during intensive scrubbing.
Proper ventilation remains crucial – always open windows and use exhaust fans when working with cleaning chemicals. Therefore, protective equipment ensures you can clean thoroughly without compromising your health.
Specialised Deep Cleaning Items
Pumice stones effectively remove stubborn limescale deposits from toilet bowls without scratching porcelain surfaces. Additionally, an old toothbrush reaches tight spaces around taps, grout lines, and other detailed areas that larger brushes cannot access.
A vacuum cleaner removes hair, dust, and debris from floors before wet cleaning begins. This preparation step prevents dirt from spreading and ensures cleaning products work more effectively on surfaces.
| Category | Essential Items | Primary Purpose |
|---|---|---|
| Cleaning Products | Bleach, descaler, antibacterial spray | Disinfection and stain removal |
| Basic Tools | Microfibre cloths, scrubbing brushes | Surface cleaning and scrubbing |
| Safety Equipment | Rubber gloves, ventilation mask | Personal protection |
| Specialised Items | Pumice stone, old toothbrush | Detailed and stubborn stain removal |
Having all supplies ready before starting prevents interruptions during the cleaning process. Furthermore, organising tools in a cleaning caddy allows easy transport between different bathroom areas whilst maintaining efficiency throughout your deep cleaning session.
Pre-Cleaning Preparation and Safety Measures
Effective bathroom deep cleaning begins with thorough preparation that sets the foundation for success. Furthermore, proper preparation prevents contamination of personal items and ensures cleaning chemicals work at maximum effectiveness.
Clearing and Decluttering the Space
Remove all personal items from countertops, shelves, and shower areas before applying any cleaning products. Additionally, toiletries, medications, and cosmetics must be relocated to prevent chemical contamination or accidental damage during the cleaning process.
Decorative objects, towels, and bath mats require temporary removal to allow unrestricted access to all surfaces. Therefore, clearing these items prevents them from absorbing cleaning fumes and ensures every corner receives proper attention during your deep clean.
Establishing Proper Ventilation
Ventilation systems must operate at full capacity throughout the entire cleaning session. Consequently, open all windows to create cross-ventilation whilst simultaneously activating the exhaust fan to remove chemical vapours and moisture.
Poor ventilation concentrates cleaning fumes, creating health hazards and reducing cleaning effectiveness. Moreover, adequate airflow accelerates drying times and prevents condensation from interfering with your cleaning efforts, particularly when working with shower glass surfaces.
Chemical Safety and Product Knowledge
Read every product label carefully before use, paying particular attention to dilution ratios, contact times, and safety warnings. Additionally, understanding chemical interactions prevents dangerous mixing that could produce toxic gases or reduce cleaning effectiveness.
Safety instructions specify personal protective equipment requirements and ventilation needs for each product. Therefore, following manufacturer guidelines ensures both cleaning success and personal safety throughout the deep cleaning process.
Never mix bleach with ammonia-based products – this combination produces deadly chloramine gas
Supply Organisation and Workflow Planning
Gather all cleaning supplies in a central location before beginning work to maintain momentum and prevent interruptions. Furthermore, organising tools in a portable caddy allows efficient movement between different bathroom zones without constant trips to retrieve forgotten items.
Strategic supply placement reduces cleaning time and ensures consistent technique application. Additionally, having backup supplies readily available prevents workflow disruption when products run empty during intensive cleaning sessions.
- Position cleaning caddy in bathroom centre for easy access
- Pre-fill spray bottles with diluted solutions
- Arrange tools in order of planned use
- Keep paper towels and cloths within arm’s reach
- Prepare backup gloves for extended cleaning sessions
Systematic preparation transforms chaotic cleaning into efficient workflow. Consequently, this organised approach ensures thorough coverage whilst maintaining safety standards throughout your bathroom deep cleaning project.
Step-by-Step Deep Cleaning Process: Top to Bottom Approach
The top-to-bottom methodology prevents recontamination of cleaned surfaces by allowing gravity to carry dirt and debris downward. Moreover, this systematic approach ensures maximum efficiency whilst avoiding the frustration of cleaning the same area twice.
Ceiling and Overhead Surface Cleaning
Begin your deep cleaning process by addressing the ceiling surfaces using an extendable duster or microfibre cloth attached to a telescopic pole. Subsequently, remove cobwebs from corners and dust from ceiling fixtures to prevent debris falling onto freshly cleaned lower surfaces.
Light fixtures require careful attention during overhead cleaning – switch off electricity at the mains before removing glass shades or bulb covers. Additionally, clean each component with appropriate solutions based on material type, ensuring complete drying before reassembly.
Exhaust fans accumulate significant dust and moisture buildup that impedes ventilation efficiency. Therefore, remove the cover carefully and clean both the fan blades and housing with a damp cloth, then vacuum accumulated debris from the motor area.
Mirror and Window Treatment
Streak-free glass cleaning requires specific technique and product selection to achieve professional results. Furthermore, using the correct cloth material and cleaning motion prevents residue buildup that creates unsightly streaking patterns.
Apply glass cleaner in a thin, even layer across the mirror surface, then immediately wipe using a lint-free microfibre cloth in overlapping horizontal strokes. Consequently, this method eliminates streaks whilst removing soap scum, water spots, and toothpaste splatter effectively.
Window cleaning follows identical principles but requires additional attention to frames and sills where moisture and debris accumulate. Similarly, clean window tracks thoroughly to prevent dirt redistribution during future openings. For comprehensive window cleaning techniques, our guide on how to clean windows without streaks provides detailed professional methods.
Wall and Tile Surface Treatment
Surface-specific cleaning ensures optimal results without damaging delicate finishes or protective coatings. Additionally, different wall materials require tailored approaches to remove buildup whilst preserving structural integrity and aesthetic appearance.
| Surface Type | Recommended Cleaner | Application Method |
|---|---|---|
| Ceramic Tiles | Alkaline degreaser | Spray and scrub with soft brush |
| Natural Stone | pH-neutral cleaner | Gentle wiping with microfibre |
| Painted Walls | Mild detergent solution | Damp cloth, minimal moisture |
| Wallpaper | Dry cleaning methods | Vacuum brush attachment |
Grout lines demand intensive treatment using specialised cleaners and scrubbing tools to remove embedded dirt and mildew. Moreover, applying grout sealer after deep cleaning prevents future staining and simplifies maintenance routines. Our comprehensive grout cleaning guide details advanced restoration techniques.
Systematic Workflow Implementation
Methodical progression from highest to lowest surfaces maintains cleaning momentum whilst preventing cross-contamination between zones. Furthermore, this approach ensures thorough coverage without missing critical areas that harbour bacteria and moisture.
- Complete all overhead cleaning before moving downward
- Allow cleaning solutions appropriate dwell time for effectiveness
- Work in small sections to maintain product efficacy
- Rinse surfaces thoroughly to remove chemical residues
- Dry each area completely before proceeding to next zone
Gravity naturally carries loosened debris downward during the cleaning process, making upward progression counterproductive. Consequently, maintaining strict adherence to top-bottom methodology maximises efficiency whilst ensuring comprehensive soil removal from all bathroom surfaces.
Professional cleaners reduce cleaning time by 40% using systematic top-to-bottom approaches
Quality control checks during each stage prevent overlooked areas and ensure consistent results throughout your bathroom. Therefore, briefly inspect completed sections before advancing to verify thorough cleaning and identify any areas requiring additional attention.
Deep Cleaning the Toilet: Inside and Out
The toilet requires comprehensive attention during deep bathroom cleaning, as this fixture harbours the highest concentration of bacteria and germs. Subsequently, systematic toilet cleaning eliminates harmful microorganisms whilst restoring hygienic conditions throughout your bathroom space.
Toilet Bowl Deep Cleaning Process
Apply toilet bowl cleaner generously under the rim and throughout the bowl interior before beginning exterior cleaning tasks. This strategic approach allows the cleaning solution adequate dwell time to dissolve mineral deposits and break down stubborn stains.
Professional cleaners recommend 10-15 minutes contact time for maximum effectiveness against limescale and bacteria. Meanwhile, utilise this waiting period to clean the toilet’s exterior surfaces, maximising your cleaning efficiency.
Scrub the toilet bowl thoroughly using a toilet brush with firm bristles, paying particular attention to the waterline and hidden areas under the rim. Additionally, clean around the base where the toilet meets the floor, as this area frequently accumulates grime and moisture.
Exterior Surface Sanitisation
Clean the toilet seat, lid, and hinges using antibacterial wipes or disinfectant spray, ensuring complete coverage of all touchpoints. Furthermore, wipe down the toilet handle multiple times, as this surface experiences frequent contact and harbours significant bacterial loads.
The toilet tank exterior and pipes behind the fixture require thorough cleaning to remove dust and moisture buildup. Consequently, use a damp microfibre cloth to clean these often-neglected areas that contribute to overall bathroom hygiene.
Address the surrounding floor area within a two-foot radius of the toilet base, as splashing and spillage create contamination zones. Therefore, mop this area with disinfectant solution, paying special attention to corners and crevices where bacteria accumulate.
Final Disinfection Protocol
Apply antibacterial spray to all toilet surfaces after mechanical cleaning, ensuring comprehensive disinfection of the entire fixture. This final step eliminates remaining pathogens and provides lasting protection against bacterial regrowth.
Allow disinfectant solutions to air dry naturally rather than wiping immediately, as this contact time ensures maximum antimicrobial effectiveness. Similarly, proper ventilation during this process prevents chemical buildup whilst promoting thorough surface drying.
Replace toilet brushes every six months to maintain optimal cleaning performance and prevent bacterial cross-contamination between cleaning sessions. Moreover, store cleaning tools in well-ventilated areas to prevent moisture retention and microbial growth.
Shower and Bath Deep Cleaning Techniques
Shower and bath deep cleaning requires systematic approaches that address multiple contamination sources simultaneously. Consequently, effective cleaning protocols target soap scum, limescale deposits, mould growth, and bacterial accumulation across all surfaces.
Removing Soap Scum and Limescale Deposits
Soap scum forms when soap combines with hard water minerals, creating stubborn film layers on shower surfaces. Therefore, descaling products containing citric acid or acetic acid effectively dissolve these mineral deposits through chemical breakdown.
Apply descaling solution generously to affected surfaces, allowing 15-20 minutes contact time for optimal penetration. Subsequently, scrub with non-abrasive sponges to remove loosened deposits without scratching delicate surfaces like glass or chrome fixtures.
Limescale buildup requires stronger acidic solutions, particularly around taps and showerheads where mineral concentration peaks. Moreover, white vinegar provides an effective natural alternative, dissolving calcium carbonate deposits through sustained acid exposure.
Cleaning Shower Doors and Screens
Shower doors accumulate water spots, soap residue, and mineral deposits that require specialised cleaning approaches. Additionally, glass surfaces show every streak and smudge, demanding precise cleaning techniques for crystal-clear results.
Start by removing loose debris with warm water rinses, then apply glass cleaner or vinegar solution using spray bottles for even coverage. Furthermore, proper shower glass cleaning techniques ensure streak-free finishes through correct application methods.
Clean shower curtains by removing them completely and washing in washing machines with regular detergent plus one cup of white vinegar. Similarly, plastic curtains benefit from gentle cycle washing followed by air drying to prevent heat damage.
Wipe down metal frames and tracks using microfibre cloths dampened with all-purpose cleaner, ensuring complete removal of soap buildup. Consequently, regular maintenance prevents permanent staining and extends fixture lifespan significantly.
Grout Line Deep Cleaning
Grout cleaning represents one of the most challenging aspects of bathroom maintenance due to porous material properties that trap dirt and moisture. Therefore, specialised grout cleaning methods target embedded stains and prevent mould growth effectively.
Create cleaning paste using baking soda and water, applying directly to discoloured grout lines with old toothbrushes for precise application. Subsequently, scrub in circular motions to lift embedded dirt whilst avoiding damage to surrounding tiles.
For severe mould infestations, diluted bleach solution (one part bleach to ten parts water) provides powerful antimicrobial action. However, ensure adequate ventilation and wear protective gloves when handling chlorine-based products to prevent respiratory irritation.
Commercial grout cleaners containing hydrogen peroxide offer effective alternatives to harsh chemicals whilst maintaining powerful cleaning action. Moreover, these products often include surfactants that improve penetration into porous grout materials.
Tap and Fixture Sanitisation
Taps and showerheads harbour significant bacterial loads due to constant moisture exposure and frequent hand contact. Additionally, mineral deposits within aerators and spray nozzles reduce water flow whilst creating breeding grounds for harmful microorganisms.
Remove showerheads completely for thorough internal cleaning, soaking in white vinegar overnight to dissolve mineral buildup. Furthermore, use old toothbrushes to clear individual spray holes, ensuring optimal water pressure restoration.
Clean tap aerators by unscrewing and soaking in descaling solution, then rinse thoroughly before reinstallation. Similarly, wipe down all chrome surfaces with glass cleaner to achieve mirror-like finishes without water spots.
Apply antibacterial spray to all fixture surfaces after mechanical cleaning, allowing proper contact time for maximum disinfection effectiveness. Consequently, this final sanitisation step eliminates remaining pathogens and provides lasting antimicrobial protection.
Drain Area Deep Cleaning
Shower drain cleaning prevents blockages whilst eliminating odour-causing bacteria that accumulate in standing water. Therefore, comprehensive drain maintenance ensures proper water flow and hygienic conditions.
Remove drain covers and extract visible hair and debris using disposable gloves and long-handled tools. Subsequently, flush with hot water to clear loose materials before applying cleaning solutions.
Pour baking soda followed by white vinegar down drains, creating fizzing action that breaks down organic buildup and neutralises odours. Moreover, this natural cleaning method avoids harsh chemicals that might damage plumbing systems.
Scrub drain surrounds with disinfectant solution, paying particular attention to crevices where soap scum and hair typically accumulate. Finally, rinse thoroughly and replace drain covers securely to maintain proper drainage function.
Sink and Basin Thorough Cleaning
Sink cleaning requires systematic attention to multiple surfaces and components for optimal hygiene results. Furthermore, proper basin maintenance prevents limescale accumulation whilst ensuring drainage systems function effectively throughout daily use.
Limescale Removal from Taps and Edges
White vinegar dissolves mineral deposits on tap surfaces more effectively than commercial cleaners. Additionally, soaking cotton pads in vinegar and wrapping around tap bases loosens stubborn limescale buildup within 15-20 minutes.
Scrub tap aerators with old toothbrushes after vinegar treatment to remove remaining calcium deposits. Similarly, clean around sink edges using descaling solution, focusing on areas where water frequently contacts porcelain or ceramic surfaces.
Apply lemon juice to persistent limescale stains as citric acid naturally breaks down mineral buildup without scratching delicate finishes. Consequently, this natural approach protects tap coatings whilst achieving thorough descaling results.
Deep Basin Bowl Cleaning
Basin cleaning begins with removing all toiletries and accessories to access every surface area completely. Moreover, this preparation ensures cleaning products reach all contaminated zones without obstruction.
Cream cleanser with mild abrasive properties removes soap scum and water stains from basin bowls without causing surface damage. Therefore, apply using circular motions with soft cloths, concentrating on discoloured areas around waterlines.
Stubborn stains require bicarbonate of soda paste made with small amounts of water for enhanced cleaning power. Subsequently, let paste sit for 10 minutes before scrubbing with non-scratch sponges to lift embedded dirt.
Rinse thoroughly with hot water after abrasive cleaning to remove all residue and cleaning product traces. Finally, dry completely with clean microfibre cloths to prevent water spots and maintain pristine basin appearance.
Tap and Fixture Polishing
Chrome fixtures require specific polishing techniques to achieve mirror-like finishes without streaking or water marks. Additionally, proper polishing protects metal surfaces from corrosion whilst enhancing bathroom aesthetics significantly.
Apply glass cleaner to dry cloths rather than spraying directly onto taps to prevent product buildup in crevices. Furthermore, this method ensures even distribution whilst avoiding excess moisture in mechanical components.
Polish in straight lines rather than circular motions to prevent swirl marks on reflective surfaces. Similarly, use separate cloths for cleaning and final buffing to achieve professional-quality results without contamination.
Baby oil applied sparingly creates water-repelling barriers on clean fixtures, reducing future water spot formation. Consequently, this protective coating extends time between deep cleaning sessions whilst maintaining shine.
Drain and Overflow Maintenance
Sink drain cleaning prevents blockages whilst eliminating odour-causing bacteria that accumulate in standing water areas. Therefore, regular drain maintenance ensures proper water flow and hygienic conditions similar to shower drain cleaning procedures.
Remove sink plugs and extract visible hair and debris using disposable gloves and long-handled tools. Subsequently, flush with hot water to clear loose materials before applying cleaning solutions to drain openings.
Pour baking soda followed by white vinegar down drains, creating fizzing action that breaks down organic buildup and neutralises unpleasant odours. Moreover, this natural cleaning method avoids harsh chemicals that might damage plumbing systems.
Clean overflow outlets using cotton buds dipped in disinfectant solution to reach narrow spaces where bacteria typically multiply. Finally, rinse all treated areas thoroughly and test water flow to confirm proper drainage function restoration.
Floor Deep Cleaning and Sanitisation
Floor cleaning forms the foundation of comprehensive bathroom sanitisation, requiring systematic debris removal before applying appropriate cleaning solutions. Consequently, proper floor preparation ensures maximum cleaning product effectiveness whilst preventing damage to various flooring materials.
Begin floor cleaning by vacuuming or sweeping thoroughly to extract hair, dust, and visible debris from all surface areas. Additionally, use crevice tools to reach tight spaces between fixtures and wall joints where accumulation typically occurs.
Tile floors require alkaline-based cleaners that dissolve soap scum and mineral deposits effectively. Meanwhile, vinyl flooring responds better to pH-neutral solutions that preserve surface integrity without causing discolouration or deterioration.
Natural stone surfaces demand specialised stone cleaners that avoid acidic ingredients, preventing etching and permanent damage. Similarly, laminate flooring needs minimal moisture application to prevent warping and joint separation over time.
Apply cleaning solutions systematically, working from farthest corner toward exit points to avoid walking on freshly cleaned areas. Furthermore, use microfibre mops that capture bacteria and debris more effectively than traditional cotton alternatives.
Corner areas and spaces behind toilets accumulate significant bacterial growth and require concentrated attention during cleaning processes. Therefore, use angled brushes or detail tools to reach these challenging areas where standard mops cannot penetrate effectively.
Sanitisation follows initial cleaning, using disinfectant solutions that eliminate remaining pathogens and create hygienic floor surfaces. Moreover, allow proper contact time as specified by product manufacturers to ensure complete bacterial elimination.
Fixture bases and toilet surrounds need individual attention using detail brushes and concentrated cleaning solutions. Additionally, clean underneath removable bath mats and around pedestal bases where moisture creates ideal conditions for mould development.
Complete drying prevents slip hazards whilst inhibiting bacterial regrowth in residual moisture areas. Consequently, use absorbent towels or allow adequate air circulation to achieve thorough drying before bathroom use resumes.
Ventilation during and after floor cleaning accelerates drying processes whilst preventing humidity buildup that encourages mould formation. Similarly, grout cleaning techniques complement floor sanitisation by addressing porous areas where bacteria commonly establish colonies.
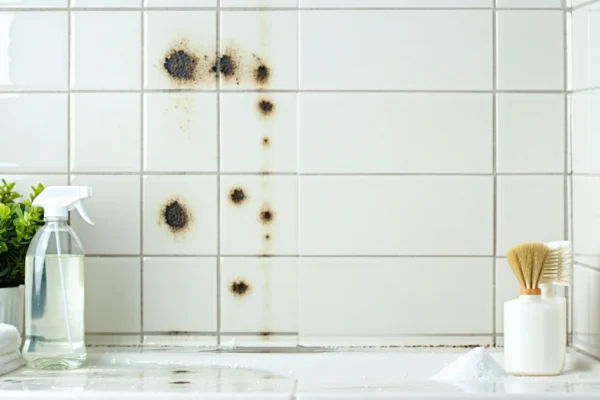
Tackling Mould, Mildew, and Stubborn Stains
Mould identification begins with systematic inspection of moisture-prone areas where fungal spores thrive in humid conditions. Therefore, examine shower corners, window sills, and ceiling areas where condensation accumulates most frequently. Black mould appears as dark patches with fuzzy textures, whilst mildew presents as white or grey powdery deposits on surfaces.
Ventilation assessment reveals inadequate airflow areas that promote mould growth through persistent dampness. Additionally, check behind bathroom fixtures and around pipe joints where hidden moisture creates ideal breeding environments for fungal colonies.
Effective Mould Removal Techniques
Contact time determines mould remover effectiveness, requiring minimum fifteen-minute application periods for complete spore elimination. Subsequently, specialised fungicidal solutions penetrate porous surfaces more effectively than standard household cleaners when addressing established mould colonies.
Protective equipment including gloves and masks prevents spore inhalation during removal processes. Furthermore, ensure adequate ventilation throughout treatment to prevent chemical accumulation whilst accelerating surface drying.
- Bleach solutions (1:10 ratio) eliminate surface mould on non-porous materials
- White vinegar provides natural antifungal properties for sensitive surfaces
- Hydrogen peroxide offers deep penetration for stubborn mould stains
- Commercial fungicides deliver professional-strength treatment for severe infestations
Stain-Specific Treatment Approaches
Hard water stains require acidic solutions that dissolve mineral deposits through chemical breakdown processes. Meanwhile, soap scum responds better to alkaline cleaners that emulsify fatty residues for easier removal.
Rust stains demand oxalic acid treatments that convert iron oxides into soluble compounds. Similarly, grout discolouration benefits from oxygen bleach applications that restore original colouring without surface damage.
| Stain Type | Treatment Method | Contact Time |
|---|---|---|
| Limescale | Citric acid solution | 30 minutes |
| Mildew | Antifungal spray | 15 minutes |
| Rust marks | Oxalic acid paste | 20 minutes |
| Soap residue | Alkaline degreaser | 10 minutes |
Prevention Strategies for Long-Term Control
Humidity control through improved ventilation prevents mould recurrence by maintaining moisture levels below 60% relative humidity. Consequently, exhaust fans should operate during and thirty minutes after shower use to remove excess moisture effectively.
Regular surface treatments with preventive sprays create hostile environments for mould spore germination. Moreover, weekly maintenance cleaning removes organic matter that feeds fungal growth before colonies establish themselves.
Sealant inspection and replacement eliminates moisture entry points where mould commonly develops in concealed areas. Additionally, shower glass maintenance prevents water accumulation that contributes to mould formation on adjacent surfaces.
Proper ventilation reduces bathroom humidity by up to 40%, significantly decreasing mould growth potential
Temperature regulation through consistent heating prevents condensation formation that creates ideal mould breeding conditions. Furthermore, addressing plumbing leaks immediately eliminates hidden moisture sources that support extensive mould development behind walls and fixtures.
Final Touches and Maintenance Tips
After completing your deep bathroom cleaning, thoughtful organisation of personal items ensures lasting results. Moreover, replacing toiletries in clean containers prevents contamination from old residues that harbour bacteria and mould spores.
Organising Personal Items
Clean storage containers eliminate cross-contamination that undermines deep cleaning efforts. Additionally, grouping similar items together creates visual order whilst preventing clutter accumulation that complicates future cleaning sessions.
Fresh towels and bath mats replace items that absorbed cleaning chemicals during the deep clean process. Furthermore, washing or replacing shower curtains removes residual cleaning product odours that can linger for days.
Establishing Regular Cleaning Schedules
Weekly maintenance cleaning extends deep clean results by three to six months compared to irregular cleaning patterns. Consequently, scheduled cleaning prevents soil accumulation that requires intensive scrubbing and harsh chemicals.
- Weekly tasks: Toilet cleaning, mirror polishing, floor mopping
- Bi-weekly tasks: Shower screen cleaning, grout inspection
- Monthly tasks: Exhaust fan cleaning, sealant checking
- Quarterly tasks: Deep tile cleaning, fixture descaling
Consistent scheduling creates cleaning habits that become automatic behaviours. Therefore, maintenance becomes less time-consuming whilst preventing the need for frequent deep cleaning sessions.
Improving Bathroom Ventilation
Enhanced ventilation systems reduce moisture levels that support mould growth and soap scum formation. Similarly, shower glass maintenance becomes easier when humidity levels remain below 60% relative humidity.
Exhaust fan upgrades improve air circulation by 40-60% compared to standard models. Moreover, timer switches ensure fans operate for optimal durations after shower use, removing residual moisture effectively.
Window opening during dry weather provides natural ventilation that complements mechanical systems. Additionally, keeping internal doors open improves air circulation throughout connected areas, reducing overall humidity levels.
Daily Maintenance Tasks
Quick daily actions prevent soil accumulation that necessitates intensive cleaning efforts. Furthermore, these simple tasks require only 2-3 minutes but extend deep clean results significantly.
Wiping shower walls after each use removes soap residue before it hardens into stubborn deposits. Consequently, weekly cleaning becomes faster and requires fewer harsh chemicals for effective results.
- Squeegee shower glass and tiles after use
- Wipe basin and taps with microfibre cloth
- Hang towels properly for air circulation
- Empty bathroom bin regularly
- Check for leaks around fixtures
Toilet bowl brushing after each use prevents stain formation that requires intensive scrubbing later. Similarly, immediate spill cleanup prevents staining on porous surfaces like natural stone tiles.
Daily maintenance tasks reduce deep cleaning frequency by up to 75%
Regular ventilation checks ensure exhaust fans operate efficiently without dust accumulation that reduces performance. Therefore, monthly fan cleaning maintains optimal air circulation whilst preventing motor strain that leads to premature failure.
Frequently Asked Questions
How often should I deep clean my bathroom?
You should deep clean your bathroom every 2-4 weeks depending on usage frequency. High-traffic bathrooms may require weekly deep cleaning, whilst guest bathrooms can be deep cleaned monthly. Regular maintenance cleaning between deep cleans helps prevent heavy buildup of grime and mould.
Can I mix different cleaning products together?
Never mix cleaning products, especially bleach with ammonia-based cleaners, as this creates dangerous toxic gases. Use one product at a time, rinse surfaces between different cleaners, and ensure proper ventilation. Always read product labels for specific mixing warnings.
What's the best way to tackle stubborn mould in bathroom corners?
For stubborn mould, apply bleach solution directly to affected areas and leave for 10-15 minutes before scrubbing with an old toothbrush. Ensure excellent ventilation and wear protective equipment. For persistent mould, you may need to remove and replace silicone sealant around baths and showers.
How do I remove limescale from shower heads and taps?
Fill a plastic bag with white vinegar or descaler solution, secure it around the shower head with an elastic band, and leave overnight. For taps, apply descaler directly and scrub with a soft brush. Rinse thoroughly afterwards and dry with a microfibre cloth to prevent water spots.
Should I clean from top to bottom or bottom to top?
Always clean from top to bottom to prevent recontaminating already-cleaned surfaces. Start with ceiling fans and light fixtures, then move to walls, mirrors, fixtures, and finally floors. This systematic approach ensures dirt and cleaning products flow downward onto surfaces you haven’t cleaned yet.
What's the safest way to clean toilet bowls thoroughly?
Apply toilet cleaner under the rim and let it work for the recommended time. Use a dedicated toilet brush to scrub thoroughly, including under the rim and around the water line. For stubborn stains, use a pumice stone on porcelain surfaces, but test in an inconspicuous area first.
How can I prevent mould growth between deep cleans?
- Improve ventilation by using exhaust fans during and after showers
- Wipe down wet surfaces immediately after use
- Keep bathroom doors open when possible to promote air circulation
- Fix any leaks promptly to eliminate moisture sources
- Use a squeegee on shower screens and tiles after each use
What protective equipment do I need for bathroom deep cleaning?
Essential protective equipment includes rubber gloves, ventilation mask, and eye protection. Ensure proper ventilation by opening windows and using exhaust fans. Wear old clothes that you don’t mind getting splashed with cleaning products, and keep a first aid kit nearby in case of accidents.
You May Also Like
How to Clean Shower Tiles: Complete Guide for 2026
How to Clean Shower Mold: Complete Removal Guide 2026