How to Clean Grout: Complete UK Guide for 2026
How to clean grout effectively requires the right tools, techniques, and cleaning solutions to restore those dingy lines between your tiles to their original brightness. Grout naturally attracts dirt, soap scum, and mould due to its porous nature, making regular cleaning essential for maintaining hygiene and appearance in bathrooms, kitchens, and other tiled areas.
Whether you’re dealing with surface stains or deep-set discolouration, the cleaning approach varies depending on your grout type and the severity of staining. Furthermore, you can choose between natural homemade solutions like bicarbonate of soda and vinegar or commercial cleaners designed specifically for grout restoration.
This comprehensive guide covers everything from basic maintenance to tackling stubborn mould and mildew. Additionally, we’ll explore preventative measures to keep your grout looking fresh longer, similar to how proper maintenance extends the life of other household surfaces like streak-free windows.
TL;DR
- Essential tools include grout brushes, microfibre cloths, and proper safety equipment for effective cleaning
- Natural solutions like bicarbonate of soda paste and white vinegar work well for regular maintenance and light stains
- Commercial cleaners are necessary for stubborn mould, deep stains, and heavily soiled grout lines
- Prevention is key – seal grout regularly, maintain proper ventilation, and clean spills immediately
- Professional help may be required for severely damaged grout or when DIY methods fail to achieve desired results
Understanding Grout and Why It Gets Dirty
Grout serves as the essential filler material between tiles, creating waterproof seals whilst providing structural support for your tiled surfaces. This cement-based mixture prevents water penetration behind tiles and maintains the integrity of your bathroom, kitchen, or floor installations. However, grout’s porous composition makes it particularly susceptible to staining and discolouration over time.
The material acts as both a functional barrier and aesthetic element, yet its very nature creates cleaning challenges. Moreover, understanding grout’s composition helps explain why certain cleaning methods work better than others for different stain types.
Types of Grout and Their Cleaning Requirements
Cement-based grout represents the most common type found in UK homes, consisting of Portland cement, sand, and water. This traditional mixture offers excellent durability but requires regular sealing due to its naturally porous structure. Additionally, cement grout absorbs moisture readily, making it prone to mould growth and staining.
Epoxy grout provides superior stain resistance through its non-porous resin composition, though it costs significantly more than cement alternatives. This synthetic material repels water effectively and resists most household chemicals. Furthermore, epoxy grout maintains its colour better over time, requiring less frequent deep cleaning.
Urethane grout combines the benefits of both cement and epoxy types, offering flexibility and stain resistance in a single product. This newer option adapts well to temperature changes whilst maintaining waterproof properties. Consequently, urethane grout requires different cleaning approaches compared to traditional cement-based products.
Common Causes of Grout Discolouration
Soap scum accumulation creates the most frequent grout staining issue in bathrooms, as soap residue combines with hard water minerals to form stubborn deposits. These alkaline buildups attract additional dirt particles, creating increasingly dark stains over time. Similarly, cleaning other surfaces like windows requires understanding how different substances interact with materials.
Hard water minerals leave chalky white deposits that gradually darken as they trap organic matter and bacteria. These calcium and magnesium compounds bond strongly with grout’s porous surface, requiring specific cleaning agents for effective removal. Additionally, cooking oils and food spills in kitchen areas penetrate grout lines, creating permanent discolouration without prompt attention.
Mould and mildew growth thrives in grout’s moist, porous environment, particularly in poorly ventilated bathrooms. These organisms produce dark stains whilst potentially causing health issues for household members. Therefore, addressing moisture problems becomes crucial for preventing recurring grout discolouration.
Why Grout Attracts Dirt and Contaminants
Grout’s porous microstructure creates countless tiny cavities that trap dirt, oils, and moisture beneath the surface. This cellular composition means standard surface cleaning cannot reach embedded contaminants. Consequently, grout requires specific cleaning techniques that penetrate these microscopic spaces.
The material’s alkaline pH naturally attracts acidic substances like body oils, soap residues, and organic matter. This chemical attraction explains why grout darkens more quickly in high-use areas like shower floors and kitchen backsplashes. Furthermore, grout’s rough texture provides additional surface area for contaminant adhesion compared to smooth tile surfaces.
Capillary action draws moisture and dissolved contaminants deep into grout’s structure, making surface cleaning insufficient for thorough maintenance. This physical process explains why unsealed grout requires more frequent and intensive cleaning than properly sealed alternatives.
Surface Dirt vs Deep Stains: Understanding the Difference
Surface dirt sits on top of grout lines and responds well to regular cleaning with mild detergents and scrubbing. These superficial deposits include dust, loose soap residue, and recent spills that haven’t penetrated the grout’s porous structure. Typically, surface contamination removes easily with standard household cleaners and gentle agitation.
Deep stains penetrate grout’s porous matrix and require specialised cleaning approaches for effective removal. These embedded contaminants include mould roots, mineral deposits, and oxidised organic matter that has chemically bonded with the grout material. Moreover, deep stains often require multiple cleaning sessions and stronger chemical solutions.
Identifying the stain type determines your cleaning strategy success. Fresh stains typically respond to immediate cleaning with basic solutions, whilst established stains may require commercial cleaners or professional intervention. Additionally, understanding this distinction prevents damage from using unnecessarily harsh chemicals on surface-level contamination.
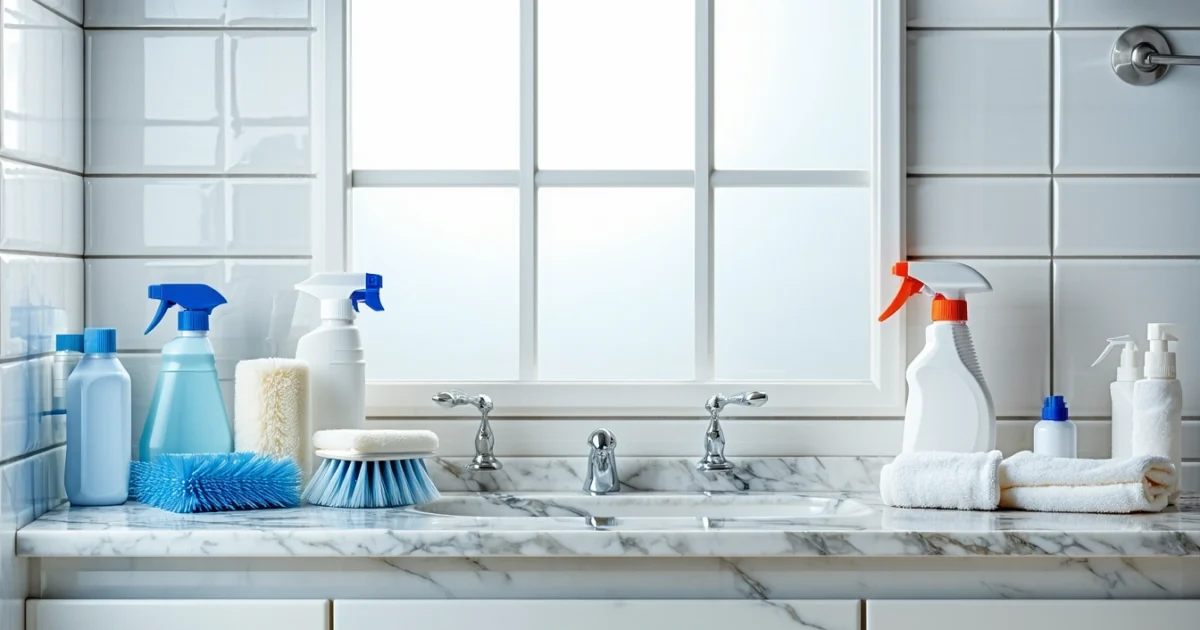
Essential Tools and Materials for Grout Cleaning
Successful grout cleaning requires the right combination of tools, cleaning agents, and safety equipment. Furthermore, selecting appropriate materials prevents damage whilst maximising cleaning effectiveness across different grout types and stain severities.
Basic Cleaning Tools for Effective Grout Maintenance
A grout brush serves as the primary tool for mechanical cleaning action. These specialised brushes feature stiff bristles designed to fit grout line widths without damaging surrounding tiles. Additionally, the angled bristle design provides optimal contact with grout surfaces for thorough scrubbing.
Old toothbrushes excel at detailed cleaning work in tight corners and narrow grout lines. Their small head size allows precise application of cleaning solutions whilst providing controlled scrubbing pressure. Moreover, the familiar grip makes them comfortable for extended cleaning sessions.
Microfibre cloths absorb loosened dirt and cleaning residue effectively without scratching tile surfaces. These cloths trap particles within their fibrous structure, preventing redistribution of contaminants during wiping. Consequently, using microfibre cloths reduces the need for multiple rinse cycles.
Specialised Grout Cleaning Tools and Their Benefits
Steam cleaners penetrate grout pores using high-temperature vapour without chemical additives. The intense heat kills bacteria, dissolves organic stains, and loosens embedded dirt through thermal expansion. Similarly, steam cleaning sanitises surfaces whilst being environmentally friendly.
Grout pens provide precision application of cleaning solutions or sealers directly into grout lines. These tools feature fine tips that deliver controlled amounts of product exactly where needed. Therefore, grout pens minimise waste whilst ensuring complete coverage of narrow grout joints.
Electric scrubbers reduce manual effort through powered bristle rotation or oscillation. These tools maintain consistent pressure and speed, delivering uniform cleaning results across large areas. Additionally, electric scrubbers prevent hand fatigue during extensive grout cleaning projects, similar to techniques used in cleaning quarry tiles.
Commercial Grout Cleaners vs Homemade Solutions
Commercial grout cleaners contain concentrated active ingredients formulated specifically for grout contamination types. These products often include surfactants, bleaching agents, and pH adjusters optimised for maximum cleaning efficiency. Furthermore, commercial cleaners undergo testing for safety and effectiveness on various grout materials.
Homemade solutions offer cost-effective alternatives using common household ingredients like bicarbonate of soda, white vinegar, and hydrogen peroxide. These natural cleaners provide gentler cleaning action suitable for regular maintenance. However, homemade solutions typically require longer contact times and more physical scrubbing than commercial alternatives.
| Solution Type | Cost | Effectiveness | Safety |
|---|---|---|---|
| Commercial cleaners | Higher | Fast-acting | Requires ventilation |
| Homemade solutions | Lower | Moderate | Generally safer |
Choosing between commercial and homemade solutions depends on stain severity, grout condition, and personal preferences. Consequently, many homeowners use homemade solutions for regular maintenance and commercial cleaners for deep cleaning sessions.
Safety Equipment for Grout Cleaning
Rubber gloves protect hands from chemical irritation and bacterial contamination during cleaning. Quality gloves prevent cleaning solutions from penetrating skin whilst maintaining grip on tools and surfaces. Moreover, disposable nitrile gloves offer superior chemical resistance compared to latex alternatives.
Eye protection shields against splashing cleaning solutions and airborne particles during scrubbing. Safety glasses or goggles prevent chemical contact with sensitive eye tissues. Additionally, wraparound styles provide comprehensive protection from multiple angles during vigorous cleaning motions.
Adequate ventilation removes chemical vapours and prevents accumulation of potentially harmful fumes. Opening windows and using exhaust fans creates air circulation that protects respiratory health. Therefore, proper ventilation becomes especially critical when using commercial cleaners or bleach-based solutions, much like the precautions needed when cleaning ovens.
- Knee pads for floor-level cleaning comfort
- Dust masks when scrubbing creates airborne particles
- Non-slip footwear for wet surface safety
Tools to Avoid That Can Damage Grout
Steel wool scratches grout surfaces and creates microscopic grooves that trap more dirt. These abrasive fibres remove grout material along with stains, weakening the structural integrity. Consequently, steel wool use leads to faster recontamination and potential grout failure.
Wire brushes cause similar damage through aggressive metal bristles that gouge grout lines. The harsh scraping action removes both stains and grout material, creating uneven surfaces. Furthermore, wire brush damage often requires professional grout repair or replacement.
Acidic cleaners dissolve cement-based grout materials through chemical reaction. Products containing muriatic acid, phosphoric acid, or strong vinegar solutions break down grout binders. Additionally, repeated acid exposure causes grout deterioration and colour changes that cannot be reversed.
Using inappropriate tools can cause permanent grout damage requiring costly professional restoration
Avoiding damaging tools preserves grout integrity whilst achieving effective cleaning results. Instead, focus on appropriate brush stiffness, pH-balanced cleaners, and gentle mechanical action for long-term grout health.
Step-by-Step Grout Cleaning Process
Pre-Cleaning Preparation and Area Setup
Begin by removing all loose items from the cleaning area to create unobstructed access to grout lines. Subsequently, sweep or vacuum the surface thoroughly to eliminate loose dirt, hair, and debris that could interfere with cleaning solutions. This preliminary step prevents particles from being ground deeper into grout during the scrubbing process.
Protect adjacent surfaces by applying painter’s tape to walls, fixtures, and delicate materials that might be damaged by cleaning solutions. Additionally, lay down plastic sheeting or old towels to catch drips and splashes. Proper preparation reduces cleanup time and prevents accidental damage to surrounding areas.
Ensure adequate ventilation by opening windows and running exhaust fans to disperse cleaning fumes. Moreover, gather all necessary tools and materials within easy reach to maintain workflow efficiency. This organised approach prevents interruptions during the cleaning process.
Initial Surface Cleaning and Debris Removal
Start with a dry brush cleaning using a medium-stiff bristle brush to dislodge surface dirt and loose particles from grout lines. Work systematically across the area, brushing along grout lines rather than against them to avoid pushing debris deeper. This mechanical action removes approximately 40-50% of surface contamination before applying any liquids.
Follow dry brushing with a damp microfibre cloth wipe-down to collect loosened particles and prepare the surface for cleaning solutions. The cloth should be barely damp to avoid saturating grout prematurely. This step creates optimal conditions for cleaning solution penetration and effectiveness.
Applying Cleaning Solution and Dwell Time
Apply your chosen cleaning solution evenly across grout lines using a spray bottle or foam applicator for consistent coverage. Work in manageable sections of approximately 2-3 square metres to prevent solution from drying before scrubbing. The application method significantly affects cleaning efficiency and results.
Allow the cleaning solution to dwell for the manufacturer’s recommended time, typically 5-15 minutes depending on soil level and product strength. During this period, the solution breaks down stains, dissolves soap scum, and loosens embedded dirt through chemical action. However, avoid letting solutions dry completely, as this reduces effectiveness and may leave residues.
Reapply solution to areas that begin drying during the dwell period to maintain optimal cleaning conditions. This attention to timing ensures maximum soil removal whilst preventing solution waste or surface damage.
Scrubbing Techniques for Different Grout Types
Cement-based grout responds best to firm, consistent pressure using a medium-stiff brush in linear motions along grout lines. Apply steady pressure whilst moving the brush back and forth to work the cleaning solution into porous surfaces. This technique removes embedded stains without damaging the grout structure.
Epoxy grout requires gentler handling due to its non-porous surface that can be scratched by aggressive scrubbing. Use a soft-bristled brush with light pressure and circular motions to clean effectively. The smooth surface releases dirt more easily than cement grout, requiring less mechanical action.
For coloured grout, test scrubbing pressure in an inconspicuous area first to ensure the pigment remains intact. Subsequently, use the minimum pressure necessary to achieve cleaning whilst preserving colour integrity. Excessive scrubbing can fade or remove grout colouring permanently.
Focus on heavily stained areas with concentrated scrubbing efforts, applying additional cleaning solution as needed. Work systematically to ensure even cleaning across all grout lines, similar to the methodical approach used when cleaning quarry tiles.
Rinsing and Drying Procedures
Rinse thoroughly with clean water using a spray bottle or damp cloth to remove all cleaning solution residues and loosened soil. Start from the top of vertical surfaces and work downward to prevent streaking. Complete rinsing prevents residue buildup that can attract dirt and cause rapid resoiling.
Use a clean microfibre cloth or squeegee to remove excess water from grout lines and surrounding surfaces. Pay particular attention to grout joints where water tends to pool and can cause prolonged moisture exposure. Proper water removal prevents mould growth and mineral deposits.
Allow the area to air dry completely before replacing items or applying any sealers. Adequate drying time, typically 2-4 hours depending on humidity and ventilation, ensures moisture doesn’t become trapped in porous grout materials. This drying period is crucial for preventing future mould and mildew issues.
Final Inspection and Touch-Up Cleaning
Examine all grout lines under good lighting to identify any remaining stains or areas requiring additional attention. Use a flashlight or mobile phone light to illuminate grout lines from different angles, revealing spots that may have been missed during initial cleaning. This thorough inspection ensures consistent results across the entire area.
Address remaining stains with targeted spot treatment using a small brush and concentrated cleaning solution. Apply solution directly to stubborn stains, allow appropriate dwell time, and scrub gently to avoid over-working surrounding clean areas. This focused approach achieves uniform cleanliness without repeating the entire process.
Document the cleaning process with before and after photos to track improvement and identify areas that may need different treatment approaches in future cleanings. This record-keeping helps refine your grout cleaning technique and timing for optimal results, much like maintaining detailed records when performing washing machine maintenance.
Natural and Homemade Grout Cleaning Solutions
Natural cleaning solutions provide effective grout restoration without harsh chemicals or expensive commercial products. These household ingredients create powerful cleaning compounds that dissolve dirt, remove stains, and brighten grout lines safely. Moreover, homemade cleaners reduce environmental impact whilst delivering professional-quality results.
Bicarbonate of Soda and Water Paste Method
Bicarbonate of soda creates an alkaline cleaning paste that neutralises acidic stains and lifts embedded dirt from porous grout surfaces. Mix three parts bicarbonate of soda with one part water to form a thick, spreadable paste. This ratio ensures optimal consistency for vertical application and maximum cleaning power.
Apply the paste generously to grout lines using a small brush or finger, working the mixture into crevices and stained areas. Allow the bicarbonate solution to sit for 15-20 minutes, enabling the alkaline compounds to break down acidic residues and organic matter. Subsequently, scrub with a toothbrush using circular motions to activate the cleaning action.
Rinse thoroughly with clean water to remove all paste residue, as dried bicarbonate can leave white deposits on tile surfaces. This method works particularly well on light-coloured grout and areas with soap scum buildup, similar to techniques used when learning how to clean a stainless steel sink without scratching.
White Vinegar Solutions and Application
White vinegar contains acetic acid that dissolves mineral deposits, soap residue, and light mildew stains naturally. Create a cleaning solution by mixing equal parts white vinegar and warm water in a spray bottle. This acidic solution effectively breaks down alkaline buildup and hard water stains.
Spray the vinegar solution directly onto grout lines, ensuring complete coverage of stained areas. Allow the acidic solution to penetrate for 10-15 minutes before scrubbing with a soft-bristled brush. The acid dissolves mineral deposits whilst the scrubbing action removes loosened debris.
Avoid using vinegar on natural stone tiles like marble or travertine, as acid can etch and damage these surfaces permanently. Additionally, never combine vinegar with bicarbonate of soda simultaneously, as the chemical reaction neutralises both cleaning agents’ effectiveness.
Hydrogen Peroxide for Whitening Grout
Hydrogen peroxide provides powerful whitening action through oxygen-based bleaching that removes organic stains and brightens discoloured grout. Use 3% hydrogen peroxide solution available from pharmacies, applying it undiluted for maximum effectiveness. This concentration provides safe yet potent cleaning power for household use.
Apply hydrogen peroxide directly to grout lines using a spray bottle or cotton swab for precise application. The solution bubbles and foams as it breaks down organic matter and lifts stains from porous grout surfaces. Allow the peroxide to work for 5-10 minutes before scrubbing gently with a soft brush.
This method excels at removing mildew stains and restoring white grout to its original brightness. However, test hydrogen peroxide on an inconspicuous area first, as it may lighten coloured grout beyond desired levels.
Lemon Juice for Natural Bleaching
Lemon juice contains citric acid that naturally bleaches stains whilst providing antibacterial properties and fresh fragrance. Fresh lemon juice works more effectively than bottled alternatives due to higher acid concentration and active enzymes. Cut a fresh lemon in half and squeeze juice directly onto stained grout areas.
Alternatively, create a lemon cleaning paste by mixing fresh lemon juice with salt to form an abrasive compound. This combination provides both chemical cleaning action from citric acid and physical scrubbing power from salt crystals. Apply the mixture and allow it to sit for 15-20 minutes before scrubbing.
Lemon’s natural bleaching action works gradually and safely, making it ideal for regular maintenance cleaning. Furthermore, the citrus oils leave grout lines smelling fresh whilst providing mild antimicrobial benefits that help prevent future mould growth.
Steam Cleaning as a Chemical-Free Option
Steam cleaning uses superheated water vapour to sanitise and clean grout without any chemicals whatsoever. Steam temperatures of 100°C or higher kill bacteria, dissolve dirt, and loosen embedded stains through heat and moisture alone. This method provides the most environmentally friendly grout cleaning approach available.
Handheld steam cleaners with brush attachments work best for grout cleaning, allowing precise application and immediate scrubbing action. Move the steam nozzle slowly along grout lines, maintaining consistent distance to prevent tile damage from excessive heat. The steam penetrates porous grout surfaces, loosening dirt for easy removal.
Steam cleaning proves particularly effective for sanitising bathroom grout and removing soap scum without chemical residues. This method works excellently in homes with children, pets, or individuals sensitive to cleaning chemicals, providing thorough cleaning similar to professional techniques used in streak-free window cleaning.
Combine steam cleaning with immediate wiping using microfibre cloths to remove loosened debris before it can resettle. This chemical-free approach requires no drying time for safety concerns and leaves grout lines completely residue-free.
Commercial Grout Cleaning Products
Commercial grout cleaners deliver professional-strength cleaning power that surpasses household alternatives for tackling stubborn stains and deep-seated grime. These specialised products contain concentrated active ingredients specifically formulated to penetrate porous grout surfaces and break down various types of contamination. Understanding different cleaner types helps homeowners select the most effective product for their specific grout cleaning challenges.
Types of Commercial Grout Cleaners
Acid-based cleaners contain hydrochloric acid, phosphoric acid, or citric acid to dissolve mineral deposits, soap scum, and hard water stains. These powerful cleaners excel at removing calcium buildup and rust stains from grout lines. However, acid-based products require careful handling and should never be used on natural stone tiles like marble or limestone, as acids can cause permanent etching and damage.
Alkaline cleaners utilise sodium hydroxide or potassium hydroxide to break down organic matter, grease, and protein-based stains. These cleaners work exceptionally well on kitchen grout contaminated with food particles and cooking oils. Alkaline formulations prove safer for most tile types whilst delivering excellent degreasing action similar to professional oven cleaning products.
Oxygen bleach cleaners contain sodium percarbonate or hydrogen peroxide compounds that release active oxygen to lift stains and brighten discoloured grout. These products provide gentler cleaning action than chlorine bleach whilst maintaining excellent stain removal capabilities. Additionally, oxygen bleach cleaners break down into harmless water and oxygen, making them environmentally responsible choices.
Matching Products to Stain Types
Different stain types respond best to specific cleaner formulations based on their chemical composition. Mould and mildew stains require antifungal ingredients found in oxygen bleach or alkaline cleaners that destroy fungal spores whilst preventing regrowth. These biological stains need thorough penetration to reach root systems embedded within grout pores.
Mineral deposits and soap scum dissolve most effectively with acid-based cleaners that chemically break down calcium and magnesium compounds. Hard water stains, limescale, and rust marks respond particularly well to phosphoric acid formulations. Meanwhile, grease and food stains require alkaline cleaners that emulsify oils and break down protein residues through saponification processes.
General discolouration and dirt accumulation responds well to oxygen bleach cleaners that lift embedded particles without harsh chemical action. These versatile cleaners work effectively on most common grout staining whilst being safe for regular maintenance use.
Application Methods and Safety Precautions
Proper application ensures maximum cleaning effectiveness whilst protecting both user safety and surface integrity. Always wear rubber gloves, eye protection, and ensure adequate ventilation when using commercial grout cleaners. Chemical fumes can cause respiratory irritation, particularly in enclosed bathroom spaces.
Apply cleaners using spray bottles or foam applicators for even coverage across grout lines. Allow products to dwell for the manufacturer’s recommended contact time, typically 5-15 minutes, to achieve optimal chemical action. Never mix different cleaner types, as chemical reactions can produce dangerous gases or reduce cleaning effectiveness.
Test cleaners on inconspicuous areas first to verify compatibility with tile materials. Furthermore, protect surrounding surfaces with plastic sheeting or tape, as commercial cleaners can damage fixtures, fabrics, or painted surfaces through overspray or splashing.
When Professional-Strength Cleaners Are Necessary
Professional-strength cleaners become essential when household products fail to achieve satisfactory results after multiple attempts. Severely discoloured grout that appears permanently stained often requires concentrated acid or alkaline formulations to penetrate years of accumulated contamination.
Commercial properties, rental units, or homes with neglected grout maintenance benefit significantly from professional-grade products. These situations typically involve multiple stain types, heavy contamination, or time constraints that demand rapid, effective cleaning solutions.
Consider professional-strength cleaners for restoration projects where grout appearance significantly impacts property value or aesthetic appeal. Similarly, use these products before applying grout sealers, as thorough cleaning ensures proper sealer adhesion and longevity.
Cost-Effectiveness Analysis
Commercial grout cleaners typically cost £8-25 per litre compared to £2-5 for household alternatives, but deliver superior cleaning power that reduces labour time and repeat applications. Professional-strength products often clean effectively in single applications, whereas household cleaners may require multiple treatments to achieve similar results.
Calculate cost-effectiveness by considering cleaning time, product quantity needed, and result durability rather than initial purchase price alone. Commercial cleaners frequently prove more economical for extensive grout cleaning projects or severely stained surfaces that resist gentler treatments.
However, household products remain cost-effective for regular maintenance cleaning and light staining situations. The key lies in matching product strength to cleaning requirements, similar to choosing appropriate tools for tile cleaning projects where different surfaces demand specific approaches.
Tackling Specific Grout Problems
Different grout stains require targeted cleaning approaches that address their unique chemical composition and adhesion properties. Understanding the specific nature of each stain type enables homeowners to select appropriate cleaning methods and avoid damage to surrounding surfaces.
Removing Black Mould and Mildew Safely
Black mould and mildew thrive in damp bathroom environments, creating dark patches that penetrate deep into porous grout lines. These fungal growths require immediate attention as they pose health risks and spread rapidly throughout tile installations.
Create a powerful mould-killing solution by mixing one part bleach with ten parts water in a spray bottle. Additionally, ensure adequate ventilation by opening windows and running exhaust fans before beginning treatment. Apply the bleach solution directly to affected grout lines and allow it to sit for 10-15 minutes before scrubbing with an old toothbrush.
For stubborn mould growth, paste made from baking soda and water provides additional abrasive action without scratching grout surfaces. Furthermore, tea tree oil mixed with water creates a natural antifungal treatment that prevents future mould development. Always wear protective gloves and ensure proper ventilation when using bleach-based solutions.
Dealing with Soap Scum and Limescale Buildup
Soap scum forms when soap combines with hard water minerals, creating a chalky film that adheres strongly to grout surfaces. Similarly, limescale deposits accumulate from calcium and magnesium in hard water, particularly around taps and shower areas.
White vinegar dissolves both soap scum and limescale effectively due to its acidic properties. Heat equal parts white vinegar and water in a microwave for 30 seconds, then spray onto affected areas. The heated solution penetrates buildup more effectively than cold applications, breaking down mineral deposits and soap residues.
Commercial limescale removers containing citric acid or hydrochloric acid tackle severe buildup that resists vinegar treatment. However, test these products on inconspicuous areas first, as strong acids can damage certain grout types. Scrub treated areas with a plastic scrubbing brush to remove loosened deposits without scratching grout surfaces.
Addressing Oil and Grease Stains
Oil and grease stains commonly occur in kitchen areas where cooking splatter penetrates porous grout lines. These hydrophobic substances repel water-based cleaners, requiring degreasing agents that break down fatty molecules.
Dish soap specifically formulated for grease cutting provides the most effective initial treatment for oil stains. Mix two tablespoons of dish soap with one cup of warm water and apply to stained grout lines. Allow the solution to penetrate for 15 minutes before scrubbing with a soft brush.
For set-in grease stains, create a paste using baking soda and dish soap that provides both degreasing action and gentle abrasion. Apply this paste thickly over stained areas and cover with plastic wrap to prevent drying. Leave overnight before scrubbing and rinsing thoroughly with clean water.
Treating Rust and Mineral Deposits
Rust stains appear as orange or brown discoloration caused by iron oxidation from water pipes, metal fixtures, or cleaning tools. Meanwhile, mineral deposits create white or grey buildup from dissolved minerals in hard water supplies.
Lemon juice contains natural citric acid that dissolves rust stains effectively without harsh chemicals. Cut a fresh lemon in half and rub directly onto rust-stained grout, allowing the acid to work for 10-15 minutes before scrubbing. The citric acid chelates iron molecules, breaking the rust bonds and facilitating removal.
Commercial rust removers containing oxalic acid tackle severe rust stains that resist natural treatments. These products require careful handling and adequate ventilation due to their corrosive nature. Always follow manufacturer instructions precisely and test on hidden areas before widespread application, similar to approaches used when cleaning stainless steel surfaces that require specific care.
Handling Stubborn or Set-In Stains
Set-in stains require progressive treatment approaches that gradually break down accumulated contamination without damaging grout integrity. These persistent stains often combine multiple contaminant types that resist single-product solutions.
Begin with the gentlest effective treatment and progressively increase strength if needed. Start with hydrogen peroxide applied directly to stained areas, as its oxidizing action breaks down organic stains safely. Cover treated areas with plastic wrap to prevent evaporation and allow extended contact time of several hours or overnight.
For extremely stubborn stains, create a paste using oxygen bleach powder and water that provides powerful stain removal without the harsh fumes of chlorine bleach. This paste can remain on stained grout for extended periods without causing damage, making it ideal for severe discoloration that requires prolonged treatment.
Steam cleaning offers a chemical-free alternative for stubborn stains, using high-temperature water vapour to penetrate and loosen embedded contamination. However, ensure grout is properly sealed before steam treatment, as unsealed grout can absorb excess moisture and develop mould problems later.
Area-Specific Grout Cleaning Tips
Different areas of your home present unique grout cleaning challenges that require tailored approaches. Understanding these area-specific requirements ensures effective cleaning whilst preventing damage to surrounding surfaces and materials.
Bathroom Grout Cleaning Considerations
Bathroom grout faces constant exposure to moisture, soap residue, and body oils that create ideal conditions for mould and mildew growth. These environments require antifungal treatments alongside standard cleaning approaches to maintain hygiene and prevent health risks.
Start bathroom grout cleaning by improving ventilation to reduce humidity levels during and after treatment. Apply a mould-killing solution containing hydrogen peroxide or white vinegar before general cleaning, allowing extended contact time to penetrate established fungal growth. Consequently, this pre-treatment breaks down biological contamination that standard cleaners cannot address effectively.
Focus particularly on shower corners and tub edges where water accumulates and creates persistent damp conditions. These areas often require weekly maintenance cleaning to prevent mould establishment, rather than waiting for visible discoloration to develop.
Kitchen Backsplash and Worktop Grout
Kitchen grout encounters cooking oils, food particles, and heat exposure that create different staining patterns compared to bathroom environments. These contaminants often combine to form sticky residues that trap additional dirt and require degreasing agents for effective removal.
Begin kitchen grout cleaning with a degreasing solution that breaks down oil-based contamination before applying standard cleaning products. Warm water mixed with washing-up liquid provides gentle degreasing action, whilst stronger alkaline cleaners handle stubborn cooking residues. Additionally, avoid acidic cleaners near stainless steel surfaces that can cause discoloration or pitting.
Pay special attention to areas behind cooktops where heat and steam create challenging cleaning conditions. These zones often require more frequent cleaning to prevent oil polymerization that creates permanent staining on grout surfaces.
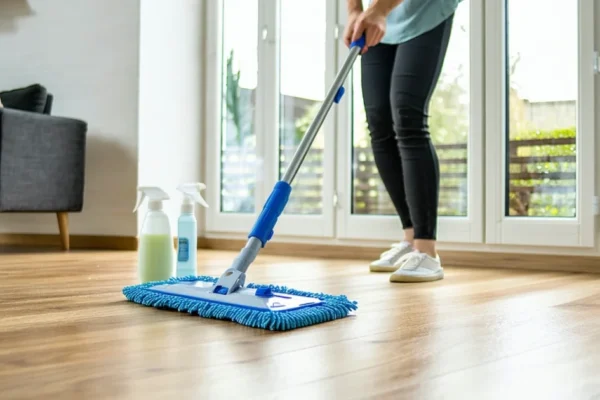
Floor Grout Cleaning Techniques
Floor grout experiences foot traffic, dirt accumulation, and mechanical wear that requires robust cleaning approaches whilst protecting the grout structure from excessive scrubbing damage. These horizontal surfaces collect different contaminants compared to vertical wall applications.
Use alkaline floor cleaners that effectively remove ground-in dirt without requiring aggressive scrubbing that can erode grout material. Apply cleaning solutions generously and allow sufficient dwell time for chemical action to loosen embedded contamination. Furthermore, work in manageable sections to prevent cleaning solutions from drying before removal.
Consider steam cleaning for large floor areas where chemical cleaning becomes impractical or where children and pets require chemical-free maintenance. Steam penetrates grout pores effectively whilst sanitizing surfaces without leaving chemical residues.
Shower and Wet Area Special Requirements
Shower areas present the most challenging grout cleaning conditions due to constant water exposure, soap scum buildup, and limited ventilation that accelerates contamination development. These wet environments require preventive maintenance alongside reactive cleaning approaches.
Apply calcium and lime scale removers specifically formulated for wet areas before general grout cleaning, as mineral deposits create barriers that prevent cleaning solutions from reaching underlying contamination. These acidic products require careful application to avoid damage to metal fixtures and natural stone surfaces. Moreover, ensure adequate ventilation during application to prevent inhalation of acidic vapours.
Implement daily maintenance routines including squeegee use and ventilation fan operation to reduce moisture levels that promote mould growth. This preventive approach significantly reduces the frequency and intensity of deep cleaning requirements.
Natural Stone Grout Cleaning Precautions
Natural stone installations require pH-neutral cleaning products that clean grout effectively without damaging adjacent stone surfaces through acid etching or alkaline dulling. These materials demand specialized cleaning approaches that balance grout cleaning effectiveness with stone preservation.
Avoid acidic cleaners including vinegar and lemon juice near marble, limestone, or travertine surfaces that react with acid to create permanent etching damage. Similarly, avoid highly alkaline cleaners that can dull polished stone finishes and create cloudy appearances that require professional restoration.
Test all cleaning products on inconspicuous areas before widespread application, as natural stone variations can react differently to the same cleaning product. This testing approach prevents costly damage to expensive stone installations whilst ensuring effective grout cleaning results.
Use stone-safe grout cleaners specifically formulated for natural stone environments, or create gentle cleaning solutions using neutral pH products that clean effectively without compromising stone integrity. These specialized products often cost more than general cleaners but prevent expensive stone replacement or restoration requirements.
Preventing Future Grout Staining
Prevention proves far more effective than reactive cleaning when maintaining grout appearance and longevity. Moreover, implementing proper preventive measures reduces the frequency of intensive cleaning sessions whilst preserving grout integrity over time.
Grout Sealing and Resealing Schedule
Grout sealer creates a protective barrier that prevents stains from penetrating porous grout surfaces. Additionally, properly sealed grout repels water, oils, and other staining substances that would otherwise absorb into unsealed material.
Apply initial grout sealing 48-72 hours after installation once grout has fully cured and dried. Subsequently, reapply sealer every 12-18 months in high-traffic areas and every 2-3 years in low-traffic spaces to maintain optimal protection levels.
Test sealer effectiveness by placing a few drops of water on grout lines – properly sealed grout causes water to bead rather than absorb. Furthermore, this simple test indicates when resealing becomes necessary to restore protective properties.
Daily Maintenance Routines
Daily maintenance prevents minor stains from becoming permanent discoloration that requires intensive cleaning methods. Consequently, consistent daily care reduces the need for harsh cleaning chemicals and aggressive scrubbing techniques.
- Wipe shower walls immediately after use to remove soap residue and mineral deposits
- Squeegee glass surfaces and tiles to minimize water spots and calcium buildup
- Clean spills on kitchen and bathroom surfaces within 30 minutes of occurrence
- Use microfibre cloths for daily cleaning to trap dirt without scratching surfaces
These simple daily habits prevent staining substances from penetrating grout pores where they become difficult to remove. Similarly, immediate attention to spills and splashes maintains grout appearance without requiring specialized cleaning products.
Proper Ventilation to Prevent Mould Growth
Adequate ventilation controls moisture levels that promote mould and mildew growth in grout lines. Therefore, proper air circulation prevents the humid conditions that allow these organisms to colonize and discolor grout surfaces.
Run bathroom exhaust fans during showers and for 30 minutes afterward to remove moisture-laden air that encourages mould development. Additionally, open windows when weather permits to create natural air circulation that reduces humidity levels.
Install exhaust fans with appropriate capacity ratings – 1 CFM per square foot of bathroom area ensures adequate moisture removal. Furthermore, regular fan maintenance including cleaning and filter replacement maintains optimal performance for mould prevention.
Regular Cleaning Frequency Recommendations
Establishing consistent cleaning schedules prevents stain accumulation that requires intensive removal methods. Likewise, regular maintenance cleaning preserves grout appearance whilst extending the time between deep cleaning sessions.
| Area | Weekly Cleaning | Monthly Deep Clean |
|---|---|---|
| Shower/Bath | Mild cleaner application | Thorough scrubbing and disinfection |
| Kitchen Backsplash | Degreasing wipe-down | Detailed grout line cleaning |
| Floor Tiles | Mopping with grout cleaner | Scrubbing with stiff brush |
| Low-Traffic Areas | Visual inspection | Spot cleaning as needed |
High-moisture areas require more frequent attention than dry spaces due to increased staining and mould risks. However, adjusting cleaning frequency based on usage patterns and environmental conditions optimizes maintenance efforts whilst preventing grout deterioration.
Signs That Indicate Grout Replacement Is Needed
Recognizing when grout cleaning becomes ineffective helps determine replacement timing before structural damage occurs. Moreover, early replacement prevents water damage to underlying surfaces that creates costly repair requirements.
Cracking or crumbling grout indicates structural failure that cleaning cannot address – these conditions allow water penetration that damages substrate materials. Additionally, persistent staining that resists multiple cleaning attempts suggests grout degradation beyond salvageable condition.
- Grout lines showing hairline cracks or missing sections
- Persistent black or brown staining despite thorough cleaning attempts
- Grout texture becoming powdery or easily scraped away
- Water absorption into grout lines even after sealer application
- Musty odours emanating from grout areas indicating trapped moisture
Professional assessment becomes necessary when multiple replacement indicators appear simultaneously. Similarly, addressing grout replacement promptly prevents water damage to wall cavities and flooring substrates that require extensive renovation work.
Regular maintenance routines, combined with proper sealing and ventilation practices, significantly extend grout lifespan whilst maintaining aesthetic appeal. Therefore, implementing these preventive strategies proves more cost-effective than frequent replacement or professional restoration services.
When to Call Professional Grout Cleaners
Certain grout cleaning situations exceed DIY capabilities and require professional intervention to achieve satisfactory results. Furthermore, recognising these scenarios prevents wasted time and potential damage from inadequate cleaning attempts.
Situations Requiring Professional Intervention
Severe mould infestations present health risks that demand professional treatment with commercial-grade antimicrobial solutions. Additionally, professionals possess protective equipment necessary for safe mould remediation in bathroom and kitchen environments.
Deep-set stains from years of neglect resist standard cleaning methods and require specialised equipment for effective removal. Similarly, epoxy grout cleaning demands professional expertise because improper techniques damage this premium material permanently.
- Grout discolouration covering entire room surfaces
- Persistent odours indicating bacterial growth within grout pores
- Grout lines showing structural weakness or crumbling texture
- Previous DIY cleaning attempts proving unsuccessful after multiple attempts
- Natural stone installations requiring pH-neutral cleaning protocols
Commercial properties benefit from professional grout cleaning services because high-traffic areas accumulate contaminants that household products cannot address effectively. Moreover, professional cleaning maintains hygiene standards required for business operations whilst extending grout lifespan significantly.
Cost Comparison of DIY vs Professional Cleaning
DIY grout cleaning typically costs £15-30 for cleaning supplies and equipment rental, whilst professional services range from £150-400 depending on room size and grout condition. However, professionals deliver superior results that last longer than DIY attempts.
| Method | Initial Cost | Time Investment | Results Duration |
|---|---|---|---|
| DIY Cleaning | £15-30 | 4-8 hours | 3-6 months |
| Professional Service | £150-400 | 2-4 hours | 12-18 months |
Professional cleaning proves cost-effective when considering time value and result longevity – their expertise prevents repeated cleaning cycles that accumulate higher costs over time. Additionally, professionals apply protective sealers that extend grout life and reduce future maintenance requirements.
Failed DIY attempts often necessitate professional intervention anyway, creating additional costs beyond initial supply purchases. Therefore, severe grout problems warrant immediate professional attention to avoid compounding expenses through ineffective cleaning attempts.
What Professional Services Include
Professional grout cleaning services begin with comprehensive assessment to determine appropriate cleaning methods and identify underlying problems requiring attention. Subsequently, technicians apply pre-treatment solutions that penetrate grout pores and dissolve embedded contaminants effectively.
Steam cleaning equipment operates at temperatures exceeding 200°C to sanitise grout whilst removing stubborn stains that resist conventional cleaning methods. Furthermore, professionals use extraction systems that remove loosened debris and excess moisture simultaneously.
- Pre-treatment application targeting specific stain types
- High-pressure steam cleaning with commercial-grade equipment
- Colour restoration for severely discoloured grout lines
- Antimicrobial treatment preventing future mould growth
- Protective sealer application extending grout lifespan
- Post-cleaning inspection ensuring complete stain removal
Many professional services include grout recolouring options that restore original appearance to severely stained grout lines. Additionally, technicians provide maintenance advice and product recommendations to preserve cleaning results between professional visits.
Expected Results and Guarantees
Reputable professional services guarantee 90-95% stain removal from grout lines whilst acknowledging that permanent damage cannot be reversed through cleaning alone. Moreover, professionals provide realistic expectations based on grout condition assessment before beginning work.
Professional grout cleaning typically achieves 90-95% stain removal with results lasting 12-18 months
Service guarantees typically cover workmanship for 30-90 days following completion, ensuring customer satisfaction with cleaning results. However, guarantees exclude damage from improper maintenance or exposure to harsh chemicals after professional treatment.
Professional cleaning restores grout to near-original condition when structural integrity remains intact, whilst severely degraded grout may require replacement rather than cleaning. Therefore, realistic expectations depend on initial grout condition and age of installation.
Choosing a Reputable Grout Cleaning Service
Selecting qualified professionals requires verification of insurance coverage and industry certifications that demonstrate competency in grout cleaning techniques. Additionally, established companies provide references from previous customers and maintain positive online reviews consistently.
Request detailed written estimates that specify cleaning methods, products used, and guarantee terms before committing to service agreements. Similarly, reputable companies offer free consultations to assess grout condition and provide realistic outcome expectations.
- Verify public liability insurance and professional certifications
- Check online reviews and request customer references
- Obtain written estimates detailing services and guarantees
- Confirm eco-friendly cleaning product options availability
- Enquire about maintenance programs and follow-up services
Professional grout cleaning services complement other household maintenance routines, similar to how window cleaning requires specific techniques for optimal results. Therefore, integrating professional services into regular home maintenance schedules ensures consistent cleanliness standards throughout your property.
Frequently Asked Questions
How often should I clean my grout?
For regular maintenance, clean grout weekly with a mild solution to prevent buildup. Deep cleaning should be done monthly in high-use areas like bathrooms and kitchens. However, if you notice discolouration or mould starting to appear, address it immediately to prevent permanent staining.
What's the best homemade grout cleaner?
A paste made from bicarbonate of soda and water works excellently for regular cleaning. For tougher stains, combine bicarbonate of soda with white vinegar to create a fizzing action that helps lift dirt. Apply the paste, let it sit for 10-15 minutes, then scrub with a grout brush and rinse thoroughly.
Can I use bleach on grout?
Yes, but with caution. Bleach effectively kills mould and whitens grout, but it can weaken cement-based grout over time. Always dilute bleach properly, ensure good ventilation, wear gloves, and test on an inconspicuous area first. Never mix bleach with other cleaning products as this can create dangerous fumes.
Why does my grout keep getting dirty so quickly?
Unsealed grout absorbs moisture, soap, and dirt rapidly due to its porous nature. Poor ventilation, hard water, and infrequent cleaning compound the problem. The solution is to seal your grout annually and maintain proper bathroom ventilation to reduce moisture buildup.
How do I know if my grout needs resealing?
Test by dropping a small amount of water on the grout. If it absorbs quickly rather than beading up, your grout needs resealing. Other signs include persistent staining despite cleaning, visible cracks, or a chalky appearance. Most grout should be resealed every 1-2 years depending on usage.
What tools do I need for effective grout cleaning?
- Grout brush or old toothbrush for scrubbing
- Microfibre cloths for wiping and drying
- Rubber gloves to protect your hands
- Spray bottle for applying cleaning solutions
- Knee pads for floor-level cleaning comfort
- Ventilation fan or open windows for proper airflow
Is it worth hiring professionals for grout cleaning?
Consider professional cleaning when DIY methods fail to remove deep stains, when grout is severely damaged, or for large areas requiring restoration. Professionals have access to steam cleaners and commercial-grade products that can achieve results impossible with household methods. The cost is often justified for heavily stained or mouldy grout.
Can I prevent grout from getting dirty in the first place?
Prevention is always better than cleaning. Seal grout annually, wipe down tiles after each shower, ensure proper ventilation, and clean spills immediately. Using a daily shower spray and running the extractor fan during and after bathing significantly reduces moisture buildup that leads to mould and staining.
You May Also Like
How to Clean Shower Head: Remove Limescale & Restore Flow
How to Clean Hardwood Floors: Complete UK Guide 2026