How to Clean Your Nespresso Machine: Complete Guide 2026
How to clean Nespresso machine properly involves both daily maintenance and regular descaling to remove mineral buildup that affects coffee taste and machine performance. Most Nespresso models require descaling every 3-6 months, depending on water hardness and usage frequency. Daily cleaning includes emptying the drip tray, rinsing the water reservoir, and wiping external surfaces, while deep cleaning uses official Nespresso descaling solution or alternatives like white vinegar.
Regular maintenance prevents calcium deposits from clogging internal components and ensures optimal coffee extraction. Additionally, proper cleaning extends your machine’s lifespan and maintains consistent brewing temperature. Different Nespresso models like Original, Vertuo, and DeLonghi variants have specific cleaning procedures and button combinations to access descaling mode.
Understanding when to use manufacturer-approved products versus household alternatives like citric acid or white vinegar helps you maintain your machine safely. Furthermore, recognizing signs that indicate immediate cleaning is needed prevents costly repairs and ensures every cup tastes perfect. Similar to maintaining other kitchen appliances, proper cleaning techniques are essential for optimal performance.
TL;DR
- Daily cleaning: Empty drip tray, rinse water reservoir, wipe surfaces, and run rinse cycles after use
- Descale every 3-6 months using official Nespresso descaler or white vinegar solution to remove mineral buildup
- Model-specific procedures: Original, Vertuo, and DeLonghi models have different button combinations for accessing cleaning mode
- Signs for immediate cleaning: slow brewing, unusual taste, or persistent cleaning light indicators
Why Regular Nespresso Machine Cleaning Is Essential
Regular cleaning transforms your Nespresso machine from a potential breeding ground for bacteria into a reliable coffee companion. Mineral deposits accumulate inside your machine’s internal components, creating blockages that restrict water flow and alter extraction temperatures. Consequently, your coffee develops bitter or sour notes that mask the intended flavor profile of premium Nespresso pods.
Calcium buildup forms naturally when water evaporates, leaving behind dissolved minerals that crystallize on heating elements and internal tubing. These deposits reduce your machine’s efficiency by forcing the heating element to work harder, ultimately increasing energy consumption and brewing time. Moreover, excessive mineral accumulation can permanently damage expensive internal components, leading to costly repairs or complete replacement.
Daily Cleaning vs Deep Descaling: Understanding the Difference
Daily cleaning focuses on surface-level maintenance that prevents immediate contamination and preserves hygiene. This routine includes emptying the drip tray, rinsing the water reservoir, and wiping external surfaces with a damp cloth. However, daily cleaning cannot address internal mineral deposits that require chemical intervention.
Deep descaling represents a comprehensive cleaning process that removes internal mineral deposits using specialized solutions. This process involves running descaling solution through the machine’s internal water system, allowing the chemical to dissolve calcium and limescale buildup. Furthermore, descaling requires multiple rinse cycles to eliminate any residual cleaning solution that could affect coffee taste.
Key Difference
Consequences of Neglecting Maintenance
Neglecting regular maintenance creates a cascade of problems that progressively worsen your machine’s performance. Reduced lifespan occurs when mineral deposits force internal components to operate under increased stress, causing premature wear and eventual failure. Additionally, blocked water channels create uneven pressure distribution that compromises the brewing process.
Poor extraction results from inconsistent water temperature and flow rate caused by mineral blockages. Your coffee becomes weak, bitter, or develops off-flavors that no amount of premium pods can remedy. Similarly, kitchen appliance maintenance requires consistent attention to prevent performance degradation.
- Potential damage includes cracked heating elements from overheating
- Corroded internal tubing from acidic mineral deposits
- Malfunctioning sensors that control brewing cycles
- Permanent staining of internal components
Optimal Cleaning Frequency Based on Water Hardness and Usage
Water hardness directly influences how frequently you should descale your Nespresso machine. Hard water contains higher concentrations of dissolved minerals, accelerating calcium buildup and requiring more frequent descaling cycles. Conversely, soft water allows for extended intervals between deep cleaning sessions.
| Water Hardness Level | Usage Frequency | Descaling Interval |
|---|---|---|
| Soft Water (0-3 grains/gallon) | Daily (1-2 cups) | Every 6 months |
| Moderate Water (4-7 grains/gallon) | Daily (3-5 cups) | Every 4 months |
| Hard Water (8+ grains/gallon) | Daily (5+ cups) | Every 2-3 months |
Usage patterns also determine optimal cleaning frequency, with heavy users requiring more frequent maintenance cycles. Machines that brew multiple cups daily accumulate mineral deposits faster than occasional-use units. Therefore, monitoring your machine’s performance indicators helps establish a personalized maintenance schedule that prevents problems before they occur.
Regular maintenance can extend your Nespresso machine’s lifespan by up to 40% while maintaining optimal coffee quality
Daily Cleaning and Maintenance Routine
Establishing a consistent daily cleaning routine prevents coffee residue buildup and maintains your Nespresso machine’s optimal performance. Additionally, daily maintenance tasks take less than five minutes but significantly extend your machine’s lifespan while preserving coffee quality.
Essential Post-Brew Cleaning Steps
Empty the drip tray immediately after each brewing session to prevent bacterial growth and unpleasant odors. Furthermore, rinse the drip tray with warm soapy water and dry thoroughly before reinstalling. The water reservoir requires similar attention, as stagnant water becomes a breeding ground for microorganisms.
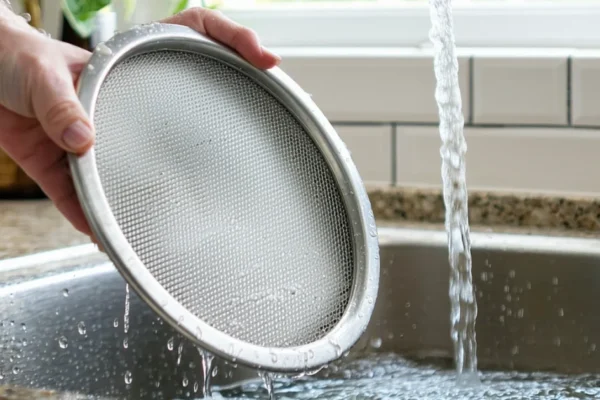
Remove the water reservoir and rinse it with fresh water after each use. Subsequently, refill with filtered water to minimize mineral deposits and improve coffee taste. Never leave water sitting in the reservoir for more than 24 hours, especially in warm environments.
Capsule Container and Residue Management
The capsule container accumulates coffee oils and aluminum particles that can affect future brewing cycles. Therefore, empty the container when it reaches capacity and wash it with warm soapy water. Coffee residue removal prevents rancid oil formation that creates bitter off-flavors.
Inspect the capsule insertion area for loose coffee grounds or punctured capsule fragments. Moreover, use a damp cloth to wipe away any visible residue around the brewing chamber entrance. This simple step prevents blockages and ensures proper capsule seating during brewing.
External Surface and Brewing Chamber Maintenance
Wipe down all external surfaces using a slightly damp microfiber cloth to remove fingerprints, coffee splashes, and dust accumulation. However, avoid using harsh chemicals or abrasive cleaners that can damage the machine’s finish. The brewing chamber area requires special attention as coffee oils can solidify and create hygiene issues.
Clean the brewing chamber’s accessible areas with a soft brush or cloth, focusing on removing any visible coffee residue. Similarly, wipe the cup support and surrounding surfaces where coffee droplets commonly accumulate. Regular external cleaning maintains your machine’s appearance and prevents sticky buildup that attracts dirt.
Internal Rinse Cycle Protocol
Running a rinse cycle after your final daily brew clears residual coffee oils from internal components and prevents flavor contamination. Consequently, this process involves brewing a cycle with water only, no capsule inserted. The rinse cycle flushes internal tubing and removes coffee particles that could affect tomorrow’s first cup.
Activate the rinse cycle by pressing the brewing button without inserting a capsule, allowing hot water to flow through the system. Most Nespresso models automatically enter rinse mode when you press the button without a capsule present. This daily habit significantly reduces the frequency of deep cleaning requirements and maintains consistent coffee quality.
Pro Tip
These daily maintenance practices work synergistically with your kitchen cleaning routine to maintain appliance hygiene and performance. Therefore, integrating Nespresso maintenance into your broader kitchen care schedule ensures nothing gets overlooked while maximizing efficiency.
Complete Descaling Process for All Nespresso Models
Descaling removes mineral deposits that accumulate inside your Nespresso machine over time. Furthermore, this deep cleaning process differs significantly from daily maintenance routines and requires specific preparation steps. The descaling cycle addresses internal components that regular cleaning cannot reach.
Preparing Your Machine for Descaling
Begin preparation by emptying both the water tank and drip tray completely. Additionally, remove any used capsules from the machine and ensure the capsule container sits empty. Most importantly, place a large container under the coffee outlet to catch descaling solution during the cleaning cycle.
Access descaling mode by following your specific model’s button sequence. Original line machines typically require holding both buttons simultaneously for three seconds until lights flash. Meanwhile, Vertuo models enter descaling mode by pressing the button three times within two seconds, then holding for five seconds.
Important Safety Note
Choosing Your Descaling Solution
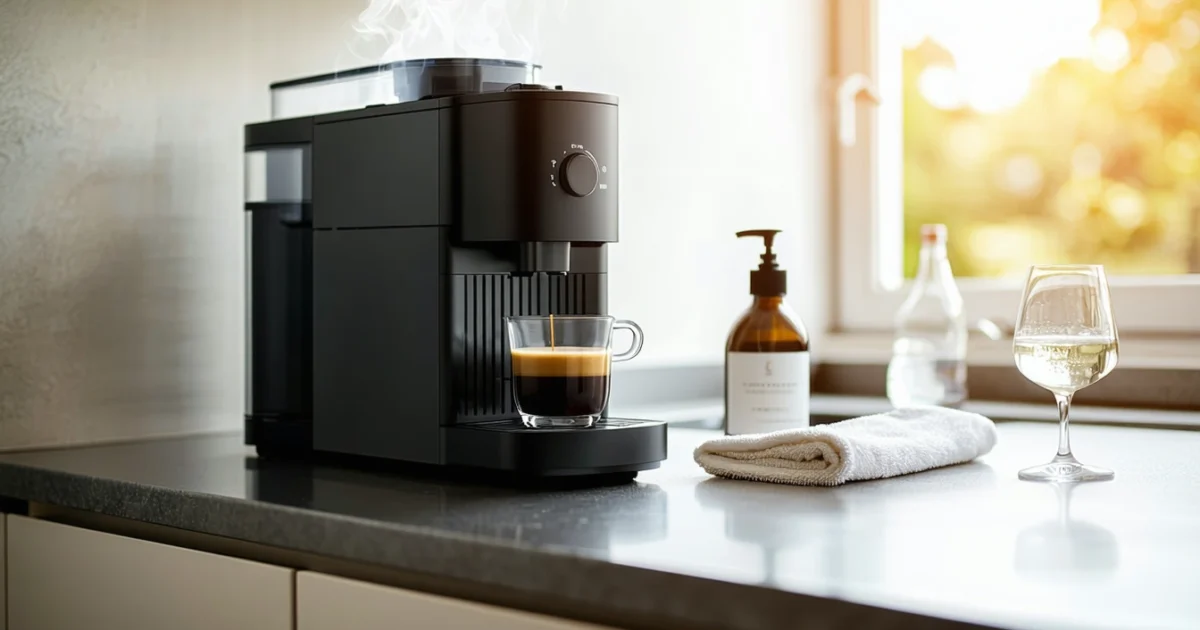
The official Nespresso descaling solution provides optimal results and maintains warranty coverage. However, alternative cleaning agents like white vinegar offer cost-effective options for regular maintenance. Each solution requires different water ratios and timing considerations.
| Solution Type | Water Ratio | Cost per Use | Effectiveness |
|---|---|---|---|
| Official Nespresso Kit | 1 packet : 500ml water | £3-4 | Excellent |
| White Vinegar | 1:1 ratio with water | £0.20 | Good |
| Citric Acid | 30g : 500ml water | £0.15 | Very Good |
Official descaling kits contain precisely formulated acids that dissolve mineral buildup without damaging internal seals. Conversely, vinegar solutions work effectively but may leave residual odors requiring additional rinse cycles. Citric acid provides a middle ground between cost and performance.
Step-by-Step Descaling Procedure
Fill the water tank with your chosen descaling solution and place it back on the machine. Subsequently, position a large container under the coffee outlet to collect the descaling liquid. The container should hold at least 1 liter to accommodate the full cleaning cycle.
- Activate descaling mode using your model-specific button sequence
- Press the brew button to start the descaling cycle
- Allow the solution to run through completely (approximately 15-20 minutes)
- Empty the collection container when the cycle pauses
- Refill the water tank with fresh water for rinsing
The machine automatically controls timing and flow rates during descaling. Therefore, avoid interrupting the process once started, as incomplete descaling can leave mineral deposits partially dissolved. Most machines pause mid-cycle to allow solution contact time with internal components.
Complete descaling cycles typically consume 20-25 minutes including rinse phases
Completing Rinse Cycles and Exiting Cleaning Mode
Thorough rinsing removes all descaling solution residue from internal components. Consequently, this phase requires multiple water-only cycles to eliminate any chemical taste from future coffee. Fill the water tank with fresh water and continue the automated rinse sequence.
The machine typically runs three separate rinse cycles automatically after descaling completion. Each cycle flushes different internal pathways and ensures complete solution removal. Empty the collection container between rinse cycles to prevent overflow.
Exit descaling mode by pressing the designated button sequence when all indicator lights return to normal operation. Most machines signal completion with steady green lights or specific flash patterns. Never force the machine out of descaling mode before the automated sequence finishes completely.
Test your machine by brewing a water-only cycle before making coffee. This final check ensures no residual descaling taste remains and confirms proper system function. Additionally, this practice aligns with comprehensive kitchen deep cleaning routines that maintain all appliances simultaneously.
Pros
- Removes all mineral buildup effectively
- Restores optimal brewing temperature
- Extends machine lifespan significantly
- Maintains coffee flavor quality
Cons
- Requires 30-45 minutes total time
- Uses specialized cleaning solutions
- Must repeat every 2-3 months
- Temporary machine unavailability
Model-Specific Cleaning Instructions
Different Nespresso machine models require distinct cleaning procedures and button combinations. Therefore, identifying your specific model ensures proper descaling execution and prevents potential damage. Original line machines operate differently from Vertuo series models, while DeLonghi variants include additional manufacturer-specific features.
Nespresso Original Line Cleaning Procedures
Original line machines enter descaling mode through specific button combinations that vary by model. Most models require holding the lungo button for three seconds while the machine is turned off. Subsequently, the descaling light begins flashing to indicate successful mode activation.
The Essenza Mini uses a different sequence: press both buttons simultaneously for three seconds. Meanwhile, the Pixie model requires holding the lungo button for five seconds after powering on. These variations exist because manufacturers optimize button layouts for each machine’s design.
CitiZ and Lattissima models feature dedicated descaling buttons that simplify the process. Press and hold the descaling button for three seconds to activate cleaning mode. The machine automatically guides users through each descaling phase with distinct light patterns.
Vertuo Series Descaling Process
Vertuo machines utilize a unique descaling sequence that differs significantly from Original line models. Turn off the machine and hold both the power button and lever simultaneously for three seconds. The machine enters descaling mode when lights begin alternating orange and white.
The VertuoPlus model requires an additional step: close the lever completely before initiating the button sequence. This ensures proper sensor alignment for descaling mode activation. Furthermore, the larger water reservoir demands extended descaling cycles compared to Original line machines.
Vertuo Next machines feature automatic descaling reminders that appear after 600 capsules or six months of use. The descaling process consumes approximately 25 minutes due to the machine’s complex brewing chamber design. Additionally, these models require specific positioning of the collection container to accommodate larger volumes.
DeLonghi Nespresso Models
DeLonghi Nespresso machines incorporate manufacturer-specific features that affect cleaning procedures. These models often include additional safety mechanisms and modified button sequences. Access cleaning functions by consulting the DeLonghi-specific manual rather than standard Nespresso instructions.
Many DeLonghi models feature automatic shut-off functions during descaling that prevent overheating. Consequently, the descaling process may pause intermittently, requiring user confirmation to continue. Press the power button briefly when the machine pauses to resume the cleaning cycle.
The DeLonghi Lattissima Touch includes integrated milk system cleaning that runs simultaneously with descaling. This comprehensive approach ensures both coffee and milk pathways receive thorough cleaning. However, this extended process requires additional descaling solution and water reserves.
Troubleshooting Cleaning Mode Issues
Error codes during descaling indicate specific problems that require targeted solutions. Red flashing lights typically signal insufficient water or improper container placement. Check water levels and ensure collection containers sit correctly before restarting the descaling process.
Machines stuck in cleaning mode often result from interrupted descaling cycles or power interruptions. Hold the power button for ten seconds to force a complete shutdown. Subsequently, restart the machine and begin the descaling sequence from the beginning.
Some models display persistent descaling alerts even after successful cleaning completion. This occurs when the machine’s internal counter fails to reset properly. Perform an additional rinse cycle or consult the user manual for model-specific reset procedures.
Important Safety Note
Temperature-related errors prevent descaling initiation when machines are too hot or cold. Allow machines to reach room temperature before attempting descaling procedures. Moreover, this practice aligns with proper kitchen appliance maintenance that ensures optimal performance across all equipment.
Alternative Cleaning Solutions and DIY Methods
Household cleaning alternatives offer cost-effective solutions for Nespresso maintenance, though they require careful preparation and application. White vinegar serves as the most popular descaling substitute, while citric acid provides another natural mineral removal option. However, these DIY methods demand precise measurements and safety considerations to avoid damaging your machine.
Using White Vinegar as a Descaling Alternative
White vinegar solution requires a specific dilution ratio of 1:1 with water for effective descaling. Mix equal parts distilled white vinegar and water to create a cleaning solution that dissolves mineral deposits without excessive acidity. This concentration provides sufficient descaling power while minimizing potential damage to internal components.
Safety considerations include ensuring adequate ventilation during the vinegar descaling process. The acetic acid produces strong odours that can irritate respiratory systems in enclosed spaces. Additionally, never use malt vinegar or flavoured varieties, as these contain sugars and additives that can damage machine components.
The vinegar descaling process follows standard descaling procedures but requires extended rinsing cycles. Run at least three complete rinse cycles with fresh water to eliminate vinegar residue and prevent taste contamination. Furthermore, this thorough rinsing approach applies to other kitchen appliance cleaning methods that use acidic solutions.
Citric Acid Solution Preparation and Application
Citric acid powder creates an effective descaling solution when mixed at a ratio of 30 grams per litre of water. This natural acid dissolves calcium deposits efficiently while producing less odour than vinegar alternatives. Purchase food-grade citric acid from brewing supply stores or online retailers for optimal purity.
Preparation involves dissolving citric acid completely in warm water before adding to the machine’s water reservoir. Stir the solution thoroughly until no powder particles remain visible. Subsequently, follow standard descaling procedures while monitoring the solution’s effectiveness through visual inspection of removed deposits.
Application timing requires allowing the citric acid solution to sit in the machine for 15-20 minutes before continuing the descaling cycle. This extended contact time enhances mineral dissolution and improves cleaning effectiveness. Moreover, citric acid produces less aggressive reactions with metal components compared to stronger commercial descalers.
When to Avoid Homemade Solutions
Warranty considerations dictate avoiding DIY descaling solutions during the manufacturer’s warranty period. Nespresso warranties specifically exclude damage caused by non-approved cleaning products, potentially voiding coverage for expensive repairs. Always check warranty terms before using alternative descaling methods.
Machine age and condition influence the suitability of homemade descaling solutions. Older machines with worn seals or damaged internal components require gentler commercial descalers to prevent further deterioration. Similarly, machines displaying unusual noises or leaking issues need professional-grade cleaning products.
Hard water areas with severe mineral buildup benefit from commercial descalers’ enhanced formulations. These regions produce stubborn calcium deposits that resist household cleaning solutions, requiring specialized chemicals for complete removal. Consequently, investing in manufacturer-approved descalers proves more cost-effective than repeated DIY attempts.
Effectiveness Comparison: Official vs. Household Alternatives
| Cleaning Method | Cost per Use | Effectiveness Rating | Rinse Cycles Required |
|---|---|---|---|
| Official Nespresso Descaler | £3-4 | Excellent (95%) | 2-3 cycles |
| White Vinegar Solution | £0.50 | Good (80%) | 4-5 cycles |
| Citric Acid Solution | £0.75 | Very Good (85%) | 3-4 cycles |
Commercial descalers demonstrate superior effectiveness in removing stubborn mineral deposits and maintaining optimal machine performance. These formulations include corrosion inhibitors and pH buffers that protect internal components during cleaning. However, household alternatives provide adequate cleaning for regular maintenance at significantly lower costs.
Time efficiency favours commercial descalers due to their concentrated formulations and reduced rinsing requirements. Professional cleaning products complete descaling cycles faster while requiring fewer rinse cycles to eliminate residue. This efficiency becomes particularly valuable for busy households or office environments where machine downtime affects daily routines.
Long-term machine health benefits from consistent use of manufacturer-approved descalers, though well-prepared household alternatives rarely cause damage when used correctly. The choice between commercial and DIY solutions ultimately depends on budget constraints, cleaning frequency, and water hardness levels in your area.
Troubleshooting Common Cleaning Issues
Even with proper maintenance, Nespresso machines occasionally encounter cleaning-related problems that disrupt normal operation. Understanding these common issues enables quick resolution and prevents unnecessary service calls. Most cleaning problems stem from incomplete cycles, sensor malfunctions, or mineral buildup interfering with machine functions.
Resolving Stuck Cleaning Mode and Machine Resets
Stuck cleaning mode represents the most frequent issue users encounter during maintenance procedures. This problem occurs when the machine fails to recognise completion of the cleaning cycle. The control panel continues displaying cleaning indicators while refusing to brew coffee normally.
To resolve stuck cleaning mode, first ensure the water tank contains fresh water and sits properly in position. Press and hold the power button for 10 seconds to force a complete system reset. Subsequently, the machine should return to normal brewing mode with all cleaning indicators cleared.
If the reset fails, remove the water tank and capsule container completely. Clean both components thoroughly before reinstalling them. This action often resolves sensor issues preventing proper cycle completion. Additionally, check that no capsules remain stuck in the brewing chamber, as this commonly triggers persistent cleaning modes.
Reset Procedure
Addressing Persistent Cleaning Light Indicators
Persistent cleaning lights continue illuminating even after completing proper maintenance cycles. These indicators signal that the machine’s internal sensors haven’t registered successful cleaning completion. Most commonly, this issue results from inadequate rinsing or sensor contamination.
Begin troubleshooting by running three additional rinse cycles with fresh water only. Each rinse cycle should use a full water tank to ensure complete system flushing. Furthermore, the water temperature should reach optimal brewing levels before starting each rinse.
Sensor contamination requires targeted cleaning of the water level sensors inside the tank. Remove the water tank and locate the small metal contacts at the base. Clean these sensors gently with a damp cloth, ensuring no soap residue remains. Mineral deposits on sensors frequently cause false readings that maintain cleaning indicators.
If cleaning lights persist after sensor cleaning, the machine may require factory reset procedures. Consult your specific model’s manual for the correct button combination, as reset procedures vary between Nespresso machine types.
Managing Incomplete Descaling Cycles and System Blockages
Incomplete descaling cycles create significant operational problems and potential damage to internal components. These issues typically manifest as reduced water flow, unusual brewing sounds, or premature cycle termination. System blockages from mineral deposits represent the primary cause of incomplete descaling.
When descaling cycles fail to complete, immediately check for visible blockages in the water outlet and drip tray area. Mineral deposits often accumulate at connection points, restricting water flow during cleaning cycles. Use a soft brush or cloth to remove any visible buildup around these areas.
For internal blockages, run a pre-cleaning cycle with plain water before attempting descaling again. This preliminary step helps dissolve loose mineral deposits that might interfere with proper descaler circulation. Allow the machine to cool completely between attempts to prevent thermal shock to internal components.
Severe blockages may require extended soaking periods with descaling solution. Fill the water tank with prepared descaler and allow the machine to sit for 30 minutes before initiating the cleaning cycle. This soaking period helps dissolve stubborn mineral accumulations that resist standard cleaning procedures.
Similar kitchen appliance blockages often require comparable approaches, as demonstrated in our complete kitchen deep cleaning guide which covers various appliance maintenance techniques.
When to Contact Customer Support vs. Additional Cleaning Attempts
Determining when to contact Nespresso customer support versus attempting additional cleaning cycles requires careful assessment of symptoms and previous troubleshooting efforts. Professional intervention becomes necessary when basic troubleshooting fails to resolve persistent issues.
Contact customer support immediately if the machine produces unusual noises during operation, displays error codes not covered in the manual, or fails to power on after cleaning procedures. These symptoms often indicate internal component damage requiring professional diagnosis and repair.
Additionally, seek professional help when cleaning cycles repeatedly fail despite following all troubleshooting steps. Three unsuccessful cleaning attempts typically indicate problems beyond user-serviceable issues. Continued DIY attempts may worsen existing problems or void warranty coverage.
However, attempt additional cleaning cycles when issues appear intermittent or improve partially with troubleshooting. Water quality variations and seasonal mineral content changes can cause temporary cleaning difficulties that resolve with persistence. Document all troubleshooting attempts to provide comprehensive information if professional service becomes necessary.
Pros
- Professional diagnosis ensures accurate problem identification
- Warranty coverage protects against repair costs
- Expert technicians prevent further damage during repairs
Cons
- Service appointments may require extended waiting periods
- Professional repairs cost significantly more than DIY solutions
- Machine downtime affects daily coffee routines
Before contacting support, gather essential information including model number, purchase date, and detailed descriptions of all symptoms observed. This preparation expedites the support process and helps technicians provide accurate guidance for your specific situation.
Maintaining Peak Performance Between Deep Cleans
Proper maintenance between deep cleaning cycles significantly extends your Nespresso machine’s lifespan while ensuring consistent coffee quality. Daily care habits and water quality management prevent mineral accumulation that compromises brewing performance and flavor extraction.
Water Quality Considerations
Using filtered water reduces mineral buildup by up to 70% compared to hard tap water. Calcium and magnesium deposits accumulate faster in areas with hard water, requiring more frequent descaling cycles and potentially damaging internal components over time.
Install a water filtration system or use bottled water with low mineral content for optimal machine performance. Water hardness levels above 150 ppm accelerate scale formation, while filtered water typically contains 50-100 ppm of dissolved minerals. This reduction dramatically decreases maintenance frequency and preserves brewing temperature consistency.
Water Quality Tip
Storage Tips for Extended Non-Use
Proper storage procedures protect your machine during extended periods of inactivity. Empty the water reservoir completely and remove any remaining capsules to prevent mold growth and component damage from stagnant water.
Run a complete brewing cycle with plain water to flush internal lines before storage. Subsequently, allow all components to air dry thoroughly for 24 hours before covering the machine. Store in a cool, dry location away from direct sunlight and temperature extremes that can damage seals and electronic components.
- Remove and clean the drip tray and capsule container
- Wipe external surfaces with a damp cloth
- Store in original packaging if available
- Place silica gel packets nearby to absorb moisture
Warning Signs Requiring Immediate Cleaning
Several indicators signal the need for immediate cleaning beyond your regular maintenance schedule. Slow water flow during brewing suggests mineral blockages in internal lines that require prompt attention to prevent permanent damage.
Additionally, unusual taste changes in your coffee often indicate bacterial growth or mineral accumulation affecting flavor extraction. Off-flavors, bitter notes, or reduced crema production warrant immediate cleaning regardless of your scheduled maintenance timeline.
| Warning Sign | Immediate Action Required | Potential Consequence if Ignored |
|---|---|---|
| Reduced water flow | Descale immediately | Complete blockage, expensive repairs |
| Strange noises | Stop use, contact support | Internal component damage |
| Error lights | Consult manual, clean if indicated | System malfunction |
| Poor crema quality | Clean brewing chamber | Permanent flavor degradation |
Extending Machine Lifespan Through Maintenance Habits
Consistent daily maintenance habits extend machine lifespan by preventing accumulated damage from neglect. Empty the drip tray daily and rinse the water reservoir weekly to prevent bacterial growth and mineral deposits that compromise internal components.
Furthermore, run a water-only cycle after every 10 brewing sessions to flush residual oils and particles from internal lines. This simple practice prevents oil rancidity that creates bitter flavors and reduces the effectiveness of cleaning solutions during deep cleaning cycles.
Professional maintenance records show that machines receiving daily care last 3-5 years longer than neglected units. Regular maintenance also preserves warranty coverage and reduces the likelihood of expensive repairs from preventable damage. Consider integrating kitchen deep cleaning routines that include your coffee equipment for comprehensive appliance care.
Document your maintenance activities in a simple log to track cleaning frequency and identify patterns in performance issues. This record proves invaluable for warranty claims and helps establish optimal cleaning intervals based on your specific usage patterns and water quality conditions.
Frequently Asked Questions
How do I run a clean cycle on my Nespresso machine?
To run a clean cycle, first ensure your water reservoir is filled with fresh water. For Original machines, press and hold both buttons simultaneously for 3 seconds to enter cleaning mode. For Vertuo models, press the button three times within 2 seconds, then press and hold for 7 seconds. The machine will automatically run water through the system to flush out any residue.
How often should I descale my Nespresso machine?
Descale your Nespresso machine every 3-6 months depending on your water hardness and usage frequency. If you use hard water or brew multiple cups daily, descale every 3 months. For soft water and occasional use, every 6 months is sufficient. Most machines have a descaling indicator light that will alert you when it’s time.
What can I run through my Nespresso machine to clean it?
You can use official Nespresso descaling solution for best results, or household alternatives like white vinegar or citric acid. For vinegar, use a 1:1 ratio with water. For citric acid, dissolve 2 tablespoons in 1 liter of water. Always follow with multiple rinse cycles using fresh water to remove any residual taste or odor.
How do you clean a Nespresso Vertuo machine?
For Vertuo machines, daily cleaning involves emptying the drip tray and capsule container, rinsing the water reservoir, and wiping surfaces. For descaling, press the button 3 times in 2 seconds, then hold for 7 seconds until the light blinks. Add descaling solution to the water tank and follow the automatic descaling cycle, which takes about 20 minutes.
How do you clean a DeLonghi Nespresso machine?
DeLonghi Nespresso models require specific button combinations for descaling mode. Typically, press and hold both the Espresso and Lungo buttons simultaneously for 5 seconds. The descaling light will start blinking, indicating the machine is ready for the descaling process. Follow the same descaling solution procedures as other Nespresso models.
Can I clean my Nespresso machine without official descaler?
Yes, you can clean your machine without official descaler using white vinegar or citric acid. Mix equal parts white vinegar and water, or dissolve 2 tablespoons of citric acid in 1 liter of water. However, official Nespresso descaler is formulated specifically for their machines and may be gentler on internal components while being equally effective.
How to put Nespresso out of cleaning mode?
To exit cleaning mode, simply turn off your machine and wait 10 seconds before turning it back on. For most models, pressing any button during the cleaning cycle will also stop the process. If the machine remains in cleaning mode, unplug it for 30 seconds, then plug it back in to reset the system.
What are the signs that my Nespresso machine needs immediate cleaning?
- Slow brewing or reduced water flow
- Unusual taste in your coffee (bitter or sour notes)
- Persistent cleaning light indicators
- Loud or unusual noises during brewing
- Visible mineral deposits around the water outlet
- Steam or water temperature issues
How do I clean my Nespresso machine with vinegar?
Mix equal parts white vinegar and water in the water reservoir. Run the descaling cycle according to your machine model’s instructions. After the vinegar cycle completes, run at least 3-4 rinse cycles with fresh water to eliminate any vinegar taste or smell. This process effectively removes mineral buildup at a fraction of the cost of commercial descalers.
What daily maintenance should I perform on my Nespresso machine?
- Empty the drip tray and capsule container daily
- Rinse the water reservoir and refill with fresh water
- Wipe external surfaces with a damp cloth
- Run a rinse cycle after your last cup of the day
- Leave the machine open to air dry overnight
How long does the Nespresso descaling process take?
The complete descaling process takes approximately 20-30 minutes, including preparation and rinse cycles. The actual descaling cycle runs for about 15 minutes, followed by multiple rinse cycles that take an additional 10-15 minutes. Plan for extra time if you’re using household alternatives like vinegar, which may require additional rinse cycles.
Can hard water damage my Nespresso machine?
Hard water accelerates mineral buildup and can significantly reduce your machine’s lifespan. Calcium and magnesium deposits accumulate faster in hard water areas, requiring more frequent descaling every 2-3 months instead of the standard 3-6 months. Consider using filtered water to reduce mineral content and extend time between descaling cycles.
What happens if I don't descale my Nespresso machine regularly?
Neglecting regular descaling leads to reduced machine lifespan, poor coffee extraction, and potential permanent damage to internal components. Mineral deposits block water channels, causing uneven pressure and temperature distribution. This results in bitter or sour coffee, slower brewing times, and increased energy consumption as the heating element works harder to maintain proper temperature.
Is the Nespresso descaling kit worth buying?
The official Nespresso descaling kit is formulated specifically for Nespresso machines and provides optimal cleaning without risking damage to internal components. While household alternatives like vinegar work effectively, the official descaler is gentler on seals and gaskets and comes with precise instructions for your specific model. The kit typically costs $10-15 and includes enough solution for 2-3 descaling cycles.
You May Also Like
How to Clean a Waffle Maker: Complete Guide for 2026
How to Clean Oven Glass Without Scratching: Expert Guide 2026