How to Clean Stainless Steel: The Complete Guide (2025)
How to clean stainless steel properly is something I’ve taught hundreds of clients over my 18 years as a professional cleaner. Despite what you might think, that gorgeous stainless steel finish on your kettle, hob, or sink isn’t actually maintenance-free – and I’ve seen too many people accidentally damage their appliances by using the wrong products. The good news? Once you understand a few basic principles, keeping stainless steel spotless takes just minutes. I’ll show you exactly how to clean everything from fingerprint-covered fridges to burnt-on pan stains, using methods I’ve tested in real homes across the UK.
What makes this guide different is that I’m not just sharing random internet tips – these are the exact techniques I use when clients pay me to make their kitchens sparkle. You’ll learn why direction matters, which common household products can permanently damage stainless steel, and the one professional trick that makes everything shine without streaks.
Quick Summary
Time needed: 5-15 minutes (depending on item)
Difficulty: Easy
You’ll need: White vinegar, bicarbonate of soda, microfibre cloths, olive oil
Key takeaway: Always clean with the grain, never use bleach or wire wool, and finish with a thin layer of oil for streak-free shine
What You'll Need
- White vinegar (about 50p from any supermarket)
- Bicarbonate of soda (under £1)
- Microfibre cloths (at least 2 – one for cleaning, one for drying)
- Olive oil or vegetable oil (you already have this)
- Soft sponge or non-scratch pad
- Warm water
- Optional: Lemon (for stubborn stains)
- Optional: Washing-up liquid
Understanding Your Stainless Steel
Before we start cleaning, here’s something crucial that most guides skip over: stainless steel has a grain, just like wood. Look closely at any stainless steel surface and you’ll see fine lines running in one direction – either horizontally or vertically. This is the grain, and cleaning against it causes streaks and makes the surface look dull.
I’ve watched countless people scrub in circles on their stainless steel appliances, then wonder why they end up with a streaky mess. The grain direction is your roadmap for streak-free cleaning. Always follow it.
How to Clean Stainless Steel Appliances – Step-by-Step Guide
Step 1 – Identify the Grain Direction
Take a close look at your appliance. The grain runs one direction – horizontal or vertical. This tells you which way to wipe. I use a dry microfibre cloth first and test a small area. Wipe horizontally, then vertically. Whichever direction gives you fewer streaks is the grain direction. Mark this in your mind because you’ll always clean this way.
Step 2 – Remove Surface Dirt and Grease
Dampen a microfibre cloth with warm water and a drop of washing-up liquid. Wipe down the entire surface, following the grain. This removes the surface layer of grease, fingerprints, and food splashes. For very greasy areas (like the hob or oven door), you might need to go over it twice.
Don’t soak the surface – you want the cloth damp, not dripping. Excess water leaves water marks, which we’re trying to avoid.
Step 3 – Apply White Vinegar
Pour white vinegar into a spray bottle (I buy mine from Poundland). Spray the stainless steel liberally, then wipe with a clean, dry microfibre cloth. Again, follow the grain. The vinegar cuts through any remaining grease and removes water marks.
You’ll notice the surface looks cleaner already, but it might appear slightly dull. That’s normal – we fix that in the next step.
Step 4 – Polish with Oil
Here’s the professional secret that makes all the difference: a tiny amount of oil. Put a few drops of olive oil or vegetable oil on a clean, dry microfibre cloth. Rub it over the entire surface, following the grain. Use very little oil – we’re talking 3-4 drops maximum for a large appliance.
This creates a protective barrier that repels fingerprints and gives you that showroom shine. Buff any excess with a clean part of the cloth until you can’t see any oily residue.
Step 5 – Final Buff
Take a completely clean, dry microfibre cloth and give everything one final buff, following the grain. This removes any streaks and brings up the shine.
The entire process takes about 10 minutes for a fridge door or oven front. Once you’ve done it a few times, you’ll do it on autopilot.
How to Clean Stainless Steel Sinks
Sinks need slightly different treatment because they get wet constantly and food waste can cause staining.
Daily Maintenance
After washing up each evening, sprinkle bicarbonate of soda around the sink. Use a damp sponge to scrub it around, following the grain. Rinse thoroughly with warm water and dry completely with a tea towel. This takes 2 minutes and prevents water marks and that dull, cloudy appearance.
Weekly Deep Clean
Once a week, I do a proper sink clean:
- Plug the sink and fill it with very hot water mixed with white vinegar (about 200ml vinegar to a full sink)
- Let it sit for 10 minutes – this loosens any built-up grime
- Drain and sprinkle bicarbonate of soda all over the sink
- Use a damp sponge or soft brush to scrub, following the grain
- For stubborn spots, make a paste with bicarbonate of soda and water, leave it for 5 minutes, then scrub
- Rinse everything thoroughly
- Dry completely with a clean tea towel
- Apply a tiny bit of olive oil on a cloth and buff the entire sink
Your sink will look brand new. I’ve brought back sinks that clients thought were ruined, using just this method.
How to Clean Stainless Steel Pans
Pans are trickier because they get direct heat and food can burn on.
For Regular Cleaning
Wash with hot water and washing-up liquid immediately after use. If food has stuck, fill the pan with hot water and let it soak for 30 minutes. Most food will then wipe off easily.
For Burnt-On Food
Fill the pan with enough water to cover the burnt area. Add 3 tablespoons of bicarbonate of soda. Bring to the boil and let it bubble for 10 minutes. The burnt food will lift off. Pour out the water, let it cool slightly, then use a wooden spoon to scrape off any remaining bits. Wash as normal.
For really stubborn burnt-on food, add 2 tablespoons of white vinegar to the bicarbonate of soda and water. The combination works wonders.
For the Outside of Pans
This requires more effort. Lay the pan upside down on a tea towel. Pour hot water over the back of the pan. Immediately sprinkle bicarbonate of soda over the wet surface – use plenty. Leave it for 20 minutes. Squeeze lemon juice over the bicarbonate of soda (you’ll hear it fizzing). Use a damp scourer to scrub in circles. Rinse and dry.
For pans with years of built-up grime, you might need to repeat this process. I once spent 45 minutes on a pan that a client hadn’t properly cleaned in 3 years, but it came up like new in the end.
How to Remove Rainbow Stains (Heat Tint)
Those blue, purple, and rainbow-coloured stains on stainless steel are called heat tints. They happen when you overheat a pan or leave a hot pan in one spot on your hob. The good news is they’re purely cosmetic – they don’t affect how the pan works.
To remove them:
- Pour white vinegar directly onto the rainbow stain
- Let it sit for 5 minutes
- Rub with a damp cloth
- Rinse and dry
The stain should disappear. If it doesn’t completely go, repeat the process. Sometimes you need to do it 2-3 times for very dark heat tints.
How to Remove Water Marks and Limescale
In hard water areas (most of the UK), water marks and limescale build up quickly on stainless steel.
White vinegar is your friend here. Spray it directly onto the marks, let it sit for 5-10 minutes, then wipe off with a damp cloth. For stubborn limescale on taps or sink edges, soak kitchen roll in vinegar, press it against the limescale, and leave for 30 minutes. The acid in the vinegar dissolves the calcium deposits.
After removing limescale, always rinse thoroughly and dry completely. Otherwise, new water marks form immediately.
Common Mistakes to Avoid
- Using circular motions – This goes against the grain and causes streaks. I see this mistake in almost every home I visit. Always wipe with the grain, even if it feels unnatural at first.
- Using bleach or chlorine-based cleaners – These cause permanent pitting and discolouration. Once the damage is done, you can’t reverse it. I’ve seen £500 sinks ruined because someone used bleach thinking it would make them “more hygienic.”
- Leaving wet cloths or sponges on stainless steel – This causes rust spots. The rust isn’t from the stainless steel itself, but from iron particles in tap water or from old scourers. Always remove wet items after cleaning.
- Using abrasive cleaners or scourers – These scratch the surface. Light scratches are normal with use, but deep scratches from harsh cleaning are avoidable and permanent.
- Not drying properly – Water marks form in minutes if you don’t dry stainless steel straight after cleaning. Use a clean, dry tea towel or microfibre cloth every single time.
- Using too much oil – A little goes a long way. Too much oil leaves a sticky residue that attracts dust. You should barely be able to see the oil on your cloth.
How Often Should You Clean Stainless Steel?
| Cleaning Task | Frequency | Why |
|---|---|---|
| Quick wipe (appliances) | Daily or after use | Prevents fingerprint buildup |
| Vinegar clean (appliances) | Weekly | Removes grease and water marks |
| Deep clean with oil polish | Monthly | Restores shine and protection |
| Sink quick clean | Daily | Prevents staining and dullness |
| Sink deep clean | Weekly | Removes built-up grime |
| Pan cleaning | After each use | Prevents burnt-on food |
The more regularly you do quick maintenance, the less often you need deep cleaning. I spend 2 minutes daily on my own kitchen’s stainless steel and maybe 15 minutes monthly on a thorough clean. Clients who never do maintenance end up calling me for 2-hour deep cleans.
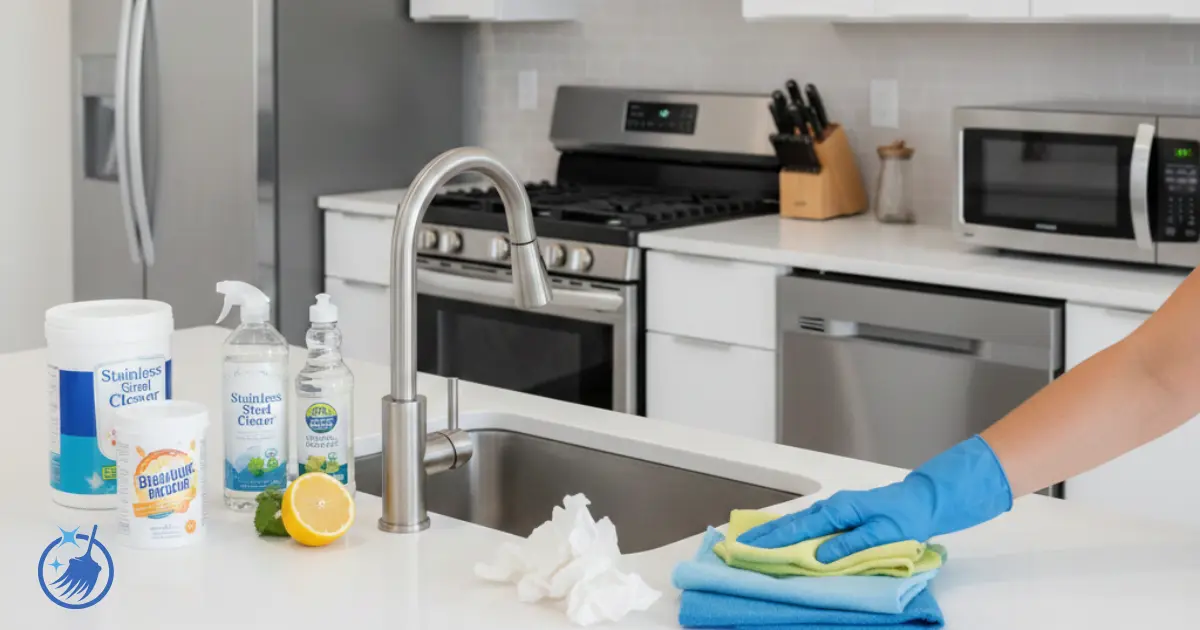
Best Products for Cleaning Stainless Steel
Budget Option (Under £2)
White vinegar and bicarbonate of soda. This is what I use in my own home and what I recommend to every client. It works brilliantly and costs pennies.
Mid-Range Option (£3-8)
Method Stainless Steel Cleaner (available from most supermarkets). This is a ready-made spray that’s effective and eco-friendly. I’ve used it in clients’ homes when they want a “proper” product, and it does work well. Just more expensive than vinegar.
Professional Favourite (£8-15)
Bar Keeper’s Friend (available from Amazon or Robert Dyas). This is what professional cleaners use for seriously stained or neglected stainless steel. It’s a gentle abrasive powder that can remove rust spots, heat tints, and stubborn stains that vinegar won’t shift. I keep a tin in my cleaning caddy for emergency jobs.
The cream version is better than the powder for most household uses – less messy and easier to control.
What About WD-40?
Some people swear by WD-40 for stainless steel. I’ve tested it, and yes, it does work – it removes fingerprints and adds shine. But it’s a petroleum-based product, which makes me uncomfortable using it near food preparation areas. If you do use it, apply it to a cloth first, never spray directly on surfaces where food might touch.
Natural vs Chemical Cleaners for Stainless Steel
I’m often asked whether natural cleaners work as well as chemical ones. After 18 years of testing both, here’s my honest opinion:
Natural cleaners (vinegar, bicarbonate of soda, lemon) work perfectly for:
- Regular maintenance
- Light grease and fingerprints
- Water marks and limescale
- Everyday cleaning
- 95% of household stainless steel cleaning needs
Chemical cleaners are only needed for:
- Seriously neglected items with years of buildup
- Stubborn rust stains from iron contamination
- Very heavy heat tinting
- Commercial kitchen equipment
For normal household use, you genuinely don’t need chemical cleaners. The natural methods work just as well and cost far less.
Dealing with Scratches on Stainless Steel
Here’s something important: scratches are normal. Any stainless steel item that’s actually used will develop fine scratches over time. This is especially true for sinks and pans.
Light scratches you can reduce:
- Use a non-abrasive stainless steel polish (like Solvol Autosol)
- Apply with a soft cloth, rubbing with the grain
- Buff with a clean cloth
Deep scratches are permanent. You can try to minimize their appearance with polish, but you can’t remove them. The good news is that over time, stainless steel develops a patina – fine scratches become less noticeable as the whole surface takes on a uniform, slightly worn appearance that many people actually prefer to the brand-new look.
My own kitchen sink has hundreds of tiny scratches from 5 years of use. I barely notice them because the whole sink has that lived-in patina. It’s far more attractive than the pristine sink in my show home photo shoots that looks cold and unused.
Pro Tips From a Professional Cleaner
Insider Tips
After cleaning thousands of kitchens, here’s what I’ve learned:
- Timing matters – Clean stainless steel when it’s completely cool. Hot surfaces streak more easily and dry products too quickly.
- The towel trick – Keep a dedicated microfibre cloth just for stainless steel. Wash it separately from other cleaning cloths. This prevents cross-contamination from other cleaning products that might damage the finish.
- Prevention beats cure – Wiping down your hob and sink after each use takes 60 seconds total. This single habit eliminates 90% of deep cleaning work.
- Test first – If using a new product, always test it on a hidden area first. I learned this the hard way after a “stainless steel cleaner” left permanent marks on a client’s expensive oven.
What Never to Use on Stainless Steel
Based on mistakes I’ve seen (and a few I’ve made myself early in my career), here’s what to absolutely avoid:
Never use:
- Wire wool or steel scourers (cause rust spots)
- Bleach or chlorine cleaners (cause pitting)
- Hydrochloric acid-based cleaners (permanent damage)
- Abrasive powders with harsh grit (deep scratches)
- Oven cleaners (too aggressive for most finishes)
- Ammonia in high concentrations (causes discolouration)
- Salt or salt water left to dry (causes pitting over time)
Use with extreme caution:
- Undiluted vinegar on natural stone backsplashes near stainless steel (the vinegar is fine for steel but damages stone)
- Lemon juice – safe for steel but can etch natural stone
- Anything containing chlorides
Honestly, stainless steel is pretty tough, but these products can cause permanent damage. Stick to gentle cleaners and you’ll never have problems.
Cleaning Different Types of Stainless Steel
Not all stainless steel is identical. The grade affects how it should be cleaned.
Brushed Finish (Most Common)
This has visible grain lines. Clean exactly as I’ve described above, always following the grain direction. This finish hides scratches better than polished finishes.
Polished/Mirror Finish
Smooth, reflective surface with no visible grain. These show fingerprints badly but look stunning when clean. Use the same cleaning method, but be extra careful with scratching. I always use the softest cloths on polished stainless steel.
Appliance-Specific Coatings
Some modern appliances have special fingerprint-resistant coatings. These need gentler cleaning – just warm water and washing-up liquid, or the manufacturer’s recommended cleaner. Avoid vinegar and abrasives on these finishes as they can strip the coating.
Check your appliance manual if you’re unsure. When I start cleaning at a new client’s home, I always ask if they have the manuals for expensive appliances before I clean them.
Keeping your stainless steel clean doesn’t require expensive products or hours of work. With the right technique – cleaning with the grain, using vinegar and bicarbonate of soda, finishing with a touch of oil – you can keep everything from your kettle to your sink looking spotless. The key is regular maintenance. Those 2 minutes after cooking prevent hours of scrubbing later.
I’ve used these exact methods in hundreds of homes across the UK, from small flats in Manchester to large houses in Surrey. They work regardless of your water hardness, how old your appliances are, or how much cooking you do. Start with one item – your kettle or your sink – and once you see how effective this is, you’ll wonder why you ever bought specialist cleaners.
Frequently Asked Questions
How do you clean stainless steel without streaks?
Always clean in the direction of the grain, never in circles. Use a dry microfibre cloth for the final buff. Streaks usually happen from too much water or cleaning product left on the surface, or from wiping against the grain. Finish with a tiny amount of oil buffed in the grain direction for a streak-free shine.
What is the best cleaner for stainless steel?
White vinegar is the best everyday cleaner for stainless steel. It cuts through grease, removes water marks, and costs about 50p. For stubborn stains, bicarbonate of soda works brilliantly. I’ve tested expensive branded cleaners and honestly, they don’t perform better than vinegar for regular cleaning. Save your money.
Can you use vinegar on stainless steel?
Yes, white vinegar is safe and effective on all grades of stainless steel. I use it daily in my professional cleaning work. However, never leave undiluted vinegar sitting on stainless steel for hours – wipe it off within a few minutes. Also be careful if you have natural stone worktops or backsplashes nearby, as vinegar damages marble and granite.
How do you remove water marks from stainless steel?
Spray white vinegar directly onto the water marks, let it sit for 2-3 minutes, then wipe with a damp microfibre cloth following the grain. Dry immediately with a clean, dry cloth. For stubborn limescale marks, soak kitchen roll in vinegar, press it against the marks, and leave for 20-30 minutes before wiping off.
Why does my stainless steel look dull?
Dull stainless steel usually means built-up grease, water marks, or product residue. Clean thoroughly with vinegar, dry completely, then apply a tiny amount of olive oil with a cloth and buff it in the grain direction. This restores the natural shine. Dullness can also come from using the wrong cleaning products – avoid anything abrasive or containing chlorine.
How often should you clean stainless steel appliances?
Quick maintenance (wiping down) should be daily or after each use to prevent fingerprint and grease buildup. A proper clean with vinegar should be weekly. Deep cleaning with oil polish is needed monthly to maintain that showroom shine. The more regularly you do quick wipes, the less often deep cleaning is necessary.
What should you not use on stainless steel?
Never use wire wool, steel scourers, bleach, chlorine-based cleaners, or abrasive powders on stainless steel. These cause permanent damage – rust spots, pitting, discolouration, or deep scratches. Also avoid leaving salt, acidic foods, or wet cloths on stainless steel for long periods. Stick to gentle cleaners like vinegar and soft cloths.
How do you get fingerprints off stainless steel appliances?
Spray white vinegar onto the surface and wipe with a dry microfibre cloth, following the grain. For stubborn fingerprints, use a tiny drop of washing-up liquid in warm water first, then follow with vinegar. Finish by buffing with 2-3 drops of olive oil on a clean cloth – this creates a barrier that prevents new fingerprints from showing as easily.
Can you use bicarbonate of soda on stainless steel?
Yes, bicarbonate of soda is excellent for stainless steel. It’s gentle enough not to scratch but abrasive enough to remove stains. Make it into a paste with water for stubborn marks, or sprinkle it dry in sinks. Always rinse thoroughly after use and dry the surface completely to prevent water marks.
How do you clean burnt stainless steel pans?
Fill the burnt pan with water to cover the burnt area, add 3 tablespoons of bicarbonate of soda, and bring to the boil. Let it boil for 10 minutes. The burnt food will lift off. For very stubborn burning, add 2 tablespoons of white vinegar to the mixture. Let it cool, scrape with a wooden spoon, then wash as normal. This method works on even seriously burnt pans without scratching.
You May Also Like
How to Stop Sediment in Washing Machine Drums: UK Guide 2026
How to Clean Glass Stovetop: Complete UK Guide 2026