Your tumble dryer is taking two cycles to do what used to take one. The clothes come out hot and still damp, the laundry room feels like a sauna, and there may be a faint scorched smell near the door. These are the classic signs of restricted airflow, and in a vented dryer the cause is usually lint packed into the hose or the outside vent. In any type of dryer, fluff in the wrong place is also a fire risk.
This page starts with the symptoms and what they point to, so you can find your problem. It then works through fixes from the quickest to the most involved, and finishes with the situations where you should stop and call a professional or a repair engineer.
Disclosure: Cleaners Guide is a participant in the Amazon Associates programme, so if you buy through links on this page we may earn a small commission at no extra cost to you. It never changes our recommendations, we suggest products because they work and we point out cheaper options where they do the same job. Prices and availability change, so always check the current price before buying.
Symptoms first: what is your dryer telling you?
| What you notice | Likely cause | Where to start |
|---|---|---|
| Clothes still damp after a full cycle | Clogged lint filter, blocked hose or outside vent, or a full condenser unit | Clean the filter, then check the airflow and the vent |
| Dryer and laundry room unusually hot | Hot air cannot escape, or the dryer is running in a cramped space | Stop the cycle, let it cool, then check vent and ventilation |
| Burning or scorched smell | Lint caught on or near the heater, or something stuck in the drum | Switch off at the wall and do not use it until checked |
| Condensation, damp walls or mould in the room | Vented dryer exhausting into the room, or a disconnected hose | Check the hose connection and the outlet |
| Dryer cuts out mid-cycle | The thermal cut-out has tripped from overheating | Clean the filter and vent. If it keeps happening, call an engineer |
| Lint outside the vent or around the door seal | Fluff escaping from the drum, a split hose or a worn seal | Clean the area and inspect the hose and seal |
| Error light for filter, condenser or water tank | The dryer is detecting a restriction | Check the manual for that light and empty or clean the part it names |
Reading the symptoms in more detail
Long drying times are the most common sign and the first one to appear, because every restriction in the air path slows evaporation. Heat is more worrying. A dryer that is hot to the touch on the outside, or a utility room that heats up noticeably, is moving heat in the wrong direction. A burning smell may be lint on the heater, but it can also be a stray sock, a coin, or a rubber-backed mat in the drum, so check the drum and the filter slot first, and never keep running a dryer that smells of burning. Damp and mould develop slowly, which is why they are often noticed late. Mid-cycle cut-outs are a safety device doing its job, and you should treat each one as a warning, not an annoyance.
Two or three of these at once, particularly heat plus damp clothes plus any smell, are a reason to stop using the dryer until you have found the cause.
Why it matters: fire and running costs
Lint is dry, fine and flammable, and a dryer supplies heat, air and movement. Fire services and consumer safety bodies regularly warn that tumble dryers are among the appliances most often involved in household fires, and that cleaning the filter after every cycle and keeping air paths clear are basic precautions. A restricted dryer also works harder and longer for the same load, so it uses more electricity and wears out its parts faster. You do not need precise percentages to see the point: if it takes longer, it costs more and runs hotter.
Separately from cleaning, check whether your model has been subject to a safety notice. The UK government keeps a product recalls and alerts service, and manufacturers have run safety programmes on some tumble dryers over the years. You need the model and serial number, which is usually on the rating plate inside the door or on the back.
First, work out which type of dryer you have
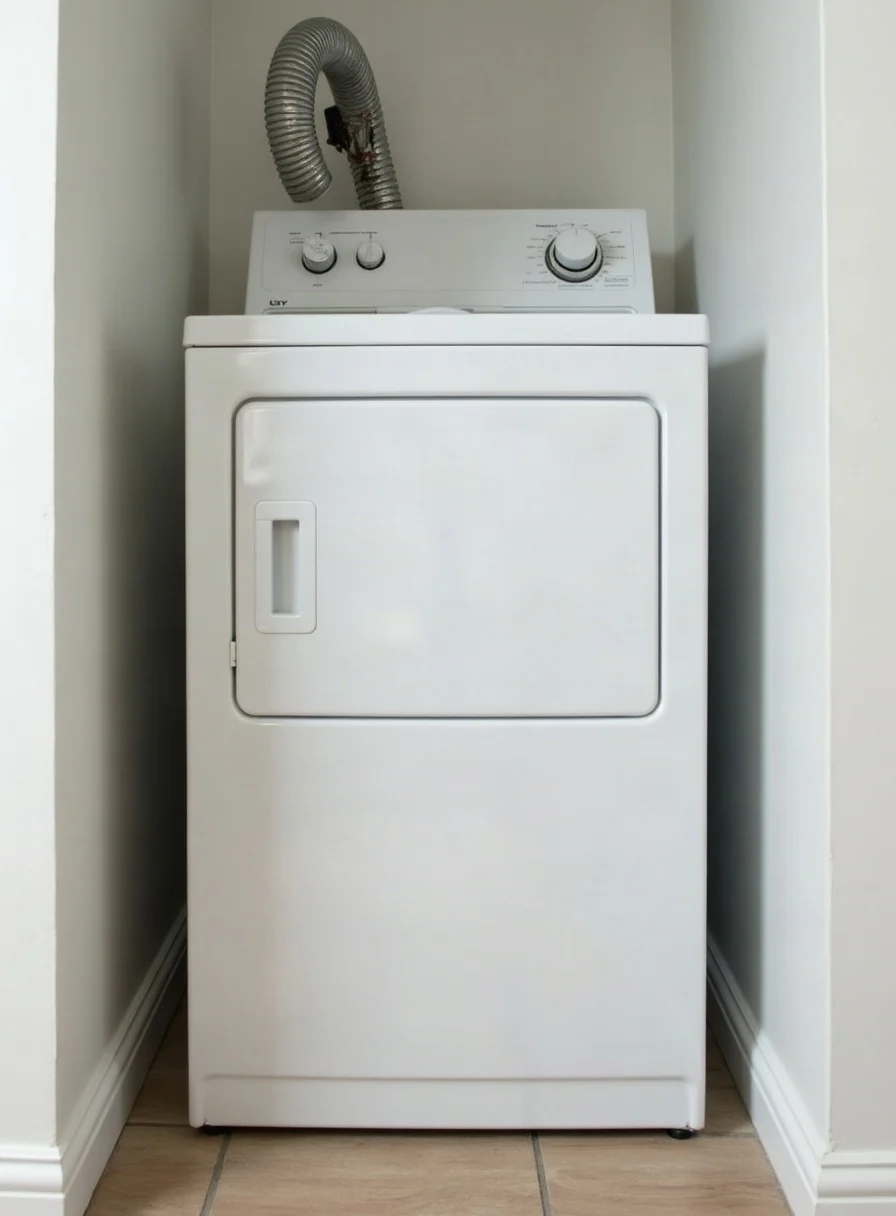
Not every tumble dryer has a vent to clean, and the right fix depends on the type. Your manual will say which you have, and if you cannot find it, look for a hose at the back.
| Type | How it handles moist air | What to clean |
|---|---|---|
| Vented | Blows the hot, damp air out through a hose to a window or wall outlet | Lint filter, drum area, hose and outside vent |
| Condenser | Cools the air and collects the water in a tank or drains it away, with no external vent | Lint filter, the condenser or heat exchanger unit, water tank and door seal |
| Heat pump | Similar to a condenser, but recycles the heat and uses a sealed circuit | Lint filters, the heat exchanger and condensate tank, as your manual directs |
| Gas | Rare in UK homes, vented outdoors | Everything as for vented, but have a Gas Safe registered engineer disconnect and test it |
If you have a condenser or heat pump dryer, there is no outside vent to clear. Use the cleaning instructions in the manual for the filters and the condenser, which many people overlook. A blocked condenser is the usual cause of long cycles in these machines. The rest of this guide focuses on vented dryers, and the early fixes apply to all types.
What to have to hand before you start
- A torch or phone light, to see into the hose and the outlet.
- A screwdriver set, because clamps are either slotted or cross-head types, and a spare clamp or jubilee clip in case one is corroded.
- A vacuum cleaner with a hose, a crevice tool and a soft brush.
- A dust mask and gloves. Lint is a fine dust, and hose ends and clamps can be sharp.
- An old sheet or towels to protect the floor, and a bin bag for the lint.
- A second person for moving the dryer, which is heavy, and awkward to lift.
Safety first, whichever fix you try
Always switch off at the socket and unplug the dryer before touching anything behind the front panel, and let the drum and the hose cool for at least half an hour after use. Pull the machine out slowly and keep the power cable and hose clear of the wheels or feet. Lay a cloth down to protect vinyl or laminate floors. If your dryer sits on top of a washing machine in a stack, do not pull it out alone and do not move it without the stacking kit disconnected. A gas dryer should only be disconnected by a Gas Safe registered engineer. Never use a dryer if the filter is missing or damaged.
Fixes, from the quickest to the most involved
Fix 1: the lint filter, after every load
This takes seconds and prevents most of the problem. Pull out the filter after every load, peel off the lint with your fingers, and put it back. Every so often, wash it in warm soapy water with a soft brush to remove the invisible film left by fabric softener, which blocks the mesh even if it looks clean. Let it dry fully before you refit it. A quick test: if water does not pass through the dry mesh, it is clogged.
Fix 2: the filter housing and the door
Lint falls past the filter into the housing, and collects around the door seal. With the dryer off and unplugged, vacuum the filter slot with a crevice tool. A vacuum crevice tool reaches into the slot, and a dryer lint brush is a long, slim brush that pulls fluff out of the narrow gap. Wipe the rubber door seal with a damp cloth. If you have a vacuum with a washable filter, our guide to cleaning a Henry Hoover filter may help you keep the cleaner itself working well.
Fix 3: the condenser unit and water tank (condenser and heat pump dryers)
Follow the manual here, because the design differs between makes. Typically you remove a cover or panel at the front or bottom, slide out the condenser, and rinse it gently under a tap, or brush the fluff from the fins, never forcing anything into the metal. Empty and rinse the water tank, and check the drain hose if there is one. Let everything dry before refitting. The same idea of rinsing out a hidden filter applies in other machines, as in our guides on the washing machine filter and the dishwasher filter.
Fix 4: the airflow test and the outside vent (vented dryers)
Run the dryer on a short, no-heat or air-only programme if it has one, and go outside. You should feel a firm stream of air from the vent, and the flap or louvres should lift. Weak airflow, a flap that stays closed, or no air at all means a blockage. Check the vent for lint, leaves or a nest, and clear it by hand or with a brush, taking care not to push debris back in. A ladder is only for ground-floor or low outlets, and anything higher is a job for someone with proper access. Trim back plants so air can leave freely. Never block the outlet with a grille that has fine mesh, because lint will clog it.
The outlet cover is worth understanding. It usually has a flap or louvres that open with the airflow and close when the dryer stops, which keeps out wind, rain and pests. Check the flap swings freely and closes fully. If it sticks, brush the hinges clean, and if it is cracked or stuck open, replace it because an open outlet admits birds and nesting material. Keep a clear space around it, since climbing plants, stored items and a pile of leaves all restrict the air. Look at the surrounding wall for staining or damp, which shows that moist air is going where it should not.
Fix 5: the hose
- Switch off at the wall, unplug the dryer and let it cool. Dryers are heavy, so ask someone to help you pull it out, and do not strain your back or scrape your floor.
- Remove the filter and loosen the clamp or collar holding the hose to the dryer, then pull it free. Release the other end where it meets the wall or window vent.
- Look inside with a torch. Shake and vacuum out the lint, using a long attachment or a soft brush. Do this outdoors if you can, or wear a dust mask.
- Look for kinks, crushing, tears, scorch marks or sections that sag, because lint collects in low points. Replace any damaged hose rather than patching it.
- Refit the hose, making sure the clamp is tight and the run is as short and straight as possible, with the fewest bends.
- Pull the dryer back, taking care not to crush the hose behind it, and run a test cycle with your hand near the outlet.
A smooth-walled rigid or semi-rigid hose collects less lint than a corrugated plastic or foil one, so your manual may suggest an upgrade if your current one is ribbed and sagging. Check what the manufacturer allows for maximum hose length and number of bends.
Fix 6: the whole duct, if there is a built-in run
Some homes have a dryer vent running through a wall or cupboard to an outlet. Here, a rotating brush on flexible rods is the standard tool. A dryer vent cleaning brush kit contains rods that screw together and a brush head, and some can be driven by a drill. Check the kit lists the duct diameter you have, push the brush through in stages from the inside, turn it in one direction only (to avoid unscrewing the rods), pull it back and vacuum the lint that comes out. Repeat from the outside end if you can reach it. Stop if the brush sticks, because forcing it through can disconnect a joint inside a wall. A long or bendy run is better left to a specialist with a camera.
The links are Amazon UK searches. Match the hose and outlet to the diameter in your manual, and prefer the dryer maker’s own parts if you are not sure.
When cleaning does not cure the long drying times
A properly cleaned vented dryer should dry a normal load in about the time the programme says. If it does not, the installation could be at fault. An overlong hose, too many bends, a narrow or crushed section, or an outlet that is too small all restrict air. Check the manufacturer’s limit for hose length and bends, and keep to it. Another cause is too small a room: a dryer running in a closed cupboard draws in its own hot air, so open the door or add ventilation. Overloading, wet clothes that have not been spun properly in the washing machine, and a worn heating element also lengthen cycles. A high spin speed on the washing machine does more than anything else to cut dryer time, so check that too.
Does a clean dryer save money?
It does, in a simple way. A dryer with a clear air path finishes its programme sooner and, on sensor models, stops earlier because the load is dry, so it spends less time heating. We have not quoted a figure because savings depend on your tariff, your machine and how blocked it was to begin with, but the direction is reliable: clean machines run shorter. The cheapest way to cut cost further is to spin clothes at the highest speed the fabric label allows, avoid mixing heavy towels with thin shirts, and dry full but not packed loads.
Test it again
After any fix, run a cycle with a small load and check that the clothes are dry in a normal time, the room is not unusually hot, and there is no smell. If the problem persists after you have cleaned the filter, housing, condenser or hose and vent, the cause is likely mechanical, such as a failing heating element or thermostat, and you need an engineer.
Keeping lint under control from now on
- After every load: empty the lint filter, and empty the water tank on a condenser dryer.
- Monthly: glance at the outside vent for visible fluff, and wipe the door seal.
- Every few months or so: wash the filter, vacuum the housing, rinse the condenser. A household with pets, a lot of towels and bedding, or heavy use may need to do this more often.
- Once or twice a year: disconnect and clean the hose and outlet on a vented dryer, and inspect the run for damage.
Moisture matters as well as lint. A vented dryer that leaks hot air into the room, or a condenser dryer in a small space, raises the humidity. This shows as condensation on windows and, over time, black mould on walls and ceilings. If you see this, check the hose joints, the outlet, and the ventilation, and see our guide to what kills mould for how to deal with what has grown.
There is no single fixed interval that suits every household. Heavy use, long-haired pets, new towels that shed lint and fabric softener build-up all increase the load. A better rule is to look at the lint, and clean when you see it. Other habits help too. Do not overload the drum, because clothes need room to tumble and air needs room to move. Clean the lint filter before every load, not after the cycle that left it clogged. Do not run the dryer overnight or when you are out of the house, which is advice from fire services. Keep the area around the dryer clear of clothes baskets, boxes or anything that can catch. Dry heavy towels separately from lighter items, and give new towels a wash first to shed loose fibres. A dryer in a cupboard needs ventilation, so keep the door ajar or fitted with a vent.
Wool dryer balls or a couple of clean tennis balls in the drum can help separate bulky items and speed up drying a little, but they are an extra, not a fix, and they do not replace cleaning the filter. Avoid dryer sheets and heavy fabric softener if you can, since they leave a waxy film on the filter mesh that is easy to miss.
It is the same logic as other appliances. A quick routine stops a big job, as in washing machine maintenance, the oven or any of the other kitchen and laundry appliances in our appliances guides. If the dryer is in a garage or utility room where you keep seasonal items, a tidy storage area also keeps the space around the machine clear. For more everyday cleaning, see the Cleaners Guide homepage.
When to stop and call someone
- A burning smell or smoke. Switch off at the wall if you can do so safely, keep the door closed, and call the fire service if there is any sign of fire. Do not use the dryer again until it has been checked.
- The cut-out keeps tripping after you have cleaned the filter and vent. A fault in the heater, thermostat or fan needs a repair engineer.
- A hose that is split, scorched or melted, or an outlet damaged by heat.
- A built-in duct that is long, bends through walls, or cannot be reached. A professional can use a camera and powered equipment.
- A gas dryer. Have a Gas Safe registered engineer disconnect, service and test it.
- You cannot move the dryer safely, or the outlet is high up. Hire someone rather than risking a fall or a back injury.
- Your model has a safety notice or recall. Follow the manufacturer’s instructions rather than trying to repair it yourself.
Check your insurance and warranty too. Appliance warranties usually require the dryer to be used and maintained as the manual says, and home insurers may ask about fire causes after a claim, so it helps to keep notes of when you cleaned and any invoices from engineers. If your tumble dryer is under warranty and a fault shows up, contact the manufacturer rather than opening it yourself.
Kit or professional visit?
A brush kit, a crevice tool and a few clamps are a low-cost purchase that you can reuse, so for a simple run to an outside wall it makes sense to do the work yourself. A professional visit costs more but includes the tools, a camera inspection and a check of the whole run, which is the better choice for a long or hidden duct. Prices vary by region, so get at least two quotes, and ask what they do and whether they can show you what they found. For a repair rather than a clean, choose a qualified appliance engineer or the manufacturer’s service team, and keep the invoice in case it is under warranty. If your dryer is old and the repair would cost a large fraction of a new machine, replacement may be the sensible option, since newer models also include safer controls.
Three questions people ask
How often should I clean the vent?
There is no single interval. Clean the lint filter after every load, check the outside vent monthly, and clean the hose and outlet once or twice a year. Do it sooner if the dryer takes longer than usual, you have pets, or you dry a lot of towels.
Can I clean it myself?
Usually yes, for a vented dryer with a short, accessible hose and outlet. The filter, housing, hose and outlet are all DIY jobs. Leave built-in ducts you cannot reach, gas models and electrical faults to professionals.
How dangerous is a blocked dryer vent?
Lint is flammable and a blocked vent traps heat, so it is a real fire risk, which is why fire services urge people to clean the filter every load and not leave dryers running unattended. In practice, most blockages show up first as long drying times and heat, so act on those signs.