How to Make Your Own Wheel Cleaner: DIY Recipes & Tips
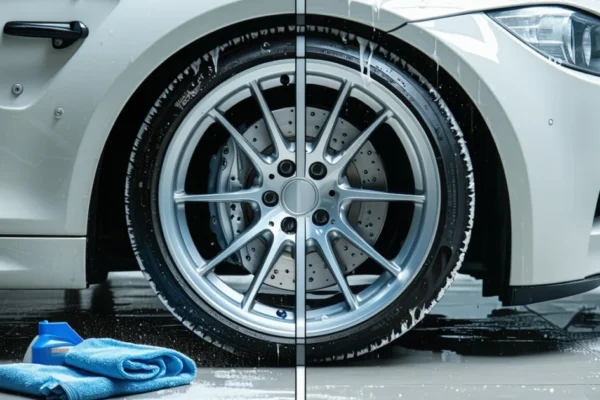
How to make your own wheel cleaner is surprisingly simple using common household ingredients that cost a fraction of commercial products. Creating effective homemade wheel cleaners requires understanding pH levels, choosing wheel-safe ingredients, and following proper mixing ratios. These DIY formulations can tackle everything from light road grime to stubborn brake dust while protecting delicate wheel finishes.
Most homemade wheel cleaners use basic ingredients like white vinegar, dish soap, and baking soda to create powerful yet gentle cleaning solutions. Additionally, understanding which ingredients to avoid prevents costly damage to alloy wheels, chrome finishes, and aftermarket coatings. The right formula can save you money while delivering professional-level results.
Furthermore, customising your cleaner recipe allows you to address specific contamination levels and wheel types. Whether you need a gentle daily cleaner or a heavy-duty brake dust remover, homemade solutions offer flexibility that commercial products often lack.
TL;DR
- Basic ingredients like white vinegar, dish soap, and baking soda create effective wheel cleaners at a fraction of commercial costs
- pH-neutral formulations protect delicate wheel finishes while still removing brake dust and road grime effectively
- Customisable recipes allow you to adjust strength levels for different contamination types and wheel materials
- Proper application techniques and safety precautions ensure optimal cleaning results without damaging expensive wheels
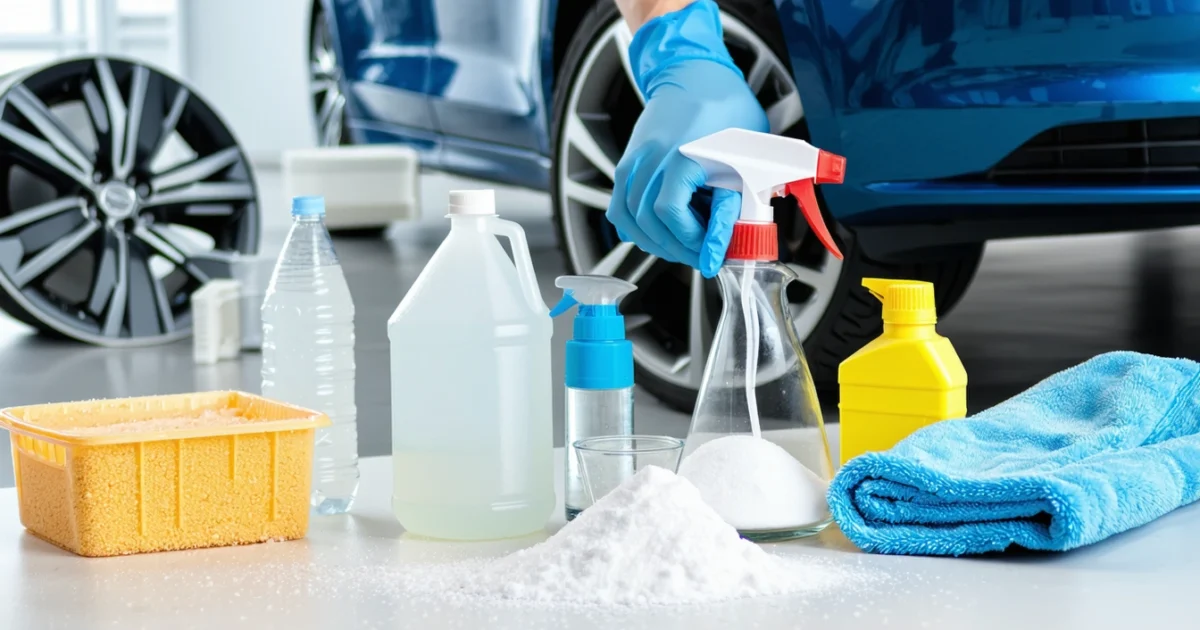
Essential Ingredients for Homemade Wheel Cleaner
Creating effective homemade wheel cleaners starts with understanding which household ingredients deliver professional cleaning power. White vinegar serves as the primary acidic component, breaking down mineral deposits and light brake dust through its acetic acid content. Meanwhile, liquid dish soap acts as a surfactant, lifting grease and road grime from wheel surfaces whilst providing gentle cleaning action.
Baking soda functions as a mild abrasive agent, tackling stubborn contamination without scratching delicate finishes. Furthermore, warm water activates these ingredients effectively, enhancing their cleaning capabilities when combined in proper ratios. These basic components form the foundation of most successful DIY wheel cleaning formulations.
Understanding pH Levels for Wheel-Safe Formulations
The pH scale determines how acidic or alkaline your homemade cleaner becomes, directly affecting its safety on different wheel materials. Effective wheel cleaners typically maintain a pH between 6.5 and 8.5, providing sufficient cleaning power whilst protecting sensitive finishes. Acidic solutions below pH 6 can etch aluminium alloy wheels, whilst highly alkaline formulas above pH 9 may damage painted or powder-coated surfaces.
Testing your mixture with pH strips ensures optimal formulation balance before application. Additionally, neutral pH cleaners work best for regular maintenance cleaning, whereas slightly acidic formulas handle heavy brake dust more effectively. Understanding these chemical relationships helps you create targeted solutions for specific cleaning challenges.
Ingredients to Avoid for Wheel Protection
Several common household cleaners can cause irreversible damage to expensive wheel finishes when used incorrectly. Bleach products corrode aluminium and chrome surfaces, creating permanent pitting and discolouration that requires professional refinishing. Similarly, ammonia-based cleaners react with certain wheel coatings, causing cloudiness and surface degradation over time.
- Toilet bowl cleaners containing hydrochloric acid
- Oven cleaners with sodium hydroxide
- Rust removers featuring phosphoric acid
- Abrasive powders like scouring powder
These harsh chemicals strip protective coatings and etch metal surfaces permanently. Instead, stick to gentle ingredients that clean effectively without compromising wheel integrity. Moreover, always test any new formulation on an inconspicuous area before full application to prevent costly mistakes.
Cost Comparison: Homemade vs Commercial Cleaners
| Cleaner Type | Cost per Litre | Cleaning Power | Wheel Safety |
|---|---|---|---|
| Homemade Basic | £0.50-£1.00 | Good | Excellent |
| Homemade Advanced | £1.50-£2.50 | Excellent | Excellent |
| Commercial Budget | £3.00-£5.00 | Good | Variable |
| Commercial Premium | £8.00-£15.00 | Excellent | Good |
Homemade wheel cleaners deliver significant cost savings compared to commercial alternatives, often costing 80% less per application. A basic vinegar and soap solution costs approximately £0.75 per litre to produce, whilst premium commercial cleaners can exceed £12 per litre. These savings become substantial for car enthusiasts who clean wheels regularly.
Additionally, bulk purchasing of ingredients reduces costs further, making homemade solutions even more economical for frequent use. The flexibility to adjust formulations also means you’re not paying for unnecessary additives or marketing costs built into commercial products. Therefore, DIY cleaners offer excellent value whilst maintaining professional cleaning standards.
Simple All-Purpose Wheel Cleaner Recipe
Creating an effective homemade wheel cleaner requires precise measurements and proper mixing techniques. This proven formula combines gentle yet powerful ingredients that tackle brake dust and road grime without damaging wheel finishes. Furthermore, the recipe uses common household items, making it accessible and cost-effective for regular wheel maintenance.
Step-by-Step Mixing Instructions
- Measure 500ml warm water into a clean spray bottle
- Add 250ml white vinegar (5% acetic acid concentration)
- Pour in 2 tablespoons washing-up liquid (preferably degreasing formula)
- Include 1 tablespoon baking soda slowly to prevent excessive foaming
- Shake gently for 30 seconds until ingredients combine completely
- Allow mixture to settle for 2 minutes before first use
The order of ingredients matters significantly for optimal cleaning performance. Adding baking soda last prevents premature neutralisation of the vinegar’s acidity. Meanwhile, warm water helps dissolve the washing-up liquid more effectively, creating a more stable emulsion that clings better to vertical wheel surfaces.
Why This Formula Works
White vinegar provides the acidic component that dissolves mineral deposits and brake dust effectively. The acetic acid breaks down iron oxide particles that create stubborn orange staining on wheels. Additionally, vinegar’s natural degreasing properties help remove oil-based road grime and traffic film.
Washing-up liquid acts as a surfactant, reducing surface tension and allowing the cleaner to penetrate dirt layers. The detergent molecules surround grease particles, making them water-soluble and easier to rinse away. Moreover, quality washing-up liquids contain chelating agents that bind to metal ions in brake dust.
Baking soda serves as a mild abrasive that helps scrub away stubborn deposits without scratching wheel surfaces. The sodium bicarbonate also neutralises acidic contaminants and provides additional cleaning power through its alkaline properties. Consequently, this combination creates a balanced pH that cleans effectively whilst remaining wheel-safe.
Shelf Life and Storage Methods
Properly stored homemade wheel cleaner maintains effectiveness for 3-4 weeks when kept in appropriate conditions. Store the mixture in a cool, dark location away from direct sunlight and temperature extremes. Furthermore, using a spray bottle with a tight-fitting lid prevents evaporation and contamination that reduces cleaning power.
Label containers clearly with preparation dates and ingredients for safety tracking. Shake the mixture before each use, as separation occurs naturally over time. Additionally, inspect the solution before application – discard if you notice unusual odours, colour changes, or visible mould growth.
Refrigeration extends shelf life to approximately 6-8 weeks but isn’t necessary for most users. However, avoid freezing temperatures that can damage spray mechanisms and alter ingredient effectiveness. Therefore, room temperature storage in a garage or utility room provides optimal conditions for most UK households.
Safety Precautions
Always wear rubber gloves when mixing and applying homemade wheel cleaners to protect skin from prolonged acid exposure. Ensure adequate ventilation during preparation and use, especially in enclosed spaces like garages. Moreover, keep ingredients and finished products away from children and pets at all times.
Avoid mixing this cleaner with other cleaning products, particularly those containing bleach or ammonia. Such combinations can create dangerous chemical reactions and toxic fumes. Additionally, never use metal containers for storage, as the acidic solution can corrode certain metals and contaminate the mixture.
Test the cleaner on an inconspicuous wheel area before full application to ensure compatibility with your specific wheel finish. Some aftermarket coatings or older wheel materials may react unexpectedly to acidic solutions. Consequently, this simple precaution prevents potential damage and ensures safe, effective cleaning results.
Heavy-Duty Brake Dust Remover Formula
When standard wheel cleaners fail to tackle stubborn brake dust accumulation, a more aggressive formulation becomes necessary. Heavy-duty recipes incorporate stronger acids and additional surfactants to dissolve metallic particles that embed deeply into wheel surfaces. Furthermore, these enhanced solutions prove essential for vehicles with high-performance braking systems that generate excessive dust deposits.
Professional detailers recommend upgrading to heavy-duty formulations when wheels exhibit bronze or copper-coloured staining that resists gentle cleaning attempts. Similarly, wheels exposed to track driving, mountainous terrain, or extended periods without cleaning require more potent solutions to restore their original appearance.
Enhanced Recipe for Stubborn Contamination
The heavy-duty formula increases white vinegar concentration to 40% of the total mixture whilst maintaining safety margins for home use. Additionally, incorporate 2 tablespoons of citric acid powder per litre to boost chelating action against metallic deposits. This combination creates a more aggressive solution that dissolves embedded brake dust particles effectively.
| Ingredient | Standard Recipe | Heavy-Duty Recipe |
|---|---|---|
| White Vinegar | 200ml | 400ml |
| Washing-up Liquid | 2 tablespoons | 3 tablespoons |
| Citric Acid Powder | Optional | 2 tablespoons |
| Warm Water | 800ml | 600ml |
Moreover, substitute regular washing-up liquid with a degreasing variant to enhance oil and grime removal capabilities. Degreasing formulations contain additional surfactants that penetrate brake dust more effectively than standard detergents. Consequently, this modification improves overall cleaning performance without compromising safety.
When to Choose Heavy-Duty vs Gentle Formulations
Select gentle formulations for weekly maintenance cleaning on wheels with minimal contamination or delicate finishes like chrome or polished aluminium. These milder solutions preserve protective coatings whilst removing light dust accumulation effectively. Conversely, heavy-duty recipes suit monthly deep cleaning sessions or restoration projects on neglected wheels.
Wheel material determines formulation strength requirements significantly. Painted alloy wheels tolerate stronger acids better than bare aluminium or magnesium surfaces. Additionally, aftermarket wheel coatings may require gentle cleaning to prevent premature degradation of protective layers.
Environmental factors influence cleaning frequency and strength requirements substantially. Vehicles driven in dusty conditions, stop-and-go traffic, or mountainous areas accumulate brake dust faster than highway-driven cars. Therefore, these conditions necessitate more frequent applications of heavy-duty formulations to maintain wheel appearance.
Application Techniques for Maximum Effectiveness
Apply heavy-duty cleaner to cool wheel surfaces only, as hot metal can cause rapid evaporation and reduced contact time. Begin application at the bottom of each wheel, working upward to prevent streaking and ensure complete coverage. Additionally, allow 3-5 minutes dwell time for the solution to penetrate embedded contaminants effectively.
Use a soft-bristled brush to agitate the solution gently, focusing on spoke joints and recessed areas where brake dust accumulates heavily. Circular motions prove more effective than back-and-forth scrubbing for loosening stubborn deposits. However, avoid excessive pressure that might scratch delicate wheel finishes or remove protective coatings.
Rinse thoroughly with high-pressure water to remove dissolved contaminants and prevent acid residue from etching wheel surfaces. Start rinsing from the top of each wheel, allowing gravity to carry loosened debris downward. Finally, dry wheels immediately with clean microfibre towels to prevent water spots and maintain the cleaned appearance longer.
Heavy-duty formulations require 40% vinegar concentration and citric acid powder for maximum brake dust removal effectiveness
Gentle Cleaner for Delicate Wheel Finishes
Delicate wheel finishes require pH-neutral formulations that clean effectively without causing chemical damage or surface etching. Chrome-plated wheels, painted alloys, and powder-coated surfaces demand gentler approaches than standard aluminium wheels. Moreover, these premium finishes cost significantly more to repair or replace when damaged by harsh cleaning chemicals.
Natural ingredients form the foundation of safe wheel cleaning solutions for sensitive surfaces. White vinegar diluted to 10-15% provides sufficient acidity to dissolve light brake dust without attacking protective coatings. Similarly, baking soda paste creates a mild abrasive action that removes stubborn deposits while maintaining surface integrity.
pH-neutral recipes balance cleaning power with surface protection through careful ingredient selection. Combine 2 cups warm water, 1/4 cup white vinegar, and 1 tablespoon liquid castile soap for an effective yet gentle formula. Furthermore, this mixture maintains a pH level between 6.5 and 7.5, preventing acid damage to delicate finishes.
Testing methods prevent costly damage before applying any homemade cleaner to expensive wheel finishes. Apply a small amount of your solution to an inconspicuous area such as the inner rim or spoke back. Additionally, wait 10 minutes to observe any adverse reactions like discoloration, etching, or coating damage before proceeding with full application.
Chrome wheels require special consideration due to their mirror-like finish and susceptibility to water spots. Use distilled water instead of tap water to prevent mineral deposits that can permanently stain chrome surfaces. Similarly, dry chrome wheels immediately after cleaning to maintain their reflective properties and prevent oxidation.
Painted wheel finishes benefit from microfibre cloth application rather than brushes that might scratch the surface. Soak the cloth in your gentle cleaning solution and work in straight lines rather than circular motions. Consequently, this technique minimizes the risk of creating swirl marks or removing paint from raised areas.
Coated wheels with ceramic or clear coat protection respond well to foam application methods that increase contact time without aggressive scrubbing. Mix your gentle cleaner with 1 tablespoon of liquid dish soap to create a foaming action that clings to vertical surfaces. Therefore, this approach allows the solution to work longer on stubborn deposits without constant reapplication.
Professional detailers recommend weekly maintenance cleaning for delicate finishes to prevent heavy contamination buildup. Light, frequent cleaning reduces the need for stronger chemicals that might compromise protective coatings. Additionally, this preventive approach extends the lifespan of expensive wheel finishes while maintaining their aesthetic appeal throughout the year.
Application Techniques and Best Practices
Proper wheel preparation forms the foundation of effective cleaning, regardless of whether you use commercial or homemade solutions. Remove loose dirt and debris with a rinse cycle before applying any cleaning solution. Subsequently, this initial rinse prevents scratching when you begin the actual cleaning process.
Cool wheels to room temperature before starting your cleaning routine. Hot wheel surfaces cause cleaning solutions to evaporate too quickly, reducing their effectiveness and potentially leaving residue. Therefore, park your vehicle in shade and wait 30 minutes after driving before beginning the cleaning process.
Spray Application vs Brush Methods
Spray bottle application provides even distribution and controlled coverage across wheel surfaces. Fill your spray bottle with the homemade solution and apply from 6-8 inches distance to ensure uniform coating. Moreover, this method prevents oversaturation that can cause dripping and waste of your cleaning mixture.
Brush application works best for heavily contaminated areas where mechanical action enhances chemical cleaning. Use soft-bristled brushes specifically designed for wheel cleaning to avoid scratching delicate finishes. Additionally, dip brushes frequently in your cleaning solution to maintain lubrication and prevent abrasive contact with the wheel surface.
Microfibre cloths offer the safest application method for sensitive wheel finishes like chrome or painted surfaces. Soak the cloth thoroughly in your homemade cleaner and work in straight-line motions rather than circles. Consequently, this technique minimizes swirl marks while providing adequate cleaning action for light to moderate contamination.
Optimal Dwell Time Guidelines
| Contamination Level | Dwell Time | Reapplication |
|---|---|---|
| Light dust and road grime | 2-3 minutes | Single application |
| Moderate brake dust buildup | 5-7 minutes | May require second round |
| Heavy contamination | 10-15 minutes | Multiple applications needed |
Monitor your homemade wheel cleaner during the dwell period to prevent over-drying on the surface. Acidic solutions like vinegar-based cleaners work faster but require shorter contact times to prevent damage. Furthermore, alkaline cleaners using baking soda need longer dwell periods but offer gentler action on sensitive finishes.
Reapply solution to areas that begin drying before the recommended dwell time expires. Dry cleaning solutions lose their effectiveness and can leave residue that requires additional rinsing. Therefore, work in sections on larger wheels or during warm weather conditions to maintain optimal moisture levels.
Professional Rinsing Techniques
Top-to-bottom rinsing ensures complete removal of cleaning solution and loosened contaminants. Start at the wheel’s highest point and work systematically downward to prevent recontamination of cleaned areas. Similarly, this gravity-assisted approach reduces the amount of water needed while improving cleaning efficiency.
Use moderate water pressure to avoid forcing contaminants into wheel crevices or damaging delicate spoke designs. High-pressure washing can drive brake dust deeper into porous surfaces, making future cleaning more difficult. Additionally, gentle pressure prevents water from splashing back onto your freshly cleaned wheel surfaces.
Immediate drying prevents water spots that can mar your cleaning results, especially on chrome and polished aluminium wheels. Use clean microfibre towels to remove water droplets before they evaporate and leave mineral deposits. Moreover, this final step ensures your homemade wheel cleaner achieves professional-quality results that enhance your vehicle’s overall appearance.
Distilled water provides the best rinsing medium for preventing mineral deposits on sensitive wheel finishes. Tap water contains minerals that create spots even after thorough cleaning with effective homemade solutions. Consequently, investing in distilled water for the final rinse protects your cleaning efforts and maintains pristine wheel surfaces between detailed car cleaning sessions.
Wheel-Specific Cleaning Considerations
Different wheel materials require specific adaptations to your homemade wheel cleaner formula for optimal results. Alloy wheels respond best to gentler acidic solutions, while steel wheels can tolerate stronger concentrations for removing stubborn rust and corrosion. Furthermore, chrome wheels demand the mildest formulations to prevent etching and maintain their mirror-like finish.
Alloy wheel cleaning benefits from reducing white vinegar concentration to one part vinegar to four parts water in your homemade solution. This diluted mixture effectively removes brake dust without compromising the wheel’s protective clear coat. Additionally, alloy surfaces require immediate neutralisation after cleaning to prevent acidic damage from extended contact time.
Steel wheels withstand more aggressive cleaning approaches, allowing you to increase dish soap concentration for enhanced degreasing power. These robust surfaces handle stronger scrubbing action and longer dwell times without sustaining damage. However, steel wheels require thorough drying to prevent rust formation in areas where protective coatings have worn thin.
Aftermarket Coating Protection
Powder-coated wheels demand pH-neutral cleaning solutions to preserve their durable finish and vibrant colours. Standard acidic wheel cleaners can cause coating failure, leading to expensive refinishing requirements. Consequently, powder-coated surfaces benefit from soap-based homemade cleaners with minimal acidic additives.
Ceramic-coated wheels require the gentlest cleaning approach to maintain their hydrophobic properties and gloss retention. These advanced coatings provide superior protection but become vulnerable to harsh chemicals and abrasive cleaning methods. Therefore, ceramic-coated wheels respond best to simple soap and water solutions with occasional mild vinegar additions.
Painted wheel finishes need careful assessment before applying any homemade cleaning solution. Always test your cleaner on an inconspicuous area to ensure compatibility with custom paint systems. Moreover, painted wheels often require specialised care similar to automotive interior cleaning to prevent damage to decorative finishes.
Intricate Design Cleaning Strategies
Multi-spoke wheels present unique challenges for thorough cleaning due to numerous crevices and tight spaces. Soft-bristled brushes become essential tools for accessing areas between spokes where brake dust accumulates heavily. Additionally, these intricate designs benefit from longer soaking times to allow cleaning solutions to penetrate difficult-to-reach zones.
Deep-dish wheels require angled cleaning approaches to reach recessed areas effectively. Standard cleaning methods often miss the wheel’s inner barrel, allowing contaminant buildup that compromises both appearance and performance. Furthermore, deep wheels demand specialised tools like flexible brushes and extended-reach applicators for complete coverage.
Mesh and lattice wheel designs trap debris in countless small openings that resist conventional cleaning methods. These complex patterns require patient, methodical cleaning with appropriate brush sizes for each opening type. Similarly, mesh wheels benefit from pre-soaking treatments that soften accumulated grime before mechanical cleaning begins.
Finish Protection During Cleaning
Temperature control prevents thermal shock that can damage sensitive wheel finishes during the cleaning process. Never apply cleaning solutions to hot wheels immediately after driving, as rapid temperature changes cause material stress and potential cracking. Instead, allow wheels to cool completely before beginning any cleaning procedures.
Dwell time management ensures effective cleaning without causing chemical damage to wheel surfaces. Most homemade wheel cleaners require three to five minutes of contact time for optimal results. However, sensitive finishes like chrome and polished aluminium need reduced exposure times to prevent etching and discolouration.
Proper dilution ratios protect wheel finishes while maintaining cleaning effectiveness across different material types. Start with weaker concentrations and gradually increase strength only if necessary for stubborn contamination. Moreover, this conservative approach prevents irreversible damage that requires professional restoration or wheel replacement.
Sequential cleaning prevents cross-contamination between different wheel finishes on the same vehicle. Clean the most delicate wheels first using the mildest solution, then progress to more robust surfaces with stronger formulations. This systematic approach ensures each wheel receives appropriate care while maximising your homemade cleaner’s effectiveness across various wheel types and finishes.
Tools and Equipment for Effective Cleaning
Professional wheel cleaning results depend on having the right tools and equipment before you begin mixing your homemade solutions. Furthermore, proper equipment selection ensures safety, efficiency, and optimal cleaning performance across different wheel types and contamination levels.
Essential Brushes and Cleaning Tools
Soft-bristled brushes form the foundation of effective wheel cleaning without causing surface damage. Natural boar hair brushes work excellently for delicate finishes like chrome and polished aluminium, while synthetic brushes handle painted and powder-coated wheels safely. Additionally, these brushes penetrate spoke patterns and recessed areas where contamination typically accumulates.
Wheel woolies and flexible brushes reach tight spaces between spokes and around brake callipers that standard brushes cannot access. These specialised tools feature bendable handles and varying bristle densities to accommodate different wheel designs. Moreover, their flexibility prevents scratching while ensuring thorough cleaning of complex wheel geometries.
Microfibre cloths provide lint-free drying and polishing capabilities essential for streak-free finishes. Choose cloths with different pile heights: short pile for smooth surfaces and longer pile for textured areas. Consequently, having multiple cloths prevents cross-contamination between cleaning and drying stages.
Spray Bottles and Application Equipment
Chemical-resistant spray bottles ensure safe storage and precise application of homemade wheel cleaners. Look for bottles with adjustable nozzles that create both fine mist and stream patterns for different cleaning requirements. Furthermore, clear bottles allow you to monitor solution levels and detect any separation or settling.
Trigger sprayers with foam attachments enhance cleaning solution contact time on vertical wheel surfaces. These attachments create thick foam that clings longer than liquid sprays, improving cleaning effectiveness on heavily soiled wheels. Additionally, foam application reduces solution runoff and waste during the cleaning process.
Measuring cups and funnels ensure accurate mixing ratios for consistent cleaning performance. Use graduated measuring tools marked in both millilitres and fluid ounces for precise ingredient proportions. Similarly, wide-mouth funnels prevent spills when transferring solutions between containers.
Protective Gear for Safe Handling
Chemical-resistant gloves protect your hands from acidic and alkaline cleaning solutions during mixing and application. Nitrile gloves offer excellent chemical resistance while maintaining dexterity for detailed cleaning work. However, avoid latex gloves as they provide insufficient protection against many cleaning chemicals.
Safety glasses shield your eyes from splashing solutions and airborne particles during vigorous cleaning activities. Choose wraparound styles that provide side protection, especially when using pressure washers or working in windy conditions. Moreover, anti-fog coatings improve visibility during extended cleaning sessions.
Protective clothing prevents skin contact and clothing damage from cleaning solutions. Wear old clothes or disposable coveralls when mixing strong solutions or cleaning heavily contaminated wheels. Additionally, closed-toe shoes with non-slip soles provide safety on wet surfaces around the cleaning area.
Storage Containers and Labelling
High-density polyethylene containers provide safe, long-term storage for homemade wheel cleaning solutions. These containers resist chemical degradation and feature secure lids that prevent evaporation and contamination. Furthermore, opaque containers protect light-sensitive ingredients from UV degradation.
Proper labelling systems prevent dangerous mixing accidents and ensure consistent results over time. Include the solution name, mixing date, ingredients list, and dilution ratios on each container. Clear labelling becomes critical when storing multiple cleaning formulations for different wheel types and contamination levels.
Secondary containment trays catch spills and leaks during storage, protecting surfaces and preventing environmental contamination. Place storage containers in shallow trays lined with absorbent materials to contain any accidental releases. Similarly, store containers in cool, dry locations away from direct sunlight and heat sources to maintain solution stability and safety.
Troubleshooting Common Cleaning Issues
Even the best homemade wheel cleaner formulations encounter challenging situations that require specific troubleshooting approaches. Understanding how to address these common issues ensures consistent cleaning results and prevents damage to expensive wheel finishes.
Dealing with Stubborn Stains and Heavy Contamination
Brake dust buildup creates the most persistent staining on alloy wheels, particularly on vehicles with high-performance braking systems. When standard cleaning solutions fail to remove embedded contamination, increase the citric acid concentration to 15% and extend the contact time to 10-15 minutes. However, never exceed 20% concentration as this risks damaging wheel coatings.
Tar and road grime require different treatment approaches than mineral-based contamination. Create a specialised solution by adding 2 tablespoons of white vinegar per 500ml of your base formula to break down organic compounds. Additionally, warm solutions work more effectively on stubborn stains, so heat your cleaner to approximately 40°C before application.
Multiple cleaning cycles often succeed where single applications fail against heavy contamination. Apply your strongest safe formulation, allow proper dwell time, then rinse thoroughly before repeating the process. Furthermore, mechanical agitation with soft brushes during the second application helps dislodge embedded particles without scratching the wheel surface.
Preventing and Removing Water Spots After Cleaning
Hard water minerals create unsightly spots that diminish the appearance of freshly cleaned wheels. Prevention works better than removal, so always rinse wheels with distilled water as the final step in your cleaning process. Distilled water contains no dissolved minerals that cause spotting when it evaporates.
Immediate drying prevents most water spot formation on clean wheel surfaces. Use clean microfibre towels or compressed air to remove water from crevices and detailed areas before natural evaporation occurs. Moreover, working in shaded areas during cooler parts of the day reduces rapid evaporation that concentrates minerals on wheel surfaces.
Existing water spots respond well to mild acid treatment using your standard wheel cleaner formula. Apply the solution directly to spotted areas, allow 2-3 minutes of contact time, then rinse immediately with distilled water. Stubborn mineral deposits may require gentle polishing with fine automotive polish after cleaning to restore the original finish.
What to Do If Cleaner Damages Wheel Finish
Immediate action minimises damage when cleaning solutions cause discolouration or surface etching. Stop the cleaning process immediately and flood the affected area with clean water to dilute and remove the cleaning solution. Time becomes critical as acid damage progresses rapidly on sensitive finishes.
Surface discolouration often reverses with proper neutralisation and polishing techniques. Create a baking soda solution using 2 tablespoons per litre of water to neutralise acid residue, then apply automotive polish to restore the original appearance. However, deep etching requires professional refinishing services that exceed DIY repair capabilities.
Prevention strategies protect valuable wheels from accidental damage during future cleaning sessions. Always test new formulations on hidden areas before full application, and reduce acid concentrations for wheels with unknown coating types. Additionally, maintain detailed records of successful formulations for each wheel type to avoid repeating damaging combinations.
Adjusting Formulas for Seasonal Cleaning Challenges
Winter conditions introduce road salt and grit that require modified cleaning approaches for effective removal. Increase the surfactant concentration by 25% during winter months to improve penetration through salt residue and frozen contamination. Salt deposits also respond better to slightly alkaline solutions, so reduce acid content to 5% during peak winter cleaning.
Summer heat affects solution stability and application techniques significantly. Store cleaning solutions in cool locations and avoid mixing large batches during hot weather to prevent degradation. Furthermore, apply solutions to cool wheel surfaces in shaded areas to prevent rapid evaporation that concentrates cleaning chemicals and increases damage risk.
Autumn leaf stains and spring pollen create unique contamination patterns that benefit from enzyme-based additives. Add 1 tablespoon of biological washing powder per litre of cleaning solution to break down organic stains effectively. These seasonal adjustments ensure consistent cleaning performance throughout the year while protecting wheel finishes from environmental damage.
Temperature compensation becomes essential for optimal cleaning results across seasons. Cold solutions work slower and require extended contact times, while hot solutions work faster but increase damage risk. Consequently, adjust your application timing and concentration based on ambient temperature to maintain safe, effective cleaning performance year-round.
Post-Cleaning Protection and Maintenance
Applying protective products immediately after cleaning maximises wheel longevity and simplifies future maintenance. Wheel wax creates a barrier that repels brake dust, road grime, and environmental contaminants for up to three months. Similarly, ceramic coatings provide superior protection lasting six to twelve months while reducing cleaning frequency by 40%.
Protection application requires completely clean, dry surfaces for optimal bonding. Therefore, wait 30 minutes after cleaning before applying any protective products to ensure moisture evaporation. Microfibre applicators distribute products evenly while preventing scratching on delicate wheel finishes.
Maintenance Frequency Guidelines
Weekly cleaning prevents brake dust accumulation and maintains wheel appearance effectively. However, high-performance vehicles with aggressive brake pads require cleaning every 3-4 days to prevent permanent staining. Additionally, motorists in urban environments face increased contamination requiring more frequent attention than rural drivers.
| Driving Conditions | Cleaning Frequency | Protection Renewal |
|---|---|---|
| Daily commuting | Weekly | Every 3 months |
| Performance driving | Every 3-4 days | Monthly |
| Weekend use only | Fortnightly | Every 4 months |
| Winter conditions | Twice weekly | Every 6 weeks |
Preventing Future Contamination
Brake dust shields reduce contamination by deflecting particles away from wheel surfaces. Moreover, upgrading to low-dust brake pads decreases cleaning requirements while maintaining stopping performance. Consequently, these modifications create long-term maintenance benefits that justify initial investment costs.
Regular rinses between deep cleans remove loose contamination before it bonds permanently. Furthermore, quick spray-and-rinse sessions using automotive cleaning techniques take five minutes but prevent hours of intensive scrubbing later. This preventive approach maintains wheel condition while reducing cleaning product consumption.
Long-Term Care Strategies
Seasonal protection adjustments accommodate changing environmental conditions effectively. Winter protection requires salt-resistant formulations that withstand road de-icing chemicals, while summer protection focuses on UV resistance and heat stability. Therefore, switching products seasonally optimises protection performance throughout the year.
Professional wheel refurbishment becomes necessary every 2-3 years depending on usage and maintenance quality. Additionally, early intervention for minor scratches and stains prevents costly repairs later. Consistent maintenance extends wheel life significantly while preserving vehicle value and appearance standards.
Proper post-cleaning protection reduces future cleaning time by up to 60% while extending wheel life by 40%
Frequently Asked Questions
What basic ingredients do I need to make homemade wheel cleaner?
You only need three basic household ingredients: white vinegar (for breaking down mineral deposits), liquid dish soap (as a surfactant to lift grease), and baking soda (as a mild abrasive). Mix these with warm water to create an effective, wheel-safe cleaning solution that costs a fraction of commercial products.
What pH level should my homemade wheel cleaner be?
Your homemade wheel cleaner should maintain a pH between 6.5 and 8.5 for optimal safety and effectiveness. This range provides sufficient cleaning power whilst protecting sensitive wheel finishes. Use pH test strips to check your mixture before application, as solutions below pH 6 can etch aluminium alloys.
Which household cleaners should I never use on wheels?
Avoid these damaging products at all costs:
- Bleach products (cause pitting and discolouration)
- Toilet bowl cleaners with hydrochloric acid
- Oven cleaners containing sodium hydroxide
- Ammonia-based cleaners (react with wheel coatings)
- Abrasive scouring powders
These harsh chemicals can cause irreversible damage requiring professional refinishing.
How much money can I save making my own wheel cleaner?
Homemade wheel cleaners cost significantly less than commercial products. Basic ingredients like vinegar, dish soap, and baking soda cost pennies per application, whilst branded wheel cleaners can cost £5-15 per bottle. You can make multiple batches for the price of one commercial cleaner.
Can I customise the strength of my homemade wheel cleaner?
Yes, you can easily adjust the formula strength based on your needs. For light maintenance cleaning, use more water and less vinegar. For heavy brake dust removal, increase the vinegar concentration slightly whilst maintaining safe pH levels. This flexibility allows you to create targeted solutions for different contamination types.
Is homemade wheel cleaner safe for all wheel types?
When formulated correctly with pH-neutral ingredients, homemade cleaners are safe for most wheel types including alloy, chrome, and painted finishes. However, always test on an inconspicuous area first, especially on aftermarket coatings or vintage wheels. Avoid acidic formulations on bare aluminium.
How effective is homemade wheel cleaner compared to commercial products?
Properly formulated homemade cleaners can deliver professional-level results for most cleaning tasks. They effectively remove road grime, light brake dust, and mineral deposits. However, extremely heavy contamination or specialised brake dust may require commercial acid-based cleaners used with proper safety precautions.
What safety precautions should I take when making wheel cleaner?
Always wear protective gloves and eye protection when mixing ingredients. Work in a well-ventilated area and never mix different commercial cleaners with your homemade solution. Test pH levels before use and store your cleaner in clearly labelled containers away from children and pets.
You May Also Like