A Henry that has gone weak, smelly or noisy is nearly always telling you something about its filters. Washing the filter often fixes it. But there are three ways the job goes wrong: working on a machine that is still connected to the mains, putting a filter back that is not completely dry, and washing a part that was never meant to get wet. Check those first, then clean.
Disclosure: Cleaners Guide is a participant in the Amazon Associates programme, so if you buy through links on this page we may earn a small commission at no extra cost to you. Product links are searches, so check the current price and compatibility before buying.
What can go wrong, and what to check first
- Mains power. Unplug the Henry from the wall socket, not just the switch, before you open anything. Let it cool for a few minutes if it has just been running.
- A damp filter. Refitting a filter that is still wet can cause damp smells and mould and can put moisture near the motor. It must be completely dry. Do not use it “nearly dry”.
- The wrong part. Not every filter in a vacuum is washable. Foam and some cloth filters are usually designed to be rinsed. Paper or pleated HEPA filters are normally replaced, not washed. Your manual or the manufacturer’s website will say which yours is.
- Heat. Hot water, radiators, hairdryers, tumble dryers and ovens can warp or damage foam.
- Dust you should not be hoovering. An ordinary domestic vacuum is not suitable for fine hazardous dust such as plaster, cement or builder’s dust, soot, or anything that might contain asbestos. Never vacuum hot ash or embers.
- No bag, no filter. Run it without a bag or filter and dust goes straight to the motor.
Before you start, find the model name or number on the label and look up the manual. Models differ in how many filters they have and where they sit, so what follows is the general approach for the common washable foam filter. If your manual says something different, follow the manual. The same wipe-clean, dry-fully logic applies to the filters on other appliances, such as the washing machine filter and the dishwasher filter.
Do the drying first in your plan. The wash takes minutes but the filter then needs about a day to dry. Do this when you do not need the vacuum straight away, or keep a spare filter to swap in.
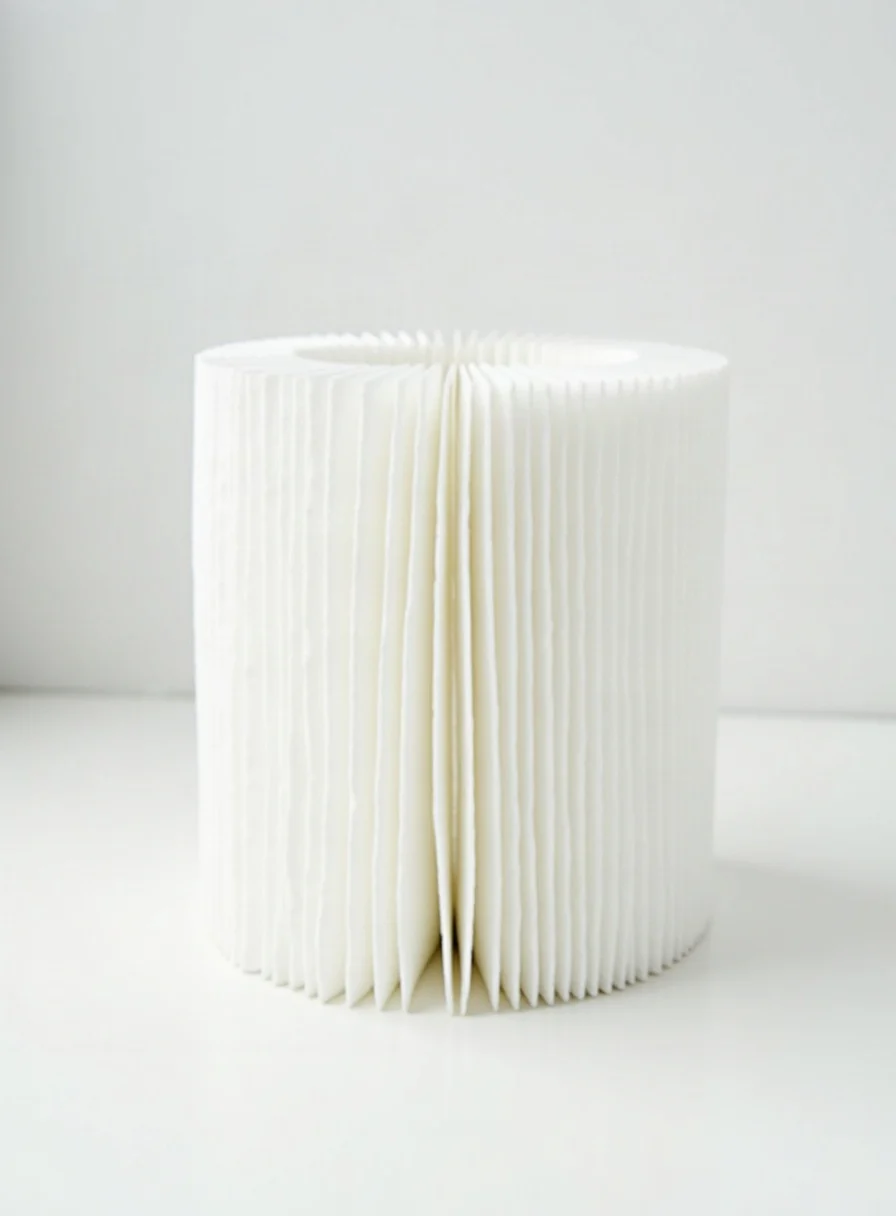
Which filter does your Henry have?
The Henry family is large, and the names include the standard Henry, the Hetty and Harry variants, models with a HEPA option, cordless versions, and industrial or trade models. They do not all share one filter arrangement. Some rely mainly on the bag, with a motor protection filter behind it, while others have additional exhaust or HEPA stages. Look for the model name and number on the rating label, then check the manual or the manufacturer’s website for the filter list. As a general rule, if a part is foam or cloth and the manual describes it as washable, you can rinse it with water. If it is pleated paper or marked as a HEPA element, plan to replace it rather than wash it.
If you cannot find the manual, search for the model number online or contact the manufacturer’s customer service. Guessing which parts are washable is how filters get ruined.
Spot the signs that the filter is the problem
Clean it as soon as you notice any of these, instead of waiting for a date on the calendar.
- Suction has dropped, but the bag is not full and the hose is clear.
- The hoover smells dusty or musty when you run it.
- The motor sounds louder or higher pitched than usual, which suggests it is working harder to pull air.
- Fine dust puffs out of the exhaust.
- The foam looks compacted, hard or grey instead of springy.
A blocked bag or hose, or a clogged floor head, gives similar symptoms, so check those too. The troubleshooting section further down goes through them.
| Usage | Suggested check or wash | Reason |
|---|---|---|
| Light use, a couple of times a week | Look at the filter every month or two | Slow build-up of fine dust |
| Daily use | Check every few weeks | More dust passes through the bag |
| Homes with pets | More often than the above | Hair and dander clog faster |
| DIY or trade use | After each dusty job, with a new bag | Fine dust blocks foam quickly |
It helps to know why this matters. The filter’s job is to stop fine dust reaching the motor and to keep it out of your room. When it clogs, the air that cools the motor also slows down, so the motor works harder and runs hotter. That shortens its life and makes the machine louder. A clogged filter also lets less dust out of the bag stage, so fine particles that should have been caught may be blown back into the room, which matters for anyone with asthma or allergies. A few minutes of cleaning every so often is a cheap way of avoiding all of that.
The safest method, step by step
1. Prepare
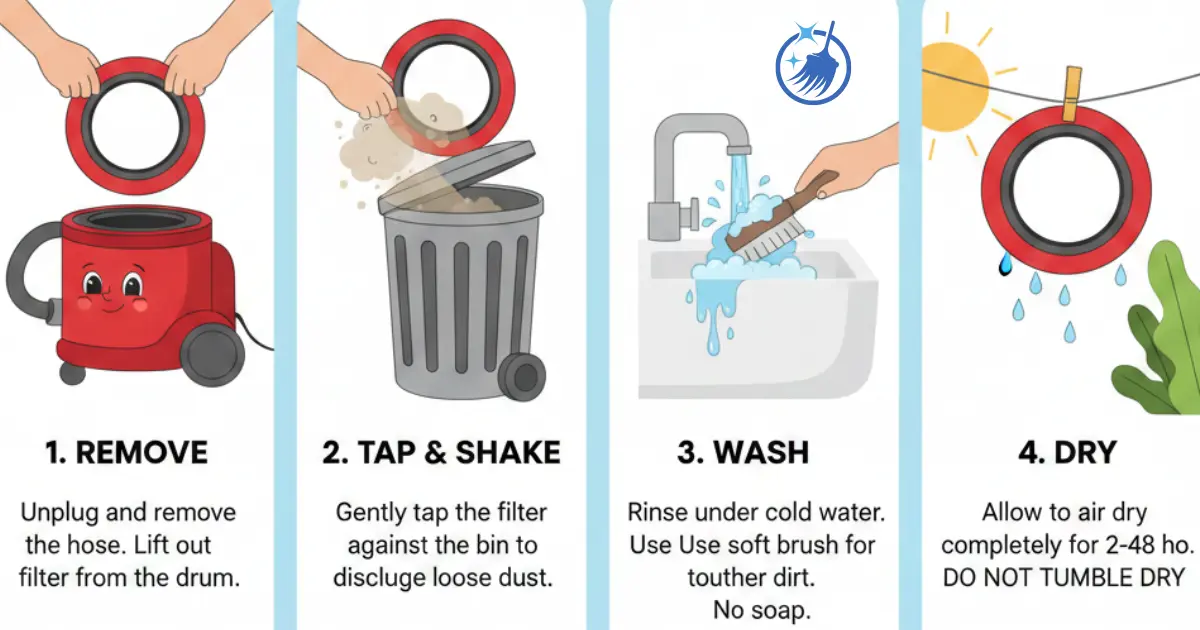
Unplug the Henry and let it cool. Lay a bin bag or newspaper next to you to catch dust. Do it somewhere you do not mind a bit of dust, ideally outdoors or near a bin.

2. Open it and take out the bag
Release the clips on either side of the head and lift it off, following the manual. Remove the bag carefully and put it straight in the bin. Henry bags are designed to be single use, so do not empty and reuse them, and a full bag is a good time to fit a new one. Fit a fresh bag when you reassemble.
3. Take out the filter and look at the housing
The filter sits around or below the motor housing and is usually a foam ring or disc, depending on the model. Ease it out and tap it gently over the bin. Do not bash it, as foam tears. Wipe the inside of the housing with a barely damp cloth, keeping moisture away from the motor itself, and check for debris or damage.
4. Rinse with cool or lukewarm water only
Hold the filter under a gentle running tap and squeeze it a few times until the water runs clear. Skip washing-up liquid, detergent, fabric softener and filter cleaners unless the manufacturer specifically allows them, since residue can clog the pores. Hot water can deform foam.
5. Press out the water, do not wring
Squeeze the filter gently, or press it between clean towels. Twisting can tear it.
6. Dry fully at room temperature
Stand the filter somewhere airy and leave it for at least a day, longer if it is cold or damp. Do not put it on a radiator or use a hairdryer or tumble dryer. To check, squeeze it: if any moisture comes out, or it feels cool and heavy, it is not ready.

If the water keeps coming out grey after a minute or two of rinsing, that is normal for a filter that has not been cleaned for a long time. Keep squeezing gently until it runs clear, but if the foam starts to break up, stop. It is past washing and needs replacing.
7. Refit and test
Put the dry filter back as it came out, without twists or folds, then fit the new bag and clip the head on until it sits securely. Run the hoover for a moment and check that suction is back and that there is no musty smell. If there still is, see below.
Make it a habit to jot the date you washed or replaced the filter on a piece of masking tape stuck inside the cupboard where you keep the hoover, or on your phone calendar. It takes a few seconds and removes the guesswork next time. If you use the Henry for DIY, it is worth keeping a separate bag stock for dusty jobs and binning those bags straight away, away from the house, rather than leaving them in the machine.
Stronger options, and when they are justified
Wash the attachments and hose too
While the filter dries, tackle the other bits. Detach the hose and floor head, and wash the plastic attachments and hose in warm soapy water if the manual allows, then rinse and let them dry fully before reconnecting. Wipe the outside of the drum with a damp cloth and dry it. Keep water out of the motor head and out of any electrical connections, and never wash the head unit.
Replace the filter
Washing does not last forever. Replace it if the foam is crumbling, torn or has holes, if it smells after washing and drying, if it looks permanently compacted, or if suction does not recover once it is clean and dry. There is no fixed lifespan. It depends on how hard the vacuum works, so judge by condition. Check the part number against your model before buying a compatible filter, as fit matters, and a poor fit lets dust past.
Add a HEPA filter if the model takes one
If you hoover dust that triggers allergies, a HEPA filter option may be worth looking at, but only where your model is designed for one. Pleated HEPA filters are replaced, not washed. Remember that a filter does not make a domestic vacuum safe for hazardous dust such as asbestos. If you suspect asbestos in a material, do not disturb or vacuum it and follow the Health and Safety Executive’s advice.
Check the rest of the airway
A clean filter will not help if the problem is elsewhere:
- Bag fitted wrongly. The collar must sit properly on the inlet.
- Hose blockage. Disconnect it and look through, or push a long soft object through carefully.
- Split hose. Run your hand along it while the hoover is on to feel for leaks.
- Tangled brush bar. Turn the floor head over and cut away wrapped hair with scissors, unplugged.
- Loose head. If the clips are not secure, air escapes.
If suction is still poor after all of that, the motor may be worn, and repair or replacement is a job for the manufacturer or a qualified repairer. Do not open the motor housing yourself. Frayed cable, a burning smell or sparks mean you should stop using it and get it checked.
Troubleshooting at a glance
| Symptom | Likely cause | What to do |
|---|---|---|
| Weak suction straight after cleaning | Filter not dry, or bag fitted wrongly | Dry for longer, refit the bag |
| Musty smell | Damp or old filter, dirty bag | Replace bag, wash filter, dry thoroughly or replace it |
| Dust from the exhaust | Torn filter, split bag or loose head | Check the filter for holes and the head clips |
| Motor sounds strained | Blocked airway or filter | Unplug, check the bag, hose and floor head |
| Burning smell, smoke or sparks | Electrical or motor fault | Unplug at once, stop using it and get it checked |
| Loses power while running | Overheating from a blocked airway | Unplug, let it cool, clear the blockage |
Some of these can be a blocked airway, but a burning smell, smoke, sparks or a damaged cable are different. Stop using the machine, unplug it if it is safe to do so, and arrange a repair or replacement.
Keeping the filter cleaner for longer
- Fit a fresh bag before dusty jobs, and change bags before they are completely full, since a packed bag restricts airflow.
- Use bags made for your model. A badly fitting bag can split or leave gaps.
- Do not vacuum damp debris or liquids. Let spills dry or mop them up, as moisture ruins filters.
- Tap the filter out over a bin between washes.
- Store the hoover somewhere dry, so a damp cupboard does not breed mould in the filter.
- Keep a spare filter so you can swap one in while the other dries.
It is also a good moment to give the exterior and attachments a wipe. For other appliances in the same routine, our guides to cleaning a washing machine, a dishwasher and a dryer vent cover similar upkeep, and the best washing machine cleaners go into the products. More appliance and cleaning product guides, and the rest of our cleaning guides, are linked from the home page.
Buying advice in short: spend money on the parts that touch the airflow, namely the right bag and a properly fitting filter. Those are the items where a poor match shows up straight away as weak suction or dust in the room. Cosmetic extras do little. If a listing does not name your model, ask the seller or move on.
What to buy for a Henry
- Replacement filter. Look for one that is listed as compatible with your exact model, with a foam that springs back when pressed. Suits anyone whose filter is torn, smelly or compacted. Avoid ones that do not state the model.
- HEPA filter. Only for models that are designed to take one. Look for the model name and a clear fitting description. Suits households with dust allergies or heavy dust, but it is replaced rather than washed.
- Dust bags. Check the bag is for your model, and look for sturdy construction and a collar that seals. Cheap loose-fitting bags can split. Suits every Henry owner.
- Microfibre cloths. Soft, lint-free cloths for wiping out the housing and attachments with the hoover unplugged. Keep them barely damp, not wet.
Quick answers
Can you wash a Henry filter? Washable foam filters can be rinsed in cool or lukewarm water, but check your manual first. Pleated HEPA and paper filters should be replaced instead.
Can it go in the washing machine? No. Agitation and detergent can damage the foam and leave residue. Rinse by hand under the tap and air dry.
How long should it dry? Allow around a day at room temperature, longer in a cold or damp room. It must feel completely dry all the way through before refitting.
Can I run it with no filter or no bag? No. The filter and bag protect the motor from dust. Running without either risks blocking or damaging the motor and blowing dust into the room.
Why does it still smell musty after cleaning? The filter was probably not dry, or it is past its best. Replace the bag, check the hose and housing, and replace the filter if the smell persists.