How to Clean Extractor Fan Filters: Complete UK Guide 2026
How to clean extractor fan filters depends on your filter type, but most can be cleaned monthly using either your dishwasher or a simple hand-washing method with degreasing solution. Regular cleaning prevents grease buildup, maintains proper ventilation, and extends your extractor fan’s lifespan significantly.
Clean filters are essential for effective kitchen ventilation and preventing fire hazards. Most metal mesh and baffle filters can be cleaned at home, whilst charcoal filters require replacement every 3-6 months.
This comprehensive guide covers everything from identifying your filter type to proper cleaning techniques. Additionally, maintaining clean kitchen appliances like your induction hob alongside your extractor filters ensures optimal kitchen hygiene.
TL;DR
- Metal filters: Clean monthly using dishwasher or hand-wash with degreasing solution
- Charcoal filters: Replace every 3-6 months (cannot be cleaned)
- Safety first: Switch off power, allow cooling, and remove filters carefully
- Maintenance: Regular cleaning prevents grease buildup and maintains ventilation efficiency
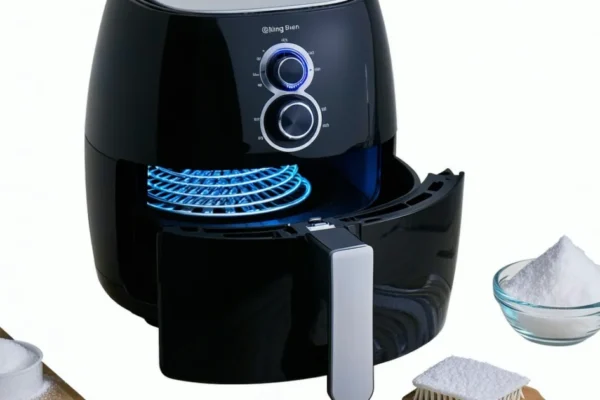
Understanding Your Extractor Fan Filter Type
Before cleaning your extractor fan filters, you must identify which type you have installed. Different filter types require completely different cleaning approaches, and using the wrong method can damage your filters permanently.
Metal Mesh vs Baffle vs Charcoal Filters
Metal mesh filters feature fine aluminium or stainless steel weaving that traps grease particles. These washable filters can withstand dishwasher cycles and degreasing solutions. Meanwhile, baffle filters use angled metal plates to redirect airflow and capture grease through centrifugal force.
Charcoal filters contain activated carbon that absorbs odours and cannot be cleaned. These disposable filters must be replaced every 3-6 months depending on cooking frequency. Attempting to wash charcoal filters destroys their absorption properties completely.
| Filter Type | Material | Cleaning Method | Replacement Frequency |
|---|---|---|---|
| Metal Mesh | Aluminium/Steel | Dishwasher or hand-wash | Clean monthly |
| Baffle | Stainless steel | Dishwasher or hand-wash | Clean monthly |
| Charcoal | Activated carbon | Replace only | Every 3-6 months |
Kitchen vs Bathroom Extractor Filters
Kitchen extractor fans typically use metal mesh or baffle filters designed to handle grease and cooking vapours. These filters require frequent cleaning due to heavy grease accumulation from frying, roasting, and general cooking activities.
Conversely, bathroom extractor fans often use simple mesh filters or no filters at all. Bathroom filters primarily collect dust, hair, and moisture rather than grease. Therefore, these filters need gentler cleaning methods and less frequent maintenance.
Dishwasher-Safe vs Hand-Wash Only Identification
Most aluminium and stainless steel filters are dishwasher-safe and can handle high temperatures and strong detergents. However, some filters have special coatings or delicate components that require hand-washing only.
Look for dishwasher-safe symbols on your filters or check for manufacturer markings. Additionally, filters with plastic components, painted surfaces, or electronic elements must be hand-washed to prevent damage.
- Dishwasher-safe indicators: Solid metal construction, dishwasher symbol, stainless steel material
- Hand-wash only signs: Plastic parts, painted surfaces, electronic components, manufacturer warnings
Checking Manufacturer Specifications
Always consult your extractor fan manual before cleaning filters. Manufacturer specifications provide exact cleaning instructions, replacement schedules, and compatibility information for your specific model.
Furthermore, filter markings often include model numbers, material specifications, and cleaning symbols. These markings help you identify replacement parts and determine appropriate cleaning methods. When manufacturer information is unavailable, contact the retailer or search online using your extractor fan’s model number.
Some filters also display replacement dates or usage indicators that change colour when cleaning or replacement becomes necessary. Regular inspection of these indicators ensures optimal filter performance and kitchen air quality.
When and How Often to Clean Extractor Fan Filters
Establishing a proper cleaning schedule ensures your extractor fan filters maintain optimal performance and extend their lifespan. The frequency of filter cleaning depends on your cooking habits, household size, and the types of meals you prepare regularly.
Monthly Cleaning for Heavy Cooking Households
Households that cook daily or prepare greasy meals frequently require monthly filter cleaning. Heavy cooking includes frying, grilling, roasting, and preparing spicy dishes that generate substantial smoke and grease particles.
Moreover, families with four or more members typically fall into this category due to increased cooking volume. Commercial-style cooking, frequent entertaining, and multiple daily meal preparations also necessitate monthly maintenance schedules.
Bi-Monthly Cleaning for Moderate Use
Moderate cooking households can clean their filters every six to eight weeks without compromising performance. This schedule suits families who cook three to four times weekly or primarily prepare lighter meals with minimal grease production.
Additionally, households that rely heavily on steaming, boiling, or microwave cooking generate less airborne grease. These cooking methods produce fewer particles that clog filter mesh, allowing for extended cleaning intervals.
Warning Signs for Immediate Filter Cleaning
Several indicators signal that your filters need immediate attention regardless of your regular cleaning schedule. Recognising these warning signs prevents damage to your extractor fan motor and maintains kitchen air quality.
- Reduced suction power during normal operation
- Visible grease accumulation on filter surfaces
- Unpleasant odours persisting after cooking
- Increased noise levels from the fan motor
- Grease dripping from the filter onto cooking surfaces
Furthermore, reduced airflow often manifests as steam lingering longer than usual or cooking smells spreading throughout your home. These symptoms indicate that grease buildup restricts air passage through the filter mesh.
Seasonal Deep Cleaning Recommendations
Seasonal deep cleaning complements your regular maintenance routine and addresses accumulated residue that standard cleaning might miss. Schedule thorough filter cleaning during spring and autumn when you typically perform other household maintenance tasks.
Deep cleaning involves extended soaking periods, stronger degreasing solutions, and detailed inspection of filter components. This process removes stubborn grease deposits and allows you to assess filter condition for potential replacement needs.
Similarly, seasonal cleaning provides an opportunity to clean surrounding kitchen surfaces and inspect your extractor fan’s overall condition. This comprehensive approach maintains optimal kitchen ventilation and prevents costly repairs from neglected maintenance.
Clean filters every 4-6 weeks for heavy use, 6-8 weeks for moderate cooking
Safety Preparation and Filter Removal
Proper safety preparation prevents electrical hazards and protects your kitchen surfaces during extractor fan filter cleaning. Therefore, switching off the power supply represents the first critical step in safe filter removal.
Turn off your extractor fan at the wall switch and unplug the unit if accessible. Additionally, allow the fan motor to cool completely for 15-20 minutes after operation, as heated components can cause burns during handling.
Protecting Surrounding Surfaces
Grease accumulation on filters creates dripping hazards that can stain countertops and damage appliances below. Consequently, place absorbent towels or newspaper beneath the extractor fan before beginning removal.
Cover nearby surfaces including your hob and worktops with protective sheeting. Moreover, keep cleaning cloths within reach to address any immediate spills during the removal process.
Safe Filter Removal Techniques
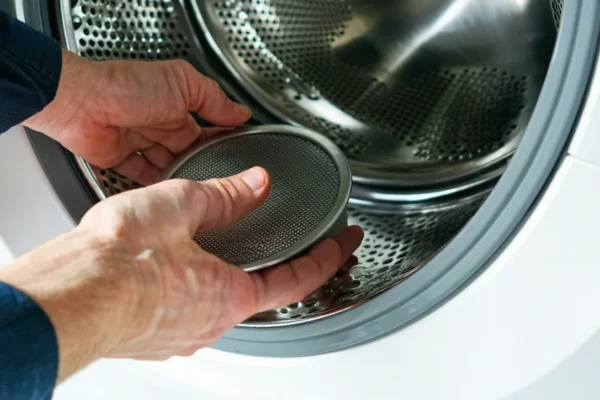
Extractor fan filters typically secure with spring-loaded clips or twist-lock mechanisms that require gentle handling to prevent damage. First, examine your specific filter mounting system before attempting removal.
Press the release clips simultaneously while supporting the filter weight with your other hand. Furthermore, avoid forcing stubborn filters, as excessive pressure can break plastic clips or bend metal housing components.
Some filters feature sliding tracks that require pulling the filter straight down rather than angling it outward. Always check your manufacturer’s instructions for model-specific removal procedures.
Documentation for Reassembly
Taking reference photographs prevents confusion during reassembly and ensures proper filter orientation. Capture images showing filter positioning, clip locations, and any directional arrows or markings.
Document the filter’s orientation before removal, noting which side faces the cooking surface. Additionally, photograph any gaskets or seals that might shift during cleaning to maintain proper positioning.
Store your reference photos on your phone for easy access during reassembly. These visual guides prove invaluable when dealing with complex multi-layer filter systems or unfamiliar extractor fan models.
Dishwasher Method for Compatible Filters
Modern dishwashers offer an efficient cleaning solution for dishwasher-safe extractor fan filters, but compatibility verification prevents costly damage. Check for dishwasher-safe symbols on your filter housing or manufacturer documentation before proceeding.
Look for specific markings including water droplet symbols, dishwasher icons, or temperature ratings on the filter frame. Additionally, aluminium mesh filters typically withstand dishwasher cleaning, while some charcoal filters require hand washing only.
Pre-Treatment for Heavily Soiled Filters
Pre-rinsing removes excess grease buildup that could clog your dishwasher’s drainage system during the wash cycle. Rinse filters under warm running water to eliminate loose debris and food particles.
Scrape away stubborn grease deposits using a soft brush or plastic scraper before loading. However, avoid harsh scrubbing that might damage delicate mesh structures or protective coatings.
Optimal Dishwasher Settings and Detergent Selection
Select the normal wash cycle with water temperatures between 50-60°C for effective grease removal without damaging filter materials. Furthermore, avoid intensive or sanitising cycles that generate excessive heat.
Use standard dishwasher detergent rather than harsh degreasers that might corrode metal components. Meanwhile, cleaning your dishwasher filter regularly ensures optimal performance during extractor filter washing.
Skip the heated dry cycle to prevent warping of plastic components or damage to rubber seals. Instead, allow filters to air dry completely before reinstallation.
Strategic Filter Positioning
Position filters vertically in the bottom rack to maximise water circulation and prevent them from blocking spray arms during operation. Secure lightweight filters with dishwasher-safe clips if they tend to float.
Separate multiple filters to prevent them from nesting together, which reduces cleaning effectiveness. Moreover, ensure filters don’t contact heating elements or moving parts that could cause damage.
Place heavily soiled surfaces facing the centre spray arm for maximum water pressure exposure. Consequently, this positioning optimises cleaning action while protecting delicate filter edges from dishwasher rack damage.
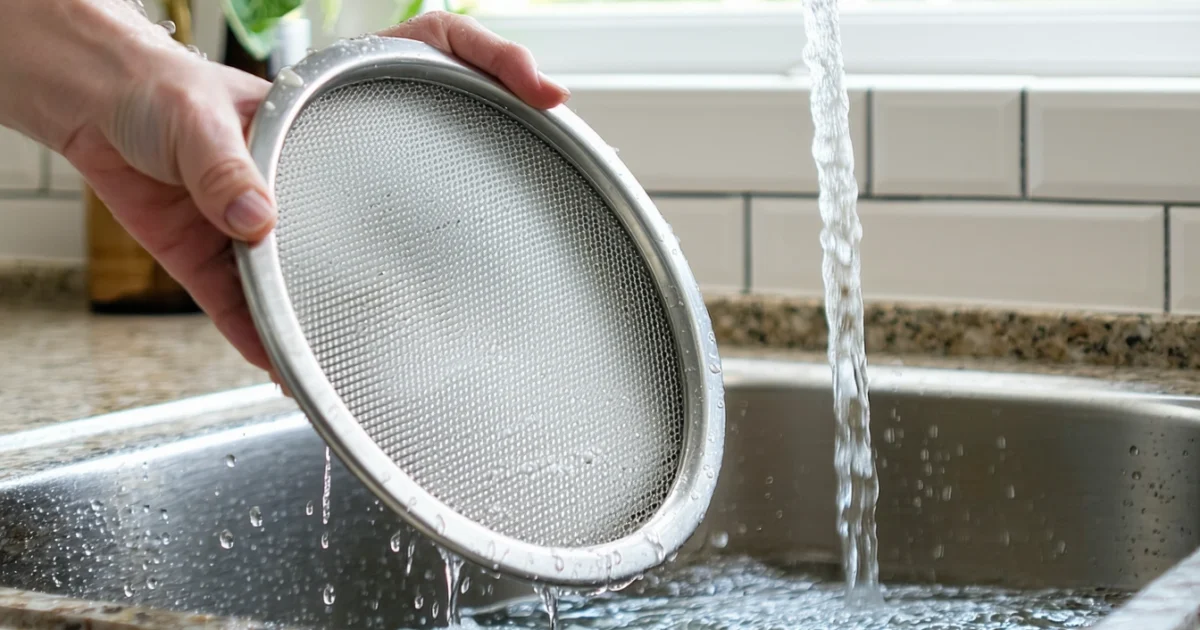
Hand Washing Method for All Filter Types
Hand washing provides superior control over cleaning intensity and allows you to target specific grease accumulations effectively. Additionally, this method works best for delicate mesh filters and heavily soiled baffle systems that require careful attention.
Creating Effective Degreasing Solution
Mix two tablespoons of washing up liquid with one tablespoon of baking soda in a large basin filled with hot water. The alkaline baking soda breaks down acidic grease deposits while the surfactants in washing up liquid lift oil particles from filter surfaces.
Create a paste using equal parts baking soda and washing up liquid for stubborn grease spots that resist standard cleaning solutions. Furthermore, this concentrated mixture targets carbonised deposits without scratching delicate filter materials.
Test water temperature by ensuring it feels comfortably hot to your hands, typically around 40-45°C. However, avoid boiling water that might warp plastic components or damage protective coatings on metal filters.
Soaking Time Requirements for Different Grease Levels
| Grease Level | Soaking Time | Solution Strength |
|---|---|---|
| Light buildup | 15-20 minutes | Standard mixture |
| Moderate grease | 30-45 minutes | Double detergent concentration |
| Heavy deposits | 60-90 minutes | Paste application + soaking |
Lightly soiled filters from weekly cleaning require minimal soaking time to soften surface grease. Meanwhile, filters cleaned monthly need extended soaking periods to penetrate hardened oil layers.
Heavily neglected filters benefit from pre-treatment with concentrated paste before full immersion soaking. Subsequently, this two-stage approach loosens stubborn deposits that resist standard cleaning methods.
Scrubbing Techniques for Mesh and Baffle Filters
Mesh filters require gentle circular motions using soft-bristled brushes to avoid tearing delicate metal weaves. Work systematically across the entire surface, paying special attention to corners where grease accumulates most heavily.
Baffle filters respond well to back-and-forth scrubbing along the grooved channels where grease flows during operation. Additionally, clean both sides thoroughly since grease penetrates through the baffle system during cooking.
Apply moderate pressure while scrubbing to remove embedded particles without damaging filter structures. Moreover, rinse frequently during cleaning to monitor progress and prevent redistributing loosened grease across clean areas.
Using Soft Brushes to Avoid Damaging Filter Material
Select soft-bristled brushes specifically designed for delicate surfaces rather than abrasive scouring pads that scratch protective coatings. Natural bristle brushes work exceptionally well for removing grease without creating microscopic scratches that trap future deposits.
Old toothbrushes provide excellent precision for cleaning intricate mesh patterns and tight corners where standard brushes cannot reach effectively. However, ensure bristles remain soft and replace worn brushes that develop sharp edges.
Avoid steel wool, abrasive sponges, or harsh scrubbing tools that permanently damage filter surfaces and reduce their effectiveness. Instead, patience and gentle persistence achieve superior cleaning results while preserving filter integrity for years of reliable service.
Rinse filters thoroughly with hot water after scrubbing to remove all soap residues and loosened grease particles. Finally, inspect cleaned filters under good lighting to ensure complete grease removal before proceeding to the drying stage.
Dealing with Stubborn Grease and Heavy Buildup
Heavily soiled extractor fan filters require more aggressive cleaning approaches when standard washing methods prove insufficient. Furthermore, commercial-grade grease deposits often accumulate over months of neglect, creating hardened layers that resist conventional cleaning solutions.
Commercial Degreasing Products for Tough Stains
Alkaline degreasers break down stubborn grease molecules more effectively than household detergents through their high pH formulation. Products containing sodium hydroxide or potassium hydroxide dissolve even the most persistent cooking residues within minutes of application.
Apply commercial degreasers according to manufacturer instructions, typically allowing 10-15 minutes contact time for maximum effectiveness. However, always wear rubber gloves and ensure adequate ventilation since these products contain caustic chemicals that irritate skin and respiratory systems.
Enzyme-based cleaners offer gentler alternatives that digest grease proteins naturally without harsh chemical reactions. These biological solutions work particularly well on organic deposits but require longer contact times, typically 30-60 minutes for complete breakdown.
Hot Water and Extended Soaking Methods
Extended soaking in hot water (60-70°C) softens hardened grease layers through thermal expansion and molecular loosening. Additionally, prolonged exposure allows cleaning solutions to penetrate deeply into porous filter materials where grease accumulates over time.
Create soaking solutions by combining hot water with washing-up liquid or biological washing powder in large containers or clean sinks. Submerge filters completely and maintain water temperature through periodic hot water additions during the soaking process.
Optimal soaking times range from 2-4 hours for moderately soiled filters to overnight for severely neglected units. Nevertheless, check progress periodically and agitate filters gently to encourage grease release from stubborn areas.
Safe Scraping Techniques for Caked-On Grease
Use plastic scrapers or wooden spatulas to remove thick grease deposits without scratching delicate filter surfaces. Metal tools create permanent damage that reduces filtration efficiency and creates rough surfaces where future grease adheres more readily.
Work systematically across filter surfaces, applying gentle pressure while scraping in the direction of mesh patterns or baffle channels. Moreover, frequently clean scraper edges to prevent redistributing loosened grease across previously cleaned areas.
Remove large grease chunks before immersing filters in cleaning solutions to prevent clogging drainage systems. Similarly, natural cleaning methods can complement scraping techniques for thorough grease removal without harsh chemicals.
When Professional Cleaning or Replacement is Needed
Filters showing permanent discoloration, structural damage, or persistent odours after thorough cleaning require professional assessment or replacement. Additionally, warped or cracked filters compromise extraction efficiency and potentially create fire hazards through impaired grease collection.
Professional cleaning services use ultrasonic cleaning tanks and industrial-strength degreasers that achieve results impossible with domestic methods. These services typically cost £15-30 per filter but restore heavily contaminated units to near-new condition.
Consider replacement when cleaning costs exceed 50% of new filter prices or when filters show signs of metal corrosion that affects structural integrity. Furthermore, aluminium mesh filters generally last 5-7 years with proper maintenance, while stainless steel baffles can serve effectively for 10-15 years under normal usage conditions.
Proper Drying and Reinstallation
Complete air drying prevents mould growth and metal corrosion that compromises filter longevity and extraction performance. Therefore, position cleaned filters in well-ventilated areas away from direct sunlight, which can warp aluminium mesh or damage plastic components.
Allow 24-48 hours drying time for thorough moisture evaporation, particularly within deep baffle channels where water commonly pools. Additionally, shake filters gently every few hours to dislodge trapped water droplets from mesh openings and crevices.
Damage Assessment Before Reinstallation
Inspect dried filters systematically for structural damage, including cracks, bent frames, or loose mesh sections that affect filtration efficiency. Furthermore, check for persistent grease residue that indicates incomplete cleaning and requires additional treatment cycles.
Examine filter edges for sharp burrs or damaged mounting points that prevent secure installation. Similarly, verify that cleaning processes haven’t compromised filter dimensions or caused warping that interferes with proper housing fit.
Correct Filter Orientation and Fitting
Install filters with grease collection channels facing downward to ensure proper drainage toward collection trays. Moreover, align mounting tabs precisely with housing slots to prevent gaps that allow unfiltered air bypass around filter edges.
Secure filters firmly using original clips or fasteners, ensuring even pressure distribution across mounting points. Additionally, verify that multiple filters sit flush against each other without overlapping or creating gaps between units.
Double-check filter positioning by gently tugging each unit to confirm secure attachment before closing extractor housing. Consequently, proper installation prevents filter displacement during operation and maintains consistent extraction performance.
Testing Extractor Fan Operation
Test fan operation immediately after reinstallation by running the extractor on low speed for several minutes while monitoring for unusual noises or vibrations. Furthermore, gradually increase speed settings to verify smooth operation across all power levels.
Check extraction efficiency by observing steam dispersal during cooking activities, ensuring vapours draw effectively toward the filter housing. Similarly, listen for changes in motor sound that might indicate airflow restrictions or improper filter installation.
Inspect the area around filters during initial operation for air leaks that create whistling sounds or reduced suction power. Proper ventilation maintenance ensures optimal performance and prevents moisture-related issues throughout your home’s extraction systems.
Charcoal Filter Replacement Guidelines
Unlike grease filters, charcoal filters cannot be cleaned and require complete replacement when saturated. These activated carbon filters absorb odours through chemical adsorption, which permanently binds molecules to the carbon surface. Consequently, washing or cleaning attempts damage the carbon structure and eliminate odour-absorbing properties entirely.
The porous carbon material becomes progressively saturated with cooking vapours, grease particles, and airborne contaminants over time. Therefore, cleaning solutions cannot reverse this saturation process or restore the filter’s original absorption capacity.
Replacement Frequency Standards
Standard replacement intervals range from three to six months depending on cooking frequency and extraction usage patterns. Heavy cooking households require more frequent replacements, typically every three months, while moderate users can extend intervals to six months maximum.
| Cooking Frequency | Replacement Interval | Usage Indicators |
|---|---|---|
| Daily cooking | 3 months | Heavy frying, strong odours |
| Regular cooking | 4 months | Moderate use, occasional frying |
| Light cooking | 6 months | Minimal frying, light cooking |
Additionally, monitor filter performance indicators such as persistent cooking odours, reduced extraction efficiency, or visible discolouration around filter edges. These signs indicate carbon saturation regardless of time intervals.
Finding Compatible Replacement Filters
Locate your extractor model number on the manufacturer’s label, typically found inside the filter housing or on the motor unit. Subsequently, search for genuine replacement filters using this specific model identifier to ensure proper fit and performance.
Measure existing filter dimensions as a backup verification method, recording length, width, and thickness in millimetres. Furthermore, note the mounting system type, whether clip-on, slide-in, or twist-lock mechanisms, to match replacement units correctly.
Purchase filters from authorised dealers or reputable suppliers to guarantee authentic carbon quality and proper filtration efficiency. However, avoid generic substitutes that may not meet manufacturer specifications or provide adequate odour absorption.
Proper Disposal Methods
Used charcoal filters belong in general household waste bins rather than recycling streams due to their mixed material composition. The combination of activated carbon, plastic frames, and accumulated grease prevents effective recycling processing.
Seal old filters in plastic bags before disposal to prevent carbon dust dispersion and contain absorbed odours during waste collection. Moreover, check with local councils for specific disposal guidelines, as some areas offer specialised collection services for kitchen extraction components.
Never attempt to regenerate charcoal filters through heating or chemical treatment, as these methods create safety hazards and release concentrated contaminants. Instead, prioritise regular replacement schedules to maintain optimal extraction performance and indoor air quality throughout your kitchen space.
Maintaining Clean Filters and Preventing Buildup
Consistent maintenance practices extend filter lifespan significantly while ensuring optimal extraction performance throughout your kitchen. Proper usage habits combined with regular cleaning routines prevent excessive grease accumulation and maintain air quality standards.
Using Extractor Fans During and After Cooking
Activate your extractor fan before starting any cooking process to establish proper airflow patterns and prevent initial grease particles from settling. Additionally, maintain fan operation for 10-15 minutes after cooking completion to capture residual steam and airborne contaminants effectively.
High-heat cooking methods require maximum extraction speeds to handle increased grease production and steam generation. Consequently, adjust fan settings based on cooking intensity rather than maintaining constant low speeds throughout meal preparation.
Steam from boiling, frying, and grilling carries grease particles that settle on filter surfaces when extraction proves inadequate. Therefore, proper fan timing reduces filter contamination rates and extends cleaning intervals between maintenance sessions.
Regular Light Cleaning Between Deep Cleans
Weekly surface cleaning prevents grease buildup from hardening and becoming difficult to remove during monthly deep cleaning sessions. Furthermore, light maintenance involves wiping visible filter surfaces with warm, soapy water using microfibre cloths.
Remove loose debris and surface grease using gentle brushing motions rather than aggressive scrubbing that damages filter materials. Moreover, focus cleaning attention on heavily soiled areas where cooking vapours concentrate most frequently.
Quick rinses under warm running water help maintain filter cleanliness between thorough washing cycles. However, ensure complete drying before reinstallation to prevent moisture-related issues and bacterial growth within extraction systems.
Adjusting Cleaning Frequency Based on Cooking Habits
Heavy cooking households require weekly filter cleaning to manage increased grease production from frequent meal preparation. Conversely, light cooking patterns allow monthly cleaning schedules while maintaining adequate filtration performance.
- Daily frying or grilling: Clean filters twice weekly
- Regular home cooking: Weekly cleaning recommended
- Occasional cooking: Fortnightly maintenance sufficient
- Minimal kitchen use: Monthly cleaning adequate
Cooking styles significantly impact filter contamination rates, with high-fat cooking methods producing more airborne grease particles. Similarly, glass stovetop cleaning requires similar attention to grease management for optimal kitchen hygiene.
Monitor filter appearance weekly to assess cleaning needs rather than following rigid schedules that may not match actual usage patterns. Therefore, visual inspection guides maintenance timing more effectively than predetermined intervals.
Signs of Filter Deterioration Requiring Replacement
Metal mesh filters develop permanent discolouration and structural damage that cleaning cannot reverse after extended use periods. Additionally, bent or warped filter frames indicate replacement necessity to maintain proper sealing and extraction efficiency.
Persistent odours remaining after thorough cleaning suggest filter saturation beyond recovery capabilities. Furthermore, visible rust spots or corrosion on metal components compromise structural integrity and filtration performance significantly.
Reduced extraction efficiency becomes apparent when cooking vapours linger despite proper fan operation and clean filter installation. Consequently, replacement becomes necessary when cleaning efforts fail to restore original performance levels.
Replace metal filters every 2-3 years with regular cleaning, or sooner if damage occurs
Charcoal filters lose absorption capacity gradually and require replacement every 3-6 months depending on cooking frequency and extraction demands. However, saturated carbon filters cannot be regenerated through cleaning and must be discarded when odour control diminishes.
Frequently Asked Questions
How often should I clean my extractor fan filters?
Metal mesh and baffle filters should be cleaned monthly to prevent grease buildup and maintain proper ventilation. Charcoal filters cannot be cleaned and must be replaced every 3-6 months depending on your cooking frequency.
Can I put my extractor fan filters in the dishwasher?
Most aluminium and stainless steel filters are dishwasher-safe and can handle high temperatures. However, filters with plastic components, painted surfaces, or electronic elements must be hand-washed only. Always check for dishwasher-safe symbols or manufacturer markings before using your dishwasher.
What's the difference between metal mesh and baffle filters?
Metal mesh filters feature fine aluminium or stainless steel weaving that traps grease particles directly. Baffle filters use angled metal plates to redirect airflow and capture grease through centrifugal force. Both types are washable and require monthly cleaning.
Why can't I clean charcoal filters?
Charcoal filters contain activated carbon that absorbs odours through chemical processes. Washing these filters with water or detergent destroys their absorption properties completely, making them ineffective. They must be replaced rather than cleaned.
What safety precautions should I take when removing filters?
- Switch off power to the extractor fan at the mains
- Allow the fan to cool completely before handling
- Remove filters carefully to avoid dropping them
- Wear gloves to protect hands from sharp edges and grease
How do I know if my filters need replacing instead of cleaning?
Replace filters if they show visible damage such as holes, bent mesh, or broken baffle plates. Additionally, if filters remain greasy after thorough cleaning or if your extractor fan’s performance has declined significantly, replacement may be necessary. Charcoal filters always require replacement rather than cleaning.
What cleaning solution works best for greasy extractor filters?
Use a degreasing solution specifically designed for kitchen appliances, or create your own using warm water with washing-up liquid. For heavily soiled filters, soak them for 15-30 minutes before scrubbing. Avoid harsh chemicals that could damage the filter material or leave residues.
Are kitchen and bathroom extractor filters cleaned the same way?
Kitchen filters handle grease and require frequent, thorough cleaning with degreasing solutions. Bathroom filters primarily collect dust and moisture, needing gentler cleaning methods and less frequent maintenance. Kitchen filters typically need monthly cleaning, whilst bathroom filters can be cleaned every 2-3 months.
You May Also Like
How to Clean Washing Machine Filter: Complete Guide 2026

How to Clean Artificial Grass: Complete Maintenance Guide