How to Clean an Oven: Complete UK Guide for 2026
How to clean an oven effectively requires the right preparation, cleaning methods, and safety precautions to restore your appliance to pristine condition. Whether you’re dealing with burnt-on grease, stubborn food stains, or simply maintaining your oven’s performance, this comprehensive guide covers everything from natural cleaning solutions to professional techniques.
Most UK households rely on their ovens daily, yet many people avoid this essential cleaning task. Consequently, grease and food debris accumulate over time, affecting both cooking performance and food safety. However, with the proper approach and tools, oven cleaning becomes a manageable task that delivers impressive results.
This guide explores multiple cleaning methods, including natural household ingredients like baking soda and white vinegar, as well as commercial cleaning products available in the UK. Additionally, we’ll cover safety guidelines, professional services, and maintenance tips to keep your oven spotless year-round. For those dealing with particularly stubborn glass stains, our detailed guide on how to clean inside oven door glass provides specialised techniques.
TL;DR – Quick Oven Cleaning Summary
- Preparation is key: Turn off power, remove racks, and gather cleaning supplies before starting
- Natural methods work: Baking soda paste and white vinegar effectively tackle most oven grime
- Commercial cleaners: Choose foam, gel, or spray cleaners based on your oven’s condition
- Safety first: Always ensure proper ventilation and wear protective equipment
- Regular maintenance: Clean spills immediately and deep clean every 3-6 months
- Professional option: Consider professional services for heavily soiled ovens or time constraints
Essential Preparation Before Cleaning Your Oven
Proper preparation forms the foundation of successful oven cleaning. Indeed, taking time to prepare thoroughly prevents accidents and ensures optimal results. Moreover, this systematic approach saves time during the actual cleaning process.
Safety Precautions and Protective Equipment
Safety must remain your top priority throughout the cleaning process. Therefore, gather essential protective equipment before beginning any work. Specifically, you’ll need rubber gloves, safety goggles, and a dust mask to protect against chemical fumes and debris.
Additionally, ensure adequate ventilation by opening windows and doors. Chemical cleaners release potentially harmful vapours that require proper air circulation. Furthermore, keep children and pets away from the cleaning area to prevent accidental exposure to cleaning products.
Power Disconnection and Cooling
Always disconnect your oven from the power supply before cleaning begins. Electric ovens require unplugging from the mains, whilst gas ovens need the gas supply turned off at the isolation valve. However, never attempt to move a built-in oven without professional assistance.
Cooling time proves absolutely critical for safety. Consequently, allow at least 2-3 hours after cooking before starting any cleaning work. Hot surfaces can cause severe burns and make cleaning products less effective.
Removing Oven Components
Systematic removal of oven accessories creates better access for thorough cleaning. Start by carefully lifting out all oven racks, baking trays, and roasting tins. Similarly, remove the drip pan and any wire shelves that detach easily.
Clean these components separately in your sink or bathtub for best results. Meanwhile, this removal process reveals hidden areas that accumulate grease and food particles over time.
Gathering Cleaning Supplies and Tools
Effective oven cleaning requires specific supplies and tools. Therefore, assemble everything before starting to avoid interruptions during the process. Essential items include baking soda, white vinegar, dish soap, and warm water for natural cleaning methods.
Commercial options encompass oven cleaning sprays, foam cleaners, and gel products designed specifically for heavy-duty degreasing. Additionally, gather microfibre cloths, scrubbing brushes, plastic scrapers, and old newspapers for various cleaning tasks.
Protecting Kitchen Surfaces
Kitchen protection prevents damage to surrounding areas during cleaning. Consequently, lay old towels or plastic sheeting around the oven base to catch drips and debris. Furthermore, cover nearby countertops and appliances with protective materials.
Floor protection proves equally important, as cleaning solutions can stain or damage various flooring types. Therefore, place cardboard or plastic sheeting beneath your work area to prevent accidental spills.
Manufacturer Guidelines
Consulting your oven manual provides valuable manufacturer-specific guidance. Indeed, different oven types require tailored cleaning approaches to avoid damage. For example, self-cleaning ovens have specific operational requirements that differ from conventional models.
Warranty considerations also influence cleaning method selection. Additionally, some manufacturers recommend particular cleaning products whilst prohibiting others. Similar to our guide on cleaning oven door glass, following manufacturer instructions ensures safe and effective results.
Professional cleaning services understand these manufacturer requirements thoroughly. However, DIY cleaning remains achievable with proper preparation and attention to detail.
Natural Oven Cleaning Methods Using Household Items
Natural cleaning solutions offer safe alternatives to harsh chemical products. Household ingredients effectively tackle grease, grime, and burnt-on residue without toxic fumes. Moreover, these eco-friendly methods protect your family’s health whilst delivering professional-quality results.
Baking Soda Paste Method for Deep Cleaning
Baking soda creates a powerful alkaline paste that breaks down stubborn grease and food residue. Specifically, mix three parts baking soda with one part water to form a thick, spreadable consistency. This natural abrasive removes burnt-on deposits without scratching oven surfaces.
Apply the paste generously to interior surfaces, avoiding heating elements and fan areas. Additionally, focus on heavily soiled areas like the oven floor and door interior. Leave the mixture overnight for maximum effectiveness, as extended contact time enhances cleaning power.
Remove the dried paste using a plastic scraper or damp cloth the following day. Furthermore, stubborn areas may require gentle scrubbing with a soft brush. Similar to cleaning oven door glass, patience and persistence deliver superior results.
White Vinegar Spray for Cutting Through Grease
White vinegar contains acetic acid that naturally dissolves grease and neutralises alkaline residues. Therefore, combine equal parts white vinegar and warm water in a spray bottle for optimal cleaning strength. This acidic solution effectively cuts through accumulated cooking fats.
Spray the vinegar solution onto baking soda residue to create a foaming reaction. Consequently, this chemical interaction lifts stubborn deposits from oven surfaces. The foaming action indicates active cleaning, making removal significantly easier.
Wipe surfaces clean with microfibre cloths after the foaming subsides. However, avoid spraying vinegar directly onto heating elements or electronic components to prevent damage.
Lemon Juice for Natural Deodorising and Stain Removal
Fresh lemon juice provides natural citric acid that breaks down grease whilst eliminating cooking odours. Indeed, lemons contain powerful degreasing compounds that rival commercial cleaners. Additionally, the fresh citrus scent leaves your oven smelling naturally clean.
Create a cleaning solution by mixing half a cup of lemon juice with two cups of warm water. Alternatively, cut fresh lemons in half and rub directly onto stained surfaces for concentrated cleaning power. The natural oils in lemon peel enhance the degreasing effect.
Heat-activated lemon cleaning proves particularly effective for removing stubborn stains. Specifically, place lemon halves in an oven-safe dish with water, then heat at 200°C for 30 minutes. The resulting steam softens deposits whilst infusing natural fragrance throughout the oven cavity.
Salt for Scrubbing Stubborn Burnt-on Food
Coarse salt acts as a natural abrasive that removes burnt-on food without damaging oven surfaces. Moreover, salt absorbs grease and moisture, making stubborn deposits easier to remove. This mineral-based approach proves especially effective on oven floors and grill pans.
Sprinkle salt generously over burnt areas whilst the oven remains slightly warm. Consequently, the heat helps salt penetrate hardened deposits more effectively. Scrub gently with a damp cloth or soft brush to lift stubborn residue.
Combining salt with lemon juice creates a powerful natural scouring paste. Furthermore, this mixture tackles the most challenging burnt-on deposits without harsh chemicals. The abrasive action removes debris whilst the acid dissolves grease simultaneously.
Steam Cleaning Technique Using Water and Natural Ingredients
Steam cleaning softens deposits using heated water vapour and natural additives. Therefore, fill an oven-safe bowl with two cups of water and add natural cleaning agents for enhanced effectiveness. This gentle method loosens grime without aggressive scrubbing.
Add two tablespoons of white vinegar or lemon juice to the water for improved degreasing action. Additionally, a few drops of essential oils provide pleasant fragrance whilst maintaining natural cleaning principles. Place the bowl on the middle oven rack for optimal steam distribution.
Heat the oven to 180°C for 45 minutes to generate sufficient steam throughout the cavity. Consequently, the heated vapour penetrates stubborn deposits, making removal significantly easier. Turn off the oven and allow cooling before wiping surfaces clean with microfibre cloths.
Combining Natural Ingredients for Maximum Effectiveness
Strategic ingredient combinations amplify natural cleaning power beyond individual components. However, understanding chemical interactions ensures safe and effective results. For example, combining acidic and alkaline ingredients creates powerful foaming reactions that lift stubborn deposits.
Create a multi-stage cleaning system using complementary natural ingredients sequentially. Specifically, apply baking soda paste first, followed by vinegar spray to activate foaming. Finally, use lemon juice for deodorising and final stain removal.
Professional cleaning services often employ similar natural ingredient combinations for eco-friendly oven maintenance. Indeed, these household methods deliver comparable results to commercial products whilst protecting indoor air quality. Additionally, natural ingredients cost significantly less than specialised cleaning products, making regular oven maintenance more affordable.
Commercial Oven Cleaning Products and Application
Types of Commercial Oven Cleaners Available in the UK
UK retailers stock numerous commercial oven cleaning products designed for different cleaning challenges. However, understanding product categories helps consumers select appropriate solutions for their specific needs. Caustic cleaners contain sodium hydroxide for heavy-duty degreasing, whilst non-caustic alternatives offer gentler formulations for regular maintenance.
Professional-grade products typically feature higher active ingredient concentrations than domestic versions. Furthermore, enzyme-based cleaners break down organic matter naturally without harsh chemicals. Meanwhile, biodegradable formulations provide eco-friendly options that maintain cleaning effectiveness.
Foam Cleaners vs Gel Cleaners vs Spray Cleaners
Each cleaner type offers distinct advantages for specific oven cleaning applications. Foam cleaners cling to vertical surfaces longer, providing extended contact time for stubborn deposits. Specifically, foam formulations expand upon application, covering larger surface areas efficiently.
Conversely, gel cleaners deliver concentrated cleaning power with minimal dripping. Additionally, gel consistency allows precise application to targeted areas requiring intensive treatment. Spray cleaners offer convenient coverage for routine cleaning tasks, particularly on easily accessible surfaces.
Professional cleaners often combine multiple product types for comprehensive oven restoration. Indeed, starting with foam for initial loosening, followed by gel for stubborn areas, maximises cleaning efficiency. Therefore, understanding each format’s strengths enables optimal product selection for specific cleaning challenges.
Reading Product Labels and Safety Instructions
Careful label examination prevents accidents and ensures effective product use. Moreover, active ingredient listings reveal cleaning power and potential hazards requiring specific precautions. For example, products containing potassium hydroxide require protective equipment and adequate ventilation during application.
Safety data sheets provide comprehensive hazard information beyond basic label warnings. Consequently, consulting these documents before use protects users from chemical exposure risks. First aid instructions outline immediate response procedures for accidental contact or ingestion.
Product concentration levels determine dilution requirements and application methods. Specifically, ready-to-use formulations require no mixing, whilst concentrate products need precise dilution ratios for safe and effective use. Additionally, storage requirements maintain product stability and prevent degradation.
Proper Application Techniques for Maximum Results
Strategic application methods significantly improve cleaning outcomes whilst minimising product waste. However, surface preparation enhances cleaner penetration and effectiveness. Remove loose debris and food particles before applying commercial cleaning products for optimal results.
Apply cleaners systematically, starting from top surfaces and working downward to prevent recontamination. Furthermore, maintaining consistent coverage ensures uniform cleaning action across all oven surfaces. Contact time varies by product formulation, typically ranging from 15 to 60 minutes for maximum effectiveness.
Temperature affects cleaning chemical activity, with warm surfaces enhancing product performance. Therefore, slightly warming the oven before application accelerates grease breakdown and stain removal. Similarly to cleaning oven door glass, proper technique prevents streaking and ensures thorough cleaning.
Ventilation Requirements When Using Chemical Cleaners
Adequate ventilation prevents harmful fume accumulation during commercial cleaner application. Specifically, open windows and doors create cross-ventilation that removes chemical vapours from indoor air. Additionally, exhaust fans accelerate air circulation and reduce exposure risks.
Chemical cleaners release volatile organic compounds that can cause respiratory irritation. Consequently, maintaining air changes per hour above 6 provides sufficient ventilation for safe cleaning operations. Professional cleaning services often use portable ventilation equipment for enhanced safety.
Never use commercial oven cleaners in enclosed spaces without proper ventilation systems. Indeed, confined areas concentrate chemical vapours to dangerous levels, potentially causing health complications. Therefore, ensuring adequate airflow protects both users and household occupants during cleaning procedures.
Recommended Brands and Products for 2026
Easy-Off Professional remains the leading choice among UK cleaning professionals for heavy-duty oven restoration. However, Oven Pride offers excellent value with effective grease-cutting formulations suitable for domestic use. Additionally, Astonish Oven Cleaner provides budget-friendly options without compromising cleaning performance.
Eco-conscious consumers prefer Ecover Oven Cleaner for plant-based formulations that deliver professional results. Furthermore, Method Heavy Duty Degreaser combines effective cleaning with pleasant fragrances and biodegradable ingredients. Cillit Bang Oven Cleaner offers rapid-action formulations for time-sensitive cleaning tasks.
Professional cleaning services frequently recommend HG Oven Grill & Barbecue Cleaner for its versatility across multiple appliance types. Meanwhile, Fairy Power Spray provides gentle yet effective cleaning for regular maintenance schedules. Indeed, selecting appropriate products based on cleaning frequency and soil levels ensures optimal oven performance and longevity.
Step-by-Step Deep Cleaning Process
Following a systematic approach ensures thorough oven restoration while protecting delicate surfaces from damage. Moreover, this methodical process guarantees complete removal of grease, food residue, and stubborn stains throughout your appliance.
Cleaning the Oven Interior Walls and Ceiling
Start by applying your chosen cleaning solution to the oven walls and ceiling using a spray bottle or cloth. However, avoid oversaturating surfaces to prevent dripping onto heating elements. Work from top to bottom, ensuring complete coverage of all interior surfaces.
Allow the cleaning product to penetrate for 15-20 minutes before scrubbing begins. Furthermore, this dwell time softens baked-on grease and food particles, making removal significantly easier. Meanwhile, prepare your cleaning tools and ensure adequate ventilation remains active throughout the process.
Tackling the Oven Floor and Removing Stubborn Stains
Focus special attention on the oven floor, where grease and food spills accumulate most heavily. Therefore, apply extra cleaning solution to these problem areas and allow extended contact time. Additionally, use a plastic scraper to gently remove thick grease deposits without scratching surfaces.
Stubborn stains require targeted treatment with concentrated cleaning paste. Specifically, mix baking soda with water to create an abrasive paste for tough spots. However, test this mixture on inconspicuous areas first to ensure compatibility with your oven’s interior finish.
Addressing Burnt-on Food and Grease Buildup
Burnt-on residue demands patience and proper technique for safe removal. Indeed, rushing this process often results in surface damage or incomplete cleaning. Apply cleaning solution generously to affected areas and allow 30 minutes for maximum penetration.
Steam cleaning techniques prove particularly effective for stubborn buildup. Consequently, place a heat-safe bowl of water inside the oven and heat to 100°C for 20 minutes. As a result, the steam softens hardened deposits, making manual removal much easier.
Proper Scrubbing Techniques Without Damaging Surfaces
Use non-abrasive scrubbing pads or soft-bristled brushes to avoid scratching oven surfaces. Furthermore, circular motions work more effectively than aggressive back-and-forth scrubbing. Apply moderate pressure consistently rather than using excessive force on resistant areas.
Different oven materials require specific cleaning approaches for optimal results. For example, stainless steel interiors need gentle cleaning to prevent scratching, while enamel surfaces tolerate slightly more aggressive techniques. Similarly, cleaning oven door glass requires specialised methods to maintain clarity and prevent damage.
Rinsing and Removing All Cleaning Residue
Thorough rinsing eliminates all traces of cleaning chemicals from oven surfaces. Moreover, residual cleaning products can produce harmful fumes when heated during subsequent cooking. Use clean, damp cloths to wipe away all cleaning solution systematically.
Multiple rinse cycles ensure complete residue removal from all interior surfaces. Therefore, inspect corners, crevices, and hard-to-reach areas where cleaning products commonly accumulate. Additionally, pay special attention to areas around heating elements where chemical residue poses safety risks.
Drying the Oven Thoroughly Before Reassembly
Complete drying prevents moisture-related issues and ensures safe oven operation. Indeed, trapped moisture can cause electrical problems or promote bacterial growth within the appliance. Use clean, dry towels to absorb excess water from all interior surfaces.
Natural air drying provides the most thorough moisture removal for optimal results. Consequently, leave the oven door open for 2-3 hours to allow complete evaporation. Meanwhile, ensure adequate ventilation continues throughout the drying period to expedite the process and maintain air quality.
How to Clean Oven Door and Glass Effectively
Oven door cleaning requires systematic approaches to achieve professional results. Glass panels accumulate grease, food splatter, and burnt-on residue that standard cleaning methods cannot remove. Therefore, specialised techniques ensure thorough cleaning without damaging delicate components.
Removing the Oven Door for Thorough Cleaning
Door removal provides complete access to all surfaces and components. Most modern ovens feature removable doors with simple hinge mechanisms for easy detachment. However, consult your manufacturer’s manual before attempting removal to prevent damage.
Start by opening the door to its fully extended position. Next, locate the hinge locks on both sides of the door frame. Additionally, some models require lifting the door slightly while disengaging the hinges. Carefully lift the door straight up and away from the oven cavity once hinges release properly.
Cleaning Between Double-Glazed Oven Door Panels
Double-glazed doors trap grease and moisture between glass panels over time. Consequently, this buildup creates unsightly streaks that affect visibility and oven appearance. Panel separation allows access to interior surfaces for comprehensive cleaning.
Remove screws around the door perimeter to separate the outer panel. Meanwhile, handle glass panels carefully to prevent cracking or chipping during disassembly. Our complete guide to cleaning inside oven door glass provides detailed instructions for this delicate process.
Clean interior surfaces using warm soapy water and microfibre cloths. Furthermore, avoid abrasive cleaners that can scratch glass surfaces permanently. Dry all components thoroughly before reassembly to prevent moisture trapping.
Best Methods for Streak-Free Glass Cleaning
Streak-free glass requires proper cleaning solutions and techniques for optimal results. Commercial glass cleaners work effectively, but homemade solutions often perform equally well. Moreover, the cleaning method matters more than the specific product used.
Mix equal parts white vinegar and warm water for an effective cleaning solution. Apply the mixture using a spray bottle for even distribution across glass surfaces. Professional window cleaning techniques apply equally to oven door glass for superior results.
Use microfibre cloths in circular motions to remove grease and grime effectively. Subsequently, wipe with a clean, dry cloth to eliminate streaks and water spots. Indeed, proper drying technique prevents the cloudy appearance that ruins glass clarity.
Removing Stubborn Grease Spots from Door Seals
Door seals accumulate stubborn grease deposits that require targeted cleaning approaches. These rubber components trap food particles and cooking residue in their grooves and crevices. Therefore, gentle cleaning prevents seal damage while ensuring thorough grease removal.
Create a paste using baking soda and warm water for effective grease cutting. Apply the mixture to affected areas and allow 15-20 minutes for penetration. Additionally, use an old toothbrush to work the paste into seal grooves without damaging the rubber material.
Rinse thoroughly with clean water to remove all cleaning residue. Furthermore, dry seals completely to prevent moisture accumulation that promotes mould growth. Properly maintained seals ensure optimal oven efficiency and prevent heat loss during cooking.
Cleaning Door Hinges and Handles
Hinge mechanisms require regular cleaning to maintain smooth door operation. Grease and food particles accumulate in hinge joints, causing stiffness and potential damage over time. However, careful cleaning restores proper function and extends component lifespan.
Remove loose debris using a soft brush or compressed air. Next, apply degreasing solution to all hinge surfaces and moving parts. Similarly, clean door handles with appropriate cleaners for their specific material composition.
Stainless steel handles respond well to specialised cleaners that prevent water spots. Meanwhile, plastic handles require gentler solutions to avoid discolouration or surface damage. Lubricate hinges lightly with food-safe lubricant after cleaning for optimal operation.
Reassembling the Door Properly After Cleaning
Proper reassembly ensures safe oven operation and prevents future cleaning complications. Component alignment affects door sealing and overall appliance performance. Therefore, follow manufacturer specifications precisely during reassembly procedures.
Ensure all glass panels align correctly before tightening mounting screws. Additionally, check that door seals sit properly in their designated channels. Misaligned components can cause heat loss and reduced cooking efficiency.
Test door operation after complete reassembly to verify proper function. The door should open and close smoothly without binding or unusual resistance. Indeed, properly maintained oven doors contribute significantly to cooking performance and energy efficiency throughout the appliance’s lifespan.
Cleaning Oven Racks and Accessories
Oven racks and accessories accumulate grease and food residue during regular cooking activities. However, proper cleaning techniques restore these components to pristine condition. Moreover, clean accessories improve cooking performance and prevent flavour transfer between dishes.
Soaking Racks in Bathtub or Large Sink
Large racks require spacious soaking areas for effective cleaning. Therefore, bathtubs provide ideal spaces for soaking heavily soiled racks overnight. Fill the tub with hot water and add 2 cups of biological washing powder for maximum grease-cutting power.
Alternatively, large kitchen sinks accommodate standard racks with proper positioning. Place towels beneath racks to prevent scratching the tub surface. Additionally, ensure water temperature reaches 60°C for optimal grease dissolution without damaging rack coatings.
Soaking duration depends on soil level and rack material. Consequently, chrome racks require 4-6 hours minimum, while heavily carbonised surfaces need overnight treatment. Furthermore, adding white vinegar enhances cleaning power and removes mineral deposits effectively.
Using Dishwasher for Smaller Oven Accessories
Smaller oven accessories clean efficiently in standard dishwashers using appropriate cycles. Specifically, baking trays, wire cooling racks, and roasting tins fit comfortably in most dishwasher configurations. However, check manufacturer guidelines before dishwasher cleaning to prevent damage.
Select heavy-duty or pots-and-pans cycles for optimal results. Meanwhile, avoid delicate cycles that lack sufficient cleaning power for baked-on residues. Indeed, high-temperature cycles dissolve grease more effectively than standard wash programs.
Position accessories strategically to ensure proper water circulation. As a result, angled placement allows better spray coverage and prevents water pooling. Additionally, avoid overcrowding to maintain cleaning efficiency throughout the cycle.
Scrubbing Techniques for Heavily Soiled Racks
Stubborn deposits require targeted scrubbing approaches after initial soaking. Therefore, use non-abrasive scrubbing pads to prevent surface damage while removing carbonised residues. Specifically, nylon brushes work effectively on textured rack surfaces without scratching.
Apply cleaning paste made from baking soda and water to problem areas before scrubbing. Consequently, this natural abrasive breaks down tough deposits without harsh chemicals. Moreover, circular scrubbing motions prove more effective than linear strokes for removing stubborn stains.
Focus attention on rack joints and corners where grease accumulates most heavily. Similarly, clean between wire sections using bottle brushes or pipe cleaners for thorough results. Furthermore, rinse frequently during scrubbing to remove loosened debris and assess progress accurately.
Natural Cleaning Solutions for Oven Trays
Natural cleaning solutions provide effective alternatives to commercial oven cleaners for tray maintenance. However, these eco-friendly options require longer contact times for comparable results. Additionally, natural ingredients pose fewer health risks and environmental concerns than chemical alternatives.
Create powerful paste using 3 parts baking soda to 1 part water for general tray cleaning. Meanwhile, add lemon juice for enhanced grease-cutting properties and pleasant fragrance. Indeed, this combination tackles most cooking residues without harsh chemical exposure.
White vinegar removes mineral deposits and water spots effectively from stainless steel trays. Consequently, spray undiluted vinegar on affected areas and allow 15-minute contact time before wiping clean. Furthermore, vinegar neutralises alkaline residues left by other cleaning products naturally.
Drying and Storing Racks Properly
Thorough drying prevents rust formation and extends rack lifespan significantly. Therefore, air-dry components completely before returning them to oven storage. Specifically, position racks vertically against walls or use drying racks for optimal air circulation.
Towel-drying accelerates the process while preventing water spots on chrome surfaces. However, ensure towels remain lint-free to avoid leaving residue on clean racks. Additionally, inspect all surfaces for remaining moisture before storage to prevent corrosion issues.
Store clean racks in dry locations away from humidity sources when not in regular use. Similarly, wrap rarely used accessories in clean cloths to prevent dust accumulation. Moreover, proper storage maintains cleanliness longer and reduces future cleaning requirements significantly. For comprehensive oven maintenance, consider our guide on cleaning oven door glass for complete appliance care.
When to Replace Worn or Damaged Accessories
Damaged oven accessories compromise cooking performance and food safety standards. Consequently, inspect racks regularly for signs of wear, warping, or coating deterioration. Furthermore, replacement becomes necessary when cleaning no longer restores acceptable condition levels.
Chrome plating damage exposes underlying metal to rust formation and food contamination risks. Therefore, replace racks showing significant coating loss or rust spots that resist cleaning efforts. Additionally, warped racks distribute heat unevenly and affect cooking results negatively.
Sharp edges or broken wires create safety hazards during oven use and food handling. Indeed, damaged accessories can scratch other oven components or cause injury during installation. Moreover, investing in quality replacements ensures continued cooking performance and maintains appliance value effectively.
Self-Cleaning Oven Features and Usage
Modern self-cleaning ovens revolutionise maintenance through pyrolytic technology that eliminates manual scrubbing. However, understanding proper usage ensures optimal results and appliance longevity. Therefore, mastering these automated systems saves time while maintaining cooking performance standards.
Understanding Pyrolytic Self-Cleaning Cycles
Pyrolytic self-cleaning operates by heating oven interiors to 400-500°C temperatures that incinerate food residues completely. Consequently, grease and burnt deposits transform into fine ash requiring simple wiping removal. Moreover, this high-temperature process typically runs for 2-4 hours depending on soil levels and oven capacity.
Advanced models offer multiple cycle intensities for different cleaning requirements. Specifically, light cycles handle recent spills while heavy-duty options tackle accumulated grime effectively. Furthermore, automatic door locking activates during operation to prevent accidental opening and ensure safety protocols.
Energy consumption increases significantly during cleaning cycles compared to normal cooking operations. Therefore, scheduling self-cleaning during off-peak electricity hours reduces utility costs substantially. Additionally, modern ovens feature insulation improvements that contain heat efficiently while protecting surrounding cabinetry.
Preparing Your Oven for Self-Cleaning Mode
Proper preparation prevents damage and ensures effective cleaning results throughout the automated cycle. Initially, remove all racks, trays, and accessories that aren’t specifically designed for pyrolytic cleaning. Indeed, standard chrome racks discolour permanently when exposed to extreme temperatures.
Wipe away large food particles and excessive grease deposits manually before initiating the cleaning cycle. However, avoid using chemical cleaners that could produce toxic fumes during high-temperature operation. Similarly, ensure adequate kitchen ventilation to manage heat and potential odours effectively.
Check door seals and hinges for proper alignment before starting the self-cleaning process. Consequently, damaged seals allow heat escape and reduce cleaning effectiveness significantly. Moreover, inspect the oven interior for any foreign objects that could interfere with the cleaning cycle operation.
What to Remove Before Starting Self-Clean Cycle
All removable accessories must exit the oven cavity before activating pyrolytic cleaning modes. Specifically, standard racks, baking trays, drip pans, and thermometer probes require removal to prevent permanent damage. Furthermore, decorative elements and aftermarket accessories cannot withstand extreme cleaning temperatures.
Aluminium foil and cooking utensils left inside will melt or warp irreparably during the cleaning process. Therefore, conduct thorough interior inspections to locate forgotten items before cycle activation. Additionally, remove any loose debris that could interfere with proper air circulation patterns.
Oven lights and bulb covers typically remain in place during self-cleaning operations on most models. However, consult manufacturer guidelines to verify component compatibility with high-temperature exposure. Meanwhile, some premium ovens feature removable light assemblies requiring manual extraction before cleaning cycles.
Safety Considerations During Self-Cleaning
Automatic door locking prevents accidental opening during dangerous high-temperature operation phases. Consequently, plan cleaning cycles when kitchen access isn’t required for several hours continuously. Moreover, children and pets should maintain safe distances from operating appliances throughout the cleaning process.
Adequate ventilation becomes crucial as cleaning cycles generate heat and potential odours in surrounding areas. Therefore, open windows or activate exhaust fans to maintain comfortable kitchen conditions effectively. Additionally, avoid using the cooktop simultaneously to prevent excessive heat accumulation in confined spaces.
Monitor the cleaning cycle progress without attempting manual intervention or forced door opening. Indeed, surface temperatures can reach dangerous levels that cause severe burns upon contact. Furthermore, allow complete cooling periods before accessing the oven interior or handling any components safely.
Post-Cleaning Maintenance After Self-Clean Cycle
Complete cooling requires 2-3 hours after cycle completion before safe oven access becomes possible. Subsequently, wipe away fine ash residues using damp cloths or soft brushes for thorough removal. However, avoid abrasive materials that could scratch interior surfaces during cleaning processes.
Inspect door seals and gaskets for any damage caused by extreme temperature exposure during operation. Therefore, replace compromised seals immediately to maintain energy efficiency and cooking performance standards. Additionally, lubricate hinges if movement seems stiff after intensive cleaning cycles.
Reinstall racks and accessories only after complete interior cooling and thorough ash removal completion. Similarly, test oven functions including lights, fans, and temperature controls to ensure proper operation restoration. For detailed glass cleaning techniques, reference our comprehensive oven door glass cleaning guide for crystal-clear results.
Limitations and When Manual Cleaning Is Still Needed
Heavily carbonised spills may require pre-treatment before pyrolytic cycles achieve complete removal effectively. Consequently, sugar-based substances and thick grease accumulations often need manual intervention for optimal results. Moreover, exterior surfaces and door glass require separate cleaning attention using appropriate methods.
Self-cleaning cycles cannot address oven door tracks, hinges, or external control panels adequately. Therefore, regular manual maintenance of these components prevents operational issues and maintains appliance appearance standards. Additionally, frequency recommendations suggest monthly manual cleaning supplements automated cycles effectively.
Certain oven models exclude specific areas from self-cleaning coverage including light housings and ventilation systems. Indeed, these components require careful manual attention using suitable cleaning products and techniques. Furthermore, professional servicing may become necessary for internal component maintenance beyond standard self-cleaning capabilities. For comprehensive appliance care, explore our detailed oven door cleaning methods to maintain optimal visibility and performance.
Professional Oven Cleaning Services in the UK
When to Consider Professional Cleaning Services
Professional oven cleaning becomes essential when stubborn grease buildup resists standard cleaning methods. Moreover, heavily soiled appliances with carbonised food residue require specialist equipment and expertise. Additionally, busy households often benefit from professional services when time constraints prevent thorough manual cleaning.
Consider professional assistance when self-cleaning cycles fail to address persistent odours or visible staining. Furthermore, commercial-grade ovens in restaurants and catering facilities typically need professional maintenance every 3-6 months for optimal performance. Indeed, safety concerns arise when attempting to clean gas ovens or complex built-in models without proper training.
What Professional Cleaners Include in Their Service
Professional oven cleaning services typically include complete dismantling of removable components including racks, trays, and door panels. Specifically, technicians use industrial-strength degreasers and steam cleaning equipment for thorough grime removal. Additionally, most services clean oven door glass to restore crystal-clear visibility.
Comprehensive packages often cover hob cleaning, extractor fan maintenance, and microwave sanitisation as additional services. Moreover, reputable companies provide protective floor coverings and ensure complete workspace restoration after completion. Furthermore, many professionals offer eco-friendly cleaning solutions for environmentally conscious customers seeking chemical-free alternatives.
Average Costs of Professional Oven Cleaning in 2026
Standard single oven cleaning costs range from £45-£80 across most UK regions in 2026. However, double ovens typically command £70-£120 depending on size and contamination levels. Additionally, range cookers with multiple components cost between £90-£150 for comprehensive cleaning services.
Premium services including hob and extractor cleaning add approximately £20-£40 to base prices. Consequently, rural areas may incur higher charges due to travel costs and limited service availability. Indeed, London and major cities often feature competitive pricing due to increased provider density and market competition.
Finding Reputable Oven Cleaning Companies
Research local companies through online review platforms including Trustpilot, Google Reviews, and Which? Trusted Traders. Moreover, verify business credentials including public liability insurance and professional certifications from recognised industry bodies. Additionally, established companies typically provide detailed service guarantees and customer satisfaction policies.
Request multiple quotes to compare pricing structures and service inclusions effectively. Furthermore, reputable providers offer fixed-price quotations without hidden charges or unexpected surcharges. Similarly, check company registration details through Companies House to verify legitimate business operations and trading history.
Preparing Your Home for Professional Cleaners
Clear surrounding areas of personal belongings, cookware, and decorative items before technician arrival. Specifically, remove items from nearby cupboards and worktops to provide adequate workspace access. Additionally, ensure pets remain secured in separate rooms during cleaning procedures for safety reasons.
Provide adequate ventilation by opening windows and doors to facilitate chemical fume dispersal during cleaning processes. Moreover, disconnect electrical appliances and turn off gas supplies as directed by cleaning professionals. Indeed, parking availability near property entrances helps technicians transport equipment efficiently and reduces service duration.
Comparing DIY vs Professional Cleaning Results
Professional cleaning achieves 95-98% grease removal compared to typical DIY results of 60-75% effectiveness. However, DIY methods cost significantly less, averaging £5-£15 for cleaning products versus professional service fees. Additionally, professional equipment reaches temperatures and pressures impossible to achieve with household cleaning supplies.
Time investment differs substantially between approaches, with DIY cleaning requiring 3-5 hours versus professional completion in 90 minutes. Furthermore, professionals guarantee results and provide insurance coverage for potential damage during cleaning procedures. Consequently, cost-conscious households may prefer DIY methods for regular maintenance while reserving professional services for deep cleaning requirements.
Professional results typically last 3-4 months longer than DIY cleaning due to superior degreasing techniques and equipment capabilities. Indeed, combining both approaches optimises oven maintenance while balancing cost considerations and cleaning effectiveness throughout the year.
Troubleshooting Common Oven Cleaning Challenges
Even experienced cleaners encounter stubborn problems during oven maintenance. However, identifying specific issues enables targeted solutions that restore appliance functionality effectively. Furthermore, understanding root causes prevents recurring problems and extends cleaning intervals significantly.
Removing Extremely Stubborn Burnt-On Food
Carbonised food deposits require specialised approaches beyond standard cleaning methods. Specifically, create a thick paste using bicarbonate of soda and water, then apply generously to affected areas. Additionally, allow the paste to work overnight for maximum penetration into hardened residues.
Steam cleaning proves highly effective against persistent burnt-on materials. Therefore, place a heat-proof bowl containing water inside the oven and heat to 100°C for 20 minutes. Consequently, generated steam softens carbonised deposits, making removal significantly easier with standard scrapers.
Commercial oven cleaners containing potassium hydroxide dissolve the most stubborn deposits effectively. However, ensure adequate ventilation and wear protective equipment when using these powerful formulations. Indeed, combining chemical action with gentle scraping achieves optimal results without damaging oven surfaces.
Dealing with Strong Odours After Cleaning
Chemical residue odours persist when cleaning products remain on oven surfaces after treatment. Moreover, inadequate rinsing allows cleaning agents to produce unpleasant smells during subsequent heating cycles. Furthermore, trapped moisture in oven cavities creates musty odours that require specific elimination techniques.
Neutralise lingering chemical smells by wiping all surfaces with white vinegar solution followed by clean water rinses. Additionally, place bowls of activated charcoal inside the oven overnight to absorb remaining odour molecules effectively. Similarly, vanilla extract on cotton balls provides pleasant masking while chemical residues dissipate completely.
Ventilation accelerates odour elimination by promoting air circulation throughout oven cavities. Therefore, leave oven doors open for 24-48 hours after deep cleaning procedures. Consequently, natural air movement removes trapped cleaning vapours more efficiently than closed-door approaches.
Addressing Discoloured Oven Surfaces
Heat discolouration affects stainless steel and painted surfaces differently, requiring targeted treatment approaches. However, most discolouration results from grease oxidation rather than permanent surface damage. Additionally, identifying discolouration types determines appropriate restoration methods and expected results.
Stainless steel discolouration responds well to specialised metal cleaners containing oxalic acid compounds. Specifically, apply cleaner following grain direction and buff with microfibre cloths for optimal results. Furthermore, regular maintenance with appropriate products prevents severe discolouration from developing over time.
Painted oven surfaces showing discolouration may require professional assessment for restoration possibilities. Indeed, heat-damaged paint rarely responds to cleaning treatments and may need refinishing procedures. Notably, prevention through regular cleaning maintains surface integrity better than restoration attempts after damage occurs.
Fixing Streaky or Cloudy Oven Glass
Glass door streaking typically results from cleaning product residue or hard water mineral deposits. Moreover, using inappropriate cleaning cloths creates micro-scratches that scatter light and produce cloudy appearances. Additionally, understanding proper glass cleaning techniques prevents these common problems effectively.
Professional glass cleaning requires specific techniques similar to window cleaning methods for streak-free results. Therefore, use ammonia-based cleaners followed by distilled water rinses to eliminate mineral deposits completely. Consequently, finishing with lint-free cloths ensures crystal-clear visibility through oven doors.
Cloudy glass often indicates etching from harsh cleaning chemicals or excessive heat exposure. However, mild abrasive pastes containing cerium oxide can restore clarity to lightly etched surfaces. Furthermore, detailed guidance on cleaning oven door glass provides comprehensive techniques for optimal results.
Handling Damaged Oven Surfaces During Cleaning
Surface scratches occur when using abrasive materials on delicate oven finishes. Specifically, steel wool and harsh scrubbers damage painted surfaces and stainless steel permanently. Additionally, recognising damage early prevents expansion and maintains oven appearance effectively.
Minor scratches on stainless steel respond to directional polishing with appropriate metal restoration products. However, deep scratches require professional repair or component replacement for optimal results. Furthermore, prevention through proper tool selection eliminates most surface damage during routine cleaning procedures.
Painted surface damage typically requires touch-up procedures using manufacturer-approved paints and primers. Indeed, matching paint colours accurately ensures invisible repairs that maintain appliance aesthetics. Notably, professional assessment determines whether DIY repairs suffice or complete refinishing becomes necessary.
What to Do If Cleaning Products Leave Residue
Product residue creates sticky films that attract dirt and produce unpleasant odours during heating cycles. Moreover, inadequate rinsing allows cleaning chemicals to react with food particles and create harmful compounds. Additionally, residue removal requires systematic approaches to ensure complete elimination.
Multiple rinses with clean water remove most cleaning product residues effectively from oven surfaces. Therefore, follow initial cleaning with three separate rinse cycles using fresh water each time. Consequently, thorough rinsing prevents chemical buildup and maintains food safety standards consistently.
Stubborn residue responds to neutralising treatments using mild acid solutions like diluted vinegar or citric acid. However, test neutralising agents on inconspicuous areas before widespread application to prevent surface damage. Indeed, systematic residue removal ensures ovens remain safe for food preparation after deep cleaning procedures.
Oven Maintenance and Prevention Tips
Regular maintenance prevents stubborn grease buildup and extends your oven’s lifespan significantly. However, establishing consistent cleaning schedules requires understanding optimal frequency patterns for different usage levels. Moreover, preventive measures reduce deep cleaning requirements and maintain appliance efficiency throughout its operational life.
How Often to Clean Your Oven for Optimal Performance
Moderate cooking households should clean their ovens every 3-4 months to maintain peak performance levels. Additionally, heavy usage kitchens require monthly deep cleaning sessions to prevent grease accumulation and odour development. Furthermore, light users can extend cleaning intervals to 6 months without compromising appliance functionality.
Specific cooking methods influence cleaning frequency requirements significantly across different household types. For example, frequent roasting and baking create more splatter patterns than simple reheating procedures. Consequently, households using high-temperature cooking methods need bi-monthly maintenance schedules for optimal results.
Daily and Weekly Maintenance Routines
Daily wipe-downs prevent minor spills from becoming stubborn stains during subsequent heating cycles. Therefore, clean visible splatters immediately after cooking while surfaces remain slightly warm for easier removal. Indeed, this simple practice reduces weekly cleaning time by 60-70% according to appliance maintenance studies.
Weekly maintenance involves removing oven racks and wiping interior surfaces with damp microfibre cloths. Additionally, check door seals for food particles that compromise heating efficiency and create unpleasant odours. Meanwhile, inspect heating elements for grease buildup that affects temperature distribution patterns.
Drip tray cleaning prevents smoke generation and maintains air quality during cooking procedures. Similarly, cleaning oven door glass weekly ensures clear visibility and professional appliance appearance consistently.
Using Oven Liners and Protective Accessories
Silicone oven liners capture spills and splatters before they reach oven surfaces permanently. However, ensure liners maintain proper spacing from heating elements to prevent melting or fire hazards. Moreover, removable liners simplify cleaning procedures and protect expensive appliance surfaces effectively.
Aluminium foil creates temporary protection during messy cooking projects like roasting or baking sticky items. Specifically, place foil on lower racks rather than oven floors to maintain proper air circulation patterns. Consequently, strategic foil placement prevents cleanup challenges without affecting cooking performance.
Ceramic baking stones absorb moisture and prevent bottom burning while protecting oven surfaces from direct spills. Furthermore, these accessories distribute heat evenly and create professional baking results consistently across different recipe types.
Proper Cooking Techniques to Minimise Mess
Covered cooking containers reduce splatter formation by 80-90% compared to uncovered methods during roasting procedures. Additionally, appropriate dish sizing prevents overflow situations that create stubborn cleanup challenges later. Therefore, select cookware with adequate capacity margins for expanding ingredients.
Lower temperature cooking methods generate fewer splatters while maintaining food quality and nutritional content effectively. For example, slow roasting at 325°F produces less grease splatter than high-temperature searing methods. Indeed, temperature control directly influences maintenance requirements and cleaning frequency patterns.
Strategic rack positioning prevents dripping onto heating elements and reduces smoke generation during cooking cycles. Similarly, using drip pans beneath fatty meats captures rendered fats before they reach oven surfaces permanently.
Immediate Cleanup Tips for Spills and Splatters
Fresh spills remove easily with damp cloths while ovens remain warm but not dangerously hot to touch. However, allow surfaces to cool sufficiently to prevent burns while maintaining cleaning effectiveness through residual heat. Moreover, immediate attention prevents spills from carbonising during subsequent heating cycles.
Salt absorption works effectively for liquid spills like wine or fruit juices that penetrate oven surfaces quickly. Specifically, cover fresh spills with coarse salt and allow 10-15 minutes absorption time before removal. Consequently, this technique prevents staining and reduces scrubbing requirements significantly.
Baking soda paste neutralises acidic spills and prevents permanent surface damage during emergency cleanup procedures. Additionally, this gentle abrasive removes sticky residues without scratching delicate oven finishes or coatings consistently.
Signs Your Oven Needs Deep Cleaning
Smoke generation during normal cooking operations indicates excessive grease buildup requiring immediate deep cleaning attention. Furthermore, unusual odours emanating from heating elements suggest carbonised food particles affecting air quality and cooking performance.
Visible grease streaks on oven walls create fire hazards and affect temperature distribution patterns throughout cooking chambers. Therefore, address surface buildup before it reaches dangerous accumulation levels that compromise appliance safety standards.
Reduced heating efficiency manifests through longer cooking times and uneven temperature distribution across different oven zones. Indeed, 20-30% longer cooking times typically indicate cleaning requirements according to Energy Saving Trust appliance maintenance guidelines.
Food taste contamination from previous cooking sessions suggests flavour transfer through accumulated residues on oven surfaces. Similarly, visible carbon deposits on heating elements create acrid smoke that affects food quality and kitchen air quality consistently.
Safety Guidelines and Health Considerations
Ventilation Requirements During Oven Cleaning
Proper airflow prevents dangerous chemical buildup during intensive oven cleaning sessions. Therefore, open all kitchen windows and doors before starting any cleaning procedure to ensure adequate ventilation throughout the process.
Extractor fans must operate at maximum speed during chemical cleaner applications. Additionally, cross-ventilation through multiple openings reduces toxic fume concentration more effectively than single-point ventilation systems alone.
Commercial oven cleaners release volatile organic compounds (VOCs) that require continuous air circulation for safe dispersal. Furthermore, natural cleaning solutions like heated vinegar also produce vapours requiring proper ventilation management during application periods.
Protective Equipment for Chemical and Natural Cleaners
Rubber gloves protect hands from caustic chemicals and prevent skin irritation during extended cleaning sessions. Moreover, nitrile gloves offer superior chemical resistance compared to standard latex alternatives for heavy-duty cleaning tasks.
Safety goggles shield eyes from splashing cleaners and airborne particles during scrubbing activities. Consequently, wraparound designs provide comprehensive protection against chemical splashes from multiple angles during intensive cleaning procedures.
Protective clothing including long sleeves and aprons prevents skin contact with harsh cleaning solutions. Indeed, even natural cleaners like baking soda paste can cause skin dryness through prolonged exposure during deep cleaning sessions.
Safe Disposal of Cleaning Products and Waste
Used cleaning cloths containing chemical residues require disposal through household hazardous waste collection services. However, cloths used with natural cleaners can enter standard domestic waste streams after thorough rinsing procedures.
Leftover commercial oven cleaners need proper disposal at designated recycling centres rather than standard bin collection. Similarly, empty aerosol containers require specific recycling procedures according to UK government waste classification guidelines.
Scraped grease and food debris can enter compost systems if completely free from chemical contamination. Therefore, separate organic waste removal during natural cleaning methods from chemically treated materials consistently.
Avoiding Toxic Fume Exposure
Chemical oven cleaners produce ammonia and sodium hydroxide vapours that cause respiratory irritation in enclosed spaces. Furthermore, these compounds can trigger asthma attacks and breathing difficulties in sensitive individuals during cleaning procedures.
Warning signs of fume exposure include headaches, dizziness, and throat irritation during cleaning activities. Additionally, immediate fresh air exposure and cleaning cessation prevent more serious respiratory complications from developing.
Natural alternatives like lemon juice and baking soda combinations eliminate toxic fume risks while maintaining effective cleaning performance. Consequently, these safer options provide excellent results without compromising indoor air quality standards.
Child and Pet Safety During Cleaning Process
Children and pets must remain outside the kitchen during all oven cleaning procedures involving chemical products. Moreover, residual fumes can persist for 2-4 hours after cleaning completion, requiring continued restricted access periods.
Secure storage of cleaning products prevents accidental ingestion by curious children or pets during cleaning sessions. Therefore, lockable cabinets or high shelves provide essential safety barriers against unauthorised access to dangerous chemicals.
Post-cleaning oven surfaces retain chemical residues until thorough rinsing removes all cleaning product traces completely. Indeed, multiple rinse cycles ensure complete chemical removal before allowing normal kitchen access for family members.
First Aid Measures for Cleaning Product Exposure
Skin contact with chemical cleaners requires immediate cold water flushing for 15-20 minutes minimum duration. However, avoid scrubbing affected areas as this increases chemical penetration and potential tissue damage significantly.
Eye exposure demands continuous water irrigation while seeking immediate medical attention from healthcare professionals. Furthermore, contact lens removal should occur only after initial flushing to prevent further corneal damage during emergency procedures.
Inhalation incidents require immediate fresh air exposure and medical consultation if breathing difficulties persist beyond initial recovery. Similarly, ingestion accidents need immediate poison control contact and professional medical intervention without delay or home treatment attempts.
Cost-Effective Oven Cleaning Solutions
Effective oven maintenance doesn’t require expensive commercial products or professional services. Indeed, budget-friendly alternatives deliver exceptional cleaning results while protecting household finances. Furthermore, smart shopping strategies and DIY approaches significantly reduce long-term cleaning costs.
Budget-Friendly Natural Cleaning Recipes
Baking soda paste creates the most economical oven cleaning solution available to UK households. Specifically, mixing three parts baking soda with one part water costs approximately £0.15 per cleaning session. Additionally, this natural mixture safely removes grease and burnt residues without harmful chemical exposure.
White vinegar spray enhances baking soda effectiveness while maintaining minimal expense levels. However, combining equal parts water and vinegar creates powerful degreasing action for under £0.10 per application. Moreover, this acidic solution neutralises alkaline residues and eliminates stubborn odours naturally.
Lemon juice provides natural bleaching properties that brighten oven interiors without costly commercial whiteners. Therefore, fresh lemon mixed with coarse salt creates abrasive paste perfect for tackling tough stains. Consequently, this citrus-based cleaner costs less than £0.20 per deep cleaning session.
Bulk Buying Cleaning Supplies for Savings
Purchasing cleaning ingredients in larger quantities reduces per-use costs by 40-60% compared to small packages. Furthermore, wholesale suppliers offer significant discounts on baking soda, vinegar, and essential cleaning components. Additionally, stainless steel cleaning supplies benefit from bulk purchasing strategies.
Storage containers preserve bulk cleaning supplies while preventing waste and contamination issues. However, proper labelling ensures safety and prevents accidental misuse of concentrated cleaning solutions. Meanwhile, rotation systems guarantee fresh supplies remain available for regular cleaning schedules.
DIY vs Professional Cleaning Cost Comparison
Professional oven cleaning services charge between £40-80 per visit depending on oven size and condition. Conversely, DIY cleaning costs average £2-5 per session using natural ingredients and basic supplies. Therefore, annual savings reach £200-400 for households cleaning ovens monthly.
Time investment differs significantly between professional and DIY approaches to oven maintenance. Specifically, professional services complete cleaning within 2-3 hours including preparation and drying time. However, DIY methods require 4-6 hours total time including soaking periods and multiple cleaning cycles.
Equipment costs favour DIY approaches over repeated professional service bookings throughout the year. Indeed, initial investment in cleaning supplies, brushes, and protective gear totals £15-25. Subsequently, these tools serve multiple cleaning sessions across several years of regular maintenance.
Long-Term Savings Through Regular Maintenance
Regular oven cleaning prevents expensive repairs and premature appliance replacement needs. Moreover, monthly maintenance reduces deep cleaning requirements and associated costs significantly. Additionally, consistent care extends oven functionality and maintains optimal cooking performance levels.
Preventive cleaning eliminates stubborn buildup that requires expensive commercial products or professional intervention. Furthermore, addressing spills immediately prevents permanent staining and costly restoration procedures. Similarly, oven door glass maintenance prevents replacement expenses through regular care.
Energy Efficiency Benefits of Clean Ovens
Clean ovens operate 15-20% more efficiently than appliances with significant grease and debris accumulation. Therefore, reduced energy consumption translates to lower electricity bills throughout the year. Additionally, improved heat circulation reduces cooking times and associated energy costs.
Grease buildup forces ovens to work harder while achieving desired cooking temperatures. However, regular cleaning maintains optimal heat transfer and reduces unnecessary energy waste. Consequently, households save approximately £30-50 annually on electricity bills through proper oven maintenance.
Extending Oven Lifespan Through Proper Cleaning
Well-maintained ovens last 12-15 years compared to 8-10 years for neglected appliances. Furthermore, regular cleaning prevents corrosion and component damage that necessitate expensive repairs. Indeed, proper maintenance protects the significant investment in kitchen appliances.
Manufacturer warranties often require evidence of regular maintenance to honour repair claims. Therefore, documented cleaning schedules protect warranty coverage and reduce out-of-pocket repair expenses. Additionally, maintained appliances retain higher resale values when kitchen upgrades become necessary.
Component replacement costs decrease significantly when ovens receive consistent cleaning attention throughout their operational lifespan. Moreover, heating elements, door seals, and interior surfaces remain functional longer with proper care. Subsequently, maintenance costs remain minimal compared to major repair or replacement expenses.
Frequently Asked Questions
How often should I clean my oven?
For most UK households, a deep clean every 3-6 months is recommended, depending on usage frequency. However, you should clean up spills immediately after they occur and the oven has cooled down. Heavy users may need monthly cleaning, whilst occasional users can extend to every 6 months. Regular maintenance prevents stubborn build-up and maintains optimal cooking performance.
Can I use the oven's self-cleaning function instead of manual cleaning?
Many modern ovens in the UK feature self-cleaning functions that use high temperatures (around 500°C) to burn off food residue. Whilst effective, this method consumes significant energy and may produce smoke and odours. Additionally, you’ll still need to wipe away the ash residue afterwards. Manual cleaning often proves more thorough and economical for regular maintenance.
Is it safe to use commercial oven cleaners on all oven types?
Not all commercial cleaners suit every oven type. Always check the manufacturer’s instructions and your oven manual before using chemical products. Some cleaners may damage certain oven coatings or components. Natural alternatives like baking soda and vinegar work safely on most oven types and prove particularly suitable for self-cleaning ovens where harsh chemicals aren’t recommended.
How long should I leave baking soda paste on stubborn stains?
For best results with natural cleaning, leave baking soda paste on stubborn stains for at least 12 hours or overnight. This extended contact time allows the alkaline properties to break down grease and burnt-on food effectively. For lighter soiling, 2-4 hours may suffice. Always spray with white vinegar before wiping away to activate the cleaning reaction.
What should I do if my oven door glass won't come clean?
Oven door glass often requires specialised attention due to grease build-up between glass panels. Create a paste using baking soda and water, apply generously, and leave overnight. For access between glass panels, some oven doors can be partially disassembled – consult your manual first. Alternatively, consider professional cleaning services for heavily soiled or difficult-to-access areas.
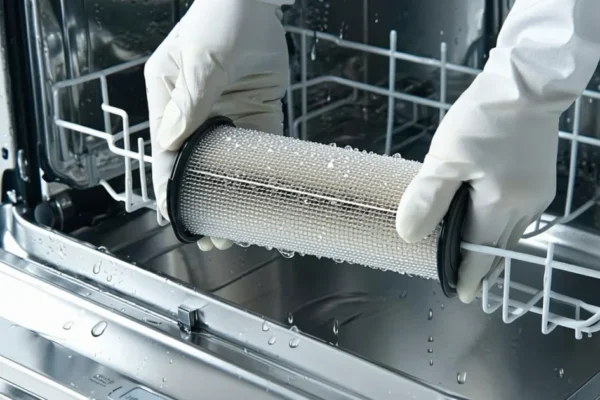
Can I clean my oven racks in the dishwasher?
Most oven racks can go in the dishwasher if they fit, but check your dishwasher manual first as large items may damage spray arms. For heavily soiled racks, pre-treat with baking soda paste or soak in warm soapy water in the bathtub. Wire racks may scratch dishwasher interiors, so hand washing often proves safer and more effective.
How do I remove burnt-on food from the oven bottom?
For burnt-on spills on the oven bottom, first ensure the oven is completely cool and disconnected from power. Apply a thick paste of baking soda and water, covering the affected area completely. Leave overnight, then spray with white vinegar and scrub gently with a non-abrasive sponge. For stubborn residue, repeat the process or consider using a plastic scraper to lift debris carefully.
When should I consider professional oven cleaning services?
Professional cleaning becomes worthwhile for heavily soiled ovens that haven’t been cleaned in over a year, when you lack time for thorough cleaning, or if you’re dealing with commercial-grade appliances. Professional services typically cost £40-80 in the UK but include specialist equipment and eco-friendly products. They’re also recommended before moving house or when selling property.
You May Also Like
How to Clean Glass Stovetop: Complete UK Guide 2026
How to Clean Dryer Vent: Complete UK Guide for 2026