How to Clean a Toaster: Complete UK Guide 2026
How to clean a toaster properly involves unplugging the appliance, removing the crumb tray, and using gentle cleaning methods to tackle both interior debris and exterior grime. Regular toaster maintenance prevents fire hazards, eliminates unpleasant odours, and extends your appliance’s lifespan significantly.
Most UK households use their toasters daily, yet many overlook proper cleaning techniques. Consequently, crumbs accumulate in hard-to-reach areas, creating potential safety risks and affecting toast quality.
This comprehensive guide covers everything from essential cleaning supplies to step-by-step interior cleaning processes. Additionally, you’ll learn about maintenance schedules and techniques for removing stubborn burnt residue safely. Similar to cleaning your oven, proper toaster care requires specific methods and regular attention.
TL;DR
- Safety first: Always unplug and cool completely before cleaning
- Weekly maintenance: Empty crumb tray and wipe exterior after regular use
- Monthly deep clean: Use soft brushes, compressed air, and mild washing-up liquid for thorough cleaning
- Never submerge: Keep electrical components away from water to prevent damage
Safety First: Preparing Your Toaster for Cleaning
Proper preparation ensures safe toaster cleaning and prevents electrical accidents. Therefore, following these essential safety steps protects both you and your appliance during the cleaning process.
Unplugging and Cooling Your Toaster
Unplug your toaster immediately after use and allow it to cool completely before cleaning begins. Hot toaster elements can cause severe burns, whilst electrical connections pose electrocution risks during wet cleaning.
Most toasters require 30-45 minutes cooling time after their last use. However, heavily used appliances may need longer cooling periods to reach safe handling temperatures.
Checking Manufacturer Guidelines
Manufacturer cleaning instructions vary significantly between toaster models and brands. Consequently, checking your specific model’s guidelines prevents damage from inappropriate cleaning methods or products.
Look for cleaning recommendations in your user manual or on the manufacturer’s website. Additionally, some toasters feature removable crumb trays whilst others require different disassembly approaches. Similar to cleaning your oven, following manufacturer specifications ensures optimal results.
Essential Cleaning Supplies
Gathering appropriate cleaning supplies beforehand streamlines the toaster cleaning process. Furthermore, having everything ready prevents interruptions that could compromise safety or effectiveness.
- Soft-bristled brush or clean paintbrush for interior cleaning
- Microfibre cloths for exterior wiping and polishing
- Mild washing-up liquid mixed with warm water
- Compressed air canister for removing stubborn crumbs
- Cotton swabs for detailed cleaning around heating elements
- Baking soda paste for tackling burnt-on residue
Creating an Optimal Cleaning Environment
Working in a well-lit area with adequate space improves cleaning accuracy and prevents accidents. Moreover, proper lighting helps identify hidden crumb accumulation and stubborn stains requiring extra attention.
Choose a stable work surface near natural light or under bright kitchen lighting. Additionally, ensure sufficient counter space for safely placing removed components like crumb trays and exterior panels during cleaning.
Keep cleaning supplies organised and within easy reach throughout the process. Similarly, maintain a clear workspace to prevent knocking over cleaning solutions or dropping small toaster components.
Essential Cleaning Supplies You'll Need
Proper toaster cleaning requires specific supplies that ensure safety whilst delivering thorough results. Moreover, using appropriate materials prevents damage to delicate heating elements and electronic components.
A soft-bristled brush or old toothbrush serves as your primary tool for dislodging stubborn crumbs from tight spaces. Additionally, these brushes reach areas where vacuum cleaners cannot access effectively. Choose brushes with natural bristles rather than synthetic ones, as they generate less static electricity around electrical components.
Microfibre cloths provide lint-free cleaning for both interior and exterior surfaces. Furthermore, these cloths trap particles effectively without scratching stainless steel or chrome finishes. Keep separate cloths for different cleaning stages to prevent cross-contamination between greasy exteriors and food-contact surfaces.
Mild washing-up liquid mixed with warm water creates an effective yet gentle cleaning solution. However, avoid harsh detergents or abrasive cleaners that could damage protective coatings. Always use minimal amounts to prevent excessive suds that might seep into electrical components.
White vinegar tackles stubborn stains and burnt-on residue naturally without toxic fumes. Similarly, this household staple neutralises odours whilst breaking down grease deposits. Mix equal parts water and vinegar for an effective cleaning solution that won’t harm food-contact surfaces.
A compressed air canister or vacuum cleaner removes loose crumbs before wet cleaning begins. Additionally, compressed air reaches deep crevices where brushes cannot penetrate effectively. Vacuum cleaners with brush attachments work equally well for initial debris removal.
Cotton swabs dipped in cleaning solution provide precision cleaning around heating elements and control knobs. Meanwhile, plastic scrapers help remove stubborn deposits without scratching surfaces. Keep these supplies organised on a nearby tray to maintain workflow efficiency throughout the cleaning process.
Step-by-Step Interior Cleaning Process
The interior cleaning process requires systematic attention to each component whilst maintaining safety protocols. Therefore, always ensure your toaster remains unplugged throughout the entire cleaning procedure. This methodical approach prevents damage to heating elements whilst ensuring thorough crumb removal from all internal surfaces.
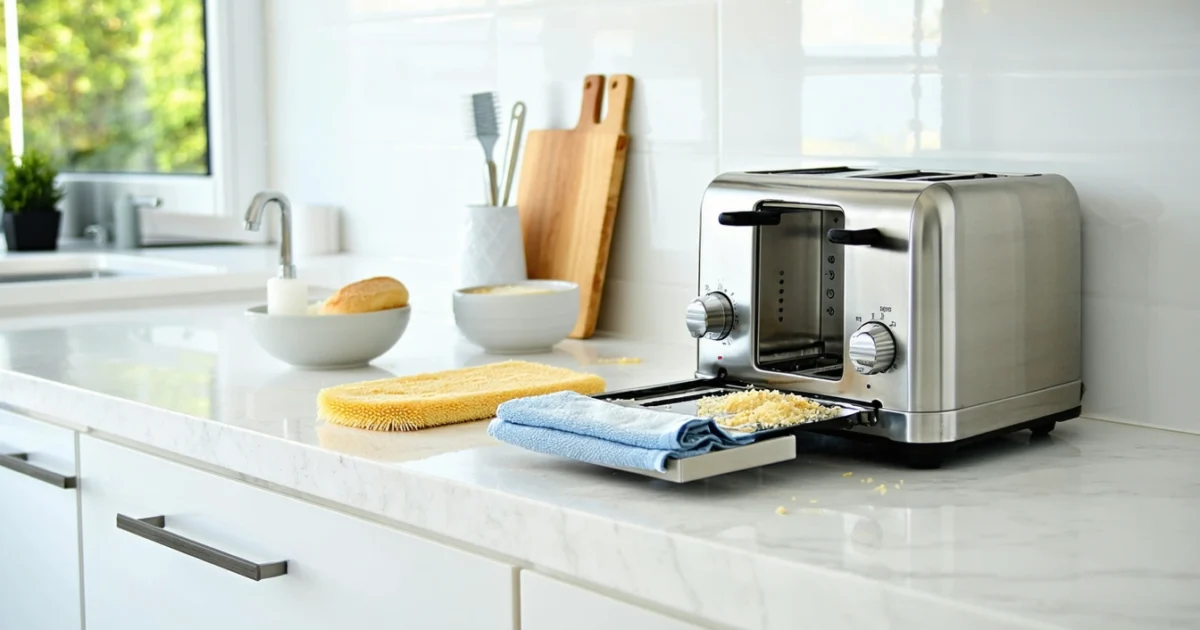
Remove and Empty the Crumb Tray
Locate the crumb tray at the bottom of your toaster and slide it out completely. Most UK toaster models feature removable trays that pull straight out or require slight lifting. Empty all accumulated crumbs into your household waste bin, then tap the tray gently to dislodge stubborn particles.
Wash the crumb tray in warm soapy water using mild washing-up liquid. Subsequently, rinse thoroughly and dry completely before reinstalling to prevent moisture damage. Never return a damp tray to your toaster as this creates ideal conditions for mould growth and electrical hazards.
Shake Out Loose Crumbs
Turn your toaster upside down over a sink or large bowl to release loose debris. Gently shake the appliance from side to side, allowing gravity to remove crumbs from bread slots and internal crevices. This preliminary step eliminates the majority of loose particles before detailed cleaning begins.
Hold the toaster firmly whilst shaking to prevent dropping or damage. Additionally, tap the sides lightly to encourage stubborn crumbs to fall free. Continue this process until no more debris falls from the toaster slots.
Use Compressed Air for Deep Cleaning
Compressed air blasts away remaining debris from hard-to-reach areas where manual cleaning proves difficult. Direct short bursts into each bread slot, working systematically from top to bottom. This technique dislodges particles wedged between heating elements and internal mechanisms.
Maintain a safe distance whilst using compressed air to prevent damage to delicate components. Furthermore, work outdoors or in a well-ventilated area to avoid inhaling displaced dust particles. Never use compressed air on wet surfaces as this could cause electrical damage.
Clean Heating Elements Safely
Gently brush heating elements using a soft-bristled brush or clean paintbrush to remove accumulated residue. Work carefully around these delicate components, applying minimal pressure to avoid damage. Brush in downward motions to prevent debris from falling deeper into the mechanism.
Heating elements require special attention as they directly contact your food during toasting. Therefore, ensure complete removal of any burnt particles or grease deposits that could affect taste or create smoke. Similar to oven cleaning techniques, patience and gentle pressure achieve better results than aggressive scrubbing.
Deep Clean Toaster Slots
Insert a long-handled brush into each bread slot to clean interior walls thoroughly. Work the brush up and down whilst rotating slightly to reach all surfaces. This action removes grease buildup and burnt crumbs that standard shaking cannot eliminate.
Bottle brushes or specially designed toaster cleaning brushes work exceptionally well for this task. Alternatively, wrap a clean cloth around a wooden spoon handle for makeshift cleaning tool. Ensure your chosen implement fits comfortably within the slots without forcing or wedging.
Complete the interior cleaning by wiping down any accessible surfaces with a slightly damp microfibre cloth. However, avoid excessive moisture that could penetrate electrical components. Allow all surfaces to dry completely before reassembling your toaster and returning it to service.
Cleaning the Crumb Tray and Removable Parts
Remove the crumb tray from your toaster by sliding it out gently from its designated slot. Most modern toasters feature removable trays that collect fallen breadcrumbs and food particles during the toasting process. Additionally, check for other detachable components such as wire racks or warming plates that require separate cleaning attention.
Fill a washing-up bowl with warm soapy water using standard washing-up liquid. Submerge the crumb tray completely and allow it to soak for several minutes to loosen stubborn residue. This soaking process softens burnt-on particles and makes subsequent scrubbing more effective.
Scrub the tray thoroughly using a soft-bristled brush or non-abrasive sponge to remove stuck-on food debris. Work systematically across all surfaces, paying particular attention to corners where grease and crumbs typically accumulate. Furthermore, gentle circular motions prove more effective than aggressive back-and-forth scrubbing that might damage the tray’s finish.
Rinse all removable parts under running water to eliminate soap residue and loosened particles. Inspect each component carefully to ensure complete removal of cleaning solution and food debris. Subsequently, shake off excess water and place items on a clean tea towel for air drying.
Allow all washed components to dry completely before reassembling your toaster. Moisture trapped within electrical appliances creates safety hazards and potential damage to internal mechanisms. Therefore, patience during this drying phase prevents future operational problems and maintains your toaster’s longevity.
Check your toaster’s instruction manual to determine whether removable parts are dishwasher-safe. Many modern crumb trays and accessories can withstand dishwasher cleaning cycles, which simplifies maintenance routines significantly. However, always verify manufacturer recommendations before placing components in your dishwasher, as some materials may warp or discolour under high temperatures.
Similar to cleaning cutting boards, thorough washing and complete drying prevent bacterial growth and maintain hygiene standards. Consequently, regular cleaning of these removable components ensures your toaster continues producing perfectly toasted bread without unwanted flavours or odours from accumulated residue.
Exterior Cleaning and Maintenance
Cleaning your toaster’s exterior requires careful attention to material-specific requirements and proper technique. Stainless steel toasters demand different cleaning approaches compared to plastic or painted metal surfaces. Additionally, control knobs and buttons accumulate fingerprints, grease, and food particles that compromise both appearance and functionality.
Begin exterior cleaning by wiping down all surfaces with a damp microfibre cloth. Microfibre material effectively captures dust, grease, and residue without scratching delicate finishes. Moreover, the cloth’s absorbent properties prevent water streaks that commonly occur with paper towels or cotton rags.
Material-specific cleaners enhance cleaning effectiveness while protecting your toaster’s finish. Stainless steel surfaces benefit from specialised cleaners that remove fingerprints and restore shine without leaving residue. Conversely, plastic exteriors require gentle, non-abrasive solutions that won’t cause discolouration or surface damage.
- Stainless steel: Use dedicated stainless steel cleaner or white vinegar solution
- Plastic surfaces: Apply mild dish soap mixed with warm water
- Painted metal: Clean with gentle all-purpose cleaner
- Chrome accents: Polish with chrome-specific cleaning products
Control knobs and buttons require careful cleaning attention due to their intricate shapes and electrical connections. Food particles and grease commonly accumulate around these components, creating hygiene concerns and operational issues. Therefore, use cotton swabs or small brushes to reach crevices and detailed areas effectively.
Never spray cleaning solutions directly onto control panels or electrical components. Instead, apply cleaner to your cloth first, then wipe surfaces gently to prevent moisture penetration into sensitive areas. Similarly, avoid excessive pressure that might damage buttons or dislodge control mechanisms.
Stainless steel polishing restores your toaster’s original lustre and provides protective coating against future staining. Polish stainless steel surfaces using circular motions, following the grain direction where visible. Furthermore, quality stainless steel polish creates a barrier that repels fingerprints and water spots between cleaning sessions.
Complete moisture removal prevents water damage and electrical hazards before reassembling your toaster. Use a dry microfibre cloth to eliminate all water droplets from surfaces, paying particular attention to seams, joints, and control areas. Subsequently, allow the toaster to air dry for several minutes before plugging back into electrical outlets.
Regular exterior maintenance extends your toaster’s lifespan while maintaining optimal performance. Weekly cleaning prevents buildup that becomes increasingly difficult to remove over time. Consequently, consistent maintenance routines ensure your appliance continues operating efficiently while maintaining an attractive kitchen appearance.
Similar to cleaning stainless steel sinks, proper technique and appropriate products prevent scratching and maintain surface integrity. Therefore, investing time in correct exterior cleaning procedures protects your toaster investment and ensures years of reliable breakfast preparation.
Dealing with Stubborn Stains and Burnt Residue
Stubborn stains and burnt residue require targeted cleaning approaches that tackle tough deposits without damaging your toaster’s surfaces. Baking soda paste provides the most effective solution for persistent stains, combining gentle abrasive action with alkaline cleaning power. Mix three parts baking soda with one part water to create a thick paste that adheres to vertical surfaces and dissolves carbonised food particles.
Apply the baking soda mixture directly onto stained areas using a soft cloth or plastic spatula. Allow the paste to work for 15-20 minutes before gently scrubbing with circular motions. Subsequently, the alkaline properties break down acidic food residues while the mild abrasive action lifts embedded particles without scratching delicate surfaces.
White vinegar effectively dissolves mineral deposits and water stains that accumulate from steam and condensation. The acetic acid in vinegar neutralises alkaline mineral buildup, particularly calcium and limescale deposits common in hard water areas across the UK. Consequently, vinegar treatment restores clarity to glass doors and removes cloudy residue from stainless steel surfaces.
Soak a cloth in undiluted white vinegar and apply directly to mineral deposits for maximum effectiveness. For heavy buildup, create a vinegar solution by mixing equal parts white vinegar and warm water in a spray bottle. Moreover, the acidic solution penetrates stubborn deposits while remaining safe for food preparation surfaces.
Abrasive cleaners pose significant risks to toaster surfaces and should never be used during cleaning procedures. Avoid steel wool, scouring pads, and abrasive powders that scratch stainless steel and remove protective coatings. Similarly, harsh chemical cleaners containing bleach or ammonia can damage internal components and leave harmful residues on food contact surfaces.
Commercial oven cleaners and caustic degreasers prove too aggressive for toaster maintenance, potentially causing permanent surface damage. Instead, stick to gentle household ingredients like baking soda, vinegar, and mild dish soap for safe cleaning results. Furthermore, these natural alternatives provide effective cleaning power without introducing toxic chemicals into your kitchen environment.
Never submerge electrical components in water or allow moisture to penetrate control mechanisms during cleaning procedures. Water exposure creates serious electrical hazards and can permanently damage heating elements, thermostats, and control circuits. Therefore, always ensure your toaster remains unplugged and completely dry before reconnecting to electrical outlets.
Focus cleaning efforts on removable components like crumb trays and wire racks that can be safely washed separately. For stubborn residue on fixed internal surfaces, use damp cloths with minimal moisture to avoid water penetration. Additionally, similar precautions apply when cleaning oven interiors, where electrical safety remains paramount throughout the cleaning process.
Persistent burnt odours require thorough ventilation and may indicate the need for professional inspection. If cleaning procedures fail to eliminate strong burning smells, discontinue use and consult manufacturer guidelines or qualified technicians. Ultimately, proper stain removal techniques maintain your toaster’s performance while ensuring safe operation for years of reliable breakfast preparation.
Maintenance Schedule and Best Practices
Regular maintenance schedules prevent excessive buildup and extend your toaster’s operational lifespan significantly. Consequently, establishing consistent cleaning routines eliminates the need for intensive scrubbing sessions that can damage delicate components. Moreover, proper maintenance practices ensure optimal heating performance and reduce fire hazards associated with accumulated debris.
Weekly Maintenance Tasks
Empty crumb trays weekly with regular daily use to prevent overflow and burning odours. Furthermore, weekly removal allows you to inspect accumulated debris patterns and identify potential heating element issues early. Additionally, frequent emptying reduces the risk of crumbs falling into heating mechanisms during operation.
Wipe exterior surfaces after each use to prevent grease buildup and maintain hygiene standards. Similarly, immediate cleaning prevents stains from setting permanently on stainless steel or plastic surfaces. Therefore, quick daily maintenance reduces the frequency of intensive cleaning sessions required for your appliance.
Monthly Deep Cleaning Protocol
Deep clean monthly or immediately after heavy use periods to maintain optimal performance levels. However, intensive cleaning becomes necessary when you notice decreased heating efficiency or persistent burning smells during operation. Subsequently, thorough monthly cleaning prevents permanent damage from accumulated grease and food particles.
Monthly maintenance includes removing and washing all detachable components separately from the main unit. Additionally, inspect heating elements for damage and clean interior surfaces with appropriate tools and cleaning solutions. Meanwhile, similar deep cleaning principles apply to oven maintenance, where regular intensive cleaning prevents long-term performance issues.
Performance Indicators and Replacement Guidelines
Monitor your toaster’s heating consistency and browning patterns to identify declining performance before complete failure occurs. Nevertheless, uneven toasting or extended heating times indicate internal component wear that cleaning cannot resolve. Therefore, performance monitoring helps determine when replacement becomes more cost-effective than continued maintenance efforts.
Replace your toaster when cleaning no longer improves performance or when safety concerns arise from damaged components. Furthermore, persistent electrical issues, damaged heating elements, or cracked housing materials signal the need for immediate replacement. Ultimately, prioritising safety over appliance longevity protects your household from potential fire hazards and electrical dangers.
| Maintenance Task | Frequency | Key Benefits |
|---|---|---|
| Empty crumb tray | Weekly | Prevents burning, reduces fire risk |
| Wipe exterior | After each use | Maintains hygiene, prevents staining |
| Deep clean interior | Monthly | Optimises performance, extends lifespan |
| Performance assessment | Quarterly | Identifies replacement needs early |
Consistent maintenance schedules reduce long-term cleaning time while maximising your toaster’s operational efficiency and safety standards. Consequently, investing time in regular upkeep prevents costly replacements and ensures reliable breakfast preparation for years ahead.
Frequently Asked Questions
How often should I clean my toaster?
You should empty the crumb tray weekly and perform a thorough deep clean monthly. If you use your toaster daily, consider cleaning the exterior weekly and checking for crumb buildup more frequently to prevent fire hazards and maintain optimal performance.
Can I put my toaster parts in the dishwasher?
Never put electrical components in the dishwasher. Only removable crumb trays (if specified by the manufacturer) may be dishwasher-safe. Always check your user manual first, as most toaster parts require hand washing with mild washing-up liquid and warm water.
What should I do if my toaster won't turn on after cleaning?
Ensure the toaster is completely dry before plugging it back in. Water in electrical components can prevent operation and cause damage. Allow 24 hours drying time if moisture may have entered the appliance. If problems persist, contact the manufacturer or a qualified repair service.
How do I remove burnt smell from my toaster?
Remove all crumbs and debris, then create a baking soda paste to clean stubborn burnt residue. Ensure the toaster is unplugged and cool, then gently scrub affected areas. Run an empty cycle outdoors or in a well-ventilated area to burn off any remaining odours before normal use.
Is it safe to use compressed air to clean my toaster?
Yes, compressed air is safe and effective for removing stubborn crumbs from hard-to-reach areas. Always ensure the toaster is unplugged and cool, and use short bursts to avoid damaging delicate heating elements. Work in a well-ventilated area to avoid inhaling dust.
Can I clean the heating elements directly?
Never touch or scrub heating elements directly. These are extremely delicate and expensive to replace. Use a soft brush to gently remove debris around elements, or use compressed air to blow away crumbs. If elements appear damaged, contact a professional repair service.
What cleaning products should I avoid when cleaning my toaster?
- Abrasive cleaners that can scratch surfaces
- Harsh chemicals like bleach or ammonia
- Steel wool or scouring pads
- Excessive water that could enter electrical components
- Oven cleaners which are too strong for toaster materials
How long should I wait before using my toaster after cleaning?
Wait until the toaster is completely dry before plugging it in – typically 2-4 hours for exterior cleaning or 24 hours if any moisture entered the interior. Run one empty cycle before making toast to ensure all cleaning residue is removed and the appliance functions properly.
You May Also Like

How to Clean Glass Stovetop: Complete UK Guide 2026
How to Clean Dryer Vent: Complete UK Guide for 2026