How to Deep Clean Your Kitchen: Complete Step-by-Step Guide
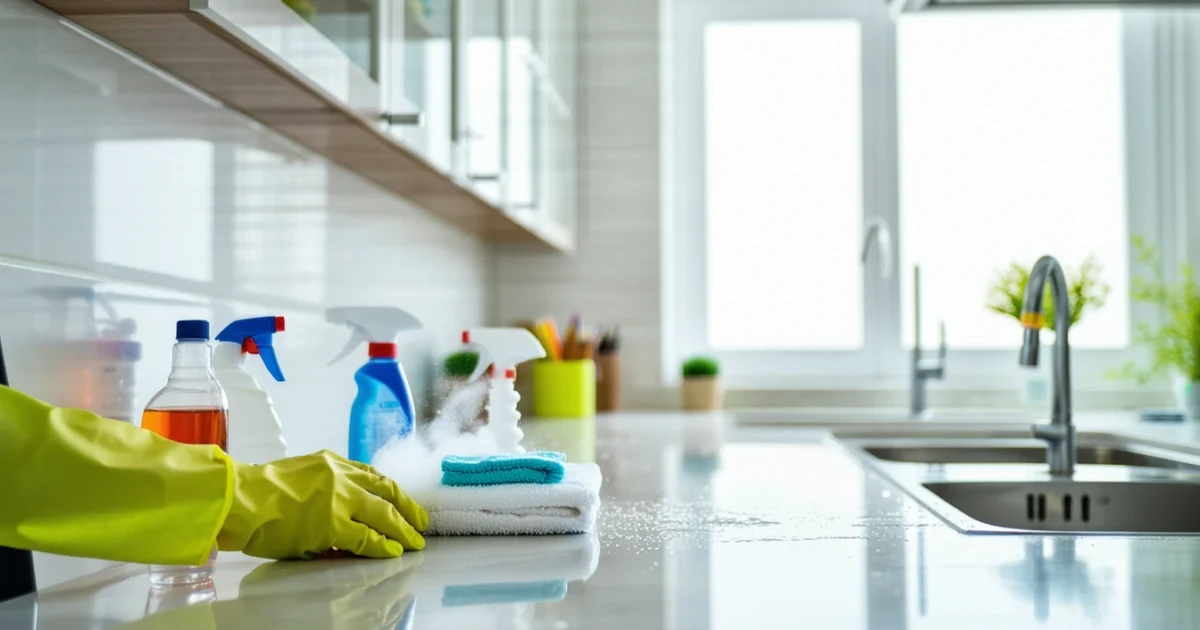
How to deep clean kitchen involves a systematic approach that goes far beyond daily wiping and washing dishes. Deep cleaning tackles built-up grease, hidden grime, and neglected areas that regular cleaning misses, transforming your kitchen into a hygienic and sparkling space. This comprehensive process includes degreasing cabinets, sanitizing appliances inside and out, scrubbing grout lines, and addressing every surface from ceiling to floor.
Unlike regular cleaning that focuses on visible dirt and daily maintenance, kitchen deep cleaning requires dedicated time and specialized techniques. Most importantly, it involves removing everything from cabinets and drawers, cleaning behind appliances, and using stronger cleaning products to eliminate stubborn stains and bacterial buildup.
Furthermore, this thorough cleaning process typically takes 4-6 hours and should be performed every 3-4 months. However, the investment in time pays off with improved food safety, extended appliance life, and a kitchen that looks and feels professionally cleaned. Additionally, following a proper cabinet degreasing method ensures even the stickiest residue comes off without damaging surfaces.
TL;DR
- Deep cleaning involves systematic cleaning of all kitchen surfaces, appliances, and hidden areas every 3-4 months
- Essential supplies include degreasers, microfiber cloths, scrub brushes, and protective equipment for safe cleaning
- Follow the top-to-bottom method starting with ceiling fixtures and working down to floors to prevent re-contamination
- Key areas include cabinet interiors, appliance deep cleaning, grout lines, and behind/under equipment
- Proper preparation involves decluttering, safety precautions, and disconnecting appliances before starting
What Deep Cleaning a Kitchen Actually Means
Deep cleaning transforms your kitchen from surface-level clean to thoroughly sanitized and restored. Unlike daily maintenance that focuses on wiping counters and washing dishes, deep cleaning penetrates every crevice, removes built-up grease, and addresses areas typically overlooked during regular cleaning routines.
Deep Cleaning vs. Regular Cleaning: The Key Differences
Regular cleaning maintains your kitchen’s daily functionality through quick tasks like wiping spills, loading the dishwasher, and sweeping floors. However, deep cleaning involves systematic dismantling of your kitchen environment to clean every component thoroughly.
Furthermore, regular cleaning uses basic supplies like all-purpose cleaners and dish soap. Deep cleaning requires specialized degreasers, descaling agents, and intensive scrubbing tools to remove stubborn buildup that accumulates over months.
| Regular Cleaning | Deep Cleaning |
|---|---|
| Surface wiping | Complete disassembly and cleaning |
| 15-30 minutes daily | 4-6 hours quarterly |
| Basic cleaning products | Specialized degreasers and tools |
| Visible dirt removal | Hidden bacteria and grease elimination |
Complete Scope of Deep Cleaning Tasks
A comprehensive kitchen deep clean covers every surface, appliance, and hidden area where grease, bacteria, and food particles accumulate. This process begins with ceiling fixtures and exhaust fans, progresses through cabinets and appliances, then concludes with floors and baseboards.
- Cabinet deep cleaning: Interior and exterior surfaces, hardware, and shelving
- Appliance restoration: Inside ovens, refrigerator coils, dishwasher filters
- Surface degreasing: Backsplashes, countertops, and wall areas
- Hidden area cleaning: Behind appliances, under sinks, inside drawers
- Grout and tile restoration: Deep scrubbing and sanitizing
- Ventilation cleaning: Extractor fan filters and ductwork access points
Additionally, deep cleaning addresses often-forgotten areas like light switch plates, door handles, and the spaces between appliances where crumbs and grease collect unnoticed.
Optimal Frequency for Deep Cleaning Sessions
Most kitchen experts recommend deep cleaning every 3-4 months to maintain optimal hygiene and prevent grease buildup from becoming permanent. However, frequency depends on cooking habits, household size, and kitchen usage patterns.
Busy households that cook daily may require monthly deep cleaning sessions, while occasional cooks might extend intervals to every 6 months. Nevertheless, certain indicators signal immediate deep cleaning needs regardless of schedule.
Deep Cleaning Schedule Indicators
Benefits of Thorough Kitchen Maintenance
Regular deep cleaning delivers measurable health and financial benefits that extend far beyond aesthetic improvements. Clean kitchens reduce foodborne illness risks, eliminate pest attraction, and create safer food preparation environments.
Moreover, thorough maintenance extends appliance lifespan significantly. Clean refrigerator coils operate 25% more efficiently, while grease-free ovens heat more evenly and consume less energy.
- Health improvements: Reduced bacteria, eliminated cross-contamination risks
- Cost savings: Extended appliance life, improved energy efficiency
- Enhanced functionality: Better appliance performance, easier daily cleaning
- Property value: Well-maintained kitchens increase home resale value
- Mental wellness: Organized, clean spaces reduce stress and improve cooking enjoyment
Professional deep cleaning can extend appliance lifespan by up to 40% while reducing energy consumption by 15-25%
Finally, deep cleaning creates a foundation for easier daily maintenance. Grease-free surfaces wipe clean effortlessly, while organized cabinets and drawers make cooking preparation faster and more enjoyable.
Essential Supplies and Tools for Kitchen Deep Cleaning
Successful kitchen deep cleaning requires specific products and equipment that tackle grease, grime, and bacteria effectively. Furthermore, having the right supplies prevents damage to surfaces while ensuring thorough sanitization throughout your cleaning process.
Commercial Cleaning Products
Degreasers form the backbone of kitchen deep cleaning, breaking down accumulated cooking oils and food residues. Heavy-duty alkaline degreasers work best on range hoods and backsplashes, while gentler formulations suit cabinet surfaces and countertops.
Additionally, disinfectants eliminate harmful bacteria and viruses that accumulate on food preparation surfaces. Look for EPA-registered products that kill 99.9% of common kitchen pathogens including Salmonella and E. coli.
- Multi-surface cleaners: All-purpose solutions for countertops and appliance exteriors
- Glass cleaners: Streak-free formulations for windows and stainless steel
- Oven cleaners: Heavy-duty products for baked-on grease and food residues
- Floor cleaners: pH-balanced solutions for different flooring materials
- Stainless steel polish: Specialized products that clean and protect metal surfaces
Essential Tools and Equipment
Microfiber cloths outperform traditional cleaning rags by trapping dirt and bacteria within their fibers. Moreover, these cloths clean effectively with minimal chemical products, reducing environmental impact while delivering superior results.
Different brush types tackle specific cleaning challenges throughout your kitchen. Scrub brushes with stiff bristles remove stubborn grime, while soft-bristled brushes protect delicate surfaces from scratching damage.
| Tool Category | Specific Items | Primary Use |
|---|---|---|
| Cloths & Towels | Microfiber, lint-free, disposable | Surface cleaning, drying, polishing |
| Brushes | Scrub, bottle, toothbrush, wire | Grout, crevices, tough stains |
| Sponges & Pads | Non-abrasive, steel wool, magic erasers | Gentle cleaning, tough residue removal |
| Protective Gear | Rubber gloves, safety glasses, masks | Chemical protection, safety |
Safety equipment protects you from chemical exposure and physical injury during intensive cleaning sessions. Rubber gloves prevent skin irritation, while safety glasses shield eyes from splashing cleaners.
Natural Cleaning Alternatives
White vinegar serves as a powerful natural degreaser and disinfectant that costs significantly less than commercial products. Its acidic properties dissolve mineral deposits and soap scum while killing many common bacteria strains.
Similarly, baking soda acts as a gentle abrasive that neutralizes odors and lifts stains without scratching surfaces. When combined with vinegar, these ingredients create an effective cleaning paste for tough kitchen grime.
DIY All-Purpose Cleaner Recipe
- Lemon juice: Natural bleaching agent for stains and cutting boards
- Castile soap: Plant-based cleaner safe for food preparation areas
- Hydrogen peroxide: Disinfectant that breaks down safely into water and oxygen
- Essential oils: Antimicrobial properties with pleasant scents
Natural alternatives work particularly well for households with children, pets, or chemical sensitivities. However, they may require longer contact times or multiple applications for heavily soiled areas. Specialized techniques for grease removal can supplement natural cleaning methods when dealing with stubborn buildup.
Organization and Decluttering Supplies
Effective deep cleaning requires temporary storage solutions for kitchen items during the cleaning process. Storage containers and bins keep items organized while protecting them from cleaning chemicals and moisture.
Labels and markers help maintain organization systems after deep cleaning completion. Clear labeling prevents items from returning to cluttered states and makes future cleaning sessions more efficient.
- Clear storage bins: Sort items by category and frequency of use
- Drawer organizers: Maintain utensil and tool organization
- Shelf liners: Protect surfaces and simplify future cleaning
- Trash bags: Multiple sizes for different disposal needs
- Cleaning caddies: Portable organization for supplies and tools
Professional-grade cleaning caddies keep supplies organized and easily transportable between different kitchen areas. These portable organizers prevent time waste and ensure all necessary tools remain within reach throughout your deep cleaning session.
Pre-Cleaning Preparation and Safety
Proper preparation transforms chaotic kitchen deep cleaning into systematic efficiency. Moreover, thorough pre-cleaning setup prevents damage to appliances and protects your health from chemical exposure. Consequently, investing time in preparation saves hours during the actual cleaning process.
Clearing and Decluttering All Surfaces
Remove everything from countertops, shelves, and storage areas before beginning your deep clean. Furthermore, this complete clearing allows access to hidden grime and forgotten spills that accumulate behind appliances and containers. Empty drawers and cabinets systematically, sorting items into categories for easier reorganization later.
Store cleared items in designated areas away from your cleaning zones. Additionally, use this opportunity to discard expired foods, broken utensils, and items you no longer use. Professional cleaners recommend the three-box method: keep, donate, and discard boxes for efficient decision-making during decluttering.
- Remove all items from countertops and work surfaces
- Empty refrigerator contents into coolers with ice packs
- Clear cabinet shelves and drawer contents completely
- Sort items into logical categories for easy reorganization
- Dispose of expired or damaged items immediately
Safety Precautions with Cleaning Chemicals
Chemical safety prevents accidents and protects your respiratory system during intensive cleaning sessions. Never mix different cleaning products, as combining bleach with ammonia creates toxic chloramine gas. Instead, use one product at a time and allow surfaces to dry completely between applications.
Read product labels carefully and follow manufacturer dilution ratios precisely. Overconcentrated solutions waste money and increase chemical exposure risks without improving cleaning effectiveness. Store all cleaning products in their original containers with intact labels for safety identification.
Chemical Safety Warning
Proper Ventilation and Protective Equipment
Open all windows and doors to create cross-ventilation before starting your deep cleaning project. Additionally, turn on exhaust fans and range hoods to remove chemical fumes and moisture from the air. Adequate ventilation reduces chemical exposure by up to 75% compared to cleaning in enclosed spaces.
Wear protective equipment appropriate for your chosen cleaning products. Rubber gloves protect your hands from harsh chemicals and hot water, while safety glasses prevent splashes from reaching your eyes. Consider wearing old clothes or aprons to protect your clothing from bleach stains and chemical splashes.
- Open windows and doors for maximum airflow
- Activate all exhaust fans and ventilation systems
- Wear chemical-resistant rubber gloves
- Use safety glasses when cleaning overhead areas
- Don old clothing or protective aprons
Disconnecting Appliances and Removing Items
Unplug all small appliances before cleaning to prevent electrical hazards and water damage. Furthermore, remove appliances from countertops to access hidden areas where grease and crumbs accumulate. Toasters and coffee makers harbor significant bacteria in their crevices and require separate thorough cleaning.
Turn off power to hardwired appliances like garbage disposals and dishwashers at the circuit breaker for safety. However, leave refrigerators connected but empty their contents into temporary cold storage. Clean removable parts like extractor fan filters separately in sinks or dishwashers for thorough degreasing.
Remove light fixtures, switch plates, and outlet covers where grease buildup occurs frequently. These often-overlooked areas collect cooking vapors and require individual attention during deep cleaning sessions. Label removed screws and hardware in small containers to prevent loss during reassembly.
| Appliance Type | Preparation Step | Safety Consideration |
|---|---|---|
| Small appliances | Unplug and remove from counters | Prevent electrical shock |
| Range hood | Remove filters and light covers | Turn off power at breaker |
| Refrigerator | Empty contents, keep plugged in | Use coolers for perishables |
| Dishwasher | Empty and remove racks | Turn off water supply if needed |
The Top-to-Bottom Deep Cleaning Method
Professional cleaners follow a systematic top-to-bottom approach because gravity naturally carries dirt and debris downward during cleaning. Moreover, this method prevents re-contamination of already cleaned surfaces. Starting from the ceiling and working methodically to the floor ensures maximum efficiency and thoroughness.
Why Cleaning from Ceiling to Floor is Most Effective
The gravitational principle governs effective deep cleaning methodology. When you clean light fixtures first, dust and grease particles fall onto lower surfaces that haven’t been cleaned yet. Consequently, cleaning from top to bottom eliminates the need for repeated cleaning of the same areas.
Furthermore, this approach maximises your cleaning solution’s effectiveness. Fresh cleaning products work better on surfaces that haven’t been contaminated by debris falling from above. Professional cleaning services consistently use this method because it reduces cleaning time by up to 30% compared to random cleaning patterns.
Starting with Light Fixtures, Ceiling Fans, and Upper Surfaces
Begin your deep clean with ceiling-mounted fixtures and ventilation systems. Light fixtures accumulate significant grease deposits from cooking vapors, while ceiling fans distribute this contamination throughout the kitchen. Additionally, extractor fan filters require thorough degreasing to maintain proper ventilation efficiency.
- Remove light covers and wash in warm soapy water
- Wipe ceiling fan blades with microfibre cloths dampened with degreasing solution
- Clean extractor fan housing and replace or wash filters
- Dust crown moulding and architectural details with extension dusters
- Address cobwebs in corners and around ceiling fixtures
Next, tackle upper cabinet surfaces and the tops of tall appliances. These areas collect substantial grease and dust because warm air rises and deposits cooking residues on horizontal surfaces. Use a sturdy step ladder and work systematically across the room to ensure complete coverage.
Working Systematically to Prevent Re-contamination
Establish a logical cleaning sequence that prevents cross-contamination between clean and dirty areas. Professional cleaners divide kitchens into zones and complete each zone entirely before moving to the next. This zonal approach maintains cleaning momentum and prevents overlooking critical areas.
Start with the least contaminated areas first, typically moving from dry storage areas toward wet zones like sinks and dishwashers. Additionally, clean appliances before surrounding surfaces to prevent spreading grease and food particles. Use separate cleaning cloths for different zones to avoid transferring bacteria between areas.
| Cleaning Zone | Order | Key Focus Areas |
|---|---|---|
| Upper Level | 1st | Ceiling, lights, upper cabinets |
| Wall Surfaces | 2nd | Backsplash, wall cabinets, switches |
| Appliances | 3rd | Range, refrigerator, dishwasher |
| Countertops | 4th | Work surfaces, sink area |
| Lower Cabinets | 5th | Doors, drawers, hardware |
| Floor Level | 6th | Baseboards, floor surfaces |
Time Management and Efficient Workflow Strategies
Effective time management transforms overwhelming deep cleaning tasks into manageable segments. Professional cleaners allocate specific time blocks for each cleaning zone, typically spending 15-20 minutes per major appliance and 10-15 minutes per cabinet section. This structured approach maintains momentum and prevents fatigue.
Implement the “clean as you go” principle by immediately disposing of debris and rinsing cleaning cloths in designated buckets. Moreover, prepare all cleaning solutions and tools before beginning to eliminate interruptions during the cleaning process. Keep a timer to track progress and maintain consistent pacing throughout the session.
Professional Timing Strategy
Batch similar tasks together for maximum efficiency. For example, remove all cabinet doors simultaneously, then clean them assembly-line style rather than cleaning each cabinet individually. Similarly, collect all removable parts like oven racks and refrigerator shelves for soaking while you clean other areas.
Finally, maintain a cleaning supply caddy that moves with you through each zone. Stock it with microfibre cloths, appropriate cleaning solutions, scrub brushes, and disposal bags. This mobile approach eliminates time wasted retrieving forgotten supplies and keeps your workflow smooth and efficient.
Deep Cleaning Kitchen Cabinets Inside and Out
Kitchen cabinets accumulate grease, food particles, and sticky residue over months of daily cooking activities. Consequently, deep cleaning these storage units requires systematic removal of contents, thorough interior cleaning, and careful attention to exterior surfaces and hardware. This comprehensive cabinet cleaning process typically takes 2-3 hours but delivers transformative results.
Removing and Organizing Cabinet Contents
Begin cabinet cleaning by completely emptying each storage compartment. Place items on nearby counters or tables, grouping similar products together for efficient reorganization. Additionally, check expiration dates on food items and discard anything past its prime.
Sort remaining items into categories: frequently used items, seasonal products, and rarely accessed supplies. This sorting process reveals optimal storage arrangements and identifies items that might relocate to different cabinets. Furthermore, wipe down containers and bottles before returning them to freshly cleaned spaces.
Cleaning Cabinet Interiors Thoroughly
Vacuum cabinet interiors using a crevice tool attachment to remove crumbs, dust, and debris from corners and shelf joints. Subsequently, prepare a cleaning solution using warm water and dish soap, or create a degreasing mixture with equal parts white vinegar and water for heavily soiled areas.
Wipe interior surfaces systematically from top to bottom, paying special attention to shelf edges and corner joints where grime accumulates. Replace shelf liners if they appear stained or damaged, as fresh liners protect surfaces and simplify future cleaning tasks. Allow interiors to air dry completely before replacing contents.
Degreasing and Polishing Exterior Surfaces
Cabinet exteriors require specialized attention due to cooking grease, fingerprints, and food splatter accumulation. Mix a degreasing solution using warm water and a few drops of dish soap, or use commercial kitchen degreasers for heavily soiled surfaces. Test cleaning products on an inconspicuous area first to ensure compatibility with cabinet finishes.
Clean cabinet doors using circular motions, working from top to bottom to prevent drip marks. Pay particular attention to areas around handles and knobs where hands frequently make contact. For stubborn grease removal, allow cleaning solution to sit for several minutes before wiping clean.
Polish wood cabinets with appropriate wood cleaner or a mixture of olive oil and lemon juice for natural conditioning. Meanwhile, laminate surfaces benefit from glass cleaner for streak-free finishing. Always follow wood grain patterns when cleaning and polishing to maintain surface integrity.
Addressing Hardware and Stubborn Stains
Remove cabinet handles and knobs when possible for thorough cleaning in warm, soapy water. Alternatively, clean hardware in place using an old toothbrush to reach crevices and decorative details. Brass and copper hardware may require specialized metal cleaners to restore original luster.
Target sticky residue and stubborn stains with paste made from baking soda and water. Apply this gentle abrasive to problem areas and let it sit for 10-15 minutes before scrubbing with a soft brush. For persistent stains, try a mixture of equal parts baking soda and white vinegar, which creates a fizzing action that helps break down tough deposits.
Pros
- Removes years of accumulated grease and grime
- Extends cabinet lifespan through proper maintenance
- Creates more hygienic food storage environment
- Reveals cabinet beauty and original finish
Cons
- Time-intensive process requiring 2-3 hours
- May require cabinet hardware removal
- Some stains might need multiple treatment attempts
- Strong cleaning solutions can affect certain finishes
Complete the cabinet cleaning process by treating hinges with a drop of cooking oil to ensure smooth operation. Finally, organize items thoughtfully as you return them to cabinets, placing frequently used items at eye level and heavy items in lower cabinets for safety and convenience.
Comprehensive Appliance Deep Cleaning
Kitchen appliances accumulate grease, food residue, and bacteria that regular wiping cannot eliminate. Deep cleaning these workhorses requires systematic approaches targeting both visible surfaces and hidden components. Professional-grade results demand attention to interior mechanisms, filters, and hard-to-reach areas that harbor stubborn buildup.
Oven Deep Cleaning: Interior, Racks, and Exterior
Begin oven deep cleaning by removing all racks, trays, and accessories for separate treatment. Soak these components in hot, soapy water mixed with degreasing dish soap for at least 30 minutes. Stubborn baked-on residue responds well to baking soda paste applied generously and left overnight.
Create a powerful oven cleaning paste using three parts baking soda to one part water. Spread this mixture throughout the oven interior, avoiding heating elements completely. The alkaline properties of baking soda break down grease and carbonized food particles effectively. Allow the paste to work for 12-24 hours for maximum effectiveness.
Remove the dried paste using a plastic scraper, then wipe surfaces with damp cloths repeatedly. Spray white vinegar over any remaining baking soda residue to neutralize alkalinity and create a foaming action that lifts final traces of grime. For glass doors, specialized techniques prevent scratching while achieving crystal clarity – detailed methods are available in our oven glass cleaning guide.
Clean exterior surfaces using appropriate cleaners for your oven’s finish. Stainless steel requires grain-direction wiping with specialized cleaners, while painted surfaces need gentle, non-abrasive solutions. Pay special attention to control knobs and handles where grease transfers from hands during cooking.
Refrigerator Thorough Cleaning and Organization
Empty your refrigerator completely, checking expiration dates and discarding spoiled items systematically. Remove all shelves, drawers, and door compartments that can be safely detached. Wash these components in warm, soapy water, allowing them to air dry completely before reinstalling.
Clean interior walls using a solution of two tablespoons baking soda per quart of warm water. This mixture neutralizes odors while providing gentle cleaning action that won’t damage food-safe surfaces. Wipe down all surfaces methodically, including often-forgotten areas like door seals and drip trays.
Address the condenser coils located behind or beneath your refrigerator for optimal efficiency. Use a vacuum cleaner with brush attachment to remove dust buildup that forces the motor to work harder. Clean coils can reduce energy consumption by up to 15 percent while extending appliance lifespan significantly.
Organize items strategically as you restock, placing dairy products in the coldest areas and fruits in designated crisper drawers. Install refrigerator thermometers to monitor temperature zones and ensure food safety standards. Maintain organization with clear containers and labels for easy identification and rotation.
Dishwasher Maintenance and Filter Cleaning
Locate your dishwasher’s bottom filter system, typically found beneath the lower spray arm. Remove the cylindrical filter by twisting counterclockwise, then lift out any additional mesh screens or components. These filters trap food particles and grease that can cause odors and reduce cleaning effectiveness.
Rinse filters under hot running water while scrubbing gently with a soft brush to dislodge trapped debris. For heavily soiled filters, soak in warm water mixed with dish soap for 10-15 minutes before scrubbing. Never use harsh chemicals or abrasive materials that could damage the fine mesh construction.
Clean spray arms by removing them according to manufacturer instructions and rinsing under high-pressure water. Use a toothpick or thin wire to clear individual holes where mineral deposits or food particles create blockages. Properly functioning spray arms ensure even water distribution and optimal cleaning performance.
Run an empty cycle with two cups white vinegar placed in a dishwasher-safe bowl on the top rack. Follow this with a second empty cycle using one cup baking soda sprinkled on the bottom to neutralize odors and remove mineral buildup. This monthly maintenance prevents costly repairs and maintains peak performance.
Microwave, Small Appliances, and Range Hood Degreasing
Steam-clean your microwave interior by heating a bowl containing one cup water and two tablespoons white vinegar for two minutes on high power. The resulting steam softens baked-on food particles and neutralizes odors simultaneously. Wipe interior surfaces immediately while steam has loosened stubborn residue.
Remove and wash the turntable and support ring in warm, soapy water. Clean the microwave exterior with appropriate cleaners for the surface material, paying attention to the door handle and control panel where fingerprints accumulate. Replace the charcoal filter if your microwave includes ventilation features.
Tackle small appliances like coffee makers, toasters, and blenders with targeted approaches. Descale coffee makers monthly using manufacturer-recommended solutions or white vinegar cycles. Empty and wash toaster crumb trays weekly, while deep-cleaning blender components requires disassembly for thorough sanitization.
Range hood cleaning demands attention to both visible surfaces and internal components. Remove and wash grease filters in hot, soapy water or run them through the dishwasher if manufacturer-approved. Degrease the hood exterior and interior using specialized kitchen degreasers that cut through accumulated cooking residue effectively.
Replace charcoal filters in recirculating range hoods every three to six months depending on cooking frequency. Clean the fan blades carefully using degreasing solutions and soft cloths, ensuring the unit is disconnected from power during maintenance. Proper range hood maintenance improves air quality and prevents grease from spreading throughout your kitchen.
Countertops, Backsplash, and Surface Restoration
Kitchen surfaces endure constant exposure to heat, moisture, and food particles, making targeted restoration essential for maintaining both hygiene and appearance. Different materials require specific cleaning approaches to prevent damage while achieving thorough sanitization.
Material-Specific Countertop Cleaning Methods
Granite countertops demand pH-neutral cleaners to preserve their natural stone integrity. Mix warm water with mild dish soap for daily cleaning, avoiding acidic substances like lemon or vinegar that etch the surface. Additionally, use specialized granite cleaners monthly to maintain the stone’s natural luster and protective qualities.
Quartz surfaces resist staining better than natural stone but still require careful maintenance. Clean spills immediately using non-abrasive cleaners and microfiber cloths. Furthermore, avoid placing hot pans directly on quartz, as extreme heat can cause permanent discoloration or cracking.
Marble countertops need the gentlest approach due to their calcium carbonate composition. Use only marble-specific cleaners or plain water with soft cloths. Never use acidic cleaners, as they create permanent etching that requires professional restoration.
Laminate surfaces tolerate most household cleaners but scratch easily. Clean with warm, soapy water and avoid abrasive sponges or scouring powders. Moreover, use baking soda paste for stubborn stains, letting it sit for 15 minutes before gentle scrubbing.
Butcher block countertops require oil conditioning after deep cleaning. Sand lightly with fine-grit sandpaper for deep stains, then apply food-grade mineral oil to restore moisture and prevent cracking. Clean daily with mild soap solutions, drying immediately to prevent water damage.
Grout Cleaning and Tile Restoration Techniques
Grout accumulates grease, food particles, and moisture, creating ideal conditions for mold and bacteria growth. Alkaline cleaners break down organic matter effectively while brightening discolored grout lines.
Create a powerful grout cleaner by mixing three parts baking soda with one part water to form a thick paste. Apply this mixture generously to grout lines, allowing it to penetrate for 20 minutes before scrubbing with an old toothbrush. Subsequently, spray white vinegar over the baking soda paste to create a foaming action that lifts embedded dirt.
For severely stained grout, use oxygen bleach solutions that safely lighten discoloration without damaging surrounding tiles. Mix oxygen bleach powder with warm water according to package directions, applying with a spray bottle for even coverage. Allow the solution to work for 30 minutes before scrubbing and rinsing thoroughly.
Steam cleaning provides chemical-free grout restoration for sensitive households. The high-temperature steam penetrates porous grout, loosening dirt and killing bacteria naturally. Work systematically across small sections, wiping immediately after steaming to prevent moisture reabsorption.
Removing Water Stains, Scratches, and Discoloration
Water stains on natural stone surfaces respond well to specialized stone cleaners containing mild acids that dissolve mineral deposits. Apply the cleaner according to manufacturer instructions, allowing adequate contact time for complete mineral dissolution.
Scratches on laminate countertops often disappear using automotive polishing compounds. Apply a small amount to a soft cloth, rubbing in circular motions until scratches fade. Alternatively, use toothpaste containing mild abrasives for minor surface scratches.
Heat discoloration on wood surfaces requires progressive sanding starting with fine-grit sandpaper. Sand gently along the wood grain, gradually removing discolored layers until reaching undamaged wood. Follow with appropriate wood stain and protective finish to restore original appearance.
Rust stains on metal surfaces dissolve effectively using lemon juice and salt combinations. Sprinkle salt over rust spots, then squeeze fresh lemon juice to create a paste. Let this mixture sit for 30 minutes before scrubbing with a soft brush and rinsing completely.
Sealing and Protecting Surfaces After Cleaning
Natural stone surfaces require sealing every 12-18 months to prevent staining and moisture penetration. Clean the surface thoroughly and allow complete drying before applying stone sealer with a clean cloth. Work in small sections, ensuring even coverage without pooling.
Test sealer effectiveness by placing a few drops of water on the surface after curing. If water beads and doesn’t absorb within 15 minutes, the seal is adequate. However, if water absorbs quickly, apply an additional sealer coat for optimal protection.
Grout sealing prevents future staining and simplifies maintenance significantly. Use penetrating grout sealers that soak into the porous material rather than forming surface films. Apply sealer with a small brush or applicator bottle, ensuring complete coverage of all grout lines.
Wood surface protection requires regular oil or wax applications to maintain moisture resistance. Apply food-grade mineral oil monthly to butcher block surfaces, allowing complete absorption before use. Proper cabinet maintenance extends to all wood surfaces in your kitchen environment.
Maintain protective coatings by cleaning gently and avoiding harsh chemicals that strip sealers prematurely. Regular maintenance preserves surface integrity while reducing the frequency of intensive restoration procedures.
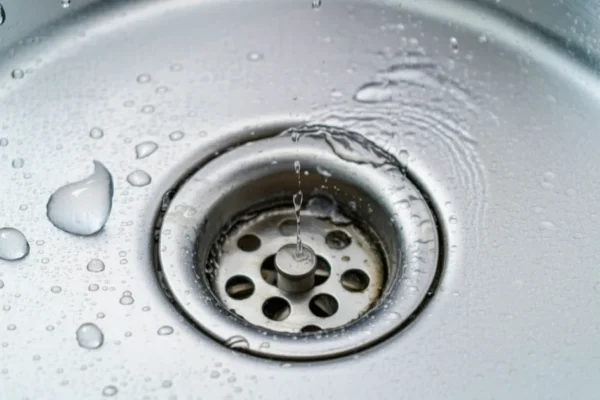
Sink, Faucet, and Plumbing Deep Clean
Your kitchen sink and plumbing system require thorough attention during deep cleaning sessions. These areas accumulate mineral deposits, soap scum, and bacteria that standard daily cleaning cannot address effectively. Consequently, dedicated deep cleaning techniques restore functionality while eliminating odours and stains.
Removing Mineral Deposits and Soap Scum Buildup
White vinegar dissolves mineral deposits naturally without damaging sink surfaces. Fill a plastic bag with undiluted white vinegar and secure it around your faucet aerator using rubber bands. Allow the vinegar to work for 2-3 hours before removing the bag and scrubbing with an old toothbrush.
Soap scum responds well to baking soda paste applications. Mix three parts baking soda with one part water to create a thick paste. Apply this mixture generously to affected areas and let it sit for 15-20 minutes before scrubbing with a non-abrasive sponge.
Stubborn buildup requires stronger intervention using citric acid powder. Dissolve two tablespoons of citric acid in one cup of warm water. This solution effectively breaks down calcium and lime deposits that vinegar alone cannot tackle.
Disinfecting and Deodorizing Sink Basin and Drain
Sink basins harbour bacteria and food particles that create unpleasant odours. Start by removing all dishes and debris from the sink area. Subsequently, sprinkle coarse salt throughout the basin and scrub with half a lemon to create natural abrasion.
Drain deodorizing requires a two-step approach for maximum effectiveness. Pour one cup of baking soda down the drain, followed by two cups of boiling water. Wait 10 minutes, then flush with cold water to neutralise remaining odours.
For persistent drain smells, the combination of baking soda and vinegar creates a powerful cleaning reaction. Add one cup of baking soda to the drain, followed by one cup of white vinegar. Cover the drain with a plug for 30 minutes before flushing with hot water. If drain odours persist, you might need to investigate why your drain smells and address underlying causes.
Polishing Faucets and Addressing Hard Water Stains
Chrome and stainless steel faucets develop water spots and mineral stains over time. Baby oil or mineral oil applied with a soft cloth creates a protective barrier while restoring shine. Buff the surface in circular motions until achieving a streak-free finish.
Hard water stains require acidic solutions for complete removal. Create a paste using cream of tartar and lemon juice. Apply this mixture to stained areas and allow it to work for 20 minutes before scrubbing gently with a soft-bristled brush.
Brass and copper faucets need gentler treatment to avoid damage. Mix equal parts flour, salt, and white vinegar to create a natural polish. Apply this paste and let it sit for 10 minutes before rinsing thoroughly and drying with a clean cloth.
Cleaning Garbage Disposal and Addressing Odours
Garbage disposal cleaning begins with safety precautions. Turn off the power at the circuit breaker before attempting any cleaning procedures. Remove visible debris using tongs or pliers, never your hands.
Ice cubes and rock salt sharpen disposal blades while removing buildup. Add two cups of ice and one cup of rock salt to the disposal. Run cold water and operate the disposal for 30 seconds to clean internal components effectively.
Citrus peels naturally deodorise and clean disposal surfaces. Drop lemon, lime, or orange peels into the disposal and run with cold water for 15 seconds. The citrus oils coat the interior surfaces while providing fresh fragrance.
Deep cleaning requires a thorough rinse cycle after mechanical cleaning. Pour dish soap into the disposal and run cold water for two minutes. This process removes loosened debris and sanitises internal surfaces completely.
Safety Reminder
Walls, Windows, and Often-Missed Areas
Kitchen walls accumulate grease splatters and cooking residue that standard cleaning routines often miss. These surfaces require specific attention during deep cleaning to maintain hygiene and appearance. Start by removing all wall decorations, hooks, and removable fixtures to access the entire surface area.
Grease removal begins with the right cleaning solution for your wall type. Mix warm water with dish soap for painted walls, creating a gentle yet effective degreasing agent. For stubborn grease deposits, combine equal parts white vinegar and warm water in a spray bottle. Test any cleaning solution on an inconspicuous area first to prevent damage.
Work systematically from top to bottom when cleaning walls. Spray the cleaning solution onto a microfibre cloth rather than directly onto the wall to control moisture levels. Excessive water can damage paint or wallpaper, so maintain moderate dampness throughout the process. Wipe in circular motions, overlapping each section to ensure complete coverage.
Window cleaning optimises natural light penetration while removing cooking-related film buildup. Kitchen windows collect grease vapours and steam condensation that reduce transparency over time. Begin by removing window treatments and cleaning the window frame with appropriate solutions.
Professional window cleaning techniques deliver streak-free results every time. Mix one part white vinegar with two parts distilled water for an effective, chemical-free solution. Alternatively, commercial glass cleaners provide excellent results when applied correctly. Use a squeegee for large windows and lint-free cloths for smaller panes.
Clean windows during overcast conditions to prevent rapid drying that causes streaks. Apply the cleaning solution evenly across the glass surface using horizontal strokes. Follow immediately with vertical squeegee passes, wiping the blade clean between strokes. Finish by polishing edges with a dry microfibre cloth.
Baseboards collect dust, grease particles, and food debris that accumulate at floor level. These horizontal surfaces trap airborne contaminants and require thorough attention during deep cleaning sessions. Remove furniture and appliances where possible to access hidden baseboard sections.
Vacuum baseboards first to remove loose debris and dust buildup. Use a brush attachment to dislodge particles from decorative grooves and corners. Subsequently, wipe with a damp cloth and appropriate cleaning solution, working methodically around the entire kitchen perimeter.
Light switches and outlet covers harbour bacteria and grease from frequent hand contact. These high-touch surfaces require disinfection as well as cleaning during deep kitchen maintenance. Turn off electrical power at the circuit breaker before cleaning any electrical fixtures for safety.
Remove outlet covers and switch plates where possible for thorough cleaning. Wash removable covers in warm, soapy water and dry completely before reinstallation. Clean fixed electrical components with barely damp cloths, avoiding excess moisture that could cause electrical hazards.
Behind and under appliances represents the most neglected area in kitchen cleaning routines. These spaces accumulate food particles, grease, and debris that can attract pests and create hygiene issues. Moving appliances requires careful planning and proper techniques to avoid damage.
Disconnect electrical appliances and shut off gas connections before moving any equipment. Use appliance sliders or furniture dollies to protect flooring while repositioning heavy items. Clean the revealed floor area thoroughly, addressing any sticky residues or staining that has developed over time.
Appliance exteriors require cleaning attention in areas normally hidden from view. Wipe down the backs and sides of refrigerators, dishwashers, and ranges using appropriate cleaning solutions. Remove grease buildup from these surfaces to prevent odours and maintain appliance efficiency.
Under-furniture cleaning extends beyond appliances to include kitchen tables, chairs, and storage units. These areas collect dropped food, dust, and debris that contribute to overall kitchen cleanliness issues. Vacuum thoroughly before mopping with appropriate floor cleaning solutions.
Floor Deep Cleaning and Restoration
Kitchen floors endure the heaviest traffic and accumulate the most stubborn residues of any surface in your home. Deep cleaning kitchen floors requires understanding your specific flooring material and selecting appropriate cleaning methods that remove built-up grime without causing damage. Different floor types demand tailored approaches to achieve optimal results.
Floor-Type Specific Deep Cleaning Methods
Ceramic and porcelain tiles handle aggressive cleaning solutions well, making them ideal for thorough degreasing treatments. Mix warm water with heavy-duty degreaser or dish soap to create an effective cleaning solution. Apply the mixture generously across the floor surface, allowing it to penetrate stubborn residues for several minutes before scrubbing.
Natural stone floors require pH-neutral cleaners to prevent etching and discoloration. Avoid acidic solutions like vinegar or lemon juice that can permanently damage marble, travertine, or limestone surfaces. Instead, use stone-specific cleaners that effectively remove grease while preserving the material’s integrity.
Vinyl and laminate flooring benefits from gentle yet effective cleaning approaches. These synthetic materials resist moisture but can suffer damage from harsh chemicals or excessive scrubbing. Use manufacturer-recommended cleaners or mild dish soap solutions for optimal cleaning results.
Hardwood floors demand the most careful treatment during deep cleaning sessions. Excess moisture can cause warping, cupping, or permanent water damage to wood surfaces. Use barely damp mops with wood-safe cleaners, working in small sections to minimize moisture exposure time.
Removing Built-Up Grime and Sticky Residue
Sticky residues from spilled food, grease splatters, and tracked-in debris create the most challenging floor cleaning obstacles. These substances bond with floor surfaces over time, requiring mechanical action combined with appropriate solvents to achieve complete removal. Start with the gentlest effective method before progressing to stronger solutions.
Apply cleaning solution directly to problem areas and allow adequate dwell time for chemical action. Dwell time enables cleaners to break down molecular bonds in sticky substances, making mechanical removal significantly easier. Most commercial degreasers require 3-5 minutes of contact time for optimal effectiveness.
Use plastic scrapers or old credit cards to gently remove softened residues without scratching floor surfaces. Mechanical removal works more effectively than chemical action alone for thick, built-up deposits. Follow scraping with thorough cleaning using appropriate floor-specific solutions.
For particularly stubborn residues, create a paste using baking soda and water for gentle abrasive action. This natural approach provides effective cleaning power without the harsh chemicals found in commercial products. Apply the paste, let it work for 10-15 minutes, then scrub gently with a soft brush.
Grout Cleaning for Tile Floors
Grout lines collect more dirt, grease, and staining than tile surfaces due to their porous nature and recessed position. Deep cleaning grout requires specialized techniques and tools designed to reach into narrow spaces where standard mops cannot effectively clean. Neglected grout can harbor bacteria and create unsanitary conditions.
Create a powerful grout cleaning solution using equal parts baking soda and water, enhanced with a small amount of dish soap. This mixture provides gentle abrasive action while breaking down grease and organic stains. Apply the paste liberally to grout lines using an old toothbrush or specialized grout brush.
Grout brushes feature stiff bristles designed to scrub effectively in narrow spaces without damaging surrounding tile surfaces. Work systematically across the floor, focusing on heavily stained areas that may require multiple treatment cycles. Rinse thoroughly with clean water to remove all cleaning residue.
For severely stained grout, hydrogen peroxide provides additional whitening power when combined with baking soda. This combination creates a foaming action that helps lift deep stains from porous grout material. However, test this solution in an inconspicuous area first to ensure it won’t cause discoloration.
Mopping Techniques and Drying for Streak-Free Results
Proper mopping technique determines the difference between truly clean floors and surfaces that appear clean but retain residue. Start by sweeping or vacuuming thoroughly to remove all loose debris that could scratch surfaces during mopping. Any remaining particles will create streaks and potentially damage flooring materials.
Use the two-bucket method for optimal cleaning results: one bucket contains clean cleaning solution while the second holds rinse water. Dip your mop in the cleaning solution, wring out excess liquid, clean a small section, then rinse the mop in the second bucket before returning to the cleaning solution.
Work in manageable sections, typically 4×4 feet areas, to prevent cleaning solution from drying on surfaces before proper rinsing. Section-by-section cleaning ensures consistent results and prevents the formation of streaks or residue buildup that occurs when solutions dry too quickly.
Follow cleaning with a final rinse using clean water to remove all soap residue that could attract dirt or create slippery surfaces. Change rinse water frequently to avoid redistributing dissolved dirt and cleaning chemicals across clean floor areas.
Air drying produces the best results for most floor types, but ensure adequate ventilation to speed the process and prevent moisture-related problems. Open windows, run fans, or use dehumidifiers in poorly ventilated areas to promote quick, even drying that prevents water spots and residue formation.
Final Steps and Maintenance Schedule
After completing your deep kitchen clean, a thorough final inspection ensures no areas were overlooked. Walk through each zone systematically, checking for missed spots, streaks on surfaces, or areas requiring additional attention. This inspection reveals cleaning inconsistencies that could undermine your hard work.
Touch-up cleaning addresses these final details with targeted solutions. Wipe down any remaining water spots on stainless steel surfaces, polish cabinet handles that show fingerprints, and ensure all cleaning residue has been completely removed from countertops and appliances.
Reorganizing with Improved Storage Systems
Smart reorganization transforms your newly cleaned kitchen into a more functional space. Group similar items together in logical locations: store baking supplies near mixing bowls, place frequently used spices within easy reach of the cooktop, and organize cleaning supplies in accessible but safe locations.
Implement storage solutions that prevent future clutter buildup. Use drawer dividers for utensils, install shelf organizers in cabinets, and consider clear containers for pantry items that allow easy identification and inventory management.
Label storage areas clearly to maintain organization long-term. When every item has a designated place, family members can easily return items to their proper locations, preventing the gradual accumulation of clutter that necessitates future deep cleaning sessions.
Creating Your Maintenance Schedule
A structured maintenance schedule prevents the buildup that makes deep cleaning necessary. Establish daily routines that take just minutes but maintain cleanliness: wipe down counters after each use, load the dishwasher immediately after meals, and sweep high-traffic areas before debris accumulates.
- Daily tasks: Clean as you cook, wipe spills immediately, empty dishwasher
- Weekly tasks: Deep clean appliances, mop floors, sanitize sinks
- Monthly tasks: Clean inside microwave, organize pantry, check expiration dates
- Quarterly tasks: Clean oven interior, defrost freezer, deep clean cabinet interiors
The 20-minute rule proves highly effective for maintaining kitchen cleanliness. Spend 20 minutes each evening tidying, wiping surfaces, and preparing for the next day. This consistent investment prevents the accumulation of grime and grease that requires intensive cleaning efforts.
Quick Daily and Weekly Routines
Daily maintenance focuses on preventing buildup rather than removing established grime. Clean spills immediately to prevent staining, rinse dishes before food particles harden, and wipe down frequently touched surfaces like cabinet handles and light switches.
Weekly routines address areas that accumulate dirt gradually but don’t require daily attention. Clean extractor fan filters weekly to maintain proper ventilation and prevent grease buildup that becomes difficult to remove over time.
Pro Maintenance Tip
Track your maintenance schedule using a simple checklist or smartphone app. Visual reminders help establish consistent habits that become automatic over time. Consistency in small daily actions eliminates the need for exhaustive deep cleaning sessions every few months.
Remember that prevention always requires less effort than correction. A few minutes of daily maintenance preserves your deep cleaning investment and keeps your kitchen consistently clean, functional, and welcoming for daily use.
Frequently Asked Questions
How do you deep clean a filthy kitchen?
To deep clean a filthy kitchen, start by decluttering and removing all items from counters, cabinets, and drawers. Work from top to bottom, beginning with ceiling fixtures and exhaust fans, then progress to cabinets, appliances, and finally floors. Use specialized degreasers for stubborn buildup and allow 4-6 hours for the complete process. Focus on hidden areas like behind appliances and inside cabinet corners where grime accumulates most.
What does a deep clean of a kitchen include?
A comprehensive kitchen deep clean includes cabinet interiors and exteriors, appliance deep cleaning (inside ovens, refrigerator coils, dishwasher filters), surface degreasing of backsplashes and countertops, hidden area cleaning behind appliances, grout and tile restoration, and ventilation system cleaning. It also covers often-forgotten areas like light switch plates, door handles, and spaces between appliances.
How often should I deep clean my kitchen?
Kitchen experts recommend deep cleaning every 3-4 months to maintain optimal hygiene and prevent excessive buildup. However, high-use kitchens or those with heavy cooking may benefit from deep cleaning every 2-3 months. Regular deep cleaning improves food safety, extends appliance life, and maintains a professional appearance.
What supplies do I need for kitchen deep cleaning?
Essential deep cleaning supplies include specialized degreasers, microfiber cloths, scrub brushes, and protective equipment. You’ll also need descaling agents for appliances, heavy-duty sponges, rubber gloves, and disinfectants. Unlike regular cleaning that uses basic all-purpose cleaners, deep cleaning requires stronger products to eliminate stubborn stains and bacterial buildup.
How long does it take to deep clean a kitchen?
A thorough kitchen deep clean typically takes 4-6 hours depending on kitchen size and condition. This includes time for decluttering, dismantling components, intensive scrubbing, and reassembly. Breaking the process into sections over a weekend can make it more manageable while ensuring no area is rushed or overlooked.
What is the proper order for deep cleaning a kitchen?
Follow the top-to-bottom method to prevent re-contamination. Start with ceiling fixtures and exhaust fans, then clean upper cabinets, work on appliances and countertops, address lower cabinets and drawers, and finish with floors and baseboards. This systematic approach ensures debris falls onto areas that haven’t been cleaned yet.
How do you deep clean kitchen cabinets?
Deep clean kitchen cabinets by removing all contents first, then cleaning interior shelves with degreasing solution. Wipe down exterior surfaces, paying special attention to handles and areas around the stove where grease accumulates. Use appropriate cleaners for your cabinet material – wood, laminate, or painted surfaces each require different approaches to avoid damage.
What's the difference between deep cleaning and regular kitchen cleaning?
Regular cleaning focuses on daily maintenance and visible dirt removal, taking 15-30 minutes with basic supplies. Deep cleaning involves complete disassembly, specialized products, and 4-6 hours of intensive work to eliminate hidden bacteria, built-up grease, and neglected areas that regular cleaning misses. It’s performed quarterly rather than daily.
How do you clean kitchen walls during deep cleaning?
Clean kitchen walls by starting from the top and working down using a degreasing solution and microfiber cloths. Pay special attention to areas behind the stove and sink where splatter occurs. For painted walls, use gentle cleaners to avoid damage, while tile walls can handle stronger degreasers and scrubbing for grout lines.
Should I disconnect appliances before deep cleaning?
Yes, always disconnect appliances before deep cleaning for safety. Unplug small appliances and turn off power to built-in units at the circuit breaker. This allows safe access to clean behind and underneath appliances, as well as thoroughly clean the appliances themselves without risk of electrical shock or damage.
How do you tackle stubborn kitchen stains during deep cleaning?
For stubborn kitchen stains, apply specialized degreasers and allow dwell time before scrubbing. Use baking soda paste for burnt-on residue, white vinegar for mineral deposits, and commercial degreasers for grease buildup. Always test cleaning products on inconspicuous areas first and use appropriate scrubbing tools to avoid surface damage.
What areas are most commonly missed during kitchen deep cleaning?
Commonly missed areas include spaces between appliances, cabinet hardware, light fixtures, and exhaust fan filters. Don’t forget door handles, switch plates, the area behind the sink, refrigerator coils, and the top of tall cabinets. These hidden spots accumulate significant grime and bacteria over time.
Can I deep clean my kitchen in sections over multiple days?
Yes, sectioning deep cleaning over multiple days can make the process more manageable. Focus on upper areas one day, appliances another, and floors last. However, ensure you complete related areas together (like all cabinets) to maintain consistency and prevent cross-contamination between cleaned and uncleaned sections.
You May Also Like
How to Clean a Sink Drain: Complete Step-by-Step Guide

Patio Cleaning UK: Complete Guide to Costs & Methods 2026
